
Related Manuals for Moxa Technologies DA-685 Series


Summary of Contents for Moxa Technologies DA-685 Series
- Page 1 DA-685 Series WinXP Embedded User’s Manual First Edition, July 2012 www.moxa.com/product © 2012 Moxa Inc. All rights reserved. Reproduction without permission is prohibited.
- Page 2 DA-685 Series WinXP Embedded User’s Manual The software described in this manual is furnished under a license agreement and may be used only in accordance with the terms of that agreement. Copyright Notice Copyright ©2012 Moxa Inc. All rights reserved.
-
Page 3: Table Of Contents
Table of Contents Introduction ............................1-1 Overview ............................1-2 Software Specifications........................1-2 Application Development Environment ................... 1-2 Networking and Communication Capabilities ................... 1-3 Supporting Services and Daemons ....................1-4 How to Determine Firmware Build Versions .................... 1-4 Inserting a USB Mass Storage Device into the Computer ................. 1-4 Insert a Compact Flash Card Storage into a DA-685-XPE Computer ............ -
Page 4: Introduction
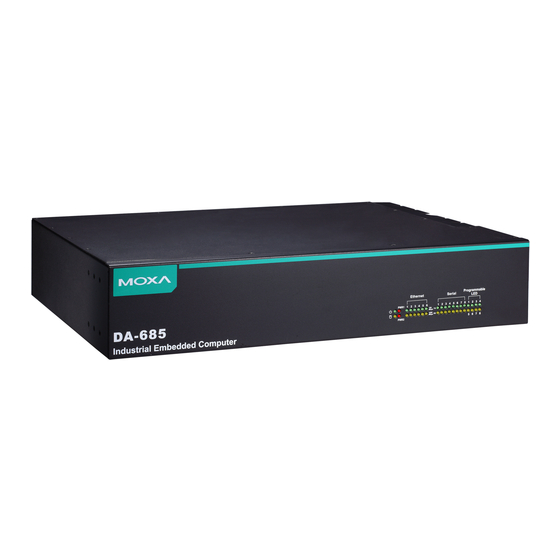
Introduction Thank you for purchasing Moxa’s DA-685 series of x86 ready-to-run embedded computers. This manual introduces the software configuration and management of DA-685 computers running the Windows Embedded Standard 2009 operating system. For hardware installation, connector interfaces, setup procedures, and upgrading the BIOS, please refer to the DA-685 Series Hardware User’s Manual. -
Page 5: Overview
Introduction Overview DA-685 industrial computers excel in a wide array of power automation applications. The DA-685 series is based on the Intel x86 processor and supports VGA, 6 Gigabit Ethernet ports, 2 RS-232 serial ports, 6 2 wire RS-485 serial ports, CompactFlash, and USB. They come in a standard 2U/19’ rackmount chassis. The Intel Atom processor gives the DA-685 enough punch to perform demanding industrial tasks without consuming a lot of power or heat, providing users with a highly cost-effective, durable system. -
Page 6: Networking And Communication Capabilities
DA-685 XPE User's Manual Introduction • Message Queuing (MSMQ) Core—Message Queuing is a messaging infrastructure and a development tool for creating distributed messaging applications for Microsoft Windows operating systems; it provides guaranteed message delivery, efficient routing, increased security, support for sending messages within transactions, and priority-based messaging. -
Page 7: Supporting Services And Daemons
DA-685 XPE User's Manual Introduction requests from the SNMP manager. The agent also notifies registered managers with traps when significant events occur. • Time Service Core—Synchronizes a workstation's clock with other computers using the Network Time Protocol (NTP) version 3. For increased accuracy, this component also incorporates algorithmic enhancements from NTP 4. -
Page 8: Insert A Compact Flash Card Storage Into A Da-685-Xpe Computer
DA-685 XPE User's Manual Introduction Insert a Compact Flash Card Storage into a DA-685-XPE Computer There is a Compact Flash slot in the side of DA-685-XPE computer. The Compact Flash slot is designed for storage expansion. Please note that it does not support “Plug and Play” and “Hot swap”. If you plug a CF card into the slot when entering the operating system, it may cause system damage. - Page 9 DA-685 XPE User's Manual Introduction...
-
Page 10: Software Configuration
Software Configuration In this chapter, we explain how to operate a DA-685-XPE computer directly or from a PC. Instructions are given on how to adjust the system time, troubleshoot network connectivity, and manage other functions. Some of these operations can be done with system commands after gaining access to the computer, and others can be done from the “Control Panel,”... -
Page 11: Starting Your Da-685-Xpe Computer
DA-685 XPE User's Manual Software Configuration Starting Your DA-685-XPE Computer Connect the CRT or LCD monitor to the DA-685-XPE computer, and then power it up by connecting it to the power adaptor. It takes about 30 to 40 seconds for the system to boot up. Once the system is ready, the desktop will appear on your monitor. -
Page 12: Operating Your Da-685-Xpe Computer With A Telnet Client
DA-685 XPE User's Manual Software Configuration Next, click Internet Protocol (TCP/IP) and select Properties to enter the network settings page. The default values are Obtain an IP address automatically, and Obtain DNS server address automatically. If you must configure the computer to use a fixed IP address, check Use the following IP address and be prepared to provide the IP address, subnet mask, and default gateway. - Page 13 DA-685 XPE User's Manual Software Configuration Before using Telnet, do the following steps to verify that TCP Port 23 on your computer and the DA-685-XPE are open . 1. Click on Start Control Panel. Double-click on Windows Firewall.
- Page 14 DA-685 XPE User's Manual Software Configuration Click Exceptions tab.
- Page 15 DA-685 XPE User's Manual Software Configuration 3. Click Add Port. 4. Enter the name, for example, Telnet, and Port number 23. Click OK to continue.
- Page 16 DA-685 XPE User's Manual Software Configuration 5. When finished, check if Telnet is in the Programs and Services list. 6. Now you can run Telnet to connect to the DA-685-XPE.
-
Page 17: Adjusting The System Time
DA-685 XPE User's Manual Software Configuration Adjusting the System Time Setting the System Time Manually: Use the date/time command line utility to query the current system date/time or set a new system date/time. Setting the System Time by Control Panel: Go to the Control Panel and double click the Date and ... -
Page 18: Starting And Stopping Services
DA-685 XPE User's Manual Software Configuration Starting and Stopping Services Select Start Control Panel Administrative Tools and double click Services. Select and right-click on the service name, and then choose to stop or restart. Simple Network Management Protocol (SNMP) To check SNMP agent capabilities on a target DA-685-XPE (e.g., suppose the network IP is 192.168.3.127) computer, log on to the workstation computer on which the SNMP manager resides and then type: \>... - Page 19 DA-685 XPE User's Manual Software Configuration Make sure that the Allow users to connect remotely to this computer checkbox is selected. Next, click Select Remote Users. Add the users allowed to connect to your desktop. When finished, click OK. 2-10...
-
Page 20: Configuring Serial Ports
DA-685 XPE User's Manual Software Configuration Configuring Serial Ports The DA-685-XPE has 2 RS-232/422/485 serial ports with DB9 connectors, and 6 2-wire RS-485 serial terminal blocks. The ports are located on the rear panel of the computer. To configure the 2 RS-232/422/485 serial ports, first right-click the My Computer icon on the desktop and then select Properties. -
Page 21: Enhanced Write Filter
DA-685 XPE User's Manual Software Configuration Ports 3 to 8 are 2-wire RS-485 terminal blocks. Right-click the COM port you wish to configure, and then select Properties. Select Port Settings tab for further configuration. Note that they support the bit rates up to 115,200 bps. -
Page 22: File Based Write Filter
DA-685 XPE User's Manual Software Configuration File Based Write Filter File-Based Write Filter (FBWF) allows Windows Embedded Standard 2009 to maintain the appearance of read and write access to write sensitive or read only storage. FBWF makes read and write access transparent to applications. - Page 23 DA-685 XPE User's Manual Software Configuration 3. When the system has rebooted, type fbwfmgr /displayconfig in the command prompt again to confirm that the status has been changed to enabled. The default folder for FBWF will be \temp. Type fbwfmgr /help for more detailed information.
-
Page 24: Management Tools
Management Tools The DA-685-XPE ready-to-run embedded computers are shipped with the Windows Embedded Standard 2009 operating system already installed. This network-centric platform is designed to serve as a front-end for data acquisition and industrial control applications. A set of Windows XP management tools are installed on the DA-685-XPE computer to resolve management issues. -
Page 25: Computer Management
DA-685 XPE User's Manual Management Tools Computer Management [Control Panel] [Administrative Tools] Computer Management. You can use the tools for a variety of tasks, such as disk partition, disk mount/dismount, and create/remove users. You can also check services in the Computer Management window. Component Services [Control Panel] ... -
Page 26: Internet Information Services (Web/Ftp)
DA-685 XPE User's Manual Management Tools Internet Information Services (Web/FTP) [Control Panel] [Administrative Tools] Internet Information Services. If you need to set up Web or FTP, you must use this tool for configuration purposes, and you can also start/stop HTTP/FTP services. - Page 27 DA-685 XPE User's Manual Management Tools 2. Follow the virtual directory creation wizard and complete the steps to create the virtual directory c:\Inetpub. 3. Type an alias (for example web), into the text box. Click Next to continue.
- Page 28 DA-685 XPE User's Manual Management Tools 4. Click Browse to select the folder. 5. Navigate the file tree and select an existing folder, or select Make New Folder to create new folder. Click OK to continue.
- Page 29 DA-685 XPE User's Manual Management Tools 6. Click Next to continue. 7. Next, you can configure access permissions. Check the items on the page, and click Next to continue.
- Page 30 DA-685 XPE User's Manual Management Tools 8. Click Finish to complete. 9. When you complete the steps, the virtual directory Web will appear under Default Web Site.
- Page 31 DA-685 XPE User's Manual Management Tools 10. On your desktop, type [IP Address]/WEB/Default.htm (e.g., 192.168.1.127/WEB/Default.htm). The following message will appear. The steps are indicated in the following sequence of diagrams. If you need to use the FTP server, you must create the default password for your account and turn on the write permission on your home directory located in c:\intepub\ftproot.
-
Page 32: Odbc Data Source Administrator
DA-685 XPE User's Manual Management Tools ODBC Data Source Administrator [Control Panel] [Administrative Tools] Data Sources (ODBC) This database source configuration tool is for users to add, delete, or set up the data source, and then display information about the installed ODBC drivers. You can create a new data source or trace the calls to ODBC functions. - Page 33 DA-685 XPE User's Manual Management Tools 3. Select a local database from your computer, and then click OK. 4. Select the database file from the directory. Click OK to continue. 5. Type Data Source Name and Description, and then click OK. 3-10...
-
Page 34: Performance Monitor
DA-685 XPE User's Manual Management Tools 6. A user data source has been successfully established. Click OK to finish. Performance Monitor [Control Panel] [Administrative Tools] Performance. You can use this tool to monitor system and network resources. 3-11... -
Page 35: Services
DA-685 XPE User's Manual Management Tools Services [Control Panel] [Administrative Tools] Services You can use this utility to start/stop/restart services. (e.g. If you do not need telnet service you can stop it and set the “startup option” to “manual”.) 3-12... -
Page 36: System Recovery
System Recovery The DA-685-XPE ready-to-run embedded computers are a Windows Embedded Standard 2009 platform. This chapter describes the recovery process in the event of system instability. The following topics are covered in this chapter: Recovery Environment Recovery Procedure ... -
Page 37: Recovery Environment
DA-685 XPE User's Manual System Recovery Recovery Environment The environment includes a DA-685-XPE embedded computer and a bootable USB disk with the recovery programs and system image file. Hardware You will need a computer (a PC or notebook), a DA-685-XPE computer, and a USB disk with the recovery programs. - Page 38 DA-685 XPE User's Manual System Recovery 3. Select USB Drive type, select a Drive, and then click OK to continue. 4. The boot files will be copied to your USB drive. 5. When finished, click Exit to stop the program.
- Page 39 DA-685 XPE User's Manual System Recovery 6. Manually unzip the os_image.zip from the \recovery\DA-685 folder on the Software CD. A directory called os_image will appear. Copy this directory to \home\partimag\on the USB drive. Step 2: Change the BIOS Settings You will need to change the BIOS settings to boot from the USB disk. 1.
- Page 40 DA-685 XPE User's Manual System Recovery 3. Press F10 and then press Enter to save and exit bios setup. Step 3: Restore the system from USB drive Connect the USB disk to any of the DA-685-XPE’s USB ports and then reboot the computer. The system will boot from the USB disk and the Pre-installation Environment and the recovery utility will appear.
- Page 41 DA-685 XPE User's Manual System Recovery 3. Enter y to continue the restore process. 4. Enter y to confirm again.
- Page 42 DA-685 XPE User's Manual System Recovery 5. Wait for the process to finish. 6. Select (0) Poweroff to power off the computer. 7. Remove the USB drive after the computer has been powered off.
- Page 43 DA-685 XPE User's Manual System Recovery Step 4: Change the BIOS Settings to Boot from the Original Disk Now you will need to change the boot priority so that it can boot from the original disk. As the system reboots, press DEL to enter the BIOS setup menu.
-
Page 44: Saving The System To The Usb Drive
DA-685 XPE User's Manual System Recovery Saving the System to the USB Drive You may also save the current system to the USB drive for system recovery in case the system crashes. Before saving the system to the USB drive, we suggest you remove all files under \home\partimag\ on the USB drive. - Page 45 DA-685 XPE User's Manual System Recovery 3. Enter y to continue. 4. Wait for the process to finish. 4-10...
- Page 46 DA-685 XPE User's Manual System Recovery 5. Select (0) Poweroff so that the computer will power off when the process is finished. 4-11...
Need help?
Do you have a question about the DA-685 Series and is the answer not in the manual?
Questions and answers