cashco 8310HP Installation, Operation & Maintenance Manual
Pressure reducing regulators
Hide thumbs
Also See for 8310HP:
- Installation, operation & maintenance manual (10 pages) ,
- Installation, operation & maintenance manual (10 pages)
Table of Contents
Advertisement
Quick Links
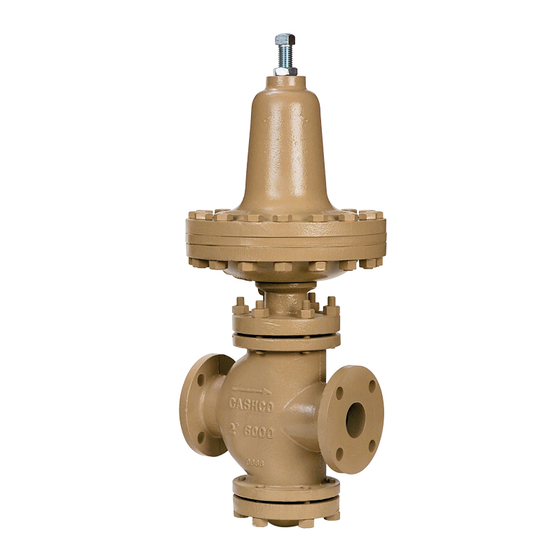
MODELS 8310HP AND 8310LP
l.
DESCRIPTION AND SCOPE
The Model 8310 is a high capacity pressure reducing regulator with double seat design used to control downstream (outlet or
P
) pressure. Sizes are 1-1/2" (DN40), 2" (DN50), 2-1/2" (DN65), 3" (DN80) and 4" (DN100). With proper trim utilization, the
2
unit is suitable for liquid, gaseous, or steam service. Refer to Technical Bulletin 8310-TB for design conditions and selection
recommendations.
II. INSTALLATION
CAUTION A
For welded installations, all internal trim parts, seals and
diaphragm(s) must be removed from regulator body prior
to welding into pipeline. The heat of fusion welding will
damage non-metallic parts if not removed.
NOTE: This does not apply to units equipped with
extended pipe nipples.
1.
An inlet block valve should always be installed.
2.
If service application is continuous such that shut down
is not readily accomplished, it is recommended that
an inlet block valve, outlet block valve, and a manual
bypass valve be installed.
3.
Pipe unions are recommended for NPT screwed instal-
lations to allow removal from piping.
4.
An outlet pressure gauge should be located approxi-
mately ten pipe diameters downstream, and within
sight.
5.
All installations should include a downstream relief
device if the inlet pressure could exceed the pressure
rating of any downstream equipment or the maximum
outlet pressure rating of the unit.
CAUTION B
Installation of adequate overpressure protection
is recommended to protect the regulator and all
downstream equipment from damage in the event
of regulator failure.
INSTALLATION, OPERATION & MAINTENANCE MANUAL
PRESSURE REDUCING REGULATORS
SECTION l
SECTION II
Supply
@ P 1
Model 8310HP or 8310 LP
Pressure Reducing Regulator
TR
Blowdown-Drain
(Shaded portion for steam/condensate systems)
Recommended Piping Schematic For
Pressure Reducing Station
6.
Clean the piping of all foreign material including chips,
welding scale, oil, grease and dirt before installing the
regulator. Strainers are recommended.
7.
In placing thread sealant on pipe ends prior to en-
gagement, ensure that excess material is removed
and not allowed to enter the regulator upon start-up.
8. Flow Direction: Install so the flow direction matches
the arrow cast on the body. Install an external sensing
line (1/2" O.D. (DN15) tubing minimum) from the 3/8"
(DN10) NPT connection in needle valve (39) to a point
downstream, preferably at gauge location. If regula-
tor pipe line is expanding to a larger pipe line, always
connect sensing line to the larger pipe line.
9.
For best performance, install in well drained horizontal
pipe, properly trapped, if a steam service application.
IOM-8310HP/LP-BASIC
11-08
Outlet
@ P 2
SRV
P
1
Bypass
TR
Blowdown-Drain
Advertisement
Table of Contents

Related Manuals for cashco 8310HP


Summary of Contents for cashco 8310HP
- Page 1 Bypass to welding into pipeline. The heat of fusion welding will Model 8310HP or 8310 LP damage non-metallic parts if not removed. Pressure Reducing Regulator NOTE: This does not apply to units equipped with extended pipe nipples.
-
Page 2: Principle Of Operation
(upstream) block valve. Close the block valve. (When on bypass, the system pressure must be constantly observed and manually regulated.) outlet (downstream) valve only if regulator removal is Close the outlet (downstream) block valve. required. IOM-8310HP/LP-BASIC... -
Page 3: Maintenance
The plug (12.1) and seat rings (10 & 11) have been Model Torque Material Size mechanically lapped at the factory per ANSI Class 8310HP 45 ft-lbs (61 Nm) 5/8" Ø II seat leakage and assembled to provide optimum 8310LP 45 ft-lbs (61 Nm) 1/2"... - Page 4 18. NOTE: Do not rotate valve plug assembly (12) rings (10 and 11) for excessive wear. If either the from optimum “free vertical movement” position plug (12.1) or the seat rings (10 and 11) are worn during final assembly. IOM-8310HP/LP-BASIC...
-
Page 5: Troubleshooting Guide
Ensure no moisture in spring chamber at temperatures below freeze point. Ensure no dust or debris entering vent opening. If rainwater or debris can enter, re-orient spring chamber. 5. Sluggish operation. Possible Causes Remedies A. Plugged spring chamber vent. Clean vent opening. B Fluid too viscous. B. Heat fluid. Contact factory. IOM-8310HP/LP-BASIC... -
Page 6: Section Viii
– – NEW REPLACEMENT UNIT: Contact your local Cashco, Inc., Sales Representa- tive with the Serial Number and Product code. With this information they can provide a quotation for a new unit including a complete description, price and availability. - Page 7 NOTES IOM-8310HP/LP-BASIC...
- Page 8 (NOTE: Variation “LP” has a larger diaphragm area than the “HP”.) Pipe Nipple Elbow Drive Screw Flow Arrow Figure 2: Model 8310HP only – Option -20, Dome Loaded Figure 3: Model 8310HP only – Option -80, High Pressure Spring Chamber Construction Cashco, Inc. P.O. Box 6...
Need help?
Do you have a question about the 8310HP and is the answer not in the manual?
Questions and answers