Table of Contents
Advertisement
Quick Links
Advertisement
Table of Contents

Related Manuals for Mobotix AllroundDual M16B


Summary of Contents for Mobotix AllroundDual M16B
- Page 1 Camera Manual AllroundDual M16...
- Page 2 M16 Camera Manual...
-
Page 3: Table Of Contents
1.5.9 MX-GPS-Box 1.5.10 MX-232-IO-Box 1.5.11 ExtIO Expansion Module 1.5.12 Mx2wire+ Media Converter 1.5.13 Security Screw Set with Allen Bit 1.5.14 Sealing Ring as Dome Replacement for Sensor Modules B016 1.5.15 Other Accessories 1.6 MOBOTIX Software 1.6.1 Integrated Camera Software (Firmware) 1.6.2 MxManagementCenter 1.6.3 MOBOTIX MxBell... - Page 4 Table of Contents Installation Preparing the Installation 2.1.1 Installation Options: Wall, Ceiling, Pole 2.1.2 Installing the Camera with Hemispheric Sensor Modules 2.1.3 Network Connection and Power Supply, UPS 2.1.4 Providing the Camera Connections, MX-Overvoltage-Protection-Box 2.1.5 Wiring, Fire Prevention, Lightning and Surge Protection First Installation Steps 2.2.1 Initial Installation of the Sensor Modules (Except M16 Complete Cameras) 2.2.2 Opening the Camera Housing...
- Page 5 3.5.1 Introduction 3.5.2 Formatting the MicroSD Card 3.5.3 Activating Recording 3.5.4 Accessing Data on the MicroSD Card 3.5.5 Deactivating Card Recording 3.5.6 Using a MicroSD Card in a Different MOBOTIX Camera 3.5.7 Limitations on Warranty When Using Flash Storage Media 3.6 Configuration in the Browser 3.6.1 Overview 3.6.2 General Browser Settings 3.6.3 Configuring the M16-Thermal(-TR) in the Browser...
-
Page 6: Legal Notes
M16, the recording of video and sound data may be subject to special documentation or it may be prohibited. All users of MOBOTIX products are therefore required to familiarize themselves with all applicable regulations and to comply with these laws. MOBOTIX AG is... -
Page 7: Safety Warnings
Make sure that you install this product as outlined in Chapter 2, «Installation» of this manual. A faulty installation can damage the camera! • When installing this product, make sure that you are only using genuine MOBOTIX parts and MOBOTIX connection cables. •... -
Page 8: Foreword
If you still have any questions, our support and international sales staff are available at intl-support@mobotix.com from Monday through Friday. Thank you for choosing MOBOTIX products and services. We wish you all the best with your new, high-performance MOBOTIX M16 AllroundDual camera! -
Page 10: Product Overview
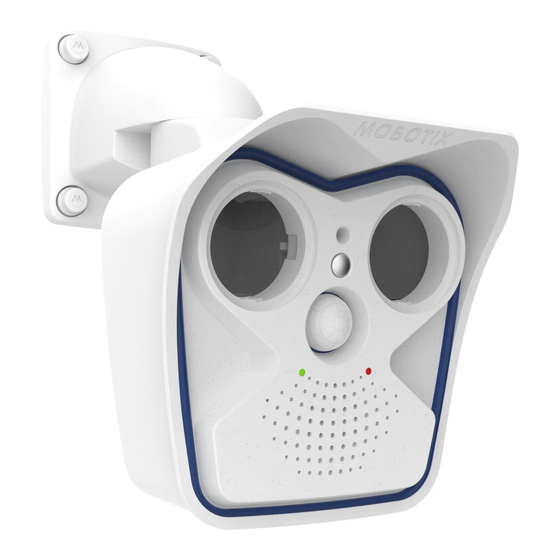
M16 Camera Manual: Product Overview PRODUCT OVERVIEW Camera Variants – Lenses, Hardware, Image Formats Camera Model M16-Thermal(-TR) Lenses with 6MP Image Sensors B016 Hemispheric (right/left) •/• –/• B036 Super Wide-Angle (right/left) •/• –/• B041 Super Wide-Angle (right/left) •/• –/• B061 Wide-Angle (right/left) •/• –/• B079 Standard (right/left) •/• –/• B119 Tele (right/left) •/• –/• B237 Tele (right/left) •/• –/•... -
Page 11: Camera Variants - Software Features
MX-232-IO-Box Programming interface/HTTP API • Security features (HTTPS/SSL, IP-level access control, • network authentication IEEE 802.1X) Video Analysis Video Motion detection • MxAnalytics – MxActivitySensor • Video Management Software Free-of-charge download MxManagementCenter • from www.mobotix.com MOBOTIX MxBell • or App Store/Google Play... -
Page 12: Technical Specifications M16/M16-Thermal/M16-Thermal-Tr
Technical Specifications M16/M16-Thermal/M16-Thermal-TR Mx-M16A/B* (any comb. of Day/Night/LPF sensor modules) Mx-M16TA/B(-TR)* (optionally one add. Day/Night/LPF sensor module) Model Versions *Variant Mx-M16B supports MOBOTIX MxBus modules Lens Options Mx Sensor 10 to 270 mm (35 mm format), hor. angles of view 180° to 8° (6MP) Module Lens Options... - Page 13 Camera Variants – Lenses, Hardware, Image Formats Video Motion detection, MxActivitySensor, external signals, temperature sensor, PIR, microphone, shock detector (with firmware version 5.0.1 and Alarm/Events higher), notification via e-mail, FTP, IP telephony (VoIP, SIP), visual/sound alarms, pre- and post-alarm images Microphone and Integrated microphone and speaker Speaker Audio Functions Lip-synchronous audio, two-way communication, audio recording Ethernet 100Base-T, MiniUSB, MxBus*; inputs/outputs and RS232 via accessories Interfaces *Only variant Mx-M16B...
-
Page 14: Delivered Parts And Dimensions
M16 Camera Manual: Product Overview Delivered Parts and Dimensions 1.4.1 M16 Body (Base Module) Visit www.mobotix.com and go to Product Selector > Outdoor Cameras > M16 M.11 M.10 1.10 1.12 1.11 1.19 1.14 1.15 1.17 1.20 1.13 1.18 1.16 Standard Delivery Item Count Part Name Camera housing with mainboard and wall mount (installed), without sen-... - Page 15 Protection cover for screw, white M.11 Security clip for sensor or blind modules, red Design of the MOBOTIX M16 The Base module of the MOBOTIX M16 consists of the camera housing with VarioFlex mount (wall or ceiling) and the front element. VarioFlex Wall Mount Camera housing...
- Page 16 M16 Camera Manual: Product Overview Connections of the MOBOTIX M16 The MOBOTIX M16 has the following connections that are accessible once the housing has been opened (see Section 2.2.2, «Opening the Camera Housing»): MxBus Ethernet patch cable MiniUSB Sensor module cable I/O cable to front element (red clips and seals)
-
Page 17: M16-Thermal/M16-Thermal-Tr Model Variants
Delivered Parts and Dimensions 1.4.2 M16-Thermal/M16-Thermal-TR Model Variants The delivered parts of the M16-Thermal/M16-Thermal-TR are slightly different from those of the M16 Body (see Section 1.4.1, «M16 Body (Base Module)»): M.11 M.10 1.10 1.12 1.11 1.19 1.14 1.15 1.17 1.13 1.20 1.18 1.16 Changes in the Delivery of the M16-Thermal/M16-Thermal-TR Item Count Part Name Front element with one thermal/thermal-TR image sensor (right) and additional sensors (installed) - Page 18 M16 Camera Manual: Product Overview Dimensions of the M16 with Wall Mount The drilling templates are available on 158 mm/6.22 in www.mobotix.com > 106 mm/4.17 in Download Center > Documentation > Manuals Always print or copy drilling templates in original size 239 mm/9.41 in...
- Page 19 Delivered Parts and Dimensions Dimensions of the M16 with Ceiling Mount* The drilling templates are available on 158 mm/6.22 in www.mobotix.com > 106 mm/4.17 in Download Center > Documentation > Manuals Always print or copy drilling templates in original size 207 mm/8.15 in 106 mm/4.17 in *Only included if this had been specified when ordering the camera!
-
Page 20: Sensor Modules B016
M16 Camera Manual: Product Overview 1.4.3 Sensor Modules B016 Sensor module including status LEDs and microphone Item Number Part Name Sensor module with affixed washer MOBOTIX lens B016 (installed) Dome (installed) Cable retainer with bayonet catch (installed) Sealing plug, blue, small (installed) Nut (plastic) - Page 21 Delivered Parts and Dimensions Front View LED default settings: 1 Power (on), Error (flashes) 2 Recording (flashes) LEDs Sensor module housing Microphone Diam. 50 mm/2 in Rear View Markers for top Top = top border of Sensor cable con- image (North) nection Sensor module housingl Pressure compen- sation Diam. 43 mm/1.7 in Side View 58 mm/2.3 in 30 mm/1.2 in 15 mm/0.6 in Sensor module...
-
Page 22: Sensor Modules
M16 Camera Manual: Product Overview 1.4.4 Sensor Modules B036, B041, B061, B079, B119, B237 Sensor module including status LEDs and microphone Item Number Part Name Sensor module with affixed washer MOBOTIX lens B036/B041/B061/B079/B119/B237 (installed) Protective glass insert with coated glass (installed) Cable retainer with bayonet catch (installed) Sealing plug, blue, small (installed) Nut (plastic) - Page 23 Delivered Parts and Dimensions Front View LED default settings: 1 Power (on), Error (flashes) 2 Recording (flashes) LEDs Sensor module housing Microphone Diam. 50 mm/2 in Rear View Markers for top Top = top border of Sensor cable con- nection image (North) Sensor module housing Pressure compen- sation Diam. 43 mm/1.7 in Side View 48 mm/1.89 in 15 mm/0.6 in Sensor module weight without lock ring: 122 g...
-
Page 24: Sensor Modules B500
M16 Camera Manual: Product Overview 1.4.5 Sensor Modules B500 Sensor module Item Number Part Name Sensor module with affixed washer MOBOTIX lens B500 (installed) Protective lens cover (installed) Cable retainer with bayonet catch (installed) Sealing plug, blue, small (installed) Nut (plastic) - Page 25 Delivered Parts and Dimensions Front View Protective lens cover Sensor module housing Diam. 50 mm/2 in Rear View Markers for top Top = top border of Sensor cable con- nection image (North) Sensor module housing Pressure compen- sation Diam. 43 mm/1.7 in Side View 32 mm/1.26 in 48 mm/1.89 in 15 mm/0.6 in Sensor module weight without lock ring: 122 g weight with lock ring: 128 g 40 mm/1.6 in...
-
Page 26: M16 Complete Camera Day/Night
M16 Camera Manual: Product Overview 1.4.6 M16 Complete Camera Day/Night In order to facilitate the installation, you also order the M16 as complete camera with one day and one night lens of the same focal lengths. Available Combinations of Image Sensors 6MP Sensor Modules D036 – N036 D041 –... -
Page 27: Available Accessories
The MOBOTIX MX-232-IO-Box can be connected directly to the M16 with this cable, which is up to five meters long. 1.5.3 MiniUSB Cable to MiniUSB (Angled/Angled) Order no.: MX-CBL-MU-EN-EN-PG-05/2/5 (angled/angled) The MOBOTIX ExtIO can be connected directly to the M16 with this cable, which is up to five meters long. 1.5.4 MiniUSB Cable to USB-A Socket Order no.: MX-CBL-MU-EN-AB-05/2/5 USB-based storage media (for example, USB hard drives) can be connected directly to the M16 with this cable, which... -
Page 28: Ethernet Patch Cable For Bayonet Catch
Order no.: MX-Overvoltage-Protection-Box-LSA Weatherproof network connector (protection class IP65, –30 to 60 °C/–22 to 140 °F) with surge protection of up to 4 kV for MOBOTIX IP cameras , ideal for replacing the MX-Patch-Box. At the same time, the MX-Overvoltage-Protection-Box pro- vides a weatherproof connection of a camera’s patch cable... -
Page 29: Mx-Npa-Box
D-Sub 15-HD connector. The MX-232-IO-Box (protection class IP65, –30 to 60 °C/–22 to 140 °F) can be attached to all MOBOTIX cameras with an MxBus or USB interface. The maximum length of the MxBus wiring (0.8 mm diameter wires) is 50 m/55 yd. -
Page 30: Extio Expansion Module
M16 Camera Manual: Product Overview 1.5.11 ExtIO Expansion Module Order no.: MX-ExtIO The device, which is suitable both for on-wall and cavity- wall installations, contains a powerful speaker, microphone, infrared motion sensor, ambient temperature sensor, two input and two output contacts and two illuminated keys. It is ideal for door communication, elevators, access control systems, etc. -
Page 31: Other Accessories
Available Accessories 1.5.15 Other Accessories Since the range of accessories for the MOBOTIX system keeps growing, you will find the list of applicable accessories in the Camera Configurator on the MOBOTIX website www.mobotix.com. THE MOBOTIX INFORMATION CHANNELS Support on the MOBOTIX Website www.mobotix.com/en/support The MOBOTIX Video Tutorials www.mobotix.com/en/support/ download-center/documenta- tion/video-tutorials Seminars on MOBOTIX Campus www.mobotix.com/en/support/... -
Page 32: Mobotix Software
The MOBOTIX MxBell for iOS and Android devices (iOS 11/Android 5.0 and higher) is also available free of charge from the App Store/... -
Page 33: Mxmanagementcenter
MxManagementCenter is perfectly designed in combination with MOBOTIX cameras repre- senting the decentralized concept at its best. MxMC allows controlled recording access via the camera or later directly to the NAS. -
Page 34: Mobotix Mxbell
M16 Camera Manual: Product Overview 1.6.3 MOBOTIX MxBell Never miss another visitor, thanks to push notifications! Use MOBOTIX MxBell on your smart- phone or tablet to receive notifications from the doorbell of a MOBOTIX IP Video Door Station and live views from MOBOTIX cameras. This app helps you open the door and enables hands- free talking, automatic camera search, a live view, camera connection via SSL and display of the connection status. Our new MOBOTIX MxBell is here! - Page 35 MOBOTIX Software Notes...
-
Page 36: Installation
M16 Camera Manual: Installation INSTALLATION The MOBOTIX M16 has been designed to be mounted on walls and ceilings. It can also be installed on a mounting pole using the appropriate MOBOTIX accessories. The different installation options are described in Section 2.3, «Mounting the Camera with Wall Mount» and the following sections, while the drilling templates are available on www.mobotix.com >... - Page 37 (IP66). Wall and ceiling mounts are designed such that they can be installed over conventional in- wall sockets (without the frame) or cavity sockets and conceal them completely. A MOBOTIX interface box can be integrated in the wall mount.
- Page 38 M16 Camera Manual: Installation Wall Installation The M16 can be installed on the wall of a building or structures, even mobile surfaces, for both indoor and outdoor use. The camera is mounted using the pre-installed VarioFlex mount (supplied as standard), which is easily secured using the four enclosed screws and screw anchors (depending on the surface, it can also be mounted without screw anchors directly over the in-wall socket).
-
Page 39: Installing The Camera With Hemispheric Sensor Modules
Installation on round poles is frequently used for cameras that are intended for mobile outdoor use (for example, surveillance of construction sites). For this purpose, MOBOTIX recommends using the pole mount, which is available for the M16 as an accessory and is almost indestructible (MX-MH-SecureFlex-ESWS). - Page 40 Detection Detection Perception Perception 1,50 m MOBOTIX recommendation MOBOTIX original 180° Panorama image (B016 sensor module) Installation in the middle of the wall Allround View A single M16 sensor module can monitor an entire room right into each of the four corners (360°...
- Page 41 Preparing the Installation Furthermore, the “camera view from top to bottom” can also be achieved by installing the camera on a wall or a pole at a tilt of 90°. Weatherproof housing visible in the full image Panning/tilting/zooming removes the area concealed by the weatherproof cover Note Part of the captured image area is concealed behind the protective cover of the M16...
-
Page 42: Network Connection And Power Supply, Ups
500 m/550 yd cable: 45 Mbps and 12 W for the PoE device). Note The MOBOTIX M16 can be powered by switches or routers that support the PoE (Power- over-Ethernet) standard and conform to IEEE 802.3af. Advantages of PoE power supply: •... -
Page 43: Providing The Camera Connections, Mx-Overvoltage-Protection-Box
MX-Overvoltage-Protection-Box (optional accessory). This interface box not only provides overvoltage protection of up to 4 kV for MOBOTIX IP cameras , it also provides simple and weatherproof connection of the cameras to a network patch cable ( -RJ45 variant) or a network installation cable ( -LSA variant). -
Page 44: Wiring, Fire Prevention, Lightning And Surge Protection
Lightning and Surge Protection In order to avoid damage to MOBOTIX cameras from overvoltages, you should always install the MX-Overvoltage-Protection-Box. This competitively priced and weatherproof network connector provides reliable protection against overvoltages of up to 4 kV; the box is easily installed in the Outdoor Wall Mount, for example (see Section 1.5.7, «MX-Overvoltage-... -
Page 45: First Installation Steps
Complete Camera 2.2.1 Initial Installation of the Sensor Modules (Except M16 Complete Cameras) (see Section 1.4.6) The MOBOTIX M16 cameras are delivered with a pre-assembled housing as M16 Body cam- era. The sensor modules (consisting of lens carrier, image sensor and lens) need be ordered separately. Upon delivery, the sensor module sockets in the front element are fitted with transport plugs. When operating the camera, it needs to be fitted either with sensor or blind modules. This closes off the front element and protects the camera against foreign... - Page 46 4. Lock sensor module cable : Apply bayonet catch as shown and turn it clockwise until it gently snaps shut. 5. Insert the sensor module : Make sure that the MOBOTIX lettering on the sensor module is at the “9 o’clock” position as shown in the figure.
-
Page 47: Opening The Camera Housing
Mx-M16B variant attach MxBus extension modules (e.g., the «MX-GPS- Box»). • Connecting a MOBOTIX USB cable in order to attach external data storage devices or an «MX-232-IO-Box». • Exchanging the pre-installed MicroSD card against a larger one or as preventive maintenance measure... -
Page 48: Installing The Security Clips (Optional, Not Required For M16 Complete Cameras)
M16 Camera Manual: Installation Procedure 1. Place the camera face-down on a clean and dry surface. 2. Remove the two rubber plugs at the back of the camera housing. 3. Using the supplied 5 mm Allen wrench, loosen the two bolts at the back of the camera housing. Leave Remove rubber plugs at the bolts and washers in the camera housing. -
Page 49: Exchanging Sensor Modules
First Installation Steps 2.2.4 Exchanging Sensor Modules Note that you only need to follow this procedure if the security clips (M11) have been installed. Since the sensor modules cannot be exchanged from the outside in such a case, you need to remove the front element, replace the sensor modules and install the front element again. If no security clips have been installed, you can exchange the sensor modules as described in Section 2.2.1, «Initial Installation of the Sensor Modules (Except M16 Complete Cameras)». -
Page 50: Replacing The Ethernet Patch Cable
Section 2.2.8. 2.2.5 Replacing the Ethernet Patch Cable If you want to replace the pre-installed MOBOTIX patch cable (0.5 m/20 in) by a longer one, make sure that you only use genuine MOBOTIX cables (see Section 1.5.5, «Ethernet Patch Cable for Bayonet Catch»). - Page 51 3. MOBOTIX patch cables! 6. Connect the patch cable : Insert the plug of the Ethernet cable into the appropriate connector. Apply bayonet catch as shown and turn it clockwise until it gently snaps shut.
-
Page 52: Connecting A Usb Cable
2.2.6 Connecting a USB Cable Using the USB plug (red circle in figure), you can attach existing expansion modules, such Only use USB cables with angled plugs for connecting as the MOBOTIX ExtIO (USB), the MX-232-IO-Box or external USB hard drives to the camera USB cables to the M16! in a weatherproof and well-protected manner. Procedure 1. Open camera housing: Open the camera housing as described in Section 2.2.2. -
Page 53: Connecting A Two-Wire Mxbus* Cable
2.2.7 Connecting a Two-Wire MxBus* Cable *Only supported by Mx-M16B variant You can use such a cable to connect additional MOBOTIX modules (e.g., the MX-GPS-Box or the MX-232-IO-Box) to the M16. Note that you can attach two MxBus cables (each having The length of the entire MxBus wiring must not two wires) to the MxBus connector (red circle in figure). -
Page 54: Closing The Camera Housing
M16 Camera Manual: Installation Notes After you have connected an MxBus module, you need to activate it in the camera's browser interface (Admin Menu > Manage Hardware Expansions or Manage MxBus Modules, respectively). 2.2.8 Closing the Camera Housing Once you have completed the tasks in the interior of the M16, you need to reassemble the front element of the M16. - Page 55 First Installation Steps 2. Place the camera on its right side (as seen by the camera) as shown. Push the cable of the left sensor module under the retaining lug at the screw bore (red circle in detail figure) 3. Push the front element into the housing and make sure that the sensor module cable remains under the retaining lug (red circle in detail image).
-
Page 56: Mounting The Camera With Wall Mount
M16 Camera Manual: Installation Mounting the Camera with Wall Mount The M16 is an allround camera designed for use in indoor and outdoor applications. The camera must always be installed with the VarioFlex mount, which has been prepared at the factory for wall mounting and allows the cabling to be concealed. The best camera position for the selected lens must be found before installing the camera on the wall (see Section 2.1.1, «Installation Options: Wall, Ceiling, Pole»... - Page 57 (VarioFlex mount). For more information on the MX-Patch-Box, please visit www.mobotix.com and go to the Product Selector > Accessories > Interface Boxes section. It is also possible to install an in-wall socket with RJ45 connector.
- Page 58 2. Drill the holes: Use the drilling template for the No screw anchors camera (available on www.mobotix.com > are required for wooden surfaces Download Center > Documentation > Manuals or, if used, the extended drilling template included in the MX-Patch-Box package).
- Page 59 Mounting the Camera with Wall Mount 5. Mount the camera: Place the wall mount over the drill holes and hold it against the wall. Then use the four screws each with a washer and tighten them using the appropriate wrench. Do not overtighten the screws as this may damage the plastic mount.
-
Page 60: Mounting The Camera With Ceiling Mount
M16 Camera Manual: Installation Mounting the Camera with Ceiling Mount* The M16 is an allround camera designed for use in indoor and outdoor applications. The camera is always installed together with the VarioFlex mount, which is shipped as a wall mount, but can be converted to a ceiling mount in just a few steps. The best camera position for the selected lens must be found before installing the camera on a ceiling, an overhang or balcony (see Section 2.1.1, «Installation Options: Wall, Ceiling, Pole»... - Page 61 Mounting the Camera with Ceiling Mount* In addition, a cavity or in-wall socket can be installed for the network cable protruding from the ceiling, which allows sufficient space to use a standard adapter to connect the network cable with the camera patch cable. Cable connector Cavity socket Wall seal Standard adapter for cable connection Additional sealing of the wall mount with silicone (on the wall seal) is recommended...
- Page 62 3. Drill the holes:Use the drilling template for the cam- No screw anchors are required for era (available on www.mobotix.com > Download wooden surfaces Center > Documentation > Manuals). Drill the holes for the supplied screw anchors. Screw anchors do not have to be fitted if the surface is made of wood. To...
- Page 63 Mounting the Camera with Ceiling Mount* 6. Mount the camera: Place the ceiling mount over the drill holes, use the four screws each with a washer and tighten them using the appropriate screwdriver. Do not overtighten the screws as this may damage the plastic mount.
-
Page 64: Mounting The Camera With Pole Mount (Accessories)
M16 Camera Manual: Installation Mounting the Camera with Pole Mount (Accessories) If you are intending to install the camera on a pole, you should consider using the MOBOTIX M16 pole mount. This mount is made of 3-mm powder-coated stainless steel (white) and has been designed specifically for outdoor use. The supplied stainless steel straps allow the mount to be attached to poles with diameters between 60 mm and 180 mm. By design, the pole mount does not allow the use of an in-wall socket. -
Page 65: Pole Mount (Mx-Mh-Secureflex-Esws)
Mounting the Camera with Pole Mount (Accessories) 2.5.1 Pole Mount (MX-MH-SecureFlex-ESWS) When mounted to a pole, the camera can be turned or tilted similar to wall installations: • horizontally: 180° • vertically: 80° 180° +20° Tilting the camera when -60° installed on a pole •... - Page 66 M16 Camera Manual: Installation Scope of Delivery and Required Parts Please first check that all the components supplied with the corner and pole mount set are present in the original packaging. Item Number Part Name Pole mount Stainless steel hex head screws M6x20 mm Stainless steel hex head screws M6x35 mm (not required) Stainless steel washers Stainless steel hex nuts M6 Stainless steel straps The caps for the screws are also required here.
- Page 67 MX-Patch-Box. All manuals can be downloaded and printed (as PDF files) from the MOBOTIX website (www.mobotix.com) in the Support > Download Center > Documentation > Manuals sec- tion. Make sure that the cables are not bent or squashed.
- Page 68 M16 Camera Manual: Installation 6. Mount the camera: Place the wall mount over the predrilled positions in the pole mount and tighten it using the supplied M6x25 mm screws (item 1.2), washers (item 1.4) and M6 hex nuts (item 1.5). Place the white caps on the screw heads.
-
Page 69: Replacing The Microsd Card
Replacing the MicroSD Card The camera must be taken down to remove, insert, or replace a MicroSD card in use. To avoid data loss, be sure to deactivate MicroSD card recording in the camera software and reboot the MOBOTIX camera before removing the card. Caution A MicroSD card may only be removed from the camera after you have deactivated recording to the SD card and rebooted the camera. Failing to do so may lead to data... - Page 70 M16 Camera Manual: Installation 5. Unlock MicroSD card : Carefully slide the metal latch to the right (using your fingernail). 6. Remove the MicroSD card : Lift the metal latch upwards and to the right and remove the SD card. 7. Insert and lock the MicroSD card : Insert the MicroSD card and close the metal latch.
-
Page 71: Network And Power Connection
MOBOTIX cameras, make sure, if possible, that these components do not have a fan. Since the power consumption of MOBOTIX cameras is very low compared to other products, the reliability of the entire system is increased, thus extending the life of these components. -
Page 72: Power Supply Using A Switch
Product Selector > Accessories > Interface Boxes. Insert the MOBOTIX patch cable of the M16 into the network port for standard connections (only permitted in indoor areas). If additional cables are required inside the housing, they must be connected as described in Section 2.2.6, «Connecting a USB Cable»... -
Page 73: Power Supply When Connected Directly To A Computer
Power supply ing to a computer For the M16 you should use the blue MX-NPA-PoE-Set or the MX-NPA-Box – previ- Camera ous MOBOTIX network (10.16.0.11/255.0.0.0) RJ45 power accessories, such as the NPA-Set, Power- Box and Power-Rack (MX-NPA-Set, MX-NPR-4 and MX-NPR8/20) are not suit-... -
Page 74: Variable Poe
M16 Camera Manual: Installation 2.7.5 Variable PoE The power consumption of the camera depends on the functions in use as well as any periph- eral devices connected (see table). PoE classes 2 or 3 may be selected in the browser-based user interface in order to optimally adjust the camera to your system design (PoE switch in use, emergency power concept, etc.). - Page 75 Network and Power Connection Notes...
-
Page 76: Operating The Camera
MOBOTIX camera using a JavaScript-enabled browser on all common operating systems ware at www.mobotix.com (such as Windows, Linux, Macintosh, etc.). As an alternative, you can also use the MOBOTIX application MxManagementCenter. Follow these steps to set up the camera: 1. Connect the camera to the network. - Page 77 Manual and Automatic Operation – Overview • Network with fixed IP addresses In order to access the camera, it must have an IP address within the range of the local network. To set the camera’s network parameters, you can use one of these methods: – Manually using a browser: First, you need to change the network parameters of your computer (see Section 3.2.1, «Manually Setting Up the Network Parameters in a Browser»...
-
Page 78: First Images And The Most Important Settings
M16 Camera Manual: Operating The Camera First Images and the Most Important Settings Once the MOBOTIX camera has been connected to the network, you need to set up the cam- era’s network interface accordingly. This step involves setting up and checking the network parameters of the camera. If your network is already using an IP address in the 10.x.x.x range with a 255.0.0.0 network mask, you do not need to change the camera’s network... - Page 79 IP address 10.16.0.11. 2. Set up the target network parameters of the MOBOTIX camera: 1. Open a web browser on the computer and enter the default IP address of the MOBOTIX camera in the address bar of the browser (for example, 10.16.0.99). Clicking Enter displays the user interface of the MOBOTIX camera (see also Section 3.2.2, «First Images...
- Page 80 M16 Camera Manual: Operating The Camera Note: The Quick Installation can also be executed at a later stage by opening Admin Menu > Network Setup > Quick Installation (see also Quick Installation in the camera’s online help). 3. Enter the target network parameters of the camera on the appropriate page of the Quick Installation assistant.
-
Page 81: First Images And The Most Important Settings In The Browser
First Images and the Most Important Settings 3.2.2 First Images and the Most Important Settings in the Browser Once the MOBOTIX camera has been connected to the power supply and to the network, you can access the user interface with the live camera image in the web browser. Internet Explorer, Firefox, Safari or any other graphical browser with activated JavaScript is suitable. - Page 82 M16 Camera Manual: Operating The Camera Camera Views: Live, Player, MultiView The MOBOTIX camera automatically displays the live screen when it starts up (factory default set- ting). You can set a different start page in Admin Live view: http://<camera IP>/ Menu > Language and Start Page (for example, control/userimage.html the Guest screen) to allow a restricted access to the live image.
-
Page 83: First Images And Network Parameter Configuration In Mxmc
MOBOTIX cameras. The number of found cameras is shown next to the Add button. This number is updated automatically if the number of MOBOTIX cameras on the network has changed (i.e., by connecting new/disconnecting existing cam- eras). - Page 84 M16 Camera Manual: Operating The Camera Reconfiguring Network Addresses of Cameras Using Bonjour*, MxManagementCenter finds not only cameras on the same network as your computer, but also MOBOTIX cameras located in other subnets (status: ). In such a case, you would not be able to establish any connection to cameras in a different network or subnet. This is the case, for example, if you are integrating cameras into a network without DHCP server (i.e., with fixed IP addresses) and the IP address range is different from the 10.x.x.x...
- Page 85 The number of selected cameras is shown on the Next button . Move to the next page and click on Finish. For more information, see the MxManagementCenter Tutorial, which can be downloaded as a PDF file from the MOBOTIX website: www.mobotix.com > Support > Download Center > Documentation > Brochures & Guides > Tutorials.
-
Page 86: Start Options Of The Camera
M16 Camera Manual: Operating The Camera 3.2.4 Start Options of the Camera By default, the camera starts as DHCP client and automatically tries to get an IP address from a DHCP server. To start the camera in a mode different from the default mode, you can activate the boot menu of the camera. Preparing the Camera • Disconnect the camera’s power supply. - Page 87 First Images and the Most Important Settings Starting the Camera with Factory (Network) Settings If you use start option 2 to load the factory configuration, this configuration is not automatically saved in the camera’s flash memory. When the camera is next rebooted Make sure you store without using start option 2, the last stored configuration will be used. To permanently the default network store the new configuration in the camera’s flash memory, open Admin Menu > Store. configuration to the per- manent flash memory Note that you can restore specific parts of the camera configuration afterwards by using “Restore” to re-apply the settings still stored in the camera. As opposed to resetting the camera using Admin Menu >...
-
Page 88: Adjusting Camera, Lens Focus And Installing Filters
M16 Camera Manual: Operating The Camera Adjusting Camera, Lens Focus and Installing Filters 3.3.1 Adjusting the Camera 1. The live image from the camera is displayed on the computer monitor. 2. Loosen the screws on the VarioFlex mount using the supplied Allen wrench so that you can easily turn and tilt the camera. -
Page 89: Adjusting Lens Focus (B119/B237 Only)
(both are supplied with the M16 basic module). The focusing aid provides a visual aid when correcting the image sharpness (see The Live Screen of the MOBOTIX Camera in the camera’s online help). Procedure 1. Position the blue lens wrench on the notches of the sensor module. -
Page 90: Inserting A Filter
M16 Camera Manual: Operating The Camera 3.3.3 Inserting a Filter MOBOTIX offers a polarization filter in its range of accessory products for all sensor modules (except the B016). The polarization filter prevents unwanted reflections from smooth surfaces. The filter can be used to provide better facial recognition of the people behind the windshield of a car, for example. Only one filter can be used per sensor module, which then replaces the standard protective glass lens. Procedure 1. Position the blue lens wrench on the notches of the protective glass lens. Rotate the wrench to the left until you feel a stop (max. 300°) and then a little bit further until the protective glass lens slides out of the sensor module. -
Page 91: Replacing The Dome Against The Sealing Ring (B016 Only)
Adjusting Camera, Lens Focus and Installing Filters 3.3.4 Replacing the Dome Against the Sealing Ring (B016 Only) For special scenarios with hemispheric sensor modules, e.g., if light entering from the side creates reflections within the dome, you can use the sealing ring instead of the dome (order no. MX-OPT-Ring-L10-L12). To exchange the dome against the sealing ring, use the blue lens wrench supplied with the S15D basic module. - Page 92 M16 Camera Manual: Operating The Camera 5. Screw the lens with the sealing ring back into the sensor module using the blue lens wrench. 6. Adjust the image sharpness according to the live image on a computer monitor. Use the blue lens wrench for this purpose and turn the lens cautiously to the left and to the right. Do not turn the lens too far or with force to avoid damaging the image sensor!
-
Page 93: Virtual Ptz And Full Image Recording
Virtual PTZ and Full Image Recording Virtual PTZ and Full Image Recording 3.4.1 Preparing the Virtual PTZ Function The virtual PTZ function allows you to use a mouse or joystick to continuously zoom in on images from the selected video source and “virtually” move the enlarged image section within the entire image sensor area. - Page 94 MxManagementCenter Tutorial on www.mobotix.com, Support > Download Center > Documentation > Brochures & Guides > Tutorials. The latest versions of all the manuals are available for download from the MOBOTIX website www.mobotix.com under Support > Download Center > Documentation >...
-
Page 95: Full Image Recording
Virtual PTZ and Full Image Recording 3.4.2 Full Image Recording It is possible to record a full image, regardless of the live image stream that is being displayed. This ensures that the recording always contains the full image of the lens used, even though the operator may have used the vPTZ features to zoom into the image in order to examine a specific detail. - Page 96 M16 Camera Manual: Operating The Camera Activate/Deactivate Full Image Recording in the Browser To configure this feature, open the Setup Menu > Event Control > Recording dialog box and activate or deactivate the Full Image Recording option.
-
Page 97: Special M16 Configuration In The Browser
. To store the changed sensor configuration in the camera, proceed as described at the end of Section 3.4.3, «Special M16 Configuration in the Browser». Configuration of the M16 Basic Parameters for Hemispheric Sensor Modules Thanks to its hemispherical lens, the MOBOTIX M16 provides certain spe- cial configuration options for the image settings. Depending on where the camera is installed (ceiling, wall or floor) and on the live image display preferred by the user,... - Page 98 M16 Camera Manual: Operating The Camera Complete the steps described below in the browser window: 1. Log the camera on and boot it as described in Section 3.2, «First Images and the Most Important Settings». Depending on the number of sensor modules used, proceed as follows: –...
- Page 99 Virtual PTZ and Full Image Recording Wall-Mounted: Setting and Correcting the Standard View “Panorama” Camera live image with panorama correction High-resolution 180° panorama 1. In the Display Mode Quick Control, select the Panorama option. Examine the image that is now displayed. If the section meets your expectations, no further adjustment is necessary, and panorama configuration is complete. To change the image section to meet your specific expectations, continue with step 2.
- Page 100 M16 Camera Manual: Operating The Camera 2. Click the lock icon. Clicking the lock once opens it (lock clasp is raised). The lock prevents execution of later vPTZ actions, which could also unintentionally modify the view you configure. This applies to all overview display modes, that is, also to Panorama/Focus, Double Panorama and Surround. Lock open 3.
- Page 101 Virtual PTZ and Full Image Recording Functions of the M16’s OnScreen Control Close Tilt up Start panning to the right Start panning to the left Tilt down Zoom Panorama correction Image tilt correction Default setting To use the OnScreen Control, click the arrows in the top area for shifting the image section. Depending on the installa- tion position (ceiling, wall, In the bottom areas, which are displayed when needed, click to the left and/or right of the floor), panorama correction center point. and image tilt correction may not be available The same applies to every area: The further away that you click from an area’s center point, the greater the change triggered.
- Page 102 M16 Camera Manual: Operating The Camera Ceiling-Mounted: Set North (User-Defined North Direction) Once a sensor module (M16) or entire camera (M16) is installed on a ceiling, you need to specify its North direction. This is not the “true” direction of North but rather the main line of sight or the focus of the camera or sensor module.
- Page 103 Virtual PTZ and Full Image Recording 3. In the Installation Quick Control, select the Set North option. 4. Store the desired North direction permanently by first activating the checkbox and then clicking on Yes. 5. You have now set the North direction for the Surround and Double Panorama display modes. In the next step, you can set these views as the standard view for the camera live image.
- Page 104 M16 Camera Manual: Operating The Camera 6. In the Display Mode Quick Control, select the option Surround or Double Panorama. You can fine-tune the views using the vPTZ via mouse or joystick and, as described above, by unlocking and locking the standard view using the lock icon (open lock, correct display and close lock again). Note For each of the subviews ( North , East , etc.;...
- Page 105 Virtual PTZ and Full Image Recording Sensor Configuration (Only with Two Sensor Modules) Sensor configuration specifies which sensor module is connected to which of the camera’s connections (Cam1 or Cam2), and in which camera image (left/right) the sensor module is to appear for the dual image display. Open the corresponding dialog box here: Admin Menu > Sensor Configuration. You should also open the Sensor Configuration dialog box in the following cases: Swapping the displayed camera images : You wish to display the left camera image •...
-
Page 106: Microsd Card Recording
Menu > Camera Status dialog box. Conservative Memory Usage Thanks to MOBOTIX MxFFS File System MxFFS formatting of the MicroSD card means that the MOBOTIX camera software will use the flash device as evenly as possible, thus allowing for the maximum possible number of write/delete cycles. This also means that all storage cells of the flash device will be written and deleted with the same frequency, if possible. MOBOTIX technology increases the life of the flash device considerably and also improves the security and the reliability of the storage process. Storage Requirements and Life Expectancy of MicroSD Cards The life expectancy of a MicroSD card increases proportionally to the storage capacity, since the camera software will execute fewer write/delete cycles on each storage cell. The first... - Page 107 We recommend changing the pre-installed, high-quality MicroSD card once a year if you have it constantly set to continuous recording. Monitoring the Cell Wear of Flash Storage Devices (Patent Pending) MOBOTIX uses its own technology for this pur- pose and has a pending patent. You can view the flash wear in the status bar of the live image or by opening Admin Menu >...
-
Page 108: Formatting The Microsd Card
Flash Device Menu > Storage on External File Server/Flash Device): 1. Make sure that there is a MicroSD card in the card slot of the MOBOTIX camera. 2. Click Format in the SD Memory Card line. 3. Note down the characters shown in the Encryption password field or enter your own password. -
Page 109: Activating Recording
(Admin Menu > Storage on External File Server/Flash Device): File Server/Flash Device 1. Make sure that there is a MicroSD card in the card slot of the MOBOTIX camera. 2. Make sure that the MicroSD card is formatted in MxFFS format. -
Page 110: Accessing Data On The Microsd Card
In MxManagementCenter: Play back the recorded video sequences with audio by accessing the MicroSD card in the MOBOTIX camera via the camera or with a direct access to the MicroSD card via a card reader connected to the computer (coming soon). -
Page 111: Using A Microsd Card In A Different Mobotix Camera
MicroSD Card Recording 3.5.6 Using a MicroSD Card in a Different MOBOTIX Camera A MicroSD card containing recorded data from a MOBOTIX camera can be inserted into any MicroSD card-enabled MOBOTIX camera. Once MicroSD card recording has been activated (requires a reboot), the “new” MOBOTIX camera automatically synchronizes with the card and resumes recording. -
Page 112: Configuration In The Browser
(such as Windows, Linux, Macintosh, etc.). The camera provides a HTML-based user interface for this purpose. The camera executes the changes you make to the camera configuration via HTTP commands using programs and scripts of the embedded software. The settings are stored in the camera’s flash memory. This section contains an overview of the general browser settings of the MOBOTIX camera, as well as further configuration options. Detailed information on the software functions is provided in the camera’s online help. - Page 113 This allows you to manually synchronize the camera with a computer or automatically using a time server or another MOBOTIX camera. The camera can use either NTP servers or Time Protocol servers. For more information on this topic, refer to the online help for the specific dialog boxes.
-
Page 114: General Browser Settings
Control Lists (ACL)), similar to a computer operating system. This approach allows individual access rights to be assigned or denied to camera-specific features based on the user groups. • Deactivate the automatic reboot: In its factory state, every MOBOTIX camera will auto- matically reboot every morning at 3:36 a.m. All images in the camera’s storage buffer will be deleted during this reboot. Images stored on external file servers, internal flash storage, or SD cards will NOT be affected by this reboot. Make sure that you deactivate the automatic reboot if this is not desired (Admin Menu > Time Tasks). -
Page 115: Configuring The M16-Thermal(-Tr) In The Browser
IP Notify or telephone call. A general advantage is that MOBOTIX cameras are extremely tough, not least because of the absence of mechani- cal moving parts. This typically allows them to stay fully operational, in particular, when they are subject to strong vibrations. - Page 116 M16 Camera Manual: Operating The Camera Using this event type, you can create up to 20 event profiles, each defining a measurement window within the image area. For every measurement window, you can set a minimum range and a trigger value and you can decide if the event should trigger if the temperature exceeds or drops below the specified value. The minimum range sets the number of pixels in the measurement window, which need to have a higher or lower temperature than the trigger value in order to trigger an event. To configure the new event type,. open the Setup Menu >...
-
Page 117: Additional Notes
Additional Notes 3.7.1 Operation with Only One Sensor Module If the MOBOTIX M16 is used with only one sensor module , the blind module needs to be installed (item 1.4 in Section 1.4, «Delivered Parts and Dimensions»)! If this is not the case, the camera must not be used (see Section 2.2.1, «Initial Installation of the Sensor Modules (Except M16 Complete Cameras)»). -
Page 118: Using The Start Options Of The Camera
Text and logos can be also deactivated or indi- and the MOBOTIX logo at the top of the image. Once the camera arming has been activated, vidually configured the text at the bottom of the live image (event, action, messaging and recording symbols) will also appear. -
Page 119: Browser
Make sure you instruct cleaning personnel on how to clean the camera. 3.7.10 Online Help and Camera Information in the Browser For more information, see the online help of the camera’s browser interface. Click on the icon to open the camera’s online help. Furthermore, detailed information on the camera and its current configuration is displayed in the Camera Status dialog box when you click on the icon. 3.7.11 Declaration of Conformity MOBOTIX products der are certified according to the applicable rules and regulations of the EU and of other countries. You can find the declarations of conformity on the MOBOTIX website on www.mobotix.com under Support > Download Center > Documentation > Certificates & Declarations of Conformity. -
Page 120: Rohs Declaration
M16 Camera Manual: Operating The Camera 3.7.12 RoHS Declaration The products of MOBOTIX AG are in full compliance with Art. 5 of the German Electrical and Electronic Equipment Act and the E.U. Directive 2011/65/EU on the Restriction of the Use of Certain Hazardous Substances in Electrical and Electronic Equipment (RoHS) as far as they are subject to these regulations. (You can find the MOBOTIX RoHS Declaration under... - Page 121 Additional Notes Notes...
- Page 122 M16 Camera Manual Notes...
- Page 123 Manufacturer...
- Page 124 Camera Manual AllroundDual M16...
Need help?
Do you have a question about the AllroundDual M16B and is the answer not in the manual?
Questions and answers