(Applicable for flicker-free models only.) BenQ ecoFACTS BenQ has been dedicated to the design and development of greener product as part of its aspiration to realize the ideal of the "Bringing Enjoyment 'N Quality to Life" corporate vision with the ultimate goal to achieve a low-carbon society. Besides meeting international regulatory...
BenQ to ensure compatibility. Do not disassemble the product unless you are aware of the consequences. If you cannot find the dismantled information on your product, contact the local customer service for assistance.
Q&A index Start with the topics that you are interested in. Setup How to set up the monitor and turn it on? Safety precautions How to assemble your monitor hardware How to adjust monitor height? Adjusting the monitor height How to wall mount the monitor? Using the monitor wall mounting kit (purchased separately) Menus and accessories How to use the OSD menu?
Page 5
Maintenance and product support How to clean the monitor? Care and cleaning How to keep the monitor not in use for a long time? How to detach the stand Care and cleaning I need more support. Product support Servicing...
• Use only the power cord provided by BenQ. Never use a power cord that appears to be damaged or frayed. • To avoid possible damage to the monitor, do not use it in a region where power supply is unstable.
• This monitor is designed mainly for personal use. If you want to use the monitor in a public place or a harsh environment, contact your nearest BenQ service center for assistance. • To avoid possible electric shock, do not dissemble or repair the monitor.
Caution • The monitor should be 50 ~ 70 cm (20 ~ 28 inches) away from your eyes. • Looking at the screen for an extended period of time causes eye fatigue and may deteriorate your eyesight. Rest your eyes for 5 ~ 10 minutes for every 1 hour of product use. •...
If any of the above mentioned misuse or other accident such as dropping or mishandling occurs, contact qualified service personnel for servicing. • Contact your place of purchase or visit the local website from Support.BenQ.com for more support.
General warranty information Note that the monitor warranty may be void if any of the following conditions occurs: • Documents required for warranty services have been altered by unauthorized use or is illegible. • The model number or production number on the product has been altered, deleted, removed or made illegible.
Table of Contents Copyright ............................2 Product support .......................... 3 Q&A index ............................ 4 Safety precautions ........................6 Power safety ..............................6 Installation ..............................7 Operation..............................7 Safety notice for remote control (applicable if a remote control is provided) ......8 Battery safety notice (applicable if a remote control is provided) ..........
Page 12
System menu ............................51 Troubleshooting ........................55 Frequently asked questions (FAQ) ...................... 55 Need more help?............................58 6/17/22 PD2506Q-EM-V0...
Getting started When unpacking please check you have the following items. If any are missing or damaged, please contact the place of purchase for a replacement. BenQ LCD Monitor Monitor Stand Monitor Base Quick Start Guide Safety Instructions Regulatory Statements...
Page 14
Video Cable: DP to DP Video Cable: USB-C™ The length of USB-C™ cable should be less than 1 meter to make the connection easy. USB Cable • Available accessories and the pictures shown here may differ from the actual contents and the product supplied for your region.
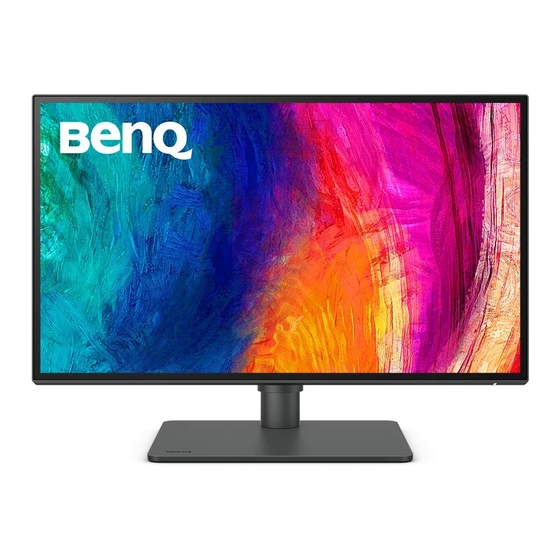
Getting to know your monitor Front view 1. Speakers 2. Power LED indicator Back view 3. USB 3.2 Gen 1 port (downstream; connecting to the USB devices) 4. USB-C™ port (for data transfer only) 5. Headphone jack 6. Power button 7.
Connections The following connection illustrations are for your reference only. For cables that are not supplied with your product, you can purchase them separately. For detailed connection methods, see page - 21. peripherals Headphone/ Speakers peripherals PC / Notebook Getting to know your monitor...
Power delivery of USB-C™ ports on your monitor With the power delivery function, your monitor helps supply power to the connected USB-C™ devices. Available power varies by port. Make sure the devices are connected to the appropriate ports to be activated properly with sufficient power. PD2506Q USB-C™...
How to assemble your monitor hardware • If the computer is turned on you must turn it off before continuing. Do not plug-in or turn-on the power to the monitor until instructed to do so. • The following illustrations are for your reference only. The location and available input and output jacks may vary depending on the purchased model.
Page 19
Protect the monitor and screen by clearing a flat open area on your desk and placing a soft item like the monitor packaging bag on the desk for padding. Gently lay the screen face down on a flat clean padded surface.
Page 20
You should position the monitor and angle the screen to minimize unwanted reflections from other light sources. Your monitor is an edge-to-edge monitor and should be handled with care. Avoid finder pressure on the screen surface. Adjust the screen angle by placing your hands on the top and on the bottom of the monitor as illustrated.
Page 21
3. Connect the headphone. You may connect the headphones to the headphone jack. 4. Connect the USB devices. 1. Connect the USB cable between the PC and the monitor (via the upstream USB port). This upstream USB port transmits data between the PC and the USB devices connected to the mon- itor.
Page 22
6. Organize the cables. Route the cables via the cable clip. 7. Connect-to and turn-on the power. Plug the other end of the power cord into a power outlet and turn it on. Picture may differ from product supplied for your region. Turn on the monitor by pressing the power button on the monitor.
How to detach the stand 1. Prepare the monitor and area. Turn off the monitor and the power before unplugging the power cable. Turn off the computer before unplugging the monitor signal cable. Protect the monitor and screen by clearing a flat open area on your desk and placing a soft item like a towel on the desk for padding, before laying the screen face down on a flat clean padded surface.
Page 24
And then detach the base from the stand. How to assemble your monitor hardware...
Adjusting the monitor height To adjust the monitor height, hold both the left and the right sides of the monitor to lower the monitor or lift it up to the desired height. • Avoid placing hands on the upper or lower part of the height-adjustable stand or at the bottom of the monitor, as ascending or descending monitor might cause personal injuries.
Rotating the monitor 1. Pivot the display. Before rotating the monitor with a portrait viewing orientation, the display has to be rotated 90 degrees. Right-click the desktop and select from the popup menu. Select Screen resolution Portrait , and apply the setting. Orientation Depending on the operating system on your PC, different procedures should be followed to adjust the screen orientation.
To avoid the edge of the LCD display hitting the monitor base surface while it is being rotated, do tilt and extend the monitor to the highest position before you start to rotate the display. You should also make sure there are no obstacles around the monitor and there is enough room for cables.
Use four M4 x 10 mm screws to fix a VESA standard wall mount bracket to the monitor. Make sure that all screws are tightened and secured properly. Consult a professional technician or BenQ service for wall mount installation and safety precautions. How to assemble your monitor hardware...
How to adjust your monitor The control panel All OSD (On Screen Display) menus can be accessed by the control keys. You can use the OSD menu to adjust all the settings on your monitor Name Description Power key Turns the power on or off. 5-way controller Accesses the functions or menu items as instructed by the on-screen icons.
5-way controller and basic menu operations The 5-way controller is located at the rear of the monitor. While sitting in front of the monitor, move the controller to the directions instructed by the on-screen icons for menu navigation and operations. Left Right Down...
Page 31
5-way controller OSD icon Function operation Move down • Goes to the next menu item. • For down / decrease adjustment. Move to the left • Returns to the previous menu. • Exits OSD menu. All OSD (On Screen Display) menus can be accessed by the control keys. You can use the OSD menu to adjust all the settings on your monitor.
Working with the hot keys The custom keys (located next to the 5-way controller) perform as hot keys to provide direct access to pre-defined functions. You can change the default setting and designate different functions for these keys. Accessing the hot key functions 1.
• To unlock the OSD controls, press and hold any key for 10 seconds. Controlling the display with Display Pilot The Display Pilot software is provided as an alternative to control the display. Download and install from Support.BenQ.com (see Product support on page The main functions include: •...
The computer’s color profile (ICC profile) may not best suit your monitor. If you want to make sure to obtain the accurate color matching representation, change the computer’s ICC profile to ensure the computer works better with the monitor. Visit Support.BenQ.com to access the under your monitor ICC Profile Installation Guide model for instructions.
Page 35
3. After the connections are made properly, the KVM Switch function is enabled automatically. You can find out the status from the OSD menus. On the main menu, the KVM status On the Input hotkey menu, is displayed. a KVM icon is displayed. KVM Switch: ON Input USB-C...
Page 36
Switch from the KVM Switch menu Go to KVM Switch to manually select a source. Mode: sRGB KVM Switch: ON If it can't use KVM, Display USB-C DisplayPort please check Color DisplayPort HDMI 1. Input Source is connected KVM Switch None 2.
3. Go to KVM Switch > USB and select None. This is because two video inputs are displayed simultaneously and require no switch. The None option will switch USB control only. 4. Press a custom key (if it has been set as the hot key for KVM Switch) or go to the KVM Switch menu to switch.
Configu- monitor (PD2506Q or a com- (PD2506Q or a com- (PD2506Q or a com- ration (PD2506Q) patible BenQ monitor) patible BenQ monitor) patible BenQ monitor) 2560 x 1440 (60Hz) 2560 x 1440 (60Hz) 1920 x 1080 2560 x 1440 (60Hz)
Page 39
Commonly used names for HDR Premium, High Dynamic Range, HDR, Ultra HD Premium HDR10 (may vary by manufacturer) 2. Make sure HDR content is available. 3. Make sure the player and the monitor have been connected via an appropriate cable: •...
Navigating the main menu You can use the OSD (On Screen Display) menu to adjust all the settings on your monitor. Press the 5-way controller to bring up the hot key menu, and press (Menu) to access the main menu. See 5-way controller and basic menu operations on page 30 for details.
Display menu Available menu options may vary depending on the input sources, functions and settings. Menu options that are not available will become grayed out. And keys that are not available will be disabled and the corresponding OSD icons will disappear. For models without certain functions, their settings and related items will not appear on the menu.
Page 42
Item Function Range Display This feature is provided to allow aspect ratios other than Mode 16:9 to be displayed without geometric distortion. The options under Display Mode will be different depending on the input signal sources. Depending on your selection of Color Mode, different Display Mode option is pre-set.
Color menu Available menu options may vary depending on the input sources, functions and settings. Menu options that are not available will become grayed out. And keys that are not available will be disabled and the corresponding OSD icons will disappear. For models without certain functions, their settings and related items will not appear on the menu.
Page 44
Item Function Range M-book Minimizes the visual differences between the monitor and the connected MacBook series product. CAD / CAM Enhances the contrast if a CAD / CAM software is used. Animation Enhances the contrast of the dark shades so you 0 ~ 10 could work on the details easily when making an animation.
Page 45
Item Function Range Contrast Adjusts the degree of difference between darkness and lightness. 0 to 100 Sharpness Adjusts the clarity and visibility of the edges of the subjects in the 1 to 10 image. Color 6500K Allows video and still photographs to be viewed Temperature with natural coloring.
Page 46
Item Function Range Adjusts the degree of how we perceive colors. • R (0~100) • G (0~100) • B (0~100) • C (0~100) • M (0~100) • Y (0~100) Saturation Adjusts the purity degree of colors. • R (0~100) • G (0~100) •...
Page 47
Settings Color Color Color Mode Brightness Contrast Sharpness Gamma Saturation Temperature Gamut DCI-P3 Display P3 sRGB Rec. 709 CAD / CAM Animation Low Blue Light ePaper Darkroom M-book DICOM User Navigating the main menu...
KVM Switch menu Available menu options may vary depending on the input sources, functions and settings. Menu options that are not available will become grayed out. And keys that are not available will be disabled and the corresponding OSD icons will disappear. For models without certain functions, their settings and related items will not appear on the menu.
Audio menu Available menu options may vary depending on the input sources, functions and settings. Menu options that are not available will become grayed out. And keys that are not available will be disabled and the corresponding OSD icons will disappear. For models without certain functions, their settings and related items will not appear on the menu.
Custom Key menu Available menu options may vary depending on the input sources, functions and settings. Menu options that are not available will become grayed out. And keys that are not available will be disabled and the corresponding OSD icons will disappear. For models without certain functions, their settings and related items will not appear on the menu.
System menu Available menu options may vary depending on the input sources, functions and settings. Menu options that are not available will become grayed out. And keys that are not available will be disabled and the corresponding OSD icons will disappear. For models without certain functions, their settings and related items will not appear on the menu.
Page 52
Item Function Range OSD Settings Language Sets the OSD menu language. • English • Français The language options displayed on your OSD may • Deutsch differ from those shown on the right, depending • Italiano on the product supplied in your region. •...
Page 53
Item Function Range USB-C Sets the refresh rate of the input video via USB-C™ port. Configuration The USB transmission speed changes accordingly due to USB-C™ technology limitation. USB 3.2 Refresh rate: 2560 x 1440 @ 60Hz Gen 1 USB transmission speed: 5 Gbps USB 2.0 Refresh rate: 2560 x 1440 @ 60Hz USB transmission speed: 480 Mbps...
Page 54
Item Function Range System Shows the current monitor property settings. • Input Setting • Timing • Brightness • Contrast • Color Gamut • Pixel Encoding • RGB Range Burn-in Screen burn-in or image retention may be found on the • YES Cleaner screen if a still image is displayed for an extended period of •...
Troubleshooting Frequently asked questions (FAQ) Imaging The image is blurred. Download from the website (see Product support on page 3). Refer to Resolution file " ". And then select the correct resolution, refresh rate and Adjusting the Screen Resolution make adjustments based on these instructions. Does the blurring only occur at resolutions lower than the native (maximum) resolution? Download from the website (see...
Page 56
You are running the monitor at its native resolution, but the image is still distorted. Images from different input sources may appear distorted or stretched on the monitor running at its native resolution. To have the optimal display performance of each type of input sources, you can use the Display Mode function to set a proper aspect ratio for the input sources.
Page 57
OSD messages A message Out of Range on the screen during computer boot up process. If there is a message Out of Range on the screen during computer boot up process, this means computer compatibility caused by operating system or graphic card. The system will adjust the refresh rate automatically.
• Check if the input source has been selected to USB-C on Display > Signal Input. Need more help? If your problems remain after checking this manual, please contact your place of purchase or visit the local website from Support.BenQ.com for more support and local customer service. Troubleshooting...
Need help?
Do you have a question about the DesignVue PD Series and is the answer not in the manual?
Questions and answers
how to activate the usb ports, they don't seem to work when I connect a device