Table of Contents
Advertisement
Quick Links
Advertisement
Table of Contents

Related Manuals for BenQ DH551C


Summary of Contents for BenQ DH551C
- Page 1 DH551C/DH550C/DL550C Double Sided Display User Manual...
-
Page 2: Disclaimer
Disclaimer BenQ Corporation makes no representations or warranties, either expressed or implied, with respect to the contents of this document. BenQ Corporation reserves the right to revise this publication and to make changes from time to time in the contents thereof without obligation to notify any person of such revision or changes. -
Page 3: Table Of Contents
Table of Contents Table of Contents Disclaimer................2 Copyright................2 Important Safety Instructions ........... 4 Safety precautions and maintenance ........... 4 Usage ....................6 Package content ..............9 Unpacking ..................9 Packing list..................11 Overview ..................12 Setting up the display ............14 Tearing down the bottom housing........... -
Page 4: Important Safety Instructions
• When turning off the display by detaching the power cord, wait 6 seconds before re- attaching the power cord for normal operation. • Ensure the use of an approved power cord provided by BenQ at all times. If your power cord is missing, please contact your local service center. - Page 5 Important Safety Instructions Read and follow these instructions when connecting and using your display • Unplug the display if you are not going to use it for an extensive period of time. • Unplug the display if you need to clean it with a slightly damp cloth. The screen may be wiped with a dry cloth when the power is off.
-
Page 6: Usage
Important Safety Instructions Usage Remote controller precautions Power function of the remote controller works only when pointing to the front side of the display; the other functions work at either side. Front Side Back Side There is a user door at the front side. Power connection to the device The display shall be installed nearby the sockets for easy access to the power. - Page 7 Important Safety Instructions IPC (Industrial PC) installation • This display contains a plate metal to be attached to your IPC. • The relative position of the screw holes is shown below. You can choose proper screw holes to apply. • The dimension of IPC space: 270*181*26.5mm screws (M3x6.5mm) Please put the IPC I/O interface down.
- Page 8 Important Safety Instructions 2. Set & fix the IPC & Reinstall the IPC fixed sheet metal with 4 screws (M3x6.5mm). 3. Set & fix the IPC (Don’t need reinstall the IPC fixed sheet metal.) with 4 screws (M3x6.5mm).
-
Page 9: Package Content
Package content Package content Unpacking • This product is packed in a carton together with the standard accessories. • Due to the size and weight of this display, it is recommended to move it with at least two people. • After opening the carton, ensure that the contents are complete and in good condition. Package 1... - Page 10 Package content Package 2...
-
Page 11: Packing List
Package content Packing list Remote controller x1 Double sided display x1 (Battery: CR 2025 3V) Bottom housing x1 Power cord x1 Key x1 M4x8mm screw x4 M5x30mm screw x4 M6x20mm screw x10 Full size stand (with wheels) HDMI cable x2 M10x100mm screw x4... -
Page 12: Overview
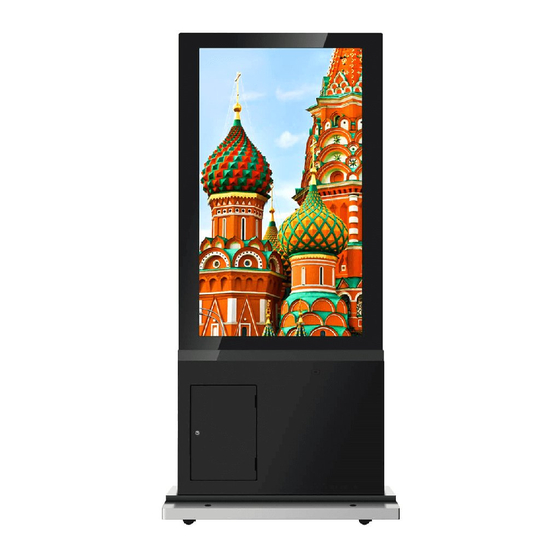
Package content Overview Top View Front View Side View Back View... - Page 13 Package content Name Double sided display Display Set Double sided remote control sensor Stand (with user hole x 10) User door (with locker)
-
Page 14: Setting Up The Display
Setting up the display Setting up the display Tearing down the bottom housing Putting the bottom housing straight, and remove 20 screws (M3x6mm) to tear down its covers. -
Page 15: Placing The Double Sided Display Into The Bottom Housing
Setting up the display Placing the double sided display into the bottom housing Notice: There is a product label at the front side of the display. When placing the display into the bottom housing, please make sure this side face front. Don’t put your hand on the... -
Page 16: Connecting The Lvds And 24V
Setting up the display Connecting the LVDS and 24V LVDS Connector LVDS LVDS 24V Connector 10pin 10pin 14pin 14pin... -
Page 17: Reinstalling The Bottom Housing Covers
Setting up the display Reinstalling the bottom housing covers Reinstall the bottom housing covers with 20 screws (M3x6mm). -
Page 18: Opening The User Door For Hdmi Connector & Ac Switch (Power Cord)
Setting up the display Opening the user door for HDMI connector & AC switch (power cord) The main signal input source is HDMI 1. Make sure HDMI 1 is well connected before establishing HDMI 2 connection. HDMI 1 Front Side Back Side HDMI 2 AC Switch... -
Page 19: Full Size Stand Installation
Setting up the display Full size stand installation Step 1 As below arrows directed, use the 10 screws (M6x20mm) to secure the display with the full size stand. - Page 20 Setting up the display Step 2 Fixed wheel: to fix by the brake. As below arrows directed, use the 4 screws (M10x100mm) to secure the product to the ground.
-
Page 21: Using The Remote Control
Setting up the display Using the remote control Name Description Power Press to turn power on/off. Press to enter OSD setting menu. MENU Press to move up in OSD setting menu. Press to move down in OSD setting menu. ... -
Page 22: Osd Menu
Setting up the display OSD menu Press MENU to pop up the OSD setting menu, and then press “” or “” to select the item. Press MENU to enter submenu. Press EXIT to exit. Luminance menu Press MENU to select one of the following, and then press “” or “” to select the desired level. - Page 23 Setting up the display Color menu Press MENU to select one of the following, and then press “” or “” to select the desired level. Press EXIT when done. Name Description Color Temperature Range: 6500K, 9300K, 11500K, User Define. If you choose User Define, gains and offsets of red, green, and blue are adjustable.
- Page 24 Setting up the display OSD setting menu Press MENU to select one of the following, and then press “” or “” to select the desired level. Press EXIT when done. Name Description Horizontal Default: 50 Default: 50 Vertical Transparency Default: 0 Default: 50 OSD Time Out OSD Rotation...
- Page 25 Setting up the display Setup menu Press MENU to select one of the following, and then press “” or “” to select the desired level. Press EXIT when done. Name Description Language English/Español/Français/Deutsch/Italiano/Português/Русский/ 简体中文 / 日本語 / 繁體中文 HDMI1/HDMI2 Input Display Size Full Screen / Smart Fit / 4:3 / Smart4:3 No/Yes...
-
Page 26: Troubleshooting
Troubleshooting Troubleshooting Symptom Possible Cause Remedy No picture is displayed. 1. The power cord is 1. Plug in the power cord. disconnected. 2. Make sure the power switch 2. The main power is switched on. switch on the back of 3. -
Page 27: Specifications
Specifications Specifications Item Specifications DH551C DH550C DL550C Model name 55 inch (diagonal) Screen size 1920 x1080 (Pixel) Resolution 1209.6(H) x 680.4(V) Display Area 3000:1 Contrast Ratio LCD Display 55” 700 nits / 700 450 nits / 700 450 nits / 450... -
Page 28: Product Dimensions
Product Dimensions Product Dimensions...
Need help?
Do you have a question about the DH551C and is the answer not in the manual?
Questions and answers