Table of Contents
Advertisement
Quick Links
EVK-R8
LENA-R8 series modules evaluation kit
User guide
Abstract
This guide explains how to set up the EVK-R8 evaluation kits to begin evaluating u-blox LENA-R8
series modules supporting LTE Cat 1bis / 2G cellular radio access technologies, plus concurrent
reception of up to 4 GNSS systems with the integrated u-blox UBX-M10 GNSS receiver.
UBX-22018774 - R01
C1-Public
www.u-blox.com
Advertisement
Table of Contents

Subscribe to Our Youtube Channel
Related Manuals for Ublox EVK-R8 Series


Summary of Contents for Ublox EVK-R8 Series
- Page 1 EVK-R8 LENA-R8 series modules evaluation kit User guide Abstract This guide explains how to set up the EVK-R8 evaluation kits to begin evaluating u-blox LENA-R8 series modules supporting LTE Cat 1bis / 2G cellular radio access technologies, plus concurrent reception of up to 4 GNSS systems with the integrated u-blox UBX-M10 GNSS receiver. UBX-22018774 - R01 C1-Public www.u-blox.com...
-
Page 2: Document Information
EVK-R8 - User guide Document information Title EVK-R8 Subtitle LENA-R8 series modules evaluation kit Document type User guide Document number UBX-22018774 Revision and date 06-Oct-2022 Disclosure restriction C1-Public This document applies to the following products: Product name Type number EVK-R8001 EVK-R8001-00C-00 EVK-R8001M10 EVK-R8001M10-00C-00... -
Page 3: Table Of Contents
EVK-R8 - User guide Contents Document information ..........................2 Contents ................................3 Starting up ............................... 4 1.1 EVK-R8 overview ............................4 1.2 EVK-R8 block diagram and basic description ..................5 1.3 Switches, jumpers and buttons ....................... 6 1.4 LEDs ................................7 1.5 Connectors .............................. -
Page 4: Starting Up
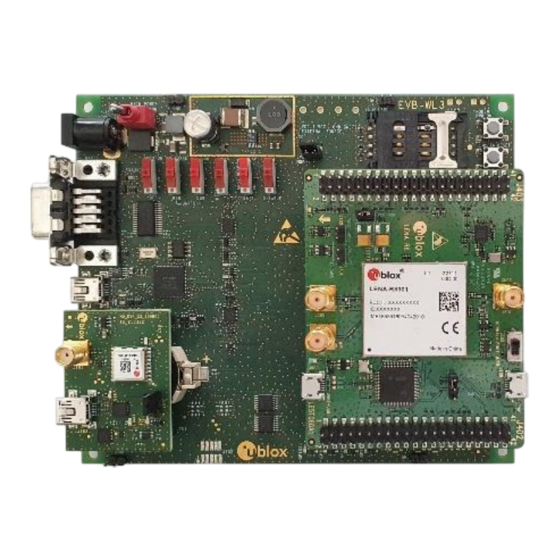
EVK-R8 - User guide Starting up 1.1 EVK-R8 overview The EVK-R8 kit is a powerful and easy-to-use tool that simplifies the evaluation of u-blox LENA-R8 series multimode modules. The following evaluation kits are available with u-blox LENA-R8 modules (see Figure •... -
Page 5: Evk-R8 Block Diagram And Basic Description
EVK-R8 - User guide 1.2 EVK-R8 block diagram and basic description Figure 2 shows the main interfaces and internal connections of the EVK-R8 evaluation kit: (Cellular UART + AUX UART) (J600) WiFi Cellular Antenna Antenna USB / 2-UART converter (J502) (J500) RS232 RS232... -
Page 6: Switches, Jumpers And Buttons
EVK-R8 - User guide • No position (no jumper socket on J601): main 8-wire UART interface or main 4-wire UART with auxiliary 4-wire UART interfaces, routed to the dual-in-line male header connectors mounted on the top of the adapter board ADP-R8, allowing a connection to an external compatible device with the on-board / B2B switch (SW401) on the EVB-WL3 board set to “B2B”. -
Page 7: Leds
EVK-R8 - User guide 1.4 LEDs Function Description LED # Board Color Main power Power supply plugged in the 9 - 18 V Power Input DL401 Cellular VCC Cellular module supplied. Main power switch must be switched on DL400 Cellular native USB USB cable plugged in the Cellular native USB connector LED700 ADP-R8 Cellular two UARTs USB... -
Page 8: Evk-R8 Pin Out
EVK-R8 - User guide 1.6 EVK-R8 pin out Table 4 shows the Interfaces of LENA-R8 series modules, as routed on the 42-pin dual-in-line board- to-board connectors (J402, J403) on the adapter board ADP-R8 of the evaluation kit LENA-R8 series DIL B2B LENA-R8 series DIL B2B LENA-R8 series... -
Page 9: Software Installation
EVK-R8 - User guide Dual-in-line board-to-board connector J402 Dual-in-line board-to-board connector J403 Signal name Pin N° Pin N° Signal name Signal name Pin N° Pin N° Signal name Not connected TIMEPULSE V_BCKP Not connected ANT_ON EXTINT Not connected Not connected RFCTRL1 RFCTRL2 Not connected... - Page 10 EVK-R8 - User guide Connect the AC / DC +12 V power adapter provided with the evaluation kit box to the 9 – 18 V Power Input connector (J400 on the EVB). LED DL401 lights turn blue. Be sure to provide a jumper socket on the Cellular VCC supply jumper (J404 on the EVB) and to Cellular VCC supply jumper (J102 on the ADP-R8).
- Page 11 EVK-R8 - User guide 11. For communication via the UART interfaces, the following connections are allowed and can be alternatively enabled in a mutually exclusive way (see Table 7 for the switch position and LED status, and see Figure 1 Figure 3 for the location of the related connectors, slide switches and the 3-way UARTs’...
-
Page 12: Enabling Error Result Codes
EVK-R8 - User guide 1.9 Enabling error result codes Command sent by DTE (user) DCE response (module) Description AT+CMEE=2 Enable the cellular module to report verbose error result codes. 1.10 PIN code insertion (when required) Command sent by DTE (user) DCE response (module) Description AT+CPIN="8180"... -
Page 13: Appendix
EVK-R8 - User guide Appendix A Setting up AT terminal application The u-blox m-center cellular module evaluation tool is a powerful platform for evaluating, configuring and testing u-blox cellular products. m-center includes an AT commands terminal for communication with the device and can be downloaded for free from www.u-blox.com. For m-center example scripts, visit https://github.com/u-blox/m-center. -
Page 14: B Setting Up Cellular Packet Data Connection On Windows
EVK-R8 - User guide B Setting up cellular packet data connection on Windows This section describes how to set up a packet data connection on Windows 10 using the operating system’s TCP/IP stack and EVK-R8. This is also referred to as a dial-up connection. The following examples describe how to install and configure two different kinds of modems on Windows: Low data rate modem: via the UART interface of the cellular module connected to the Windows... - Page 15 EVK-R8 - User guide Tick “Don’t detect my modem” checkbox. Click Next. Select Standard 33600 bps Modem. Click Next. Select COM port for data communication and click Next. The modem will be installed on this COM port. Click Finish to complete the installation. UBX-22018774 - R01 Appendix Page 15 of 20...
-
Page 16: How To Install And Configure A High Data Rate Modem Connection
EVK-R8 - User guide Now the new modem is visible in Control Panel, under Phone and Modem > Modems. Any extra initialization AT command (e.g., to set a specific APN name) can be entered by selecting Properties and filling in Advanced > Extra initialization commands text box. - Page 17 EVK-R8 - User guide Select Dial-up and if requested, the modem previously installed. Select one of the two AT commands ports. Enter the parameters for the dial-up connection: module telephone number: *99***1# (change if using a PDP context different from 1) The specific account information for the network operator A name for the connection (e.g., “R8...
-
Page 18: C Current Consumption Measurement
EVK-R8 - User guide C Current consumption measurement The current consumption of the LENA-R8 module cellular system can be measured by removing the jumper socket from the Cellular VCC supply jumper (J102 on the ADP-R8, see Figure Cellular VCC supply jumper socket (J102) to be removed for LENA-R8 cellular system current consumption measurements... -
Page 19: D Glossary
EVK-R8 - User guide D Glossary Abbreviation Definition Adapter Board Access Point Name AT Command Interpreter Software Subsystem, or attention Board-To-Board Circuit Switched Clear To Send Direct Current Display Data Channel Dual In Line Evolved Packet System Evaluation Board Evaluation Kit Ground GNSS Global Navigation Satellite System... -
Page 20: Related Documentation
EVK-R8 - User guide Related documentation u-blox LENA-R8 series AT commands manual, UBX-22016905 u-blox LENA-R8 series data sheet, UBX-22003110 u-blox LENA-R8 series system integration manual, UBX-22015376 ☞ For regular updates to u-blox documentation and to receive product change notifications, register on our homepage (www.u-blox.com).
Need help?
Do you have a question about the EVK-R8 Series and is the answer not in the manual?
Questions and answers