Table of Contents
Advertisement
Quick Links
Advertisement
Table of Contents

Related Manuals for Frontier ST0522


Summary of Contents for Frontier ST0522
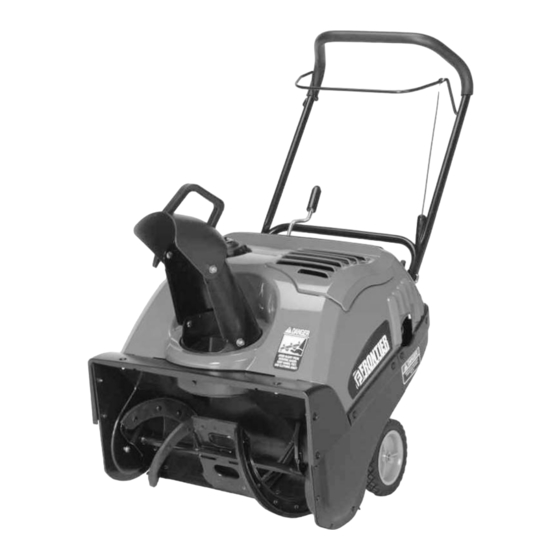
- Page 1 OPERATOR’S MANUAL SNOWTHROWERS ST0522 MT1740284 Rev. 01 TP 100-4363-01-SW-T...
- Page 2 INTRODUCTION Congratulations on your purchase of a Frontier Snowthrower. It has been designed, engineered and manufactured to give you the best possible dependability and performance. However, like all mechanical products, your machine will occasionally require adjustment and maintenance. This handbook should be read before operating or performing any adjustments on your machine.
-
Page 3: Hazard Symbols And Their Meanings
RULES FOR SAFE OPERATION Operating Symbols and their Meanings This manual contains safety information to make you These symbols are used on your equipment and defined in your operating aware of the hazards and risks associated with manual. It is important that you review and understand the meanings. snowthrowers, and how to avoid them. -
Page 4: Rules For Safe Operation
RULES FOR SAFE OPERATION WARNING: This machine is capable of amputating hands and feet and throwing objects. Read these safety rules and follow them closely. Failure to obey these rules could result in loss of control of unit, severe personal injury or death to you, or bystanders, or damage to property or equipment. - Page 5 RULES FOR SAFE OPERATION 17. Never operate the snowthrower near glass enclosures, automobiles, 4. Maintain or replace safety and instruction labels as necessary. window wells, drop-offs, and the like without proper adjustment of 5. Run the machine a few minutes after throwing snow to prevent the snow discharge angle.
-
Page 6: Table Of Contents
TABLE OF CONTENTS HAZARD SYMBOLS AND THEIR MEANINGS ..........3 OPERATING SYMBOLS AND THEIR MEANINGS ........... 3 RULES FOR SAFE OPERATION ............... 4 SAFETY DECALS ................7 WARRANTY ..................8 OWNER’S INFORMATION ..............8 ASSEMBLY ..................9 TOOLS REQUIRED FOR ASSEMBLY................ 9 CONTENTS OF SHIPPING CARTON................. -
Page 7: Safety Decals
SAFETY DECALS WARNING: If safety decals are damaged or missing, If any safety decals become worn or damaged and cannot be read, replace immediately. order replacement decals from your local dealer. Look for this symbol to indicate important safety pre- Identifying Your Snowthrower cautions. -
Page 8: Warranty
This warranty covers the cost of the part only. However, if the part was installed by an authorized John Deere/Frontier service center, the cost of the part as well as the labor to install will be covered. -
Page 9: Assembly
ASSEMBLY TOOLS REQUIRED FOR ASSEMBLY WARNING: Always wear safety glasses or eye shields while assembling snowthrower. 1 – Knife Figure 2 shows the snowthrower in the operating position. CONTENTS OF SHIPPING CARTON References to the right or left hand side of the snowthrower are from the viewpoint of the operator’s position behind the unit. -
Page 10: Engine
ASSEMBLY Attach Auger Drive Cable Adjust The Upper Chute 1. Attach the auger drive cable to the auger drive lever using 1. Remove the T-knob and bolt on the upper chute (Figure 5). the “Z” hook (Figure 4). 2. Rotate the upper chute to the operating position (past the lower chute stop). -
Page 11: Operation
OPERATION READ THIS OPERATOR’S MANUAL AND SAFETY RULES BEFORE OPERATING YOUR SNOWTHROWER. Compare the illustrations with your SNOWTHROWER to familiarize yourself with the location of various controls and adjustments. Save this manual for future reference. Auger Drive Lever Recoil Starter Ignition Switch Key Crank Assembly Primer Button... -
Page 12: Snowthrower Operation
OPERATION The operation of any snowthrower can result in foreign objects being thrown into the eyes, which can result in severe eye damage. Always wear safety glasses or eye shields before beginning snowthrower Operation. We recommend standard safety glasses or Wide Vision Safety Mask for over spectacles. SNOWTHROWER OPERATION The most effective use of the snowthrower will be established by experience, taking into consideration the terrain, wind conditions... -
Page 13: How To Throw Snow
OPERATION HOW TO MOVE FORWARD 3. To stop, release the auger drive lever. IMPORTANT: Before operating, make sure the area in front of NOTE: If the auger continues to rotate, see “How To Adjust The snowthrower is clear of bystanders or obstacles. Auger Control Cable”... -
Page 14: Before Starting Engine
OPERATION BEFORE STARTING ENGINE NOTE: Winter grade gasoline has higher volatility to improve starting. Be certain container is clean and free CHECK THE OIL from rust or other foreign particles. Never use gasoline that may be stale from long periods of storage in the container. 1. -
Page 15: Before Stopping The Engine
OPERATION BEFORE STOPPING THE ENGINE Run the engine for a few minutes to help dry off any moisture on the engine. TO STOP ENGINE CAUTION: To stop the engine, do not move the choke control to CHOKE position. Backfire or engine damage can occur. 1. - Page 16 If after following the preceding instructions, your engine fails to depress the starter button (see Figure 14). To prolong the life start, have the engine checked by a John Deere/Frontier dealer. of the starter, do not crank for more than 5 seconds at a time.
-
Page 17: Frozen Starter
OPERATION FROZEN STARTER WARNING: Never run engine indoors or in enclosed, poorly ventilated areas. Engine exhaust contains CARBON If the starter is frozen and will not turn engine: MONOXIDE, AN ODORLESS AND DEADLY GAS. Keep hands, 1. Pull as much rope out of the starter as possible. feet, hair and loose clothing away from any moving parts on engine and snowthrower. -
Page 18: Operating Tips
OPERATION OPERATING TIPS 5. Clean the snowthrower thoroughly after each use. 1. Most efficient snowthrowing is accomplished when snow is 6. Remove ice and snow accumulation and all debris from the removed immediately after it falls. entire snowthrower, and flush with water (if possible) to remove all salt or other chemicals. -
Page 19: Service Recommendations
SERVICE RECOMMENDATIONS SERVICE RECOMMENDATIONS FIRST BEFORE EVERY EVERY EVERY BEGINNING BEFORE PROCEDURE EACH OFTEN EACH STORAGE HOURS HOURS HOURS HOURS SEASON Tighten all screws ✓ ✓ ✓ and nuts SNOWTHROWER Check Clutch Cable Adjustment (See ✓ ✓ ✓ Cable Adjustment) Oil, Check ✓... -
Page 20: Maintenance
MAINTENANCE Some adjustments will need to be made periodically to properly SAE VISCOSITY GRADES maintain your snowthrower. All adjustments in the MAINTENANCE section of this manual 5W30 should be checked at least once each season. ENGINE Synthetic 5W30 ENGINE POWER RATING INFORMATION −... -
Page 21: How To Remove The Covers
MAINTENANCE HOW TO REMOVE THE COVERS 7. Carefully pull the rear of the top cover up and over the gas tank. To access the drive system or the engine, the covers must be removed as follows: 8. To install the top cover, reverse the above steps. HOW TO REMOVE THE TOP COVER HOW TO REMOVE THE BELT COVER 1. -
Page 22: How To Remove The Chute
MAINTENANCE WARNING: Always turn unit off, remove ignition key and Chute disconnect the spark plug wire before making any repairs or adjustments. HOW TO REMOVE THE CHUTE 1. Remove the fasteners that secure the chute to the top cover. 2. Remove the chute. Top Cover Figure 20 HOW TO ADJUST THE BRAKE PAD... -
Page 23: How To Replace The Drive Belt
Engine Pulley original factory replacement belt available from your nearest John Idler Pulley Deere/Frontier dealer. 1. Remove the belt cover. See “How To Remove The Belt Cover”. Brake Pad 2. Remove the drive belt from the idler pulley (Figure 22). -
Page 24: How To Check And Adjust The Cable
MAINTENANCE HOW TO CHECK AND ADJUST THE CABLE 8. To check the adjustment, start the snowthrower. Make sure the auger does not rotate when the auger drive lever is The auger drive cable is adjusted at the factory and no adjustment released. -
Page 25: To Adjust Or Replace The Spark Plug
MAINTENANCE TO ADJUST OR REPLACE THE SPARK PLUG Check the spark plug every twenty-five (25) hours. Replace the spark plug if the electrodes are pitted or burned or if the porcelain is cracked. 1. Open the access door on the control panel (Figure 27). 2. -
Page 26: Storage
STORAGE OFF SEASON STORAGE 4. Thoroughly clean the snowthrower. WARNING: Never store the engine, with fuel in the tank, 5. Lubricate all lubrication points (see “Lubrication” in the indoors or in a poor ventilated enclosure where fuel fumes MAINTENANCE section). could reach an open flame, spark or pilot light as on a furnace, 6. -
Page 27: Trouble Shooting Chart
If you have any questions concerning parts, service, or technical data, contact your nearest John Deere/Frontier dealer. For complete warranty information refer to the warranty in the OWNER’S... -
Page 28: Replacement Parts
PART NUMBERS MAY CHANGE. When you order replacement parts, use the part numbers listed below and in the Parts Manual. If a part number changes, your John Deere/Frontier dealer will have the latest part number. WHEN YOU ORDER PARTS, your John Deere/Frontier dealer must have your snowthrower model and serial number and your engine model number. - Page 29 NOTES...
- Page 30 NOTES...
-
Page 31: Specifications
SPECIFICATIONS ST0522 Engine Briggs & Stratton Horsepower 5 hp Starter Electric / Recoil Fuel Capacity 2 quarts Drive System Auger Tire Diameter 7" Clearing Width 22" Housing Height 12" Auger Diameter 9" Auger Type Rubber Edge Chute Rotation Remote Chute Turning Radius 190°...
Need help?
Do you have a question about the ST0522 and is the answer not in the manual?
Questions and answers