Sign In
Upload
Download
Table of Contents
Contents
Add to my manuals
Delete from my manuals
Share
URL of this page:
HTML Link:
Bookmark this page
Add
Manual will be automatically added to "My Manuals"
Print this page
×
Bookmark added
×
Added to my manuals
Manuals
Brands
Instant Pot Manuals
Kitchen Appliances
Duo Plus 30 v2
Get started
Instant Pot Duo Plus 30 v2 Get Started
Hide thumbs
1
Table Of Contents
2
3
4
5
6
7
8
9
10
11
12
13
14
15
16
17
18
19
20
21
22
23
24
25
26
27
28
29
30
31
32
33
34
35
36
37
38
39
40
41
42
43
44
45
46
page
of
46
Go
/
46
Contents
Table of Contents
Troubleshooting
Bookmarks
Table of Contents
Table of Contents
Welcome
Register Your Product
Contact Us
Product Specifications
How to Find the Model Name and Serial Number
Important.safeguards
Special Cord Set Instructions
Product,.Parts.and.accessories
Get.started
Initial Set up
Initial Test Run (Water Test)
Pressure.cooking.101
Releasing.pressure
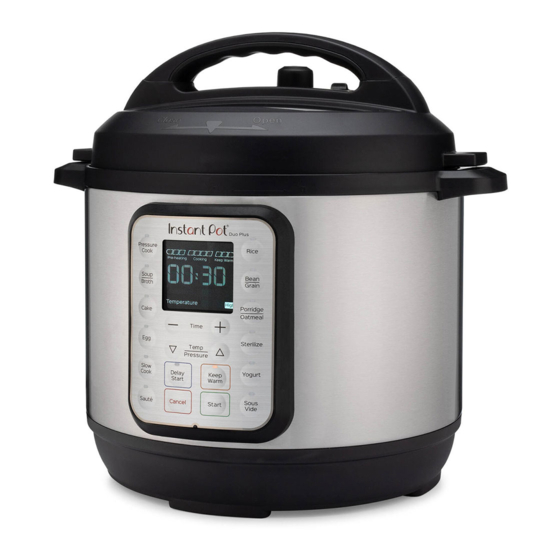
Control Panel
Settings
Status Messages
Pressure.control.features
Multi-Cooker Lid
Quick Release Switch
Sealing Ring
Anti-Block Shield
Float Valve
Pressure.cooking.smart.programmes
Using Pressure Cooking Smart Programmes
Smart Programme Details
Pressure Cooking Grains
Other.cooking.smart.programmes
Slow Cook
Sauté
Yogurt
Sous Vide
Care,.Cleaning.and.storage
Removing.and.installing.parts
Silicone Sealing Ring
Steam Release Valve
Anti-Block Shield
Float Valve and Silicone Cap
Condensation Collector
Troubleshooting
Warranty
Advertisement
Quick Links
Download this manual
™
INSTANT POT
®
DUO
PLUS
MULTI-COOKER
Table of
Contents
Previous
Page
Next
Page
1
2
3
4
5
Advertisement
Table of Contents
Need help?
Do you have a question about the Duo Plus 30 v2 and is the answer not in the manual?
Ask a question
Questions and answers
Related Manuals for Instant Pot Duo Plus 30 v2
Kitchen Appliances Instant Pot Duo PLus User Manual
Multifunctional programmable pressure cookers (23 pages)
Kitchen Appliances Instant Pot Duo Plus 60 v2 Get Started
(46 pages)
Kitchen Appliances Instant Pot Duo Plus 80 v2 Get Started
(46 pages)
Kitchen Appliances Instant Pot PLUS WIFI RPPC61-BK User Manual
5.7l multicooker (60 pages)
Kitchen Appliances Instant Pot Pro 60 Manual
(58 pages)
Kitchen Appliances Instant Pot Pro User Manual
(56 pages)
Kitchen Appliances Instant Pot PRO WIFI PRCPC601WE User Manual
5.7l (58 pages)
Kitchen Appliances Instant Pot Max Series User Manual
(44 pages)
Kitchen Appliances Instant Pot Aura User Manual
(24 pages)
Kitchen Appliances Instant Pot RIO DUPC801BK User Manual
Multi-cooker wide (44 pages)
Kitchen Appliances Instant Pot Accu Slim User Manual
Sous vide immersion circulator (21 pages)
Kitchen Appliances Instant Pot DUPC601BKEU User Manual
5.7l multi-cooker (41 pages)
Kitchen Appliances Instant Pot Accu SV800 Instructions Manual
Immersion circulator (18 pages)
Kitchen Appliances Instant Pot IP-DUO60 V3/80 Quick Reference Manual
(2 pages)
Kitchen Appliances Instant Pot IP-LUX60 User Manual
(4 pages)
Kitchen Appliances Instant Pot XL 7.1L User Manual
(41 pages)
This manual is also suitable for:
Duo plus 60 v2
Duo plus 80 v2
Table of Contents
Print
Rename the bookmark
Delete bookmark?
Delete from my manuals?
Login
Sign In
OR
Sign in with Facebook
Sign in with Google
Upload manual
Upload from disk
Upload from URL


Need help?
Do you have a question about the Duo Plus 30 v2 and is the answer not in the manual?
Questions and answers