Instant Pot Max Series User Manual
Hide thumbs
Also See for Max Series:
- User manual (40 pages) ,
- Quick start manual (9 pages) ,
- Safety, maintenance & warranty (12 pages)

Related Manuals for Instant Pot Max Series


Summary of Contents for Instant Pot Max Series
- Page 1 Series User Manual Instant Pot Free Recipe App ® • 500+ Free Recipes • New User Tips • Getting Started Videos...
- Page 2 Welcome to the World of Cooking! Thank you for selecting an Instant Pot smartcooker! Our vision for ® Instant Pot is to provide you with the right tools to enhance your food ® preparation experience. Our smartcookers are designed to save you time, replace a number of appliances, and prepare healthy and tasty meals in a convenient and dependable way.
-
Page 3: Table Of Contents
Table of Contents Welcome Important Safeguards 1 - 3 Product Specifications What’s Included Lid Structure Cooker Base Structure Getting Started 7 - 10 Control Panel 11 - 12 Venting Methods Initial Test Run (15 psi Water Test) 14 - 15 System Settings &... - Page 4 IMPORTANT SAFEGUARDS When using electrical appliances, basic safety precautions should always be followed: READ ALL INSTRUCTIONS. Do not touch hot surfaces. Only use side handles for carrying or moving. Do not place the appliance on or in close proximity to a hot gas or electric burner, or a heated oven;...
-
Page 5: Important Safeguards
IMPORTANT SAFEGUARDS Do not cover or obstruct the steam release valve/handle and float valve with cloth or other objects. Obstructing the steam release valve/handle and float valve can create a safety issue and may cause injury. Turn the appliance off if steam escapes from the steam release valve/handle or float valve in a steady stream for longer than 3 minutes. -
Page 6: Product Specifications
IMPORTANT SAFEGUARDS 26. When pressure cooking food with a doughy or thick texture, or a high fat/oil content, contents may splatter when opening the lid. Please follow recipe instructions for pressure release method. Once steam is fully released, gently shake the appliance with extreme caution and then if necessary, release the steam again before removing the lid. -
Page 7: What's Included
What’s Included Before using your new Instant Pot Max, please remove all items from the box and read over all ® instructions carefully. Pay special attention to Important Safeguards and operation instructions, in order to avoid personal injury and/or property damage. -
Page 8: Lid Structure
Lid Structure When attached to the base, the lid becomes powered, enabling an automated venting process to occur during and after cooking. This technology also enables the thermal sensor to transmit temperature readings to the cooker base for precision cooking. Steam Release Assembly Steam Release Cover... -
Page 9: Cooker Base Structure
Cooker Base Cooker Handle Stainless Steel Outer Pot Base LCD Touch Power Socket Screen Central Dial Condensation Drain Hole Heating Cooker Element Handle INSTANT TIP: The Cooker Handles are also a Lid Holder The lid has been designed with lid fins that fit perfectly inside the cooker handles on the left and right sides of the cooker base. -
Page 10: Getting Started
Getting Started Read Safeguards & Remove Tags Remove all packaging materials and accessories from in and around the pressure cooker, and verify that all parts are accounted for. Rating Label Read all safeguards and instructions. Remove all warning cards and hanging tags after reading. Do not remove safety warning sticker placed on Safety Warning Sticker... - Page 11 Getting Started Remove & Install the Steam Release Assembly The steam release valve and cover must be installed during use. Steam Release Remove the Steam Release Cover: Turn the steam Cover release cover counter-clockwise until it can be pulled off from the lid.
- Page 12 Getting Started Remove & Clean the Inner Pot Remove the inner pot from the cooker base — always ensure that the inner pot’s exterior is Heating clean and dry, and that the heating element is Element free of food debris. Always check that the element is clean and in good condition before use.
-
Page 13: Getting Started
Valve place on the bottom of the float valve. Note: Regular removal and cleaning of the float valve and surrounding area is essential to ensure proper function of your Instant Pot ®... -
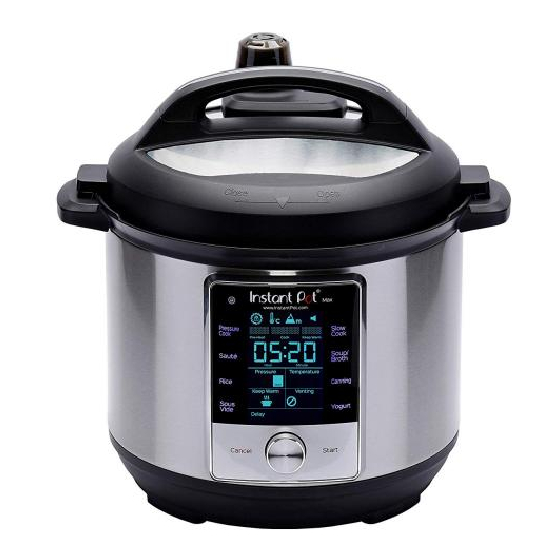
Page 14: Control Panel
Control Panel Pressure Slow Cook Cook Pre-Heat Cook Keep Warm Soup / Sear Broth Hour Minute Pressure Temperature Rice Canning Keep Warm Venting Sous Yogurt Vide Delay Cancel Start... - Page 15 Pressure Indicator The icon will be lit when the pressure cooker is still under pressure, indicating that the lid is locked and cannot be removed System Settings System Settings Lock / Unlock • • Temperature Display: Fahrenheit (°F) or Celsius (°C) •...
-
Page 16: Venting Methods
Venting Methods Your pressure cooker has an automated venting system for post-cooking pressure release, which can be activated on pressure cooking Smart Programs when desired. The default venting method is Natural Release (NR). To stop or pause once a venting method has begun, touch the Venting field and the pressure cooker will automatically return to NR. -
Page 17: Initial Test Run (15 Psi Water Test)
Initial Test Run (15 psi Water Test) PC MAX Add 3 cups (750 mL) of Turn the lid clockwise Line up the unlock water to the inner pot. to close until a arrow on the cooker base with the arrow on jingle sounds. - Page 18 Initial Test Run (15 psi Water Test) A short warning burst The float valve will drop When the Smart Program will be released, followed to indicate the pressure has completed, 10 beeps by a continuous stream has been fully released. will sound.
-
Page 19: System Settings & Time
System Settings & Time Adjust the System Settings: The system settings will remain on your display so you always know which ones are in effect. To change your system settings: 1. Touch Cancel to ensure the cooker is in standby mode. 2. -
Page 20: Operation Field
Operational Field - Delay The Delay setting can be applied to all Smart Programs with the exception of Sauté, Manual Keep Warm, and Yogurt. The Delay setting is not recommended to be used in conjunction with the auto-venting features when cooking thick or foamy foods. The liquid may cause spattering during the cooking process. -
Page 21: Keep Warm
Operational Field - Keep Warm Automatic Keep Warm can be applied to all Smart Programs with the exception of Sauté, Sous Vide, and Yogurt. When enabled, the setting will turn ON by itself after the Cook cycle has completed, and remain on for up to 10 hours. When selecting an applicable Smart Program, the Keep Warm setting will be ON by default. -
Page 22: Usage Tips
Gently scrape up the bits and pieces on the bottom and use this liquid to pressure cook with. Ensure to have 1½ cups (375mL / 12oz) of liquid in the inner pot before pressure cooking, unless otherwise directed by an authorized Instant Pot recipe. -
Page 23: Cooking Tips
Cooking Tips • Certain food (such as applesauce, cranberries, pearl barley, oatmeal, split peas, noodles, etc.) can foam, froth, or spatter, and can clog the steam release pipe and/or steam release valve. Extreme caution must be used when cooking and venting these foods—the inner pot should not be filled higher than the —... -
Page 24: Pressure Cook
Smart Program - Pressure Cook The following pressure cooking programs are available: Soup/Broth, Rice, Canning, or Pressure Cook. Steps to Pressure Cook Add ingredients to the inner pot and insert the inner pot into the cooker base. Place the lid on the cooker base and turn it clockwise to close it. Connect the power cord. -
Page 25: Nutriboost
Advanced Feature - Nutriboost™ NutriBoost™ is a mid-cooking pulse release setting. When activated, NutriBoost™ releases intermittent bursts of steam from the steam release valve during the "Cook" cycle of the Rice and Soup/Broth Smart Programs. The boiling motion effect created by NutriBoost™ helps to break down food— adding nutrients, enhancing flavors, and improving textures. - Page 26 Canning - Getting Started Canning is a pressure cooking function based on traditional canning principles. When proper canning processes are followed and sufficient temperatures are reached for a sustained period of time, canning is considered an economical way to preserve quality food at home. Recipes must be closely followed when canning.
- Page 27 Canning - Sterilizing Jars All food used for canning should be poured into sterile, empty jars. Always check your jars, lids, and seals for chips and other imperfections. Sterilization of jars should occur just before filling. Excess contact with the air should be avoided for safe canning. Steps to Sterilization Before Canning Wash the jars and rinse thoroughly.
-
Page 28: Canning
Canning - Pressure Canning Steps to Pressure Canning To begin, select a recipe that has been pre-tested and approved for pressure canning. Though ingredients may vary, the process will be the same. Refer to the USDA’s Complete Guide to Home Canning for tested recipes: http://nchfp.uga.edu/publications/publications_usda.html Fill warm, sterilized canning jars with food, following the directions in the recipe for required headspace. - Page 29 Canning - Pressure Canning Place the lid on the cooker base and turn it clockwise to close it. Connect the power cord to a 120V outlet. The cooker will enter standby mode. Select Canning. Touch the ‘Minute’ field to select it, then turn the central dial to adjust the time as determined by the recipe.
-
Page 30: Sauté
Smart Program - Sauté Sauté is a non-pressure cooking program and works like a frying pan or flat-top grill — as a fantastic way to caramelize onions or sear meat before cooking. Note: This Smart Program has a maximum set time of 30 minutes to prevent overheating. You may see the display switch between ‘On’... -
Page 31: Slow Cook
Touch the Temperature field to toggle between Low and High. Touch the Keep Warm field to turn the setting ON or OFF. Touch Start to begin. The pressure cooker will beep 3 times. INSTANT TIP: Instant Pot Tempered Glass Lid ®... -
Page 32: Sous Vide
Smart Program - Sous Vide The term “Sous Vide” is French for ‘Under Vacuum’ and refers to the process of vacuum sealing food, bringing it to a very precise temperature, and maintaining that temperature for a period of time to achieve high quality, consistently delicious results. Sous Vide offers a customizable setting which allows you to choose a precise cooking temperature from a range of 25°C ~ 90°C / 77°F ~ 194°F, ideal for Sous Vide cooking. -
Page 33: Sous Vide
Smart Program - Sous Vide Place the lid on the cooker base and turn clockwise to close. For long cooking times, check periodically to make sure the water level remains above the sealed pouches. If you need to add water, heat it to approximately the same temperature as the water in the container to avoid cooling the water. -
Page 34: Cooking Guidelines
Sous Vide - Cooking Guidelines Cooking Cooking Cooking Cooking Food Thickness Time Time Outcome Temperature (Minimum) (Maximum) Beef Tender Cuts: Tenderloin, cutlets, 2-5 cm/ ½”- 2” Rare 50 °C / 122 °F 1 hour 4 hours sirloin, rib eye, rump, Medium rare 54 °C / 129 °F 1 hour... -
Page 35: Yogurt
Smart Program - Yogurt Yogurt is a non-pressure cooking function with 3 settings: Boil, Yogurt, and Custom. The Custom setting will allow users to make different types of customized fermented dairy and non-dairy recipes. Steps to Making Yogurt - fresh, dairy-based yogurt Pasteurization Add milk to the inner pot. -
Page 36: Care & Cleaning
Care & Cleaning • Wash all parts and accessories after use. • Never use harsh chemical detergents, scouring pads, or powders on any of the unit’s parts or components Cleaning Method Part Cleaning Tip Accessories • For dishwasher place in top rack. •... -
Page 37: Troubleshooting
• Live Chat with us: • Email us: support@instantpot.com • Call: 1-800-828-7280 www.InstantPot.com • Tips, videos, and FAQs: www.store.instantpot.com Instant Pot parts and accessories are available on our online store: ® www.instantpot.com/support/register Register your Instant Brands™ appliance here: Problem Possible Reason... - Page 38 Troubleshooting Problem Possible Reason Solution Food debris on float valve or Remove float valve from lid, clean float valve, surrounding area silicone cap, and surrounding area on lid Replace the float valve Float valve silicone cap worn out Float valve does not rise Add requisite minimum 1.5 cups Too little liquid in inner pot...
-
Page 39: Warranty
Warranty Limited Warranty This Limited Warranty is effective for one year from the date of original consumer purchase. Proof of original purchase date and, if requested by an authorized representative of Instant Brands Inc. (“Instant Brands”), return of your appliance, is required to obtain service under this Limited Warranty. Provided that this appliance is operated and maintained in accordance with written instructions attached to or furnished with the appliance, Instant Brands will, in its sole and exclusive discretion, either: (i) repair defects in materials or workmanship;... -
Page 40: Warranty
Warranty Disclaimer of Implied Warranties EXCEPT AS EXPRESSLY PROVIDED HEREIN AND TO THE EXTENT PERMITTED BY LAW, INSTANT BRANDS MAKES NO WARRANTIES, CONDITIONS OR REPRESENTATIONS, EXPRESS OR IMPLIED, BY STATUTE, USAGE, CUSTOM OF TRADE OR OTHERWISE WITH RESPECT TO THE APPLIANCES OR PARTS COVERED BY THIS WARRANTY, INCLUDING BUT NOT LIMITED TO, WARRANTIES, CONDITIONS, OR REPRESENTATIONS OF WORKMANSHIP, MERCHANTABILITY, MERCHANTABLE QUALITY, FITNESS FOR A PARTICULAR PURPOSE OR DURABILITY. -
Page 41: Index
Index Acceptable Liquids LCD Touch Screen 8, 12 Adding Culture 6, 7 Adjust Altitude 12, 16, 24 Lid Fins 7, 8 Anti-Block Shield 2, 7, 10, 29 Lid Handle Lid Locking Pin Lid Position Markers 7, 9 Base Power Socket 8, 31 Limited Warranty 32, 33... - Page 42 Index Stainless Steel Outer Pot Start Program Key Steam Rack with Handles Venting Methods Venting Fields Venting System Voltage Warranty 32, 33 Water Test 14-15 Wattage Weight Yogurt...
- Page 43 The Instant Pot Products ® Duo Plus Ultra 3, 6, 8 Quart 3, 6, 8 Quart 6 Quart 3, 6, 8 Quart 3, 6, 8 Quart Tools for a New Lifestyle *Instant Pot Brand: The NPD Group Inc., Retail Tracking Service, Cookers Category, Dollar ®...
- Page 44 11 - 300 Earl Grey Dr. Suite 383 Ottawa, Ontario K2T 1C1 Canada Telephone: 1-800-828-7280 Web: www.instantpot.com US & Canada Email: support@instantpot.com Download Free Recipe App below: To enhance your experience with Instant Pot ® join the official Instant Pot Community: ® facebook.com/groups/instantpotcommunity @instantpot @Theinstantpot...
Need help?
Do you have a question about the Max Series and is the answer not in the manual?
Questions and answers
Is there automatic cook time for meat, rice, bean, etc ..
Yes, the Instant Pot Series has automatic cook times for rice and likely for meat and beans through its Smart Programs. For example, the rice program automatically sets a 12-minute cook time.
This answer is automatically generated
Quick release on max
To perform a Quick Release (QR) on the Instant Pot Max Series, a short warning burst is followed by a continuous stream of steam. This method is commonly used for foods like vegetables, fish, and eggs that may overcook during Natural Release (NR) or Pulse Release (PR).
This answer is automatically generated