Table of Contents
Advertisement
Advertisement
Table of Contents

Related Manuals for Instant Pot Pro


Summary of Contents for Instant Pot Pro
- Page 1 INSTANT POT ® MULTI-COOKER USER MANUAL...
- Page 2 This Instant Pot Pro Multi-Cooker can help you cook healthy, delicious meals more easily and in less time. We hope you fall in love with Instant Pot cooking and enjoy it in your kitchen for years to come. Get started with your new Pro!
-
Page 3: Table Of Contents
CONTENTS Important safeguards What’s in the box Using your Pro Initial setup Using the lid Pressure cook Rice/Grain Steam Sauté Slow cook Sous Vide Yogurt Bake Keep warm Favorites Cleaning Troubleshooting Error Codes Replacement parts Learn more Warranty... -
Page 4: Important Safeguards
• DO use extreme caution when the cooking pot contains hot food, hot oil or other hot liquids. • DO use only the Instant Pot lid that came with this cooker base. Using any other pressure cooker lids may cause personal injury and/or property damage. - Page 5 Failure to follow safety instructions may result in personal injury and/or property damage and may void your warranty. • DO NOT use the appliance without the removable inner cooking pot installed. • DO NOT touch the appliance’s hot surfaces, or any accessories during or immediately after cooking because they will be hot.
- Page 6 Failure to follow safety instructions may result in personal injury and/or property damage and may void your warranty. • DO NOT attempt to force the lid off the Instant Pot cooker base. • DO NOT move the appliance when it is pressurized.
- Page 7 Failure to follow safety instructions may result in personal injury and/or property damage and may void your warranty. • DO use only an authorized Instant Pot inner cooking pot to reduce the risk of pressure leakage. • DO only replace the sealing ring with an authorized Instant Pot sealing ring to prevent personal injury, property damage, and/or damage to the appliance.
- Page 8 If the unit includes a detachable power cord: • To connect, always attach the power cord to the appliance first, then plug the power cord into the wall outlet. Electrical Cautions The cooker base contains electrical components that are an electrical shock hazard.
-
Page 9: What's In The Box
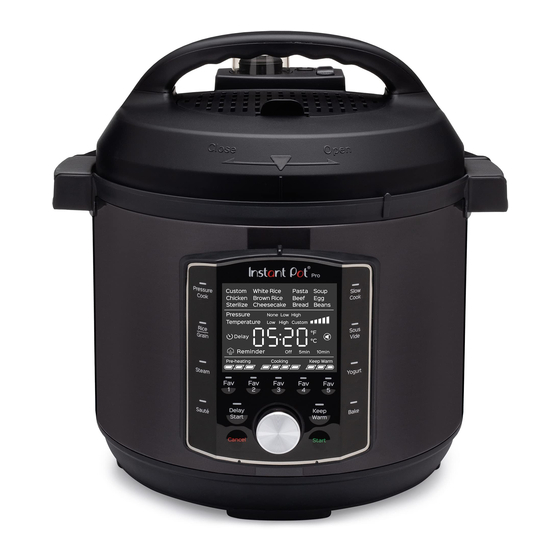
WHAT’S IN THE BOX Steam Release Cover Float Valve Lid Fin Steam Release Switch Lid Handle Lid Fin QuickCool Protective Cover Lid Position Markers Steam Release Valve and Anti-Block Shield (Steam Sealing Ring Release Pipe inside) Sealing Ring Rack Illustrations are for reference only and may differ from the actual product. User Manual... - Page 10 Stainless Steel Inner Cooking Pot Max PC Fill Cooker Base Lid Holder Condensation Rim Cooker Handles Lid Holder Condensation Collector Mount Heating Element (inside) (rear) Control Panel Cord Holder (rear) Illustrations are for reference only and may differ from the actual product. User Manual...
- Page 11 Accessories Steam Rack Extra Sealing Ring Condensation Collector Remember to recycle! We designed this packaging with sustainability in mind. Please recycle everything that can be recycled where you live. User Manual...
-
Page 12: Using Your Pro
USING YOUR PRO Control panel Pressure Cooking Smart Programs 9. Vent Reminder Light shows the active Smart Program For pressure cooking 2. Non-Pressure Cooking Smart 10. Sounds Programs On or Off Light shows the active Smart Program 11. Cooking Progress Bar 3. - Page 13 Cooking Progress Bar Preheating: cooker is heating to the set temperature and pressure is building on pressure programs. Display shows On. Cooking: cooker has started the Smart Program. Display counts down cooking time. Keep Warm: turns on automatically after cooking stops. When done, display shows End.
- Page 14 Status messages The control panel shows information you need to know when using your Instant Pot Pro. Standby mode Preheat mode Sauté Smart Program is ready to add food Time • Smart Program: cooking time remaining • Delay Start: time until Smart Program starts •...
- Page 15 Turning the sound On/Off You set the alert sounds to either ON or OFF. When in Standby mode, press and hold the dial for 5 seconds. Press the dial again to display the current sound settings. Turn the dial until the display shows S On or SOFF. Press Start to save the new setting.
- Page 16 Set a timer (without cooking) You can set a timer for a minimum of 1 minute or a maximum of 60 minutes. When the unit is on and the message display shows OFF, press Delay Start. Turn the Control Dial to set the time (in 1 minute increments). Press Start to begin the timer.
-
Page 17: Initial Setup
INITIAL SETUP Clean before use Wash the inner cooking pot with hot water and soap. Rinse and use a soft cloth to dry the outside. Or you can wash the inner cooking pot in the dishwasher Wipe the heating element inside the cooker base with a soft cloth to ensure there are no stray packaging particles. - Page 18 Install the Sealing Ring Place the sealing ring behind the sealing ring rack and press it into place. Press down firmly to ensure there is no puckering. The sealing ring should be snug and should not fall out when the lid is turned over.
- Page 19 Using the float valve The float valve shows whether there is pressure in the cooker (pressurized) or not (depressurized). Visibly popped up above the surface of the lid. Pressurized Descended, with the top flush with the lid. Depressurized Anti-block shield The anti-block shield prevents food particles from coming up through the steam release pipe, helping to regulate pressure.
- Page 20 Install the Anti-Block Shield Place anti-block shield over prongs and press down until it snaps into position. Do not attempt to operate the pressure cooker without the anti-block shield installed. Using the steam release valve When the cooker releases pressure, steam ejects from the top of the steam release valve.
- Page 21 Install the Steam Release Valve Place the steam release valve on the steam release pipe and press down firmly. When installed properly, the steam release valve sits loosely on the steam release pipe. It should remain in place when the lid is turned over. Note: 6QT and 8QT model has electrical cord that is always connected to the unit.
- Page 22 Test run Setting up your new Instant Pot Pro for a test run is a great way to familiarize yourself with how the unit works before you actually cook a meal. To perform a test run: Add 3 cups water to the inner cooking pot.
-
Page 23: Using The Lid
You’ll use the pressure cooking lid for most cooking programs, and especially for pressure cooking. Always use the pressure cooking lid that came with this Instant Pot Pro cooker base. How to close and lock the lid For pressure cooking, the lid must be securely locked into place to prevent steam from escaping. - Page 24 How to release steam Instant Pot Pro can release steam in 2 different ways. Use the one that best fits the type of food you’re cooking. Natural steam release Releases steam gradually over time (up to 40 minutes or more) as after cooking stops.
-
Page 25: Pressure Cook
PRESSURE COOK Pressure cooking uses pressurized steam to quickly and evenly cook foods. Each specific Smart Program is designed to pressure cook a specific type of food. You can adjust the settings as your recipe directs. Choose from these settings in the Pressure Cook Smart Program: Program Default Cook Min Cook... - Page 26 Control Dial to turn it off, then press the dial to select it. Press Start. The Progress Bar shows Preheating (the display shows On) and the Instant Pot Pro starts building pressure. Keep Warm setting is ON by default. Press Keep Warm at any time to turn it off.
- Page 27 See ‘How to release steam’ for full details. Using liquid to create steam Pressure cooking requires liquid in the inner cooking pot to produce the steam needed. Depending on the size of your Instant Pot Pro, here are the minimum amounts you’ll need: Instant Pot Size Minimum Liquid for Pressure Cooking* 6 Quarts / 5.7 Litres...
-
Page 28: Rice/Grain
RICE/GRAIN The Rice program uses pressurized steam to cook rice quickly and evenly. You can adjust the settings as your recipe directs. Choose from these settings in the Rice Smart Program: Program Pressure Default Cook Min Cook Max Cook Time Time Time Custom... - Page 29 The pressure level and time you choose will be the new settings the next time you use that Smart Program. Cook When the pressure is ready, the Instant Pot Pro starts cooking. The cooking timer starts counting down. You can press Cancel to stop cooking and cancel the Smart Program at any time.
-
Page 30: Steam
STEAM Use Steam as you would a regular stovetop steamer, boiling liquid to cook food with hot steam, or as a sanitization chamber for glass and plastics. The Steam program does not use pressure to cook. Refer to the glass or plastic manufacturer’s instructions for the time needed for sanitization. - Page 31 The default cooking temperature flashes. To select it, press the Control Dial. Or to change it, turn the Control Dial until the one you want flashes, then press the dial to select it. The default cooking time flashes. To select it, press the Control Dial.
-
Page 32: Sauté
Low or Custom, then press the dial to select it. The default cooking time flashes. To select it, press the Control Dial. Or to change it, turn the Control Dial to change it. Press Start. The display shows On and the Instant Pot Pro starts heating. User Manual... - Page 33 Cook When display shows Hot, add ingredients. Do not use the lid while sautéing. When timer ends, display shows End. You can press Cancel to stop cooking at any time. Sautéing before Pressure or Slow Cooking Quite often, you’ll want to sauté foods to brown them before further cooking them.
-
Page 34: Slow Cook
SLOW COOK Slow Cook lets you make your favorite simmering and stewing recipes. This program does not use pressure to cook food. Make sure steam release is set to Vent or use a glass lid with a venting hole. Choose from these settings in the Slow Cook Smart Program: Program Temperature Default Cook... - Page 35 Dial. Or to change it, turn the Control Dial to change it. Press Start. The Progress Bar shows Preheating and the Instant Pot Pro starts heating. Note: Preheating can take some time as it slowly reaches the maximum cooking temperature.
-
Page 36: Sous Vide
SOUS VIDE Sous Vide cooks food underwater in an air-tight, food-safe bag, for a long period of time. Food cooks in its own juices and comes out delicious and very tender. This program does not use pressure to cook food. Make sure steam release is set to Vent or use a glass lid with a venting hole. - Page 37 Preheat Place the inner cooking pot into the cooker base. Add water to the inner cooking pot. Place the lid on top of the cooker base and lock the lid. Choose Sous Vide on the Control Panel. Turn the Control Dial to highlight the Smart Program you want to use, then press the Control Dial to select it.
-
Page 38: Yogurt
YOGURT You can use your Instant Pot Pro to easily make delicious, fermented dairy and non-dairy yogurt. Choose from these settings in the Yogurt Smart Program: Program Temperature Default Cook Min Cook Max Cook Time Time Time Custom 8 hours... - Page 39 High, then press the dial to select it. Press Start. The Progress Bar shows Preheating and the Instant Pot Pro starts heating. The display shows Boil. When it’s done, the Progress Bar shows End. Milk must reach a minimum of 161°F / 72°C for pasteurization to occur Adding Culture/Starter Allow pasteurized milk to cool to 43°C / 110°F;...
- Page 40 A longer fermentation period will produce tangier yogurt. Allow yogurt to cool. Place in fridge for 12–24 hours to develop flavors. How much to make? Instant Pot Size Minimum Milk Volume Maximum Milk Volume 3 Quarts / 2.8 Liters 2 Cups...
-
Page 41: Bake
Prepare your ingredients according to your recipe. Place the ingredients into an oven-safe baking dish that fits in the Pro cooker base. Leave approximately 1”/ 2.5 cm of space around all sides of the baking dish to allow heat to circulate evenly. - Page 42 Control Dial to turn it off, then press the dial to select it. Press Start. The Progress Bar shows Preheating and the Instant Pot Pro starts heating. When it’s ready, the Progress Bar shows Cooking and the timer starts counting down.
-
Page 43: Keep Warm
Prep Place the food to be reheated into the inner cooking pot or into an oven-safe baking dish that fits in the Pro cooker base. When using an oven-safe baking dish to reheat food, always add enough water into the inner cooking pot to surround the baking dish. - Page 44 If you chose the ‘Custom’ smart program the cooking temperature setting flashes. Turn the Control Dial to select a reheating temperature, then press the dial to select it. The default cooking time flashes. Turn the Control Dial to select a reheating time, in 30-minute increments.
-
Page 45: Favorites
FAVORITES You can set and save 5 custom programs as Favorites for one-touch access to recipes. Saving recipes as Favorites Select any Smart program and set it up according to your recipe. When you’re happy with the settings, touch and hold any Fav key for 3 seconds to save the program. -
Page 46: Cleaning
CLEANING Clean your Instant Pot Pro after each use. Always unplug the unit and let all parts cool to room temperature before cleaning. Before use or storing, make sure all surfaces are dry. Part Cleaning instructions Accessories • Wash after each use •... -
Page 47: Troubleshooting
TROUBLESHOOTING Problem Cause Solution Difficulty closing lid Sealing ring not properly Reposition sealing ring, installed ensure it is snug behind sealing ring rack. Contents in cooker are Gently press the float valve still hot downward with a long utensil. Set Steam Release switch to Vent, then lower lid onto cooker base. - Page 48 Problem Cause Solution Steam gushes from Not enough liquid in the Add thin, water-based liquid steam release vent inner pot to the inner pot according to when Steam Release its size: switch is in Seal 6 Quart: 1 1/2 cups position (12 oz / 375 mL) 8 Quart: 2 cups (16 oz / 500 mL)
-
Page 49: Error Codes
ERROR CODES If the control panel displays an error code from this list, there is an issue with the Instant Pot Pro. Here are the actions you should take to fix the problem. Problem Cause Solution C1 C2 C6 Faulty sensor Contact Consumer Care. -
Page 50: Replacement Parts
User Manual 399-1268-03US * The Evo Plus Steam Release Packs (that are compatible with the Pro Series) DO NOT include the Steam Release Valve. It does include the Float Valve, Silicone Cap, Steam Release Cover and release post, but not the Steam Release Valve. -
Page 51: Learn More
How-to videos, tips and more Instanthome.com Replacement parts and accessories Instanthome.com Join the community Product specifications Model Volume Wattage Power Pro 60 6 Quarts 1200 W 120V/60Hz 5.7 Litres Pro 80 8 Quarts 1400 W 120V/60Hz 7.6 Litres User Manual... -
Page 52: Warranty
WARRANTY One (1) Year Limited Warranty This One (1) Year Limited Warranty applies to purchases made from authorized retailers of Instant Brands LLC (“Instant Brands”) by the original appliance owner and is not transferable. Proof of original purchase date and, if requested by Instant Brands, return of your appliance, is required to obtain service under this Limited Warranty. - Page 53 Some states or provinces do not allow for: (1) the exclusion of implied warranties of merchantability or fitness; (2) limitations on how long an implied warranty lasts; and/or (3) the exclusion or limitation of incidental or consequential damages; so these limitations may not apply to you.
- Page 54 NOTES User Manual...
- Page 55 NOTES User Manual...
- Page 56 In U.S., distributed by Instant Brands LLC 3025 Highland Parkway, Suite 700 Downers Grove, IL 60515 U.S. instanthome.com © 2023 Instant Brands 112-0123-01 / 113-0044-01 Art release date 11/15/2023 INSTANT, INSTANT POT and INSTANT BRANDS are registered trademarks of Instant Brands...
Need help?
Do you have a question about the Pro and is the answer not in the manual?
Questions and answers
How do I get my app for my Instant **** Pro 8Qt pressure cooker?
The provided context does not mention an app specifically for the Instant Pot Pro 8QT Multi-Use Pressure Cooker. However, it does state that the Instant Pot Pro Plus Wi-Fi Smart 10-in-1 includes a free app. If you need an app for your Instant Pot Pro 8QT, check the official Instant Pot website or app store for availability.
This answer is automatically generated
How do I re3gistwer my Instant **** Pro that I bought from Amazon?
To register your Instant Pot Pro purchased from Amazon, provide the store name (Amazon), date of purchase, model number (found on the back of the appliance), and serial number (found on the bottom of the appliance). You will also need to provide your name and email address. Registration helps keep you updated on product developments, recipes, and safety notifications.
This answer is automatically generated