Advertisement
Quick Links
BT7832
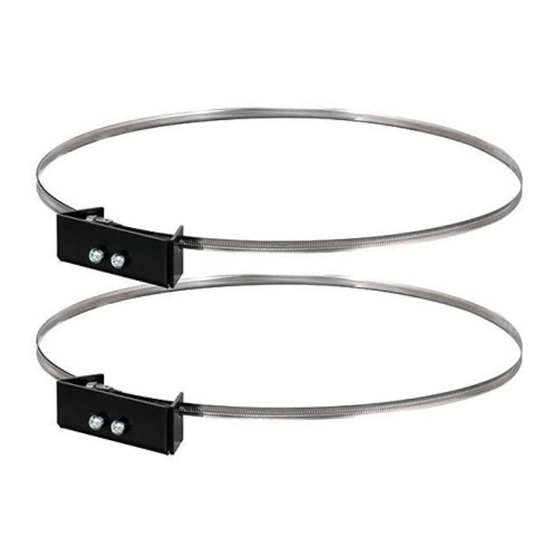
COLLAR / PILLAR CLAMP
INSTALLATION GUIDE
SPECIFICATIONS
• Allows displays to be mounted around a column or pillar
without the need to drill into the wall
• For use with a collar compatible B-Tech at screen mount
• Max load: 50kg (110lbs)*
*Depending on type of screen mount used
• Adjustable strap suitable for di erent sized columns with a
diameter from: Min.140mm (5.5") to Max. 750mm (29.5")
• Strap mly holds onto the column without slipping
• Suitable for landscape or portrait mounting
www.btechavmounts.com
50kg
(110lbs)
Advertisement

Related Manuals for B-Tech BT7832


Summary of Contents for B-Tech BT7832
- Page 1 • Allows displays to be mounted around a column or pillar without the need to drill into the wall • For use with a collar compatible B-Tech at screen mount • Max load: 50kg (110lbs)* *Depending on type of screen mount used •...
-
Page 2: Table Of Contents
Please check carefully to make sure there are no missing or defective parts - defective parts must never be used. B-Tech AV Mounts, its distributors and dealers are not liable or responsible for damage or injury caused by improper installation, improper use or failure to observe these safety instructions. In such cases, all guarantees will expire. -
Page 4: Parts List
BT7832 PARTS LIST PLEASE KEEP THIS FOR FUTURE REFERENCE INSTALLATION TOOLS ITEM PART NAME REQUIRED MOUNTING PLATE COLUMN STRAP L.2400mm Crosshead Cutter screwdriver M8 x 12mm HEX SOCKET SCREW 5AF HEX KEY Tape Measure Suitable for loads up to 50kg (110lbs) -
Page 5: Installation Instructions
INSTALLATION INSTRUCTIONS CUT STRAP TO CORRECT LENGTH i. Measure the circumference of the column using a tape measure. COLUMN X cm TAPE MEASURE ii. To prepare the strap to the correct length add 10cm (4”) to the circumference of the column and cut the strap accordingly. - Page 6 ASSEMBLE STRAP TO THE COLUMN. i. Unlock the strap and thread item 2 through item 1. ii. Wrap item 2 around the column and thread the end of the strap back through item 1 and close the lock. COLUMN iii. Fix the strap to the column by tightening the straps with a screwdriver. LOCK SCREWDRIVER...
- Page 7 ATTACH FLAT SCREEN WALL PLATE TO THE COLUMN. i. Fix the wall plate to item 1 using item 3. FLAT SCREEN WALL PLATE ii. Position the wall plate to preferred height on the column and retighten the strap if necessary. iii.
-
Page 8: Typical Installations
TYPICAL INSTALLATIONS A. Installation with BT8441 BT7832 COLUMN BT8441 SCREEN B. Installation with BT8431 COLUMN BT7832 BT8431... - Page 9 C. Installation with BT7532 BT7832 COLUMN SCREEN BT7532 D. Installation with BT7523 Note: Single collar mounts only require 1 strap. BT7523 BT7832...
- Page 10 E. Installation with BT7515 BT7832 BT7515 COLUMN F. Installation with BT8312 Note: The max screen weight using the BT8312 will be reduced to 37kg (82lbs). COLUMN BT7832 BT8312 SCREEN...
-
Page 11: Product Dimensions
130mm FRONT VIEW 5.12in 24mm 0.94in 2 - M8 x 1.25mm 750mm 29.53 787mm 30.99in SIDE VIEW THESE INSTRUCTIONS ARE INTENDED AS A GUIDE ONLY AND B-TECH ACCEPTS NO LIABILITY FOR THE ACCURACY OF THE INFORMATION CONTAINED IN THIS DOCUMENT. -
Page 12: B-Tech Contact Details
©2022 B-Tech International Design and Manufacturing Ltd. All rights reserved. B-Tech AV Mounts is a division of B-Tech International Design and Manufacturing Ltd. B-Tech AV Mounts and the B-Tech logo are registered trade marks. All other brands and product names are trademarks of their respective owners.
Need help?
Do you have a question about the BT7832 and is the answer not in the manual?
Questions and answers