Table of Contents
Advertisement
Quick Links
Advertisement
Table of Contents

Related Manuals for Martin Audio MLA Mini


Summary of Contents for Martin Audio MLA Mini
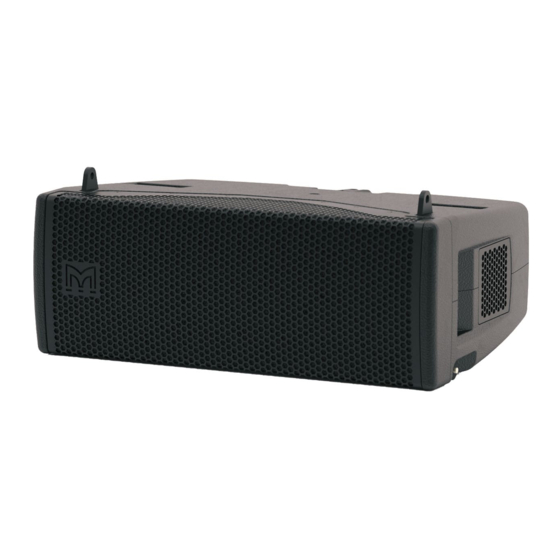
- Page 1 MARTIN AUDIO MLA MINI MLA MINI USER GUIDE...
-
Page 2: Safety Information
CAUTION To reduce the risk of electric shock do not remove any covers. There are no user serviceable parts inside the units. Refer servicing to qualified service personnel only. Call Martin Audio Ltd on +44 (0) 1494 535312 or e-mail info@martin-audio.com... -
Page 3: Approvals
Safety: IEC60065:2002 + A1:2006 Environmental: IP25 when fitted with cowl assembly (Martin Audio Pt No ASF15027) and used with mains connectors/cords rated to at least IP25. IP2X when NOT fitted with cowl assembly or not used with mains connector/cords rated to at least IP25. -
Page 4: Safety Rules
• When not fitted with the optional rain cowl (Martin Audio Pt No ASF15027) or not used with mains connector/cords rated to at least IP25, the MSX must not be exposed to dripping, or splashing and no objects filled with liquids, such as vases should be placed on the apparatus. -
Page 5: Table Of Contents
Preset 3: Pole Mount with Universal Tilt Bracket .........32 Preset 4: Ground Stack of MLA array on MSX sub ........33 Preset 5: Flown Mini array with sub on floor ..........37 Preset 6: Fully-flown system ..............42 CONTACT INFO ....................45 WARRANTY.....................45 MLA Mini User Guide V1.0... -
Page 6: Introduction
INTRODUCTION IMPORTANT: This document is the User Guide for the MLA Mini Loudspeaker Array system. It is an abridged and edited version of the MLA Mini Advanced Manual and describes how to set up a basic MLA Mini system in its most common configurations, using the internal factory presets. -
Page 7: Overview
USER GUIDE OVERVIEW Like the MLA and MLA Compact systems from which it is derived, the MLA Mini is a precision multi-cellular loudspeaker array designed to accurately deliver a required SPL (acoustic loudness) within a defined area. Smaller and lighter than the MLA and MLA Compact systems, the MLA Mini will reproduce high quality sound in smaller venues, as either a fixed or portable installation. -
Page 8: Msx - Rear Panel
MSX cabinet. 1. INPUT – a 3-pin female XLR audio input connector. The MLA Mini system can be fed with either balanced analogue audio or AES3 digital audio. The same connector is used for both formats, and the analogue/digital selection is made via VU-NET control software. -
Page 9: Neutrik® Powercon True1 Connector Assembly Instructions
9.5 - 12.0 mm Place bushing and chuck over the cable. 20 mm 20 mm [0.787”] [0.787”] 8 mm 8 mm [0.32"] [0.32"] Prepare cable as shown. PE 23 mm PE 23 mm [0.9”] [0.9”] MLA Mini User Guide V1.0... - Page 10 Slide the cable clamp bushing up the cable and Wrench size tighten it with the tool as shown. 10 mm (Tool available: Art. No. HTAC) Disassembly (open twist lock): 1. Press with screw driver to unlock 2. Turn bushing while still pressing locking. MLA Mini User Guide V1.0...
-
Page 11: Mla Mini Connection
USER GUIDE MLA MINI CONNECTION The MLA Mini system only has one other connection. This is a Neutrik® NL4 on the Mini cabinets themselves. Connect the cables referred to in Item [3] above here, taking care to observe the colour coding of the connectors. -
Page 12: Installation
Flying Frame This steel assembly is required when an MLA Mini system is to be flown using one or two chain hoists; it attaches either to the 4 x Mini array or to the MSX, depending whether the MSX is being flown as part of the array. - Page 13 This is used to elevate an array of 4 Minis above the MSX as a single assembly. The height of the array can be set to that required (either determined by the preset in use or according to the VU- NET specifications) by turning the handle, and then locked in position with the integral clamp. MLA Mini User Guide V1.0...
- Page 14 The pins are used to lock the individual Mini cabinets into position at the defined inter-cabinet angle, and also to lock the 4 x Mini array to the Transition Frame or Flying Frame at the required angle. The pins are supplied with the relevant components. MLA Mini User Guide V1.0...
- Page 15 Note that all rigging accessories (except the flying pins – but see below) should be removed before stowing the Minis in the flightcase for shipment. MLA Mini User Guide V1.0...
- Page 16 Ground Stack Baseplate, and also for convenient transportation. It does not form part of an assembled system. MSX Transit Cover A tough flexible cover for the MSX with an integral plywood lid for shipping purposes. MLA Mini User Guide V1.0...
-
Page 17: Configuration Options
Bracket MINI MINI MINI MINI Transition MINI MINI Frame MINI MINI MINI MINI MINI MINI MINI MINI MINI MINI MINI MINI MINI Flying MINI Frame Presets 1 to 3 Preset 4 Preset 5 Preset 6 MLA Mini User Guide V1.0... -
Page 18: Choosing A Preset
Mini. The selected preset optimises the MLA Mini system for the dimensions and heights shown in the diagrams, but good performance will still be obtained if, for example, the room is a different size or if it necessary to use a different mounting height. - Page 19 audience. Note the array tilt and inter-cabinet angles differ again. MLA Mini User Guide V1.0...
- Page 20 MLA Mini User Guide V1.0...
- Page 21 2 - 17 m Standing Ground stack On stage 2 – 12 m Standing Flown array Sub on floor, array flown 2 – 12 m Standing Fully flown Fully flown 2 – 12 m Standing MLA Mini User Guide V1.0...
-
Page 22: Cabling, Connecting Up
MSX sub. Do not connect the other end of the cable to a live AC supply at this stage. 2. Connect the amplifier outputs to the MLA Mini cabinets using the pre-made cable assembly supplied (if length permits - configuration-dependent. Some configurations will require longer cables). - Page 23 MLA Mini User Guide V1.0...
-
Page 24: Rigging
4 Minis and one MSX sub. The six presets cover four possible rigging arrangements for 4 MLA Mini cabinets and one MSX sub; the components required for each are summarised in the table below. Note that the component count applies to a single system;... -
Page 25: Preset 1: Pole Mount With Universal Or Fixed Tilt Bracket
(the rear location is only needed for larger configurations). With the MSX on its wheelboard and the front edge of the Baseplate on the floor, the dropdown brackets should align with the correct holes. Secure all four dropdown brackets with Flying Pins. MLA Mini User Guide V1.0... - Page 26 Step 3: As the Bracket Tilt Angle for Preset 1 is 14.5°, either the Universal Tilt Bracket or the Fixed Tilt Bracket may be used. Attach the chosen bracket to the top of the telescopic pole and secure by tightening the boss onto the pole using the knob. MLA Mini User Guide V1.0...
- Page 27 Step 4b (with Fixed Tilt Bracket): Lift the first MLA Mini cabinet onto the bracket. The lugs on the ends of the main cross-arm should mate with the slots in the front corners of the cabinet.
- Page 28 “6.5” on the rear bracket. This gives the correct inter-cabinet angle required by Preset 1. Step 6: Repeat Step 5 twice to add the two remaining MLA Mini cabinets, while referring to the Preset diagrams starting on page 18 and the table below. Note that the inter-cabinet angles for cabinets 2 to 3 and 3 to 4 differ.
- Page 29 MLA MINI USER GUIDE Summary of angles (Presets 1): Preset 1 Bracket tilt angle 14.5° Cabinets 1 & 2 6.5° Inter-cabinet Cabinets 2 & 3 6.5° angles Cabinets 3 & 4 0.5° MLA Mini User Guide V1.0...
-
Page 30: Preset 2: Pole Mount With Universal Tilt Bracket
Step 4: Lift the first MLA Mini cabinet onto the Universal Tilt Bracket. The lugs on the ends of the main cross-arm should mate with the slots in the front corners of the cabinet. Secure these points with flying pins. - Page 31 USER GUIDE Step 5: As for Preset 1. Step 6: Repeat Step 5 twice to add the two remaining MLA Mini cabinets, while referring to the Preset diagrams starting on page 18 and the table below. Note that the inter-cabinet angles for cabinets 2 to 3 and 3 to 4 differ.
-
Page 32: Preset 3: Pole Mount With Universal Tilt Bracket
Flying Pins into the drop-down brackets accordingly to achieve the correct angles. Summary of angles (Preset 3): Preset 3 Bracket tilt angle 11° Cabinets 1 & 2 10° Inter-cabinet Cabinets 2 & 3 0.5° angles between: Cabinets 3 & 4 0.5° MLA Mini User Guide V1.0... -
Page 33: Preset 4: Ground Stack Of Mla Array On Msx Sub
With the MSX on its wheelboard and the front edge of the Baseplate on the floor, the dropdowns should align with the correct holes. Secure all four dropdown brackets with Flying Pins. MLA Mini User Guide V1.0... - Page 34 Step 3: For Preset 4 the required angle between the sub and the bottom Mini is 20°, so the Long Ground Stack Bar must be used between the cabinet and the Flying Frame. Fit the lower end of the bar into the Flying Frame at the 20° mark and secure with a Flying Pin. MLA Mini User Guide V1.0...
- Page 35 Step 4: Next, raise the two front lugs of the Flying Frame to their upright position, and secure. These will mate with the front slots of the first Mini. Fit the first MLA Mini cabinet onto the Flying Frame, locking the two front slots into place with Flying Pins. Note that the front of the Flying Frame should be flush with the lower front edge of the cabinet.
- Page 36 Preset 4. Step 7: Repeat Step 6 twice to add the two remaining MLA Mini cabinets, while referring to the Preset diagrams on page 20 and the table below. Take care to set the correct angles.
-
Page 37: Preset 5: Flown Mini Array With Sub On Floor
Pole Mount or Ground Stack configuration. Thus the top cabinet in the array is assembled first. Step 1: Start with the four MLA Mini cabinets face down on their flightcase base. The cabinets should be locked together with Flying Pins at the front and rear, with the rear pins in the ’0.5’... - Page 38 Remove the Pole Mount boss from the Universal Tilt Step 2b (using Universal Tilt Bracket): Bracket (if one is attached). Attach a standard Trigger Clamp to the bracket’s fixing hole with an M12 (½”) nut and bolt. MLA Mini User Guide V1.0...
- Page 39 Frame and begin to raise the array up off the flight case base. As the array rises, insert Flying Pins in the rear brackets to define the inter-cabinet angles according to the diagram on page 20 and the table below. MLA Mini User Guide V1.0...
- Page 40 Step 6a (using Flying Frame): Continue raising the array on the hoist until the lower edge of the bottom MLA Mini cabinet is approximately 2.38 m above floor level. If the Flying Frame tilt angle is fitted with a clinometer, the tilt can be checked with the clinometer display. With a single hoist attached as described in Step 3a, the array’s centre of gravity should set the tilt at...
- Page 41 MLA MINI USER GUIDE Summary of angles (Preset 5): Preset 5 Flying Frame tilt angle 7° Cabinets 1 & 2 0.5° Inter-cabinet Cabinets 2 & 3 4° angles between: Cabinets 3 & 4 10° MLA Mini User Guide V1.0...
-
Page 42: Preset 6: Fully-Flown System
Flying Pins. Step 2: Attach the chain hoist to the H13 suspension hole of the Flying Frame and raise the MSX upwards. Remove the wheelboard when it is clear of the ground. MLA Mini User Guide V1.0... - Page 43 MLA MINI USER GUIDE Step 3: Assemble the 4 x MLA Mini array face down on their flightcase base. Attach the Transition Frame to the upper MLA Mini cabinet with Flying Pins. The frame connects at three points: two are the cabinet’s front location points, which engage with slots in the frame; the other is at the rear, where the swinging arm can mate with the upper section of the cabinet rear bracket in three positions to produce an angle between the Transition frame and the Mini of 0°, 2.5°...
- Page 44 7.5°. This can be checked by using the clinometer display if one is fitted. Summary of angles (Preset 6): Preset 6 Flying Frame tilt angle 7.5° Transition Frame angle 0° Cabinets 1 & 2 0.5° Inter-cabinet Cabinets 2 & 3 4° angles between: Cabinets 3 & 4 10° MLA Mini User Guide V1.0...
-
Page 45: Contact Info
Martin Audio Ltd. cannot be held responsible for defects caused by unauthorised modifications, improper use, negligence, exposure to inclement weather conditions, act of God or accident, or any use of this product that is not in accordance with the instructions provided by Martin Audio. Martin Audio is not liable for consequential damages. - Page 46 MLA MINI USER GUIDE MLA Mini User Guide V1.0...
- Page 47 MLA MINI USER GUIDE MLA Mini User Guide V1.0...
- Page 48 All information is Copyright © 2013 Martin Audio Ltd. Martin Audio, the Martin Audio logo and Hybrid are registered trademarks of Martin Audio Ltd. in the United Kingdom, United States and other countries; all other Martin Audio trademarks are the property of Martin Audio Ltd.
Need help?
Do you have a question about the MLA Mini and is the answer not in the manual?
Questions and answers