Advertisement
Quick Links
Purpose
This document outlines the procedure for replacing a damaged Vela Pop Up canvas top.
NOTE: Images used in this document are for reference only when assembling, installing and/or operating
this product. Actual appearance of provided and/or purchased parts and assemblies may differ.
Safety
Read and understand all instructions before installing or operating this product. Adhere to all safety labels.
This manual provides general instructions. Many variables can change the circumstances of the instructions,
i.e., the degree of difficulty, operation and ability of the individual performing the instructions. This
manual cannot begin to plot out instructions for every possibility, but provides the general instructions,
as necessary, for effectively interfacing with the device, product or system. Failure to correctly follow the
provided instructions may result in death, serious personal injury, severe product and/or property damage,
including voiding of the LCI limited warranty.
The "WARNING" symbol above is a sign that a procedure has a safety risk involved and may cause
death or serious personal injury and severe product and/or property damage, including voiding of
the Lippert Limited Warranty, if not performed safely and within the parameters set forth in
The "CAUTION" symbol above is a sign that a safety risk is involved and may cause personal injury
and/or product or property damage, including voiding of the Lippert Limited Warranty, if not
Resources Required
• 2 people, depending on task
• Plastic auto-body pry bar toolset (Fig. 1)
• Ratchet strap (optional)
NOTE: Have more than one set of pry bar tools on hand during the attachment cord installation process.
The corners of a pry bar can break, which may cause the damaged pry bar to cut the canvas fabric.
Rev: 01.27.22
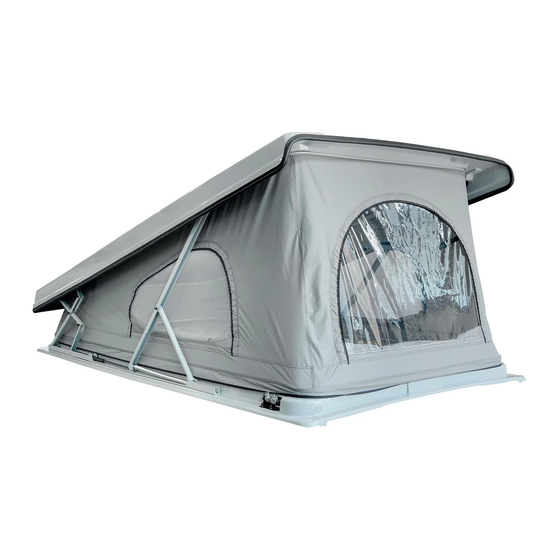
VELA POP-UP CANVAS REPLACEMENT
performed safely and within the parameters set forth in
BEDS
this manual.
this manual.
Fig. 1
Page 1
CCD-0004556
Advertisement

Related Manuals for Lippert VELA POP-UP


Summary of Contents for Lippert VELA POP-UP
- Page 1 The “WARNING” symbol above is a sign that a procedure has a safety risk involved and may cause death or serious personal injury and severe product and/or property damage, including voiding of the Lippert Limited Warranty, if not performed safely and within the parameters set forth in this manual.
- Page 2 VELA POP-UP CANVAS REPLACEMENT BEDS Procedure Canvas Removal Excessive damage to the fabric during removal may make the removal process more difficult. Use care not to tear fabric while removing canvas. From inside of the pop-up, apply pressure with a nylon pry bar to the channel of the pop-up's top track until a section of attachment cord is released (Fig.
- Page 3 VELA POP-UP CANVAS REPLACEMENT BEDS From outside of the pop-up, release the bottom canvas first by pulling it free of the channel by hand (Fig. 4). Fig. 4 Pull carefully around the sewn seams—found at all four corners, top and bottom, and in the center at the rear of the pop-up—where the fabric can easily be damaged (Fig.
- Page 4 VELA POP-UP CANVAS REPLACEMENT BEDS After the bottom attachment cord is entirely released, repeat steps 3 and 4 for the top track (Fig. 6). Fig. 6 Replacement Canvas Installation Pop-up Top Track NOTE: Have more than one set of nylon pry bar tools (Fig. 1) on hand during the attachment cord installation process.
- Page 5 VELA POP-UP CANVAS REPLACEMENT BEDS Use a nylon pry bar to press the sewn seam attachment cord into the track's channel (Fig. 8). Fig. 8 Continue pressing the attachment cord into the channel until the entire corner radius is installed.
- Page 6 VELA POP-UP CANVAS REPLACEMENT BEDS To install the attachment cord into the last corner: A. Stretch the fabric of the last corner. B. Place the nylon pry bar tool on the interior of the attachment cord and use the leading edge of the track to hook the nylon pry bar into the inside of the channel (Fig.
- Page 7 VELA POP-UP CANVAS REPLACEMENT BEDS With the top four canvas seams and material installed into the track’s four corner radiuses, working from front to back—align the nylon pry bar tool to the angle of the channel. 10. While applying pressure to the attachment cord, glide the nylon pry bar along the channel until the attachment cord is installed along the length of the pop-up (Fig.
- Page 8 VELA POP-UP CANVAS REPLACEMENT BEDS 13. Gently hand-press each end of the attachment cord seam into the channel then use the nylon pry bar to fully seat the ends of the seam into the channel, butting them together with no overlap.
- Page 9 VELA POP-UP CANVAS REPLACEMENT BEDS Pop-up Bottom Track NOTE: Have more than one set of nylon pry bar tools on hand during the attachment cord installation process. The corners of a nylon pry bar can break, which may cause the damaged pry bar to cut the canvas fabric.
- Page 10 VELA POP-UP CANVAS REPLACEMENT BEDS After the fabric is in position for installation, start at the front of the pop-up and align one of the corner sewn seams to the center of a corner radius (Fig. 18). Use a nylon pry bar to press the attachment cord into the channel of a corner radius.
- Page 11 VELA POP-UP CANVAS REPLACEMENT BEDS C. After the nylon pry bar is in place, the attachment cord can be pressed into the channel. With the bottom four canvas seams and material installed into the track’s four corner radiuses, working from front to back—align the nylon pry bar tool to the angle of the channel.
- Page 12 VELA POP-UP CANVAS REPLACEMENT BEDS Follow steps 6-8 to continue gliding or pushing the attachment cord into the channel until the bottom pop-up side is completely installed. 10. Repeat step 9 for the opposite side. 11. At the rear of the pop-up, locate the middle seam where the two ends of the attachment cord meet (Fig.
- Page 13 VELA POP-UP CANVAS REPLACEMENT BEDS 13. After the butted ends of the attachment cord's seam are installed, insert the nylon pry bar into the track at the seam and slide the pry bar outward towards the corner to press in the remaining portion of the attachment cord (Fig.
-
Page 14: Post-Installation Inspection
As a supplier of components to the RV industry, safety, education and customer satisfaction are our primary concerns. Should you have any questions, please do not hesitate to contact us at 432-LIPPERT (432-547-7378) or by email at customerservice@lci1.com. Self-help tips, technical documents, product videos and a training class schedule are available at lippert.com...
Need help?
Do you have a question about the VELA POP-UP and is the answer not in the manual?
Questions and answers