Table of Contents
Advertisement
Quick Links
INSTRUCTION MANUAL
INSTALLATION | WIRING | COMMISSIONING | MAINTENANCE |
I S O 9 0 0 1
ISO 14001
Q u a l i t é
Environnement
AFNOR CERTIFICATION
AFNOR CERTIFICATION
JBRB ECOWATT
PR VCHV
®
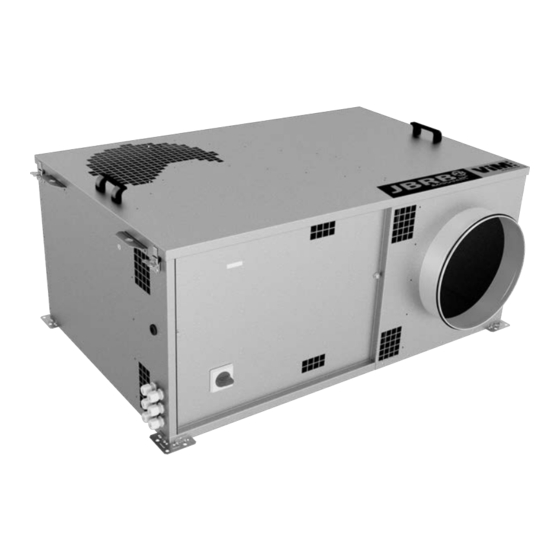
VMC Collective housing
Tertiary premises ventilation
Approved 400°C 1/2H C4
PV Efectis : EFR-16-002341
VENTIDRIVE controller
NT00000749-JBRB-ECOWATT-PR-VCHV-AN-211115
Advertisement
Table of Contents

Related Manuals for ViM JBRB ECOWATT PR VCHV


Summary of Contents for ViM JBRB ECOWATT PR VCHV
- Page 1 INSTRUCTION MANUAL INSTALLATION | WIRING | COMMISSIONING | MAINTENANCE | I S O 9 0 0 1 ISO 14001 Q u a l i t é Environnement AFNOR CERTIFICATION AFNOR CERTIFICATION JBRB ECOWATT PR VCHV ® VMC Collective housing Tertiary premises ventilation Approved 400°C 1/2H C4 PV Efectis : EFR-16-002341 VENTIDRIVE controller...
-
Page 2: Table Of Contents
SUMMARY GENERALS ............................3 Warnings ..........................3 Safety instructions ........................3 Reception - Storage........................3 Warranty ........................... 4 PRODUCT PRESENTATION ......................4 Description..........................4 Aeraulic curves ......................... 5 INSTALLATION ..........................8 Dimensions and weight ......................8 Handling ..........................12 Choice of location ........................12 Ceiling installation........................ -
Page 3: Generals
GENERALS 1.1 Warnings This product has been manufactured under strict technical safety rules in accordance with EC standards. The CE declaration can be downloaded from the website (contact details on last page). Before installing and using this product, please read these instructions carefully as they contain important infor- mation for your safety and the safety of others during the installation, commissioning and maintenance of this product. -
Page 4: Product Presentation
The equipment is guaranteed for 24 months from the invoice date. The warranty is limited to the replacement of parts or equipment whose operation is recognized as defective by VIM, excluding any compensation or penalties. The costs of labor, removal and rest, travel related to the replacement are the responsibility of the Customer. -
Page 5: Aeraulic Curves
Operating mode COP mode: Constant pressure regulation This operating mode allows to maintain a constant pressure in the network over the whole operating range of the fan. The pressure losses in the network (opening/closing of dampers, dual flow vents...) modify the pressure in the suction plenum of the ventilation box. - Page 6 JBRB ECOWATT PR VCHV 10 JBRB ECOWATT PR VCHV 22 ® ® P (Pa) P (Pa) stat stat 100% 100% Qv (m Qv (m 1000 1200 1000 1500 2000 2500 P (W) P (W) 100% 100% Qv (m Qv (m 1000 1200 1000...
- Page 7 JBRB ECOWATT PR VCHV 48 JBRB ECOWATT PR VCHV 70 ® ® P (Pa) P (Pa) stat stat 100% 100% Qv (m Qv (m 1000 2000 3000 4000 5000 6000 1000 2000 3000 4000 5000 6000 7000 8000 P (W) P (W) 1400 1200...
-
Page 8: Installation
INSTALLATION 3.1 Dimensions and weight JBRB ECOWATT PR VCHV 04 / 06 / 10 / 22 / 30 / 38 ® Horizontal discharge - L / M configuration Direction of the air Direction of the air Direction of the air Available only on modular version Model... - Page 9 JBRB ECOWATT PR VCHV 10 / 22 / 30 / 38 ® Horizontal discharge - Configuration D Direction of the air Direction of the air Direction of the air Model Weight (kg) JBRB ECOWATT PR 10 ® JBRB ECOWATT PR 22 1048 ®...
- Page 10 JBRB ECOWATT PR VCHV 04 / 06 / 10 / 22 / 30 / 38 ® Vertical discharge - L / M configuration Direction of the air Direction of the air Available only on modular version Model Weight (kg) JBRB ECOWATT PR 04 ®...
- Page 11 JBRB ECOWATT PR VCHV 10 / 22 / 30 / 38 ® Refoulement vertical - Configuration D Direction of the air Direction of the air Model Weight (kg) JBRB ECOWATT PR 10 ® JBRB ECOWATT PR 22 1037 ® JBRB ECOWATT PR 30 1276 1238...
-
Page 12: Handling
3.2 Handling CAUTION: Do not use the plastic handles to handle the cabinet. These han- dles are only used to open the lid of the cabinet. JBRB ECOWATT PR VCHV 04 to 38 JBRB ECOWATT PR VCHV 48 to 92 ®... -
Page 13: Ceiling Installation
3.4 Ceiling installation JBRB ECOWATT PR VCHV 04 to 38 Ceiling installation ® ® JBRB ECOWATT PR VCHV sizes 04 to 38 can be installed with the cover down. • A minimum air gap of 100 mm must be main- tained between the unit and the horizontal sup- porting structure. -
Page 14: Aeraulic Connection
Modulable coudé à 90° / Modulable coudé à 90° / Modulable coudé à 90° / double aspiration à 90° AERAULIC CONNECTION double aspiration à 90° Modulable coudé à 90° / En ligne Double aspiration Modulable coudé à 90° / En ligne Double aspiration double aspiration à... -
Page 15: Electrical Characteristics
5.2 Electrical characteristics Single-phase 230V Three-phase 400V Size P. Abs. I. Max P. Abs. I. Max (kW) (kW) JBRB ECOWATT PR VCHV 04 ® 0,07 JBRB ECOWATT PR VCHV 06 ® 0,13 JBRB ECOWATT PR VCHV 10 ® 0,15 JBRB ECOWATT PR VCHV 22 ®... -
Page 16: Electrical Connection Of The Start/Stop Command
JBRB ECOWATT PR VCHV 30 to 92 Three-phase ® L1 L2 L3 To access the switch terminals, unscrew the 2 M8 screws on the door with a 13 mm wrench. Pass the power cable through a PE and wire it to the switch terminals. 5.4 Electrical connection of the Start/Stop command Some installations require an on/off command. -
Page 17: Connection Of The Pressure Switch
VCHV - Controller VENTIDRIVE - EC motor controller BR- BR+ U V W PE 5.4.2 JBRB ECOWATT PR VCHV 30 to 92 models ® R2 No R2 C Factory wiring Adding the start/stop command R2 Nc R1 No R1 C R1 Nc VCHV - Controller VENTIDRIVE - EC motor controller... -
Page 18: Commissioning
COMMISSIONING 6.1 Adjustment of the pressure set point The VCHV-A adjustment buttons are located inside the unit under the cover. Press the snap lock on the bottom of the unit next to the pressure points to open the unit. SET.1 SET.3 OK The first digit flashes, press the up or down arrow to enter 0140... -
Page 19: Access To The Motor Fan
7.3 Access to the motor fan JBRB ECOWATT VCHV PR 04 to 38 ® JBRB ECOWATT PR VCHV 48 to 92 ® To access all the compartments of the unit, unlock the 4 toggles, then remove the top of the unit using the handles. -
Page 20: Replacement Of The Motor Fan
7.4 Replacement of the motor fan 7.4.1 JBRB ECOWATT VCHV PR 04 to 22 ® • Turn off the power supply. • Unscrew the 2 screws of the door, then remove the door. • Disconnect the power cable from the switch. •... - Page 21 7.4.2 JBRB ECOWATT PR VCHV 30 to 92 ® A (1:1) • Turn off the power supply. • Unscrew the 2 screws of the door, then remove the door. • Disconnect the power cable from the switch. • Unlock the 4 toggles, then remove the top of the unit using the handles. •...
-
Page 22: Waste Management
7.5 Spare parts VIM Code Type Quantity Designation ® 263200 Motor-turbine Replacement motor-turbine for JBRB ECOWATT ® 263201 Motor-turbine Replacement motor-turbine for JBRB ECOWATT ® 263202 Motor-turbine Replacement motor-turbine for JBRB ECOWATT ® 263203 Motor-turbine Replacement motor-turbine for JBRB ECOWATT ®... - Page 23 23/24 NT00000749-JBRB-ECOWATT-PR-VCHV-AN-211115...
- Page 24 Les prés de Mégy Sud – SOUDAN CS 60120 - 79401 ST MAIXENT L’ECOLE CEDEX Tél. : +33 (0)5 49 06 60 38 or +33 (0)5 49 06 60 25 – Fax : +33 (0)5 49 06 60 36 sav@vim.fr - www.vim.fr 24/24 NT00000749-JBRB-ECOWATT-PR-VCHV-AN-211115...
Need help?
Do you have a question about the JBRB ECOWATT PR VCHV and is the answer not in the manual?
Questions and answers