Sign In
Upload
Download
Table of Contents
Contents
Add to my manuals
Delete from my manuals
Share
URL of this page:
HTML Link:
Bookmark this page
Add
Manual will be automatically added to "My Manuals"
Print this page
×
Bookmark added
×
Added to my manuals
Manuals
Brands
NEC Manuals
Projector
DLP Cinema NC3200S
Installation manual
NEC NC3200S Installation Manual
Hide thumbs
Also See for NC3200S
:
User manual
(70 pages)
,
Specifications
(2 pages)
,
Manual
(5 pages)
1
2
3
4
5
6
7
8
9
10
11
12
13
Table Of Contents
14
15
16
17
18
19
20
21
22
23
24
25
26
27
28
29
30
31
32
33
34
35
36
37
38
39
40
41
42
43
44
45
46
47
48
49
50
51
52
53
54
55
56
57
58
59
60
61
62
63
64
65
66
67
68
69
70
71
72
73
74
75
76
77
78
79
80
81
82
83
84
85
86
87
88
89
90
91
92
93
94
95
96
97
98
99
100
101
102
103
104
105
106
107
108
109
110
111
112
113
114
115
116
117
118
119
120
121
122
123
124
125
126
127
128
129
130
131
132
133
134
135
136
137
138
139
140
141
142
143
144
145
146
147
148
149
150
151
152
153
154
155
156
157
158
159
160
161
162
163
164
165
166
167
168
169
170
171
172
173
174
175
176
177
178
179
180
181
182
183
184
185
186
187
188
189
190
191
192
193
194
page
of
194
Go
/
194
Contents
Table of Contents
Bookmarks
Table of Contents
Important Information
Wichtige Informationen
Table of Contents
Before Setting up Your Projector
Lamp Power Supply Installation Conditions
Exhaust Equipment Specifications
Technische Daten des Aubsauggeräts
Selecting Primary/Wide Converter Lenses for Your Projector
Screen Type
Selection of Wide Converter Lens/ Anamorphic Lens
Selection of Primary Lens
List of Tools Used
Carrying the Projector
Handles Installation Locations
Installing and Removing the Handles
Removing the Projector Covers
Mounting and Removing the Front Cover
Mounting and Removing the Side Cover
Mounting and Removing the Lens Side Cover
Mounting and Removing the Top Front Cover
Mounting and Removing the Lamp Replacement Cover
Mounting and Removing the Top Rear Cover
Setting up Your Projector
Setup Procedure
Projector Installation
Mounting a Lamp Power Supply to the Pedestal
Befestigen einer Lampen-Spannungsversorgung am Fuß
Connecting the Power Cable
Lamp AC Power Supply Installation Specifications
Projector AC Power Supply Installation Specifications
Removing the Covers of the Projector and LPS
Connecting the AC Power Cable to the LPS
Connecting the AC Power Supply Cable to the Projector
Anschließen des Stromkabels
Installationsanweisungen für die Lampen-Spannungsversorgung
Installationsanweisungen für die Projektor-Spannungsversorgung
Abnehmen der Abdeckungen des Projektors und der Lampen-Spannungsversorgung
Anschließen des Wechselstrom-Netzkabels an die Lampen-Spannungsversorgung
Anschließen des Netzkabels an den Projektor
Mounting the Primary Lens
Mounting the Wide Converter Lens Turret
List of Accessories Attached to Turret
Descriptions of the Parts in Turret
Mounting the Wide Converter Lens Turret
Mounting of the Wide Converter Lens or Anamorphic Lens
Installing Small Iris
Mounting the Exhaust Equipment
Montage der Entlüftungsanlage
Mounting the Lamp Bulb
2.11 Mounting the Option Board
Remove the Projector Cover
Mount the Option Board to the Projector
Mount the Cover to the Projector
Setting up the Projector
Projector Adjustment and Connecting
Flow of Adjustment and Connecting
Recovering from Tamper Errors
Procedure for Recovering from Tamper Errors
Turning Your Projector on
Setting the Date and Time in the Projector
Setting the Projector Projection Method
Adjusting the Lamp Bulb Shaft
Adjusting the Primary Lens
Display the Test Pattern
Adjusting the Screen Ratio
Adjusting the Wide Converter Lens or Anamorphic Lens
Z-Direction Adjustment
X-Direction Adjustment
Y-Direction Adjustment
Adjusting the Roll Angle
Adjusting the Tilt Angle
Adjusting the Pan Angle
Adjusting the Focus
Checking the Adjustment Results
Connecting with the Image Input Port
3.10 Connecting the Various Control Terminal
LCD Menu
List of Menu
When You Use the Service Personnel Menu
Title Select
Title Select (Title Memory)
Test Pattern
Configuration
Lamp Setup
Lens Control
Setup
Installation
Memory
Title Setup
Preset Button
Information
Lamp
Preset Button
Usage
Error Code
Version
IP Address
Setup Date
Option Status
Steps to Upgrade to 4K
List of Parts Used
List of Tools Used
Summary Flow for 4K Upgrading
Removing the Covers and Lens
Upgrade Kits Parts Replacement
Replacement of the INTEGRATER ROD
Replacement of PRISM ASSY
Mounting the G-FSB COOLING ASSY
Installing the Gaskets to CPU PWB Bezel
Replacement of the PJDIV PWB
Replacement of CN6
Other Parts Replacement
Replacement of the ICP
Software Update
Adjustment of INTEGRATER ROD
Confirm the Upgrade
Mount the Covers and Lens
Service Door Tamper/Marriage Tamper Initiation
Error Check
Digital Certification Registration
Appendix
List of Registered Titles (When Shipped from the Factory)
Error Code List
Battery Replacement Method for ICP Board
Batterieaustauschverfahren für ICP-Karte
Outline Drawing
Signal Input Board (NC-80LB01)
Signal Input Board (NC-80DS01)
Index
Advertisement
Quick Links
1
Lamp Power Supply Installation Conditions
Download this manual
®
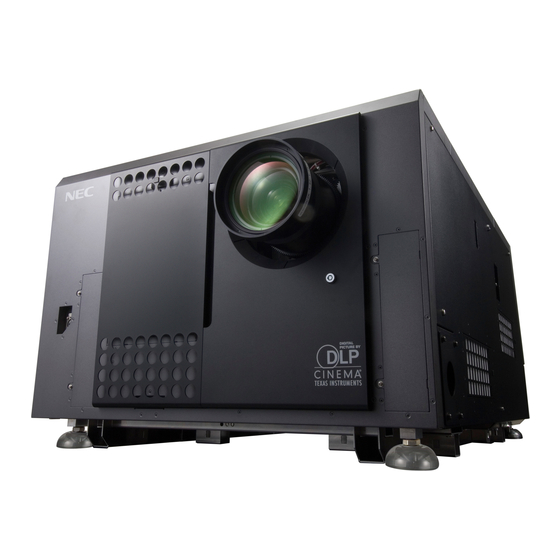
DLP Cinema
Projector
Installation Manual
®
DLP Cinema
Projector
NC3200S/NC3200S-A
NC3240S-A
Lamp Power Supply Unit
NC-32PS01/NC-32PS02
Table of
Contents
Previous
Page
Next
Page
1
2
3
4
5
Advertisement
Table of Contents
Need help?
Do you have a question about the NC3200S and is the answer not in the manual?
Ask a question
Questions and answers
Related Manuals for NEC NC3200S
Projector NEC DLP Cinema NC3200S User Manual
Projector and lamp power supply unit (70 pages)
Projector NEC NC1200C Manual
Nc1200c : press release (5 pages)
Projector NEC NC1200C Release Note
Press release (4 pages)
Projector NEC NC3200S Specifications
Digital cinema projector series (2 pages)
Projector NEC NC1200C Brochure & Specs
Digital cinema projector series (2 pages)
Projector NEC NC3240S Release Note
4k resolution digital cinema projectors (3 pages)
Projector NEC NC3240S Brochure & Specs
Digital cinema projector series (2 pages)
Projector NEC NC1201L-A User Manual
(78 pages)
Projector NEC DLP Cinema NC3541L Installation Manual
(108 pages)
Projector NEC NC3541L User Manual
(88 pages)
Projector NEC NC3240S-A Installation Manual
(194 pages)
Projector NEC NC1600C Service Manual
Dlp cinema projector (382 pages)
Projector NEC NC2500S DLP CInema Installation Manual
(134 pages)
Projector NEC NC1040L-A User Manual
Dlp cinema projector and laser unit (90 pages)
Projector NEC NC1000C Installation Manual
Dlp cinema projector (98 pages)
Projector NEC NP-NC2402ML User Manual
Dlp cinema projector (81 pages)
This manual is also suitable for:
Nc3200s-a
Nc3240s-a
Nc-32ps01
Nc-32ps02
Table of Contents
Save PDF
Print
Rename the bookmark
Delete bookmark?
Delete from my manuals?
Login
Sign In
OR
Sign in with Facebook
Sign in with Google
Upload manual
Upload from disk
Upload from URL


Need help?
Do you have a question about the NC3200S and is the answer not in the manual?
Questions and answers