Table of Contents
Advertisement
Available languages
Available languages
Quick Links
Advertisement
Chapters
Table of Contents

Related Manuals for Canvas 064-4021-4


Summary of Contents for Canvas 064-4021-4
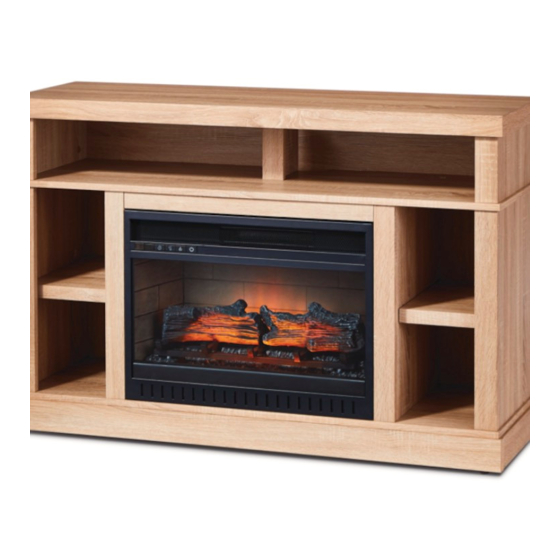
- Page 1 WOODHAVEN 46” MEDIA FIREPLACE PRODUCT NO. 064-4021-4 ASSEMBLY INSTRUCTIONS HAVING TROUBLE? TOLL-FREE: 1-888-670-6684 IMPORTANT: Please read this manual carefully before beginning assembly of this product. Keep this manual for future reference.
- Page 2 From on-trend furniture pieces to holiday décor and all your outdoor living essentials, CANVAS® makes it easy to refresh your space to reflect your unique style and the way you live every day. We would love to hear from you and welcome your thoughtful feedback.
-
Page 3: Table Of Contents
TABLE OF CONTENTS Safety Information Parts List Before You Begin Assembly Step-by-step Guide Technical Data Operating Instructions Troubleshooting Caring for Your Item Warranty WARNING! TO REDUCE THE RISK OF SERIOUS INJURY, READ THE FOLLOWING SAFETY INSTRUCTIONS BEFORE ASSEMBLING AND USING THE PRODUCT. When using electrical appliances, basic precautions should always be followed to reduce the risk of fire, electric shock and injury to persons, including the following:... -
Page 4: Safety Information
TOOLS REQUIRED 2 People Cross-head Screwdriver SAFETY INFORMATION IMPORTANT SAFETY INFORMATION Use this appliance only as described in the manual. Any other use is not recommended by the manufacturer and may cause fire, electric shock or injury to persons. Read all instructions before installing or using the fireplace. - Page 5 9. Use this heater only as described 14. Under no circumstances should this in this manual. Any other use not fireplace be modified. Parts removed recommended by the manufacturer for servicing must be replaced prior may cause fire, electric shock, to operating this fireplace again.
- Page 6 FCC / IC STATEMENT This equipment has been tested and found to comply with the limits for a Class B digital device, pursuant to Part 15 of the FCC Rules. These limits are designed to provide reasonable protection against harmful interference in a residential installation. This equipment generates, uses, and can radiate radio frequency energy and, if not installed and used in accordance with the instructions, may cause harmful interference to radio communications.
-
Page 7: Parts List
PARTS LIST ITEM DESCRIPTION THUMBNAIL QUANTITY Top Panel Media Shelf Bottom Panel Side Panel Left Partition Panel Right Partition Panel Lower Side Panel Moulding Middle Stile Lower Back Panel Middle Crossbar Upper Side Panel Upper Side Panel Moulding Upper Partition Panel WOODHAVEN 46”... - Page 8 PARTS LIST ITEM DESCRIPTION THUMBNAIL QUANTITY Upper Partition Moulding Front Skirting Back Skirting Left Skirting Right Skirting Adjustable Shelf Firebox Support Upper Back Panel Fireplace Insert Remote Control with Batteries WOODHAVEN 46” MEDIA FIREPLACE...
- Page 9 EXPLODED PARTS WOODHAVEN 46” MEDIA FIREPLACE...
- Page 10 HARDWARE LIST ITEM DESCRIPTION THUMBNAIL QUANTITY Wood Dowel M8x30mm Cam Lock Cam Bolt Screw M3.5x12mm Screw M4x50mm Pan Head Screw M5x12mm Washer Head Screw M3.5x15mm Mending Plate Touch-up Pen WOODHAVEN 46” MEDIA FIREPLACE...
- Page 11 HARDWARE LIST ITEM DESCRIPTION THUMBNAIL QUANTITY Shelf Support L-shaped Bracket Cam Lock Cover Glue Tipping Restraint Hardware Kit EXTRA HARDWARE BAG WOODHAVEN 46” MEDIA FIREPLACE...
-
Page 12: Before You Begin Assembly
Place packing materials back in the box. Do not dispose of packaging materials until assembly is complete. READ EACH STEP CAREFULLY Make sure you understand each step. If you have any questions, contact CANVAS® customer service at 1-888-670-6684 (toll free). WOODHAVEN 46” MEDIA FIREPLACE... -
Page 13: Step-By-Step Guide
STEP-BY-STEP GUIDE STEP 1 Securely screw the cam bolts into the designated small holes on the top panel and media shelf using a cross-head screwdriver. NOTE: Ensure cam bolts are flush all the way and straight. WOODHAVEN 46” MEDIA FIREPLACE... - Page 14 STEP-BY-STEP GUIDE STEP 2 Securely screw the cam bolts into the designated small holes on the lower side mouldings , middle stiles , upper side mouldings and upper partition panel using a cross-head screwdriver. WOODHAVEN 46” MEDIA FIREPLACE...
- Page 15 STEP-BY-STEP GUIDE STEP 3 Glue the wood dowels into the inner holes on the side panels and lower partition panels ( NOTE: It is very important to use a small amount of glue on ends of dowels and wipe away excess glue immediately. WOODHAVEN 46”...
- Page 16 STEP-BY-STEP GUIDE STEP 4 Attach one middle stile to the left partition panel by engaging two cam locks Repeat the same procedure to attach the other middle stile to the right partiton panel The outer edges are flush with each other.
- Page 17 STEP-BY-STEP GUIDE STEP 5 Attach one lower side moulding to one side panel by engaging two cam locks Make sure the outer edges are flush with each other. Repeat the same process for the other side panel. WOODHAVEN 46” MEDIA FIREPLACE...
- Page 18 STEP-BY-STEP GUIDE STEP 6 Glue two wood dowels into the inner holes on the middle crossbar and attach it to the media shelf by engaging three cam locks The cam locks face inward. WOODHAVEN 46” MEDIA FIREPLACE...
- Page 19 STEP-BY-STEP GUIDE STEP 7 Securely screw the cam bolts into the designated small holes on the bottom panel , front skirting and side skirtings ( ) using a cross-head screwdriver. WOODHAVEN 46” MEDIA FIREPLACE...
- Page 20 STEP-BY-STEP GUIDE STEP 8 Glue the wood dowels into the drilled holes on the skirting boards ( ) as shown. WOODHAVEN 46” MEDIA FIREPLACE...
- Page 21 STEP-BY-STEP GUIDE STEP 9 Attach the back skirting between the side skirtings ( ) with two cam locks The cam locks face inward. WOODHAVEN 46” MEDIA FIREPLACE...
- Page 22 STEP-BY-STEP GUIDE STEP 10 Align and attach the front skirting to the side skirtings ( ) by engaging two cam locks WOODHAVEN 46” MEDIA FIREPLACE...
- Page 23 STEP-BY-STEP GUIDE STEP 11 Attach the previous assembly to the bottom panel by engaging eleven cam locks WOODHAVEN 46” MEDIA FIREPLACE...
- Page 24 STEP-BY-STEP GUIDE STEP 12 Securely screw the cam bolts into the designated small holes on the top surface of the bottom panel using a cross-head screwdriver. WOODHAVEN 46” MEDIA FIREPLACE...
- Page 25 STEP-BY-STEP GUIDE STEP 13 Align the inserted wood dowels on the lower side panels with the large holes on the bottom panel and press them together. Attach the lower side panels in place by engaging four cam locks NOTE: Lower side mouldings bottom front stretcher face the same direction.
- Page 26 STEP-BY-STEP GUIDE STEP 14 Fasten the lower partition panels ( ) to the bottom panel with four M4x50mm screws NOTE: The middle stiles face inward. WOODHAVEN 46” MEDIA FIREPLACE...
- Page 27 STEP-BY-STEP GUIDE STEP 15 Position the media shelf onto the inserted wood dowels on the vertical panels properly, and fasten it in place by engaging eight cam locks NOTE: Middle crossbar faces forward. WOODHAVEN 46” MEDIA FIREPLACE...
- Page 28 STEP-BY-STEP GUIDE STEP 16 Lift the assembled unit upright. Securely screw the cam bolts into the designated small holes on the top surface of the media shelf using a cross-head screwdriver. WOODHAVEN 46” MEDIA FIREPLACE...
- Page 29 STEP-BY-STEP GUIDE STEP 17 Glue the wood dowels into the inner holes on the upper side panels and upper partition panel WOODHAVEN 46” MEDIA FIREPLACE...
- Page 30 STEP-BY-STEP GUIDE STEP 18 Combine both upper side panel mouldings with upper side panels using two cam locks each. Make sure that the outer edges are even. Attach the upper partition panel moulding to the upper partition panel with two cam locks WOODHAVEN 46”...
- Page 31 STEP-BY-STEP GUIDE STEP 19 Attach the assembled upper side panels and upper partition panel to the media shelf by engaging six cam locks NOTE: Upper mouldings face the front. WOODHAVEN 46” MEDIA FIREPLACE...
- Page 32 STEP-BY-STEP GUIDE STEP 20 Place the top panel onto the inserted wood dowels on the vertical panels properly, and fasten it in place with six cam locks The pilot holes for back panel WOODHAVEN 46” MEDIA FIREPLACE...
- Page 33 STEP-BY-STEP GUIDE STEP 21 Lay down the unit on its front edges. Using the pilot holes as a guide, fasten two mending plates at the joints where the middle crossbar meets the middle stiles with four M3.5x12mm screws WOODHAVEN 46” MEDIA FIREPLACE...
- Page 34 STEP-BY-STEP GUIDE STEP 22 Go back and fully tighten all the fasteners. Make sure there are no gaps between the parts. This will help keep the unit square. Pick up the upper back panel and align the pre-drilled holes against the upper long edge with the pilot holes on the back of top panel .
- Page 35 STEP-BY-STEP GUIDE STEP 23 Lift the assembled unit upright and position it near its final location with room to access the back with the fireplace insert. Insert four shelf supports in the holes at the desired height inside each side compartment.
- Page 36 STEP-BY-STEP GUIDE STEP 24 Plug the cam lock covers onto the visible cam locks to conceal the cams. WOODHAVEN 46” MEDIA FIREPLACE...
- Page 37 STEP-BY-STEP GUIDE STEP 25 Using the pilot holes as a guide, fasten two L-shaped brackets onto the firebox support with four short pan-head screws Make sure that the right-angle side of the L-shaped brackets is flush with the end of the firebox support.
- Page 38 STEP-BY-STEP GUIDE STEP 26 Lift the fireplace insert carefully into the back of the assembled mantel and centre it in the opening. DO NOT drag the insert across the bottom panel as it may scratch the unit. Using the pilot holes as a guide, fasten the firebox support between the lower partition panels with four short pan-head screws...
- Page 39 STEP-BY-STEP GUIDE STEP 27 Position the assembled fireplace at the desired location against a wall. If necessary, adjust the installed floor levellers at the front of the unit by hand to correct tilting. Follow the instructions printed on the plastic bag containing the tipping restraint hardware to attach the tipping restraint hardware to the unit and the wall.
-
Page 40: Technical Data
TECHNICAL DATA WARNING! For use with televisions weighing 60 lb (27.2 kg) or less. Use with heavier televisions may cause instability and/or tip over which can be dangerous and cause serious injury. 15 1/2” 46” (39.3 cm) (116.8 cm) 30” 30 1/4”... - Page 41 INSTRUCTIONS FOR USE Identifying the control panel The control panel is located on the top left corner of the fireplace/heater unit. The control panel contains the display unit (1), function indicator (2), timer function (3), heater control (4), flame control (5), and main power (6). The display unit (1) displays information about the flame level, timer, and current temperature.
- Page 42 INSTRUCTIONS FOR USE Using the timer function The timer button (3) allows you to set the amount of time you want the fireplace/heater to run. The timer button (3) operates both the flames and the heater function. If the heater is operating when the timer is set, then the heater is on the timer.
- Page 43 INSTRUCTIONS FOR USE To set the thermostat temperature: Press the heater button multiple times to cycle through the temperature settings, starting at 82°F down to 62°F, then Always OFF or Always ON. (27°C to 17°C - OFF - ON). After you release the heater button, your preferred setting will be flashing.
- Page 44 INSTRUCTIONS FOR USE Log Glow Mode: To lock the flame function in the OFF position, with the flame in L4 mode, press and hold the flame button (5) for five seconds. The log lights flash several times to indicate that the flame function is locked. In this mode, there are no flames but only glowing logs.
- Page 45 INSTRUCTIONS FOR USE Using the Demo Mode For use in retail store. To turn Demo Mode on, press and hold the timer button (3) for 10 seconds until the display (1) shows “00”. Demo Mode deactivates the heater and all front control panel buttons except the flame control button.
- Page 46 INSTRUCTIONS FOR USE OPEN CLOSE Battery safety warnings NOTE: Do not mix old and new batteries. Do not mix alkaline, standard (carbon-zinc), or rechargeable (NiCad, NiMH, etc.) batteries. WARNING: Do not ingest batteries. • Non-rechargeable batteries are not to be recharged. •...
- Page 47 INSTRUCTIONS FOR USE 1. The battery compartment is located on the back of the remote control. 2. Press the small tab inward as you slide the battery door open and remove the exhausted batteries. 3. Insert two new AAA batteries (not included), ensuring the polarities of the batteries match the inside of the battery compartment.
- Page 48 INSTRUCTIONS FOR USE • Make sure the unit is turned OFF, unplugged and the heating elements are cool whenever you are cleaning the heater. • Clean the metal trim using a water-dampened soft, clean cloth. DO NOT use brass polish or household cleaners as these products will damage the metal trim.
-
Page 49: Troubleshooting
ASSEMBLY TROUBLESHOOTING HAVING TROUBLE? LET US HELP YOU! TOLL-FREE: 1-888-670-6684 BEFORE RETURNING CALL US; If you have questions regarding your product or require YOUR PRODUCT WE CAN HELP warranty assistance, please call our customer service helpline. PRODUCT TROUBLESHOOTING PROBLEM POSSIBLE CAUSES SOLUTION Cannot adjust the temperature. - Page 50 PRODUCT TROUBLESHOOTING PROBLEM POSSIBLE CAUSES SOLUTION Change the remote batteries. Operate remote transmitter at a slow, Batteries are exhausted. measured pace. Press the remote control Remote control operated buttons with an even motion and gentle improperly. pressure. Buttons are pressed Remote control is not Repeatedly pressing buttons in rapid improperly.
-
Page 51: Caring For Your Item
WARRANTY INFORMATION This CANVAS® product carries a one (1) year warranty against defects in workmanship and materials. Trileaf Distribution agrees to replace the defective product free of charge within the stated warranty period, when returned by the original purchaser with proof of purchase. This product is not guaranteed against wear or breakage due to misuse and/or abuse. - Page 53 FOYER MULTIMÉDIA DE 46 PO WOODHAVEN ARTICLE Nº 064-4021-4 INSTRUCTIONS D’ASSEMBLAGE VOUS RENCONTREZ DES PROBLÈMES? NUMÉRO SANS FRAIS : 1 888 670-6684 IMPORTANT : Veuillez lire attentivement ce guide avant de procéder à l’assemblage de ce produit. Conservez ce guide aux fins de...
- Page 54 D’INSPIRATION CANADIENNE Nous croyons au pouvoir de la décoration pour donner son âme à votre maison. C’est pour cela que les collections CANVAS inspirent des Canadiens et de leur style de vie. Qu’il s’agisse de meubles tendance, de décorations pour les fêtes ou pour le plein air, CANVAS vous permet de rafraîchir...
- Page 55 TABLE DES MATIÈRES Consignes de sécurité Liste des pièces Avant de commencer l’assemblage Guide étape par étape Données techniques Instructions d’utilisation Dépannage Entretien de votre article Garantie AVERTISSEMENT! VEUILLEZ LIRE LES CONSIGNES DE SÉCURITÉ SUIVANTES AVANT D’ASSEMBLER ET D’UTILISER L’ARTICLE AFIN DE RÉDUIRE LE RISQUE DE BLESSURES GRAVES.
-
Page 56: Consignes De Sécurité
OUTILS REQUIS 2 personnes Tournevis à tête cruciforme CONSIGNES DE SÉCURITÉ CONSIGNES DE SÉCURITÉ IMPORTANTES Utilisez cet appareil uniquement comme indiqué dans ce guide. Toute autre utilisation non recommandée par le fabricant peut provoquer un incendie, une décharge électrique ou des blessures corporelles. - Page 57 9. Utilisez cet appareil de chauffage 14. Ce foyer ne doit être modifié en conformément au présent guide. Toute aucun cas. Les pièces retirées pour autre utilisation non recommandée par l’entretien doivent être replacées le fabricant peut causer un incendie, avant de pouvoir utiliser le foyer à...
- Page 58 DÉCLARATION FCC / IC Cet équipement a été testé et déclaré conforme aux restrictions prévues dans le cadre de la classe B des appareils numériques, définies par la partie 15 du règlement de la FCC. Ces restrictions visent à garantir une protection suffisante contre les interférences nuisibles dans une installation à...
-
Page 59: Liste Des Pièces
LISTE DES PIÈCES RÉFÉRENCE DESCRIPTION ILLUSTRATION QUANTITÉ Panneau supérieur Tablette de médias Panneau inférieur Panneau latéral Panneau de partition de gauche Panneau de partition de droite Moulure de panneau latéral inférieur Montant intermédiaire Panneau inférieur arrière Barre transversale moyenne Panneau latéral supérieur Moulure de panneau latéral supérieur Panneau de séparation supérieur FOYER MULTIMÉDIA DE 46 PO WOODHAVEN... - Page 60 LISTE DES PIÈCES RÉFÉRENCE DESCRIPTION ILLUSTRATION QUANTITÉ Moulure de panneau de séparation Plinthe avant Plinthe arrière Plinthe de gauche Plinthe de droite Tablette réglable Support du foyer Panneau arrière supérieur Foyer encastrable Télécommande avec piles FOYER MULTIMÉDIA DE 46 PO WOODHAVEN...
- Page 61 VUE ÉCLATÉE FOYER MULTIMÉDIA DE 46 PO WOODHAVEN...
- Page 62 LISTE DE LA QUINCAILLERIE RÉFÉRENCE DESCRIPTION ILLUSTRATION QUANTITÉ Goujon de bois M8x30mm Came Boulon à came Vis M3.5x12mm Vis M4x50mm Vis à tête cylindrique M5x12mm Vis à tête rondelle M3.5x15mm Plaque de raccordement Stylo de retouche FOYER MULTIMÉDIA DE 46 PO WOODHAVEN...
- Page 63 LISTE DE LA QUINCAILLERIE RÉFÉRENCE DESCRIPTION ILLUSTRATION QUANTITÉ Taquet Support en L Cache de came Colle Matériel de retenue antibasculement SAC DE MATÉRIEL SUPPLÉMENTAIRE FOYER MULTIMÉDIA DE 46 PO WOODHAVEN...
-
Page 64: Avant De Commencer L'assemblage
LIRE ATTENTIVEMENT CHAQUE ÉTAPE Assurez-vous de bien comprendre chaque étape. Si vous avez des questions, contactez le service à la clientèle CANVAS au 1 888 670-6684 (sans frais). FOYER MULTIMÉDIA DE 46 PO WOODHAVEN... -
Page 65: Guide Étape Par Étape
GUIDE ÉTAPE PAR ÉTAPE ÉTAPE 1 Vissez solidement les boulons à came dans les petits trous désignés sur le panneau supérieur et la tablette de média à l’aide d’un tournevis à tête cruciforme. REMARQUE : Assurez-vous que les boulons à came sont affleurants et droits. - Page 66 GUIDE ÉTAPE PAR ÉTAPE ÉTAPE 2 Vissez solidement les boulons à came dans les petits trous désignés sur les moulures latérales inférieures , les montants de milieu , les moulures du côté supérieur et le panneau de séparation supérieur à l’aide d’un tournevis à tête cruciforme.
- Page 67 GUIDE ÉTAPE PAR ÉTAPE ÉTAPE 3 Collez les goujons de bois dans les trous intérieurs des panneaux latéraux et des panneaux de séparation inférieurs ( REMARQUE : Il est très important d’utiliser une petite quantité de colle sur les extrémités des goujons et d’essuyer immédiatement l’excès de colle. FOYER MULTIMÉDIA DE 46 PO WOODHAVEN...
- Page 68 GUIDE ÉTAPE PAR ÉTAPE ÉTAPE 4 Fixez le montant de milieu au panneau de séparation de gauche en engageant deux cames Répétez la même procédure pour fixer le l’autre montant au panneau de séparation de droite Les bords extérieurs sont affleurants les uns avec les autres.
- Page 69 GUIDE ÉTAPE PAR ÉTAPE ÉTAPE 5 Fixez une moulure latérale inférieure à un panneau latéral en engageant deux à cames . Assurez-vous que les bords extérieurs sont affleurants les uns avec les autres. Répétez le même processus pour l’autre panneau latéral. FOYER MULTIMÉDIA DE 46 PO WOODHAVEN...
- Page 70 GUIDE ÉTAPE PAR ÉTAPE ÉTAPE 6 Collez deux goujons de bois dans les trous intérieurs de la barre transversale du milieu et fixez-la à la tablette de média en engageant trois cames Les cames de verrouillage font face vers l’intérieur. FOYER MULTIMÉDIA DE 46 PO WOODHAVEN...
- Page 71 GUIDE ÉTAPE PAR ÉTAPE ÉTAPE 7 Vissez solidement les boulons à came dans les petits trous désignés sur le panneau inférieur , les plinthes avant et les plinthes latérales ( ) à l’aide d’un tournevis à tête cruciforme. FOYER MULTIMÉDIA DE 46 PO WOODHAVEN...
- Page 72 GUIDE ÉTAPE PAR ÉTAPE ÉTAPE 8 Collez les goujons de bois dans les trous percés sur les plinthes ( comme indiqué. FOYER MULTIMÉDIA DE 46 PO WOODHAVEN...
- Page 73 GUIDE ÉTAPE PAR ÉTAPE ÉTAPE 9 Fixez la plinthe arrière entre les plinthes latérales ( ) au moyen de deux cames Les cames de verrouillage font face vers l’intérieur. FOYER MULTIMÉDIA DE 46 PO WOODHAVEN...
- Page 74 GUIDE ÉTAPE PAR ÉTAPE ÉTAPE 10 Alignez et fixez la plinthe avant aux plinthes latérales ( ) en engageant deux cames FOYER MULTIMÉDIA DE 46 PO WOODHAVEN...
- Page 75 GUIDE ÉTAPE PAR ÉTAPE ÉTAPE 11 Fixez l’ensemble précédent au panneau inférieur en engageant onze cames FOYER MULTIMÉDIA DE 46 PO WOODHAVEN...
- Page 76 GUIDE ÉTAPE PAR ÉTAPE ÉTAPE 12 Vissez solidement les boulons à came dans les petits trous désignés sur la surface supérieure du panneau inférieur à l’aide d’un tournevis à tête cruciforme. FOYER MULTIMÉDIA DE 46 PO WOODHAVEN...
- Page 77 GUIDE ÉTAPE PAR ÉTAPE ÉTAPE 13 Alignez les goujons de bois insérés sur les panneaux latéraux inférieurs avec les grands trous sur le panneau inférieur et appuyez-les ensemble. Fixez les panneaux latéraux inférieurs en place en engageant quatre cames REMARQUE: Les moulures latérales inférieures la traverse avant inférieure font...
- Page 78 GUIDE ÉTAPE PAR ÉTAPE ÉTAPE 14 Fixez les panneaux de séparation inférieurs ( ) au panneau inférieur moyen de quatre vis M4x50mm REMARQUE : Les montants du milieu font face à l’intérieur. FOYER MULTIMÉDIA DE 46 PO WOODHAVEN...
- Page 79 GUIDE ÉTAPE PAR ÉTAPE ÉTAPE 15 Positionnez correctement la tablette de média sur les goujons de bois insérés sur les panneaux verticaux, et fixez-la en place en engageant huit cames REMARQUE: Barre transversale du milieu orientée vers l’avant. FOYER MULTIMÉDIA DE 46 PO WOODHAVEN...
- Page 80 GUIDE ÉTAPE PAR ÉTAPE ÉTAPE 16 Redressez le meuble. Vissez solidement les boulons à came dans les petits trous désignés sur la surface supérieure de la tablette de média à l’aide d’un tournevis à tête cruciforme. FOYER MULTIMÉDIA DE 46 PO WOODHAVEN...
- Page 81 GUIDE ÉTAPE PAR ÉTAPE ÉTAPE 17 Collez les goujons de bois dans les trous intérieurs des panneaux supérieurs du panneau de séparation supérieur FOYER MULTIMÉDIA DE 46 PO WOODHAVEN...
- Page 82 GUIDE ÉTAPE PAR ÉTAPE ÉTAPE 18 Combinez les deux moulures de panneaux supérieurs avec les panneaux latéraux supérieurs en utilisant deux cames dans chacune. Assurez-vous que les bords extérieurs sont uniformes. Fixez la moulure du panneau de séparation supérieur au panneau de séparation supérieur au moyen de deux cames FOYER MULTIMÉDIA DE 46 PO WOODHAVEN...
- Page 83 GUIDE ÉTAPE PAR ÉTAPE ÉTAPE 19 Fixez les panneaux latéraux supérieurs assemblés et le panneau de séparation supérieur à la tablette de média en engageant six cames REMARQUE : Les moulures supérieures font face à l’avant. FOYER MULTIMÉDIA DE 46 PO WOODHAVEN...
- Page 84 GUIDE ÉTAPE PAR ÉTAPE ÉTAPE 20 Placez le panneau supérieur sur les goujons de bois insérés sur les panneaux verticaux et fixez-le en place au moyen de six cames Avant-trous pour le panneau arrière. FOYER MULTIMÉDIA DE 46 PO WOODHAVEN...
- Page 85 GUIDE ÉTAPE PAR ÉTAPE ÉTAPE 21 Déposez le meuble sur ses bords avant. En utilisant les avant-trous comme guide, fixez deux plaques de raccordement sommet des joints où la barre transversale du milieu rencontre les montants du milieu au moyen de quatre vis M3,5x12mm FOYER MULTIMÉDIA DE 46 PO WOODHAVEN...
- Page 86 GUIDE ÉTAPE PAR ÉTAPE ÉTAPE 22 Revenez en arrière et serrez complètement toutes les fixations. Assurez-vous qu’il n’y a pas d’espace entre les pièces. Cela aidera à garder le meuble à l’équerre. Ramassez le panneau arrière supérieur et alignez les trous prépercés contre le bord long supérieur avec les avant-trous à...
- Page 87 GUIDE ÉTAPE PAR ÉTAPE ÉTAPE 23 Redressez le meuble et positionnez-le près de son emplacement final en assurant de l’espace pour accéder à l’arrière avec l’appareil de foyer. Insérez quatre taquets dans les trous à la hauteur souhaitée à l’intérieur de chaque compartiment latéral.
- Page 88 GUIDE ÉTAPE PAR ÉTAPE ÉTAPE 24 Posez les caches de came sur les cames de verrouillage visibles pour masquer les cames. FOYER MULTIMÉDIA DE 46 PO WOODHAVEN...
- Page 89 GUIDE ÉTAPE PAR ÉTAPE ÉTAPE 25 En utilisant les avant-trous comme guide, fixez deux supports en forme de L sur le support du foyer au moyen de quatre courtes vis à tête cylindrique Assurez-vous que le côté à angle droit des supports en L soit affleurant avec l’extrémité...
- Page 90 GUIDE ÉTAPE PAR ÉTAPE ÉTAPE 26 Soulevez l’appareil avec précaution à l’arrière du manteau assemblé et centrez-le dans l’ouverture. NE FAITES PAS glisser l’appareil sur le panneau inférieur, car il peut rayer l’appareil. En utilisant les avant-trous comme guide, fixez le support du foyer entre les panneaux de séparation inférieurs ( ) au moyen de quatre courtes vis à...
- Page 91 GUIDE ÉTAPE PAR ÉTAPE ÉTAPE 27 Placez le foyer assemblé à l’endroit souhaité contre un mur. Si nécessaire, ajustez à la main les pieds de nivellement installés à l’avant du foyer pour corriger l’inclinaison. Suivez les instructions imprimées sur le sac en plastique contenant le matériel de retenue de basculement pour fixer le matériel de retenue antibasculement foyer et au mur.
-
Page 92: Données Techniques
DONNÉES TECHNIQUES AVERTISSEMENT! Pour une utilisation avec des téléviseurs pesant 60 lb (27,2 kg) ou moins.L’utilisation avec des téléviseurs plus lourds peut causer de l’instabilité ou des basculements qui peuvent être dangereux et causer des blessures graves. 15 1/2 po 46 po (39,3 cm) (116,8 cm) - Page 93 CONSIGNES D’UTILISATION PANNEAU DE COMMANDE Le panneau de commande est situé dans le coin supérieur gauche du foyer/appareil de chauffage. Le panneau de commande comprend l’afficheur (1), l’indicateur de fonction (2), la fonction de minuterie (3), la commande de chauffage (4), la commande d’effet de flamme (5) et l’interrupteur d’alimentation (6).
- Page 94 CONSIGNES D’UTILISATION Utilisation de la fonction de minuterie Le bouton de la minuterie (3) vous permet de régler la durée de fonctionnement du foyer. Le bouton de minuterie (3) active à la fois l’effet des flammes et la fonction de chauffage.
- Page 95 CONSIGNES D’UTILISATION Pour régler la température du thermostat : Appuyez plusieurs fois sur le bouton de chauffage pour parcourir les réglages de température, à partir de 82 °F jusqu’à 62 °F, puis toujours sur OFF (arrêt) ou toujours sur ON (marche). (27 °C à 17 °C - ARRÊT - MARCHE).
- Page 96 CONSIGNES D’UTILISATION Mode de bûches de faible luminosité : Pour verrouiller la fonction de flamme en position d’arrêt, avec les flammes en mode L4, appuyez sur le bouton de commande d’effet de flamme (5) pendant cinq secondes. Les lumières de bûche clignotent plusieurs fois pour indiquer que la fonction de flamme est verrouillée.
- Page 97 CONSIGNES D’UTILISATION Utilisation du mode démo Pour une utilisation dans un magasin de détail. Pour activer le mode démo, appuyez sur le bouton de la minuterie (3) pendant 10 secondes jusqu’à ce que l’afficheur (1) indique « 00 ». Le mode démo désactive le foyer et tous les boutons du panneau de commande avant, sauf le bouton de commande de la flamme.
- Page 98 CONSIGNES D’UTILISATION OUVRIR OPEN FERMER CLOSE AVERTISSEMENTS DE SÉCURITÉ CONCERNANT LES PILES REMARQUE : Ne mélangez pas des piles neuves avec des piles usagées. Ne mélangez pas des piles alcalines, standard (carbone-zinc) ou rechargeables (NiCad, NiMH, etc.). AVERTISSEMENT : N’avalez pas de piles. •...
- Page 99 CONSIGNES D’UTILISATION 1. Le compartiment à piles est situé à l’arrière de la télécommande. 2. Appuyez sur la petite languette vers l’intérieur tout en ouvrant le couvercle du compartiment à piles et retirez les piles épuisées. 3. Insérez deux nouvelles piles AAA (non incluses), en respectant les polarités des piles à...
- Page 100 CONSIGNES D’UTILISATION • Assurez-vous que l’appareil est éteint, débranché et que les éléments chauffants sont froids lorsque vous nettoyez le foyer. • Nettoyez la garniture métallique à l’aide d’un chiffon doux, propre et humide. N’UTILISEZ PAS de poli pour laiton ou de nettoyants ménagers, car ces produits endommageront la garniture métallique.
-
Page 101: Dépannage
RÉSOUDRE LES PROBLÈMES D’ASSEMBLAGE VOUS RENCONTREZ DES PROBLÈMES? LAISSEZ-NOUS VOUS AIDER! NUMÉRO SANS FRAIS : 1 888 670-6684 AVANT DE APPELEZ-NOUS; Si vous avez des questions concernant votre produit ou avez RETOURNER NOUS POUVONS besoin d’une assistance au titre de la garantie, veuillez appeler VOTRE RÉFÉRENCE VOUS AIDER notre service d’assistance à... - Page 102 DÉPANNAGE PROBLÈME CAUSE POSSIBLE MESURE CORRECTIVE Changez les piles de la télécommande. Utilisez la télécommande à un rythme Les piles sont épuisées. lent et mesuré. Appuyez légèrement sur Les boutons ne sont pas les boutons de la télécommande avec un enfoncés.
-
Page 103: Entretien De Votre Article
Exclusion : usure ou bris causés par un usage abusif ou inapproprié. N° DE MODÈLE : 064-4021-4 Fabriqué au Vietnam Importé par Trileaf Distribution Trifeuil Toronto, Canada M4S 2B8... - Page 104 D’INSPIRATION CANADIENNE...
Need help?
Do you have a question about the 064-4021-4 and is the answer not in the manual?
Questions and answers