Clarion VRX935VD Owner's Manual & Installation Manual
Am/fm dvd video / video cd / cd / mp3 player / cd changer controller with 7" lc display
Hide thumbs
Also See for VRX935VD:
- Installation and wire connection manual (12 pages) ,
- Service manual (8 pages) ,
- Owner's manual (2 pages)
Table of Contents
Advertisement
Quick Links
Owner's manual & Installation manual
Mode d'emploi et manuel d'installation
Manual de instrucciones y de instalación
VRX935VD
AM/FM DVD VIDEO / VIDEO CD / CD / MP3
PLAYER / CD CHANGER CONTROLLER WITH 7"
LC DISPLAY
CONTRÔLEUR DE RADIO AM/FM/LECTEUR DVD
VIDÉO /CD VIDÉO/CD/MP3/CHANGEUR CD AVEC
AFFICHEUR À CRISTAUX LIQUIDES DE 7
POUCESl
CONTROLADOR DE RADIO DE AM/FM,
REPRODUCTOR DE DISCOS DVD/VIDEODISCOS
CD/CD/MP3/CAMBIADOR DE DISCOS CD CON
VISUALIZADOR DE CRISTAL LÍQUIDO DE 7"
R
Clarion Co., Ltd.
R
All Rights Reserved. Copyright © 2003: Clarion Co., Ltd.
QC-6810B
Printed in Japan/
Imprimé en Japon
/ Impreso en Japón
2003/1 (D·K)
280-7897-01
Advertisement
Table of Contents

Related Manuals for Clarion VRX935VD


Summary of Contents for Clarion VRX935VD
-
Page 1: Controls
CONTROLADOR DE RADIO DE AM/FM, REPRODUCTOR DE DISCOS DVD/VIDEODISCOS CD/CD/MP3/CAMBIADOR DE DISCOS CD CON VISUALIZADOR DE CRISTAL LÍQUIDO DE 7" Clarion Co., Ltd. All Rights Reserved. Copyright © 2003: Clarion Co., Ltd. QC-6810B Printed in Japan/ Imprimé en Japon / Impreso en Japón 2003/1 (D·K) -
Page 2: Table Of Contents
Thank you for purchasing the Clarion VRX935VD. This owner’s manual is for the VRX935VD. Please read this owner’s manual in its entirety before operating this equipment. After reading this manual, be sure to keep it in a handy place (e.g., glove compartment). -
Page 3: Precautions
: Stereo indication : Repeat indication : Loudness indication : Random indication : Beat-EQ indication VRX935VD 280-7897-01 2. PRECAUTIONS WARNING For your safety, the driver should not watch the TV or operate the controls while driving. Please note that watching and operating the TV while driving are prohibited by law in some countries. -
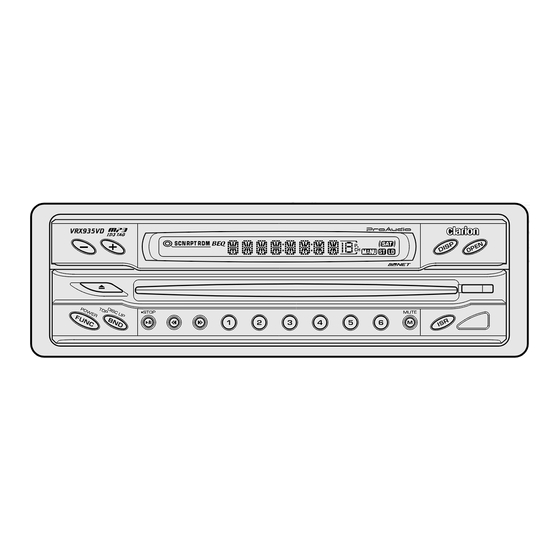
Page 4: Nomenclature
Note: Be sure to unfold this page and refer to the front diagrams as you read each chapter. Remarque: Veuillez déplier cette page et vous référer aux schémas quand vous lisez chaque chapitre. Nota: Cuando lea los capítulos, despliegue esta página y consulte los diagramas. VRX935VD 280-7897-01 4. NOMENCLATURE... -
Page 5: Display
USER TITLE SHINE (user title) DISC TITLE SHINE (disc title) TRACK TITLE Time has come (track title) ARTIST Time has come (artist) DISC TITLE SHINE (disc title) TRACK TITLE Time has come (track title) MOTION/SPRITE pattern display Clock time VRX935VD... -
Page 6: Outline Of Button And Touchkey Operation When The Display Is Open
] key to go to the next menu. 7: Touch the [ ] key to return to the previous menu. 8: This icon [ ] is displayed to indicate that the button should be held down for 1 second or longer. VRX935VD FUNCTION DVD PLAYER... - Page 7 (ADJUST MODE menu) (DVD SETUP menu) STOP CLOCK PARENTAL LEVEL VRX935VD...
- Page 8 (AUDIO MODE menu) (KEY PAD) BASS BOOST DETAIL EQ LEVEL VRX935VD...
- Page 9 10: Use this button during DVD, video CD and MP-3 playback. 11: When the KEY PAD is difficult to view, press the touch key on the right (left) side of the screen to move it to the other side of the screen. VRX935VD...
-
Page 10: Inserting The Batteries
• Do not short-circuit, disassemble or heat batteries. • Do not dispose of batteries into fire or flames. • Dispose of spent batteries properly. VRX935VD Signal transmitter Operating range: 30˚ in all directions [ CeNET ] [ MUTE ] [ VOLUME ] [ P.TIME ]... -
Page 11: Functions Of Remote Control Unit Buttons
If you want to select a menu after the SETUP menu is displayed, touch the operation keys on the menu screen. [TITLE] button • Press to display the title screen on DVD video discs. Some discs do not display the title screen. VRX935VD... - Page 12 [ANGLE] button • Press to turn the ANGLE function on and off in DVD video mode. (This button is available only on multiple angles DVDs.) VRX935VD [SLOW] button • Press to perform slow playback in DVD video or video CD mode.
-
Page 13: Dcp
When you attach the DCP, the panel is to come out to its original position after a warning sound. Note: • If the DCP is dirty, wipe off the dirt with a soft, dry cloth only. VRX935VD... -
Page 14: Cautions On Handling
VRX935VD • Do not place anything on the display when the panel is tilted. • The remote controller may not work if the re- mote control sensor is exposed to direct sun- light. -
Page 15: Dvd Video System
This low sound compression format delivers a large amount of data and makes it possible to reproduce a high quality sound. Menu screens Menus can be called up during DVD video play- back to perform menu setting. • Example showing menu display VRX935VD... -
Page 16: About The Registered Marks Etc
“1”. The DVD video region number is marked on the disc jacket as shown below. VRX935VD TV color system This DVD player plays NTSC discs and PAL discs only and cannot be used for playback of SECAM discs. -
Page 17: Turning On And Off The Power
• For CD, MD and TV, some special characters of the title will not be displayed on the Information Panel of the DCP. In this case, those characters will only be left blank. CAUTION MAIN Display SUB Display Clock Time Display MAIN Display VRX935VD... - Page 18 The unit enters the same display mode as the dis- play was turned off the last time. VRX935VD Adjusting the angel, etc. of the liquid crystal panel The angle of the liquid crystal panel or protrud-...
- Page 19 FREQ. : 50Hz/80Hz/120Hz (The factory de- fault setting is “50”) : 1/1.25/1.5/2 (The factory default setting is “1”) 5. When the adjustment is complete, touch the [RTN] key several times or press the [A-M] button to return to the previous mode. VRX935VD...
- Page 20 2. Touch the [BAL/FAD] key. 3. Touch the [w] or [z] key to adjust to the fader level. VRX935VD The factory default setting is “0”. (Adjustment range: front 13 to rear 13) [w] key : Emphasized the sound from the front speakers.
-
Page 21: Listening To The Radio
3. Press the [a] or [d] button to tune in the desired station. When the panel is open, the same operation is also available by using the [a] or [d] but- ton in the panel. FM1... VRX935VD... -
Page 22: Manual Tuning
[PS] key. To cancel the KEY PAD display, press the [KEY PAD] button or touch the [OFF] key. VRX935VD Manual tuning There are 2 ways available: Quick tuning and step tuning. When you are in the step tuning mode, the fre- quency changes one step at a time. -
Page 23: Manual Memory
Recalling a station with ISR 1. In any mode, press [ISR] button to turn on the radio function and tune the selected radio station. “ISR” appears in the display. Press [ISR] button again to return to the previous mode. VRX935VD... -
Page 24: Dvd Video Player Operations
The factory default setting is “N PS”. The color of the selected item changes. VRX935VD When watching through a conventional type of the rear view monitor (4:3) • N PS : The leftmost and rightmost areas of the screen are cut off. -
Page 25: Setting Up The Parental Level
3. Touch the ten-key(0 to 9) to input a 4-digit password, and touch the [ENT] key. The factory default setting of the password is “0000”. 4. Touch the [w] or [z] key to select level 1 to 8, or 0 (no parental). The factory default setting is “8”. VRX935VD... -
Page 26: Dvd Video Player Operations
Notes: • For your safety, the VRX935VD has a safety func- tion which turns off the picture when the car is moving, so only the audio can be heard. The pic- ture can only be watched when the car is stopped and the parking break is applied. -
Page 27: Ejecting A Disc
[ANGLE] key. • In video CD mode: To turn on/off the play time indication, touch the [P.TIME] key. To switch the playtime, touch the [P.TIME] key for 1 second or longer. To perform track repeat, touch the [T.RPT] key. VRX935VD... -
Page 28: Dvd Video Operations
The DVD menus appears. The displayed contents may differ, depending on the DVD software. • Example showing menu display VRX935VD 2. To cancel to the DVD menu, press the [MENU] button again. To select the menu contents, press the [KEY PAD] button and use either the “Cross KEY... - Page 29 Depending on the disc, the menu may ap- pear again after scan playback of all chap- ters within the title. 3. Touch the [CHAPTER SCAN] key again, and scan playback is turned off. VRX935VD...
-
Page 30: Top Function
On discs in which two or more audios or audio languages have been recorded, you can switch among the audio languages during playback. VRX935VD 1. Display the sub KEY PAD using the proce- dures described in the section “KEY PAD operation”. -
Page 31: Switching Angles
The displayed contents may differ, depending on the V-CD software. • Example showing menu display To select the menu contents, press the [KEY PAD] button and use either the “Cross KEY PAD” or the “Ten KEY PAD” according to the disc contents menu. VRX935VD... - Page 32 2 seconds, playback starts from the beginning of the previous track. This operation cannot be performed on some discs with PBC. VRX935VD Fast forward and fast backward 1. Press and hold the [a] button or [d] button during playback.
-
Page 33: Pausing Playback
This unit supports only CD TEXT in English. Also, some character data may not be reproduced prop- erly on the display. Pausing playback 1. Press the [s] button during playback. Playback pauses. 2. To resume playback, press the [s] button, and playback resumes. VRX935VD... -
Page 34: Random Playback
10 seconds for each. 1. Touch the screen and touch the [SUB MODE] key. VRX935VD 2. Touch the [TRACK SCAN] key, then touch the [RTN] key. Touch the [TRACK SCAN] key again, and scan playback is turned off. - Page 35 • Press the [a] button, and playback starts from the beginning of the current track. When this button is pressed again within about 2 seconds, playback starts from the beginning of the previous track. This operation skips the track over the folder. VRX935VD...
- Page 36 (Track scan playback) About file scan playback This operation plays back all files recorded on the disc, about 10 seconds for each. VRX935VD 1. Touch the screen and touch the [SUB MODE] key. 2. Touch the [TRACK SCAN] key, then touch the [RTN] key.
- Page 37 Title, artist and album title are displayed. Press the [DISP] button again to return to the previous mode. In case of an MP3 file without ID3-TAG data, “NO ID3 TAG DATA” appears in the display then return to the STANDARD screen. VRX935VD...
-
Page 38: Visual Operations
Switching to the VISUAL mode Notes: • For your safety, the VRX935VD has a safety func- tion which turns off the picture when the car is moving, so only the audio can be heard. The pic- ture can only be watched when the car is stopped and the parking break is applied. - Page 39 • When 2-ZONE or 3-ZONE is used, the sound from an external device (VTR, TV game console, etc.) can only be heard from headphones con- nected to the external device. • A rear monitor is a separately sold accessory. VRX935VD...
- Page 40 3. Touch the [RTN] key or press the [ADJ] but- ton. 4. To cancel the monitor lock, press [ADJ] but- ton, touch the [REAR MONI LOCK] key and the [OFF] key. VRX935VD 2 ZONE Rear monitor Visual 2 connection lock...
-
Page 41: Cd/Md Changer Operations
2. Each time you press and hold the [DISP] but- ton for 1 second or longer, the display toggles among the disc title, the track title or the artist titles, user title. The selected title scrolls once. VRX935VD... - Page 42 MD. When the panel is open: 1. Touch the screen or press the [LIST] button. VRX935VD 2. Each of the [DIRECT] key corresponds to an MD loaded into the MD changer. Touch the [DISC SELECT] key in the display, the [DIRECT] key (1 to 6) appears in the dis- play.
- Page 43 Press the [DIRECT] button (1 to 6) with the same number that the MD playing. If an MD is not loaded in a slot of the MD changer, pressing the [DIRECT] button corre- sponding to its disc number is invalid. VRX935VD...
-
Page 44: Disc Scan Play
3. To cancel repeat play, touch the [TRACK RE- PEAT] key. “TRACK REPEAT” goes off from the display and the unit returns to normal play. VRX935VD Disc repeat play After all tracks in the current disc have been played, the disc repeat play automatically re- plays the current disc over from the first track. -
Page 45: Dvd Changer Operations
Watching TV Notes: • For your safety, the VRX935VD has a safety func- tion which turns off the picture when the car is moving, so only the audio can be heard. The pic- ture can only be watched when the car is stopped and the parking break is applied. - Page 46 [PS] key. To cancel the KEY PAD display, press the [KEY PAD] button or touch the [OFF] key. VRX935VD Manual tuning There are 2 ways available: Quick tuning and step tuning. When you are in the step tuning mode, the frequency changes one step at a time.
-
Page 47: Manual Memory
3. Touch the [ON] key or [OFF] key to set the selected reception setting. Sets reception emphasizing the visual. OFF: Sets the diver setting to OFF. 4. Press the [ADJ] button or touch the [RTN] key to return to the previous mode. VRX935VD... -
Page 48: Sirius Operations
It’s radio like you’ve never heard before. So Get Sirius and Listen Up! For more informa- tion, visit siriusradio.com. VRX935VD Selecting Sirius Radio modes Press the [FUNC] button to select the Sirius mode. -
Page 49: Displaying Radio Text
SR1, 6-SR2 and 6-SR3). This allows you to se- lect your favorite SIRIUS stations and store them in memory for later recall. Using the [DIRECT] key 1. Press the [LIST] button. 2. Press the [BAND] button or touch the [BAND] key to select the desired band. VRX935VD... - Page 50 3. Press the [a] or [d] button to tune in a sta- tion. This starts seek tuning and broadcast channels that meet the specified category are selected. VRX935VD Notes: • When the category selection mode is entered, the category of the last received channel is displayed first.
-
Page 51: Entering Titles
Radio station or a TV station for which you want to enter the title. 3. Touch the screen or press the [LIST] button, the MENU screen appears. 30 titles 15 titles 60 titles 50 titles VRX935VD... -
Page 52: Adjusting The Dimmer Level
SELECT] key to change over to a list display of discs 7 to 12. 3. Touch the [RTN] key again to return to the previous mode. VRX935VD Setting the auto dimmer The brightness of the color LCD display is ad- justed automatically in proportion to the sur- rounding light. -
Page 53: Other Functions
This unit requires special wiring to mute the au- dio signal automatically when a cellular tele- phone rings in the car. This function is not compatible with all cellular telepones. Contact your local authorized Clarion dealer for information on proper installation and compatibility. VRX935VD... -
Page 54: Ch Surround Decoder Operations
• The phase of the “SUB WOOFER” is re- versed in the ON- setting. The default value is “ON+”. VRX935VD PL II CONTROL This function is available only when the MUSIC MODE is selected for Dolby PL II. For setup de- tails, see “Selecting the Dolby PL II (Dolby Pro... - Page 55 [Å] key : emphasized the sound from the left speakers. [Î] key : emphasized the sound from the right speakers. 3. When the adjustment is complete, touch the [RTN] key or press the [A-M] button to return to the STANDARD screen. VRX935VD...
- Page 56 2. Touch the [P.EQ] key to show the P.EQ ad- justing display. 3. Touch the key for the desirable type to select it. The P.EQ adjustment contents are as fol- lows: VRX935VD SIGNAL The factory default setting is “P.NOISE”. This function selects [P. NOISE] or [MUSIC]. SPEAKER SELECT The factory default setting is “FRONT”.
-
Page 57: In Case Of Difficulty
Replace with a compact disc with no scratches. Let dry for about 1 hour with the power on. Release the view limitation or change the parental level. See the subsection “Setting up the parental level”. Measure Main Unit The Reset button VRX935VD... - Page 58 There are red, green, and blue points in the dis- play. VRX935VD Cause Check that the parking brake is applied. Adjust the brightness properly. The temperature inside the vehicle may be 0˚C or less. Set to an appropriate temperature (25˚C or so) and check it again.
-
Page 59: Error Displays
MD changer. This is a failure of MD changer’s mecha- nism and consult your store of purchase. Replace with a non-scratched, non- warped-disc. Eject the disc then reload it properly. Load a pre-recorded MD in the MD changer. Measure VRX935VD... -
Page 60: Specifications
Display method: Transmission type TN liquid crystal display Drive method: TFT (thin-film transistor) active matrix driving Pixels: 336,960 (1440 234) VRX935VD General Power source voltage: 14.4 V DC (10.8 to 15.6 V allowable) Ground: Negative Current consumption: 4.0 A (1 W)
Need help?
Do you have a question about the VRX935VD and is the answer not in the manual?
Questions and answers