Table of Contents
Advertisement
Advertisement
Table of Contents

Related Manuals for Geeetech Mizar S


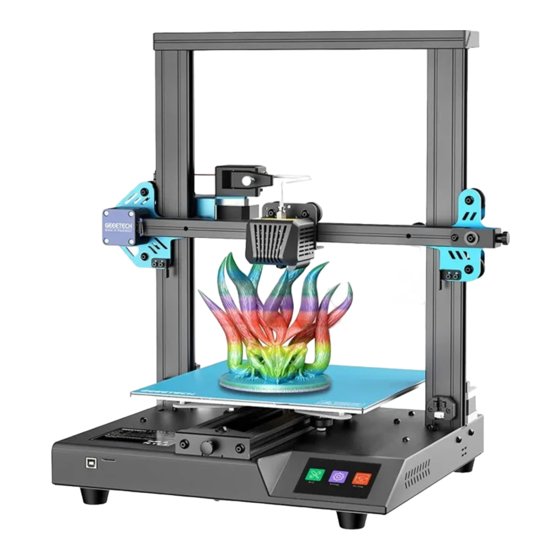
Summary of Contents for Geeetech Mizar S
- Page 1 Mizar USER MANUAL V1.0 Shenzhen Getech Technology Co., Ltd. www.geeetech.com...
- Page 2 Please be advised of the following terms (the “Terms”) regarding this User Manual (this “Manual”): All information in this Manual is subject to change at any time without notice and is provided for convenience purposes only. GEEETECH reserves the right to modify or revise this Manual in its sole discretion and at any time. You agree to be bound by any modifications and/or revisions. Contact the GEEETECH Support Team for up-to-date information.
-
Page 3: Table Of Contents
CONTENTS Warm Tips Start Printing Parameter Adjustment After Printing Starts Packing List The Whole Machine Structure Inspection Pause Printing Check Power Supply Break-Resuming Machine Components Filament Detector Assemble the Machine Slicing Software Connect Cables Online Printing Touch Screen UI Introduction Daily Maintenance and Usage Suggestions Hot Bed Leveling Wiring diagram &... -
Page 4: Warm Tips
Mizar S is not leveled at the factory. Please level the hot bed before using Mizar S, otherwise Mizar S will not be able to print. Please refer to the relevant chapters of the manual to complete the leveling of the hot bed. -
Page 5: Packing List
PACKING LIST Power Cord*1&Shovel*1 Teflon Tube & Zip Ties*1 Filament Holder*1 USB Cable*1 Tool Kit User manual*1 Spare nozzle*2 Service Card*1 Screw bag Micro SD Hot Bed Kit*1 Gantry Kit*1 Belt Tensioner*2 Y-axis Limit Switch*1 Test Filament*1... -
Page 6: The Whole Machine Structure Inspection
THE WHOLE MACHINE STRUCTURE INSPECTION Unpacking inspection After opening the Mizar S package, first check whether the accessories are missing, then check whether the hot end and the hot bed are loose (the hot end and the hot bed may be loose during transportation), and finally check whether the power supply voltage is correct. -
Page 7: Check Power Supply
CHECK POWER SUPPLY MIZAR S power supply has two voltage ranges of 230V and 115V. Please select the voltage range according to the country or region where you are located and ensure that the voltage range is in the correct position. Otherwise, the power supply will be damaged. Please make sure, then power on the printer. -
Page 8: Machine Components
MACHINE COMPONENTS Filament Holder Extruder Filament Detector Hotend X-axis Belt Tensioner Hotbed Power Touch Screen Switch Y-axis belt Tensioner Y-axis Limit Switch 115V/230V Power Supply... -
Page 9: Assemble The Machine
ASSEMBLE THE MACHINE Find out the hot bed kit and gantry kit, placed them on a flat workbench. Find the Y-axis limit switch kit and M3*16 screws, assemble the Y-axis limit switch according to the picture below. Totally of 2 M3*16 screws are needed. - Page 10 Find M3*6 screw and T-nut, fix the filament holder to the top of the gantry as the picture below shown. SCREWS M3*6 STEP 3 T-NUT Insert the other end of the Teflon tube on the hot end into the extruder. STEP 1 STEP 2...
-
Page 11: Connect Cables
CONNECT CABLES Each cable of the printer has a text label on the end. Please connect the cables correctly according to the following picture. X_ES E1_M Z1_ES Z2_ES Z1_M Z2_M Y_ES BACK FRONT... -
Page 12: Touch Screen Ui Introduction
TOUCH SCREEN UI INTRODUCTION All the grey icons in the UI indicates that the operation is unavailable or the corresponding function is unavailable. Tool menu. Main page. Tool Preheat. 2. 1 Tool: mainly for setting the related printing parameters. Settings: mainly for setting buzzer switch, language, filament detector,lighting LED and other functions. - Page 13 PLA: tap to preheat PLA filament. Please note that even if you exit this page after the preheating starts, the printer will always be in the preheating state. Decrease temperature. If you want to turn off the preheating, please re-enter the page and click the "Cool"...
- Page 14 Home. Load: for loading filament. Unload: for draw back filament. There is no next-level menu for this button. If you press it, the X, Y and Z axis will return home at the same time. Move X/Y/Z axis. AutoLevel. Move AutoLevel This interface is used to check whether the X/Y/Z axis is abnormal.
- Page 15 Manual leveling of the hot bed requires the user to manually measure each measurement reference point. Unlike the traditional adjustment nut of the hot bed, Mizar S uses the height of the nozzle to adjust the nozzle Runout: It is used to turn on/off the filament detector function.
- Page 16 Buzzer: Used to turn on/off touch screen button feedback sound, default turn on. Off/White/Color: Used to control the color and off of the LED on the hot end, there are three states: off LED, white light, colored breathing light, the default color is colored breathing light state.Each time the printer is _gtm _0w1 _QW1_...
-
Page 17: Hotbed Leveling
Pause the current printing. HOTBED LEVELING Mizar S does not level the hot bed by default when leaving the factory. After assembling the printer, the user must level the hot bed before printing, otherwise the system will prohibit the printing operation. Mizar S has two kinds of leveling method: auto-leveling and manual leveling. Either of the two modes enables precise printing. Due to the convenience and speed of the automatic mode, we advise you to use the auto-level mode. - Page 18 30m-.g V60-.g Cancel Hot bed leveled After the leveling sensor is calibrated, Mizar S will automatically start heating the nozzle and hot bed, and automatically start the hot bed leveling after the nozzle and hot bed are heated, During _gtm...
- Page 19 After leveling is completed, you can start using the printer. Abnormal Failure of auto-level elimination: Please check whether the connection between the main board and the hot end is normal or broken. Remove the hot end cover and check whether the internal wiring is loose or broken.
- Page 20 Click the "Confirm" icon and the hot end will move to the lower left There are 9 points in total for manual leveling. After the measurement corner of the hot bed. Now,you can start manual leveling of the hot bed. of the 9th point, click the icon of "Confirm"...
-
Page 21: Loading Filament
LOADING FILAMENT Click "Tool"→"Autolevel"→"Z-offset" icon in turn to enter the Z-offset setting menu (when using the 3D printer for the first time, the "Z-offset" icon on the Autolevel page is gray, indicating that it is Click "Tool" → "Change" to enter the exchange filament inoperable, indicating use the user did not enter the "Leveling"... -
Page 22: Start Printing
Insert the micro SD print card into the printer card slot. Tip: Before inserting the filament, please straighten the front end of the filament by 5cm and do not bend it, otherwise the filament will not pass through the extruder smoothly. When you see the nozzle has filament extrusion, it means that loading filament is completed. -
Page 23: Parameter Adjustment After Printing Starts
Runout: This is used to turn on/off the filament detector function. When the function is turned on, Mizar S will automatically suspend the current printing task if the filament is broken or used up in the printing process. After the filament is replaced, the suspended printing task can be resumed on the printing status interface. -
Page 24: Pause Printing
FILAMENT DETECTOR Mizar S has a filament detection sensor. During printing process, if filament breaks or runs out, the system will automatically suspend the current printing work to prevent the printing failure caused by lack of filament. Users only need to replace the filament again to continue the suspended printing task. -
Page 25: Slicing Software
SLICING SOFTWARE Slicing software is a software tool that converts 3d models of objects into G-code files that can be recognized by printers. Mizar S only supports files in G-code format. If you want to use 3D printer to print an object, you need to convert the 3D model of the object into G-code through slicing software. -
Page 26: Daily Maintenance And Usage Suggestions
Open the slicing software, set the port and baud rate of the printer. The baud rate of the serial port of Mizar S is 250000. Please fill it correctly in the slicing software, otherwise the slicing software may fail to connect to the printer. -
Page 27: Faq
FAQ (FREQUENTLY ASKED QUESTIONS) Abnormal Extrusion. The filament is tangled. The nozzle temp is too low to reach the melting temperature required. There is carbonized residue inside the nozzle. Please replace it with the spare nozzle. Insufficient heat dissipation of radiator of the Extruder head causes the filament in the tube to melt in advance and the extrusion strength is insufficient. - Page 28 Layer Shift The printing speed is too fast. Please slow it down. The belt of X or Y axis is too loose. Please tighten it. The X or Y axis synchronization wheel is not fixed firmly. Please adjust the eccentric nuts. Print Stopped USB printing: the signal is interfered.
-
Page 29: Wiring Diagram & Machine Parameters
WIRING DIAGRAM & MACHINE PARAMETERS Mainboard Wiring Diagram... - Page 30 Hotend Wiring Diagram...
- Page 31 Machine Parameters Power Input Printing Technology AC 115/230V, 50/60Hz 0.1~0.2mm Layer Thickness Power Output DC24V/14.6A, 350W 1.75mm PLA/ABS / PLA / Print Size 255*255*260mm Printing Material wood-polymer/PVA/HIPS/PETG, etc Low Speed: 10 150mm/s TF Card, USB Printing Speed Medium Speed: 150 300mm/s Connectivity High Speed: >300mm/s...
- Page 32 Shenzhen Getech Technology CO., LTD. Room 103, Building 8, Yungu II, Pingshan 1st Road, Taoyuan Street, Nanshan District, Shenzhen City, Guangdong Province, China Website: https://www.geeetech.com...
Need help?
Do you have a question about the Mizar S and is the answer not in the manual?
Questions and answers
Какое напряжение нагревательного элемента головки?
The heating element voltage for the Geeetech Mizar S is 24 Volts.
This answer is automatically generated