Table of Contents
Advertisement
Advertisement
Table of Contents

Related Manuals for Geeetech Rostock 301


Summary of Contents for Geeetech Rostock 301
- Page 1 Geeetech Rostock 301 3D Printer —— —— USER MANUAL...
-
Page 2: Terms
All information in this Manual is subject to change at any time without notice and is provided for convenience purposes only. Geeetech reserves the right to modify or revise this Manual in its sole discretion and at any time. You agree to be bound by any modifications and/or revisions. Contact the Geeetech Support Team for up-to-date information. -
Page 3: Table Of Contents
Content TERMS ...................................... 2 DISCLAIMERS ..................................2 SAFETY INSTRUCTION ..............................4 ABOUT ROSTOCK 301 ................................. 1 1. Check Power Supply ................................4 2. Software Resources ................................4 2.1 Repetier-Host ................................4 2.3 Firmware resources ..............................4 3 USB Driver Installation ................................5 USB Driver Installation for Win7 OS .......................... -
Page 4: Safety Instruction
Disconnect your Rostock 301 printer from the power supply and computer when not in use. Do not print using materials that have not been approved by GEEETECH for use with the Rostock 301. Only operate your Rostock 301 printer in a well-ventilated space away from moisture and heat sources... -
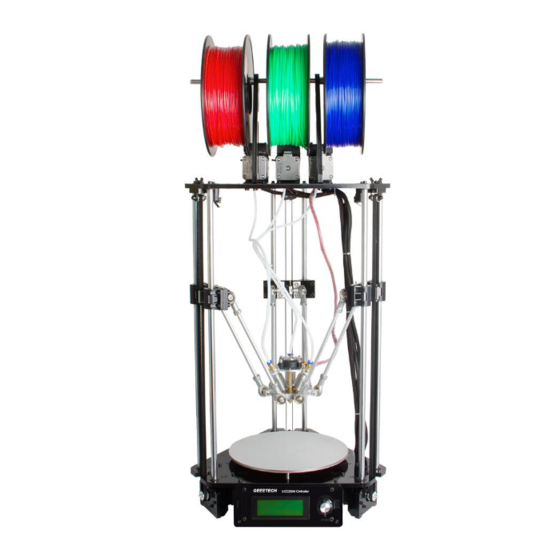
Page 5: About Rostock 301
3D design files into instructions for the Rostock 301. Then transfer those instructions to the Rostock 301 via USB drive, USB cable. The Rostock 301 will melt filament such as PLA or ABS and squeeze it out onto the build plate in thin lines to build your object layer by layer. This method of 3D printing is called fused deposition modeling (FDM). - Page 6 SHENZHEN GETECH TECHNOLOGY CO,.LTD...
- Page 7 SHENZHEN GETECH TECHNOLOGY CO,.LTD...
-
Page 8: Check Power Supply
SHENZHEN GETECH TECHNOLOGY CO,.LTD 1. Check Power Supply Rostock 301 uses DC12V, 29A power supply, choose 110V or 220V according to national power using standard. Please make sure that the voltage of the power supply conforms to current national power using standard. -
Page 9: Usb Driver Installation
USB Driver Installation for Win7 OS Power the Rostock 301 up and connect it to computer with the USB cable, the driver will be installed automatically. After installation, please enter Device manager and find the USB Serial Port which is the communication port for the printer and computer. -
Page 10: Set Up Repetier Host
The next step should be to configure your printer so you can connect your computer with the host. Open Repetier Host. When you start Repetier Host for the first time, you need to set up parameters for Rostock 301. Click the Printer Settings on the top right corner, you will be presented with the following window. -
Page 11: Create New Printer
SHENZHEN GETECH TECHNOLOGY CO,.LTD 4.1 Create New Printer At the top you see a drop down box, with the currently selected printer. At the start you have only the default printer. To create a new printer you only need to change the printer name and press “Apply”. The new printer will start with the same settings as the last selected printer. -
Page 12: Connection
SHENZHEN GETECH TECHNOLOGY CO,.LTD There are six tags in Printer settings in total. Detailed configurations of the 4 relevant tags are as follow. 4.2 Connection In this first tab, you set how to connect with your printer. In “Port” you select the port, where your printer is connected. - Page 13 SHENZHEN GETECH TECHNOLOGY CO,.LTD Port:Get the printer connected to the port of computer, which is corresponding to the USB Serial Port in the Device manager. Baud Rate: Corresponding to the Baud Rate in firmware. Generally it is set as 115200.
-
Page 14: Printer
SHENZHEN GETECH TECHNOLOGY CO,.LTD 4.3 Printer The second tab defines important behavior you want. The Travel feed rate and Z-axis feed rate are used, when you move the extruder with the manual controls. The temperatures are set in the manual controls as start values. -
Page 15: Printer Shape
SHENZHEN GETECH TECHNOLOGY CO,.LTD manual control. The max volume per second defines the maximum amount of filament in mm³, the extruder can melt per second. Number of the extruder: 3 Number of the extruder: 0.4mm *We use the 3-in-1-out hot end, so we need to check the “printer as Mixing extruder” 4.5 Printer shape The “Printer Shape”... - Page 16 Home Y:0 Home Z:Max Printable Radius:100mm Printable Height:220mm (In case the motor direction is wrong, we’d better set the print height as 220mm to avoid clash of the hotend to the platform) So far the setting of Rostock 301 is finished.
-
Page 17: Connect The Printer
SHENZHEN GETECH TECHNOLOGY CO,.LTD 4.6 Connect the Printer After setting, click the connect button on the top left corner of main interface. When the button turns green, the connection is successful. -
Page 18: Function Testing
SHENZHEN GETECH TECHNOLOGY CO,.LTD 5. Function Testing The firmware of Rostock 301 is already uploaded based on Windows 7 operating system, and we have done debugging to make sure that every part of it can work normally. However, there may be unpredictable factors during transportation . - Page 19 SHENZHEN GETECH TECHNOLOGY CO,.LTD Right position of Homing:...
- Page 20 SHENZHEN GETECH TECHNOLOGY CO,.LTD Note: origin point is the corner of the platform when printing. So when the printer is at home position, the coordinates of X/Y axis are: X=0mm, Y=0mm,Z=220mm. As a result:...
- Page 21 SHENZHEN GETECH TECHNOLOGY CO,.LTD 图片 Tips: In manual control, the high-light part of the panel stands for the current selected direction, and it moves 1mm every click. You can also choose to move 10mm or 50mm every click, but here we choose in order to avoid possible incorrect operation.
- Page 22 SHENZHEN GETECH TECHNOLOGY CO,.LTD If the motor direction is reverse, you can alter the direction in LCD. You can follow the steps below Control>printer settings>X/Y/Z DIR Scroll down to Motor Dir. If X axis direction is reversed, you can choose the X motor Dir, press the knob,...
- Page 23 SHENZHEN GETECH TECHNOLOGY CO,.LTD it will be changed from True to False. Vice versa. *After the modification, do remember to go back to control menu and choose Store memory.
- Page 24 SHENZHEN GETECH TECHNOLOGY CO,.LTD 5.1.2 Heating Test Click the heating button of the hot bed and the extruder . When the slash disappeared as shown below, it indicates the heating is ongoing and you can see the number rising up. Meanwhile you can see the temperature at the bottom status bar of Repetier Host.
-
Page 25: Lcd Controller Test
SHENZHEN GETECH TECHNOLOGY CO,.LTD Heat up the extruder. 1. While wait for the extruder to heat, cut the end of your filament to create a clean edge. 2. When the extruder is fully heated, grasp the top of the extruder assembly and push the free end of filament into the loading tube. - Page 26 SHENZHEN GETECH TECHNOLOGY CO,.LTD LCD homepage: 1. Extruder temperature: current temperature/target temperature 2. Hotbed temperature: current temperature/target temperature 3. Current feeding rate of X/Y/Z 4. Current height of print head 5. Current printing speed rate: current printing rate 6. Current rate of printing process Note: Rotate the knob during printing will change the federate in real time.
- Page 27 SHENZHEN GETECH TECHNOLOGY CO,.LTD Main functions of Prepare menu: 1. Disable steppers: unlock the motor so that you can move them freely. 2. Auto home: automatically homing of each axis. 3. Preheat PLA: manually preheat the hotbed and the extruder before printing PLA. 4.
- Page 28 SHENZHEN GETECH TECHNOLOGY CO,.LTD...
- Page 29 SHENZHEN GETECH TECHNOLOGY CO,.LTD Main functions of Control menu: 1. Temperature: You can change the temperature of the hotbed and the extruder in real time in printing process. Meanwhile you can set the temperature of Pre-heat PLA and Pre-heat ABS. 2.
- Page 30 SHENZHEN GETECH TECHNOLOGY CO,.LTD For other detailed functions please read the following introduction of function tests. 5.2.2 Use LCD for Motor Test After understanding the functions of LCD, press the knob on LCD to enter the sub-menu, and choose Prepare:...
- Page 31 SHENZHEN GETECH TECHNOLOGY CO,.LTD Choose Auto home in menu to do home operation:...
- Page 32 SHENZHEN GETECH TECHNOLOGY CO,.LTD If you want to move the motor, choose Move axis: Choose Move 1mm: Note: only 10mm and 1mm are available for the printer, and 0.1mm invalid. We recommend you to use move 1mm to test each axis.
- Page 33 SHENZHEN GETECH TECHNOLOGY CO,.LTD Choose the axis you need to move: Move X/Y/Z to test the 3 axis. Move E0/E1/E2 to test the extruder. Rotating the knob can make each axis move.
-
Page 34: Build Platform Leveling
SHENZHEN GETECH TECHNOLOGY CO,.LTD After testing each axis, if you want to unlock the motors, choose Prepare>Disable steppers: 6. Build platform leveling Before printing, please check whether the moving path of the extruder is parallel with the heatbed or not, which is called leveling. - Page 35 SHENZHEN GETECH TECHNOLOGY CO,.LTD Move the nozzle to the other front screw and adjust the screw until you get the same amount of friction as you felt with the first one. Then adjust the back screw the same way. Once you have adjusted each of the three screws, go back and check each one again, since adjusting one screw can affect another.
-
Page 36: Slic3R Setting
SHENZHEN GETECH TECHNOLOGY CO,.LTD 7 Slic3r Setting So far we can begin printing. But in order to achieve better effect, we need set the slicing parameters such as the diameter of the filament, speed, layer height. Open the slicing software, slic3r, which comes with Repetier host. - Page 37 SHENZHEN GETECH TECHNOLOGY CO,.LTD The following interface will appear:...
-
Page 38: Printing Setting
SHENZHEN GETECH TECHNOLOGY CO,.LTD 7.1 Printing Setting Set the layer height and height of the first layer in the option of Print settings. The layer height of Rostock 301 can be between 0.05-0.3mm. Considering of precision and speed, 0.2mm is the most appropriate. Set the first layer height as 0.3mm by default. -
Page 39: Filament Setting
SHENZHEN GETECH TECHNOLOGY CO,.LTD You can set the printing speed here: 7.2 Filament Setting Set the filament diameter and printing temperature in the tab of Filament settings. Here we use 1.75mm PLA. Usually the temperature of the print head is 195-210℃, the hot bed is 60-70℃. Here we set them as 200℃ and 65℃. -
Page 40: Printer Setting
SHENZHEN GETECH TECHNOLOGY CO,.LTD actual temperature please refer to the data from manufacture of filament) and 90-110℃ for the hot bed. You need to use glue on the hot bed when printing with ABS, which can effectively help the first layer stick to the platform and avoid warping. - Page 41 SHENZHEN GETECH TECHNOLOGY CO,.LTD Hot bed shape:...
- Page 42 SHENZHEN GETECH TECHNOLOGY CO,.LTD Number of extruder: 1...
-
Page 43: Other Parameters
SHENZHEN GETECH TECHNOLOGY CO,.LTD At the same time, set the diameter of the print head as 0.4mm. (input the actual diameter of your printer) After the setting, do remember to save the three main settings separately. 7.4 Other parameters Except for above settings, parameters like speed are also important to the printing effect, which requires your long time using experience of 3D printing. - Page 44 SHENZHEN GETECH TECHNOLOGY CO,.LTD Note: the configuration uses 1.75mm PLA filament and 0.4mm nozzle diameter, and it slices with slic3r engine which is built-in in Repetier host 1.6.0. Open slic3r>File>Load Config: Direct to the file Rostock 301 PLA config.ini and open it.
- Page 45 SHENZHEN GETECH TECHNOLOGY CO,.LTD After you import the config.ini file Click the save button to rename and save. Click to save in the tab of Print Settings: Note: all the three settings need to be saved in turn!
- Page 46 SHENZHEN GETECH TECHNOLOGY CO,.LTD Click to save in the tab of Filament Settings:...
- Page 47 SHENZHEN GETECH TECHNOLOGY CO,.LTD...
- Page 48 SHENZHEN GETECH TECHNOLOGY CO,.LTD Click to save in the tab of Printer Settings:...
-
Page 49: Start Printing
So far the preparation work is finished. Next step is to load model, slicing and printing. The file format of the model file for 3D printer is usually .stl. Rostock 301 supports following file format: STL, 3ds, obj, mf, dae, G-code. You can download models on the internet for printing. Of course you can also design your own creative models for printing. -
Page 50: Slicing
SHENZHEN GETECH TECHNOLOGY CO,.LTD 8.2 Slicing You can use the following button to enlarge, shrink or rotate it. - Page 51 SHENZHEN GETECH TECHNOLOGY CO,.LTD After setting the size, choose the slicing parameters which were imported before in slicer window, and click slicing. Now the .gcode file which can be recognized by the printer is generated.
- Page 52 SHENZHEN GETECH TECHNOLOGY CO,.LTD click printing button to start printing.
-
Page 53: Stand-Alone Printing With Sd Card
SHENZHEN GETECH TECHNOLOGY CO,.LTD 8.3 Stand-alone Printing with SD card If you want to use SD card to print, we can save g.code file into SD card for printing. Note: the printer can only recognize .gcode file, and it must be put in the root directory of the SD card. 8.3.1 Save Click Save to File, and choose save button in the dialog. - Page 54 SHENZHEN GETECH TECHNOLOGY CO,.LTD 8.3.3 Printing Insert the SD card into the printer, choose corresponding .gcode file to print. Press the knob on LCD, enter the main menu, and choose the SD card.
- Page 55 SHENZHEN GETECH TECHNOLOGY CO,.LTD Choose corresponding g.code file to begin printing. It will automatically print after heating is finished.
-
Page 56: Introduction Of Mixer
SHENZHEN GETECH TECHNOLOGY CO,.LTD 9. Introduction of Mixer Mixer is used to adjust the mixing proportion of two kinds of filaments in order to realize the printing effect of different colors and blending colors. The menu in Mixer is shown as below: Prepare: used for returning to upper Prepare Menu Filament 0: displaying current proportion of Filament 0. - Page 57 SHENZHEN GETECH TECHNOLOGY CO,.LTD The sum of the proportion of Filament 0, Filament 1 and Filament 2 is 100%. If you manually adjust either of the two values, system will automatically work out the other value. The proportion will not change unless you readjusting it or choosing template again.
- Page 58 SHENZHEN GETECH TECHNOLOGY CO,.LTD Step2: Increase F1 to 7%, now the proportion will be F0/ F1/ F 2=80%/ 7%/ 13%. The feeding proportion will change immediately; you do not need to store memory.
-
Page 59: Print With Alternating Color
9.1 print with alternating color You can use Rostock 301 to print alternating color like using other printers with multi extruders. Please calculate the printing time in advance, and adjust the proportion of F0/F1/F2 when it is time to change color. -
Page 60: Gradient Color
SHENZHEN GETECH TECHNOLOGY CO,.LTD 9.3 Gradient color This printing model only applies to F0 and F1. When you choose this model, the proportion of F2 will be 0% as default. Custom template allows user to set the parameters of gradient color printing. It provides six customizable templates for user to set and they are named as Custom1 to Custom6. - Page 61 SHENZHEN GETECH TECHNOLOGY CO,.LTD 2. According to the work principle of Mixer, the sum feeding rate of Filament0 and Filament1 is 100%. After Filament0 is set, the system will automatically calculate the corresponding feeding rate of Filament1. 3. Start percent and end percent can be set at will. The sum of them is not always 100%. Users can adjust it according to their requirements.
- Page 62 SHENZHEN GETECH TECHNOLOGY CO,.LTD Let’s take custom 1 as example.
- Page 63 SHENZHEN GETECH TECHNOLOGY CO,.LTD Here we set custom 1 conf as follows: Start Percent: 20% End Percent: 62% Start Height: 0mm End Height: 32mm...
- Page 64 SHENZHEN GETECH TECHNOLOGY CO,.LTD When the setting is done, please press Store memory to save it: Similarly you can set other custom templates, for example, custom 2: Start Percent: 25% End Percent: 40% Start Height: 32mm End Height: 100mm (Note: there is no overlapped height)
- Page 65 SHENZHEN GETECH TECHNOLOGY CO,.LTD...
- Page 66 SHENZHEN GETECH TECHNOLOGY CO,.LTD The templates which have been set can be found in Mixer->Templates. You can change setting parameters at any time during the printing process. When the setting is done, you can start printing. Select the corresponding template in Mixer-> Templates during the printing process. Note: the“*”...
-
Page 67: Other Mix Effect
SHENZHEN GETECH TECHNOLOGY CO,.LTD 9.4 Other mix effect For the above 3 printing effects, they are used to print 3d models that are a whole part and the color changes in verticle. For those 3D models that consists of multiple parts and the color changes in horizontal, for such models, we can assign different color for different parts. - Page 68 SHENZHEN GETECH TECHNOLOGY CO,.LTD Let’s take the heart-bracelet as an example. Click to download the .stl file. Step1. Actually we have done this step before, but to be sure, we need to check again. Choose different colors for the three extruder at Printer setting->Extruder...
- Page 69 SHENZHEN GETECH TECHNOLOGY CO,.LTD Step2. Load the .stl to repetier host.
- Page 70 SHENZHEN GETECH TECHNOLOGY CO,.LTD Step3. The model is combined together, and was divided into 3 groups, which makes it easier for us to differentiate each part. Click the eye icon to hide the part.
- Page 71 Now you have differentiated them, you can assign different extruders / colors for each part. Note: the extruder 1 in repetier host is coorespinding to the E0 of Rostock 301 the extruder 2 in repetier host is coorespinding to the E1 of Rostock 301...
- Page 72 SHENZHEN GETECH TECHNOLOGY CO,.LTD Step4. Assign extruder for each group of the model. Choose the group, and click the setting icon, choose the extruder in the drop menu of Assigned Extruder:...
- Page 73 SHENZHEN GETECH TECHNOLOGY CO,.LTD Step 5 Slicing...
-
Page 74: Faq
10. FAQ If you have any problem when you use the printer, you can visit our forum http://www.geeetech.com/forum/there are detailed solutions on the forum. FAQ are as follows: 10.1 Motors cannot work When your are testing the motors, if the motor of an axis has no response or cannot work normally (the... -
Page 75: Extruder Cannot Work/ Extrusion Not Fluent
For detailed solutions, please refer to: http://www.geeetech.com/forum/viewtopic.php?f=17&t=17038 10.2 Extruder cannot work/ extrusion not fluent When you are testing the extruder, make sure the temperature is over 170℃. - Page 76 SHENZHEN GETECH TECHNOLOGY CO,.LTD Printing precision:0.05mm Print Speed: 80-120mm/s Positioning precision: X/Y:0.05mm. Z: 0.05mm Filament diameter: 1.75mm Nozzle diameter: 0.4mm Filament type: ABS/PLA Software: Operating system: Windows/Mac/Linux Control software: Repetier-Host, Printrun Slicing software: Slic3r, Cura-engine File format: .STL, 3ds, obj, amf, dae, G-code Temperature: Max heated bed temperature: About 110 °...
- Page 77 SHENZHEN GETECH TECHNOLOGY CO,.LTD Shipping box Dimension: 495x395x195mm Machine Net weight: 9.05kg Machine shipping weight: 17.5kg Contact us...
- Page 78 SHENZHEN GETECH TECHNOLOGY CO,.LTD 1. There are lots of documents and troubleshooting for Rostock 301 on our website. They are good resources if you would like to quickly solve problems by yourself. Technical support 2.If you still can not solve problems yourself even with the help of above files, you can send e-mail to technical@geeetech.com,we will reply to you within...
- Page 79 www.geeetech.com...
Need help?
Do you have a question about the Rostock 301 and is the answer not in the manual?
Questions and answers