Table of Contents
Advertisement
Advertisement
Table of Contents

Related Manuals for Geeetech E180


Summary of Contents for Geeetech E180
- Page 1 GEEETECH 3D Printer E180 —User Manual—...
-
Page 2: Table Of Contents
Start to Print ............................23 Connect E180 ..........................23 Slice and Print ...........................24 Stand-alone Printing with a TF Card ..................27 Printing via Wi-Fi ..........................30 7.1 Install EasyPrint 3D APP ........................31 7.2 Bind printer to EasyPrint 3D App ....................31 Specifications of E180 ..........................41 Contact us .............................43... -
Page 3: Terms
All information in this Manual is subject to change at any time without notice and is provided for convenience purposes only. Geeetech reserves the right to modify or revise this Manual in its sole discretion and at any time. You agree to be bound by any modifications and/or revisions. - Page 4 Geeetech assumes no responsibility, nor will be liable, for any damages to, or any viruses or malware that may infect your computer, telecommunication equipment, or other property caused by or arising from your downloading of any information or materials related to Geeetech products.
-
Page 5: Safety And Compliance
-- Consult the dealer or an experienced radio/TV technician for help. To maintain compliance with FCC’s RF Exposure guidelines, this equipment should be installed and operated with minimum distance between 20cm the radiator your body: Use only the supplied antenna. FCC ID: 2ANHN-E180... - Page 6 Caution: In case of emergency disconnect the Geeetech E180 from the wall socket. Caution: The Geeetech E180 melts plastic during printing. Plastic odors are emitted during this operation. Make sure to set up the Geeetech E180 in a well-ventilated area.
-
Page 7: About E180
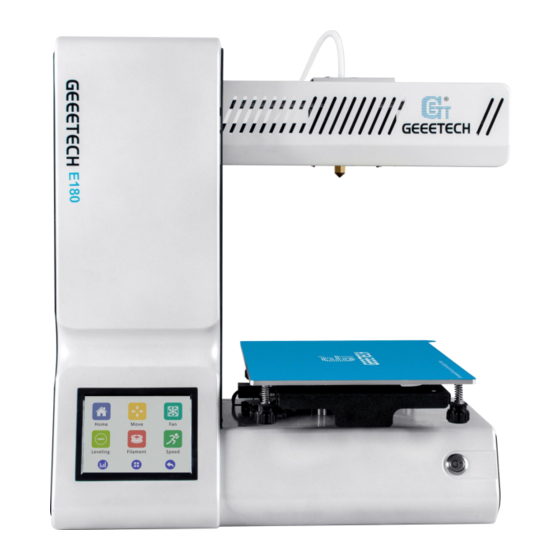
1. About E180 Geeetech has launched its brand new cloud 3D printer --- E180, trying its hand at integrating 3D printing technology into education. Compact and easy-to-manage, E180 is geared toward helping students map their boundless imagination to real experiences and tangible creations through trial and error. -
Page 10: Software Resources
4. Introduction to the Menu of the Touch Screen 4.1 Home Page After you start E180, on the touch screen will appear the home page, showing three main menu functions: control, printing and setting. Click on the three menus respectively to... -
Page 11: Control
4.2 Control Click the [Control] menu to enter the corresponding interface, where it is convenient to manually control the 3D printer by means of the following functions: home, move, fan, leveling, heating and speed, as shown by the picture below. 4.2.1 Home 1) When the printer is running with a TF card or connected with a computer, clicking on the [Home] menu is disabled. -
Page 12: Move
2) When the printer is idle, you can click to home X/Y/Z axis respectively. Besides, it is efficient to click to home the three axises simultaneously. 3) Choose the button to get to the [Move] interface. 4.2.2 Move 1) When the printer is running with a TF card or connected with a computer, clicking on the [Move] menu is disabled. - Page 13 before you move each axis. If you fail to choose the corresponding moving distance, the motor will move according to the current one by default. There are five values available. It is convenient to switch the five moving distances by each click.
-
Page 14: Fan
4.2.3 Fan On this interface you can observe and modify the status of the fans for the extruder and the control board. 1) The two fan switches are closed by default, when you start the printer. It will autonomously open upon printing. During the printing process, it is convenient to switch on or off the fans by clicking the buttons. -
Page 15: Leveling
4.2.4 Leveling 1) When the printer is running with a TF card or connected with a computer, the leveling function is unavailable. This situation also applies to the [Disable] status of the stepper motors. 2) When the printer is idle, please enter the leveling interface. Meanwhile, home the printer and lower the Z axis to Z=10 mm to prepare for the leveling. -
Page 16: Heating
a. Choose 1: raise the printing head to Z=10mm and move it to point 1. At the same time, lower the printing head to Z=0mm. The icon will turn into b. Choose 2: raise the printing head to Z=10mm and move it to point 2. At the same time, lower the printing head to Z=0mm. -
Page 17: Setting
4.3 Setting Choose [Setting] on the home page to visit the following interface, composed of the relevant settings for Wi-Fi connectivity, language, screen calibration, about E180, factory default, etc. -
Page 18: Wi-Fi Connectivity
4.3.1 Wi-Fi Connectivity This sub-interface shows the Wi-Fi switch, SSID, IP address, the IP of the server and the button for autonomous Wi-Fi connectivity upon starting the printer [Connect Autonomously]. Switch on the Wi-Fi button and click the [Set] to visit the interface for Wi-Fi configuration, as shown by the picture below. -
Page 19: Language
Wi-Fi connectivity interface will display the relevant information. When all the configurations are successful, the Wi-Fi icon will turn into green 4.3.2 Language E180 is compatible with two languages: Chinese and English. You could switch to the corresponding language for your need. -
Page 20: Calibrating The Touch Screen
4.3.4 About Choose [About] to visit the [Info] interface, where you could check the relevant information about E180, as shown by the picture below. 4.3.5 Factory Default 1) [Factory Default] is disabled, when the printer is running with a TF card or connected with a computer, or it stops working temporarily. -
Page 21: Leveling The Build Platform
Click the [Factory Default] button , and a prompt box will appear, as shown by the picture below. Choose [Yes]: restore factory and restart the printer. Choose [No]: return to the [settings] interface. 5. Leveling the Build Platform Step1. Choose [Leveling] icon to enter the interface to start to level the build platform. Meanwhile the motors will be homed and Z axis will rise to 10mm. - Page 22 Step 2.Click the leveling point 1, the extruder will move to the first point. Put a piece of A4 paper between the nozzle and build platform. Slide the paper back and forth. Stop when you feel the nozzle just start to grab a little bit. If you cannot feel a little bit friction at all, it means the distance between the nozzle and build platform is too far and the adhesion of filament to the platform will be not guaranteed.
- Page 23 to leveling point 1 and make the build platform raise up to reduce the distance between the nozzle and the build platform. If you can feel a big amount of friction, it means the distance between the nozzle and build platform is too close. The filament can’t be extruded out or can even be jammed. You need to clockwise rotate the nut in the bottom of the platform which is corresponding to leveling point 1 and make the build platform drop off to increase the distance between the nozzle and the build platform.
-
Page 24: Start To Print
If you can’t find the COM, please check if the power switch is turned on or the USB cable is well connected. 3. Select your printer. Click the [printer] menu on the top left and choose the printer type as E180. -
Page 25: Slice And Print
4. Click the [connect] button on the top right to connect E180 with your computer. At this time, you could observe the real-time status of the E180 on the bottom of EasyPrint 3D. Now we’ve completed the preparatory job before printing. In the next part, we will load and slice a 3D model and begin to print. - Page 26 2) Print settings: click the [print settings] menu and modify the relevant parameters. Here we take the [Quick] mode as an example. Choose the [Quick] mode, set the printing quality as [Standard] and take the parameters like [Infill], [Extruder temperature] and [Layer height] by default. Select the [Support] button, according to your printing need.
- Page 27 3) Click [slicer] in the menu to slice the .stl file. You can observe the slicing time in the following picture. Upon slicing, you get the .gcode file.
-
Page 28: Stand-Alone Printing With A Tf Card
6.3 Stand-alone Printing with a TF Card E180 can run stand-alone with a TF card, untethered to your computer. All you need to do is save 3D models in the TF card for printing. Here are the detailed procedures. - Page 29 2) Click the [Save] button to save the .Gcode file in TF card, as shown in the picture below. Note: The .Gcode file shall be kept in the root file of TF card, or the printer can’t recognize the file.
- Page 30 3) Insert the TF card into the slot on the back of E180. 4) Click the [Printing] button on the home page of the touch screen.
-
Page 31: Printing Via Wi-Fi
(换图) 7. Printing via Wi-Fi E180 Cloud 3D printing solution conveniently provides users EasyPrint 3D App to enjoy free 3D models, just slightly pressing to start your printing journey. Even if you are not keeping company with your printer, you can control the printer via EasyPrint 3D APP. -
Page 32: Install Easyprint 3D App
7.1 Install EasyPrint 3D APP Download the EasyPrint 3D APP here and install the EasyPrint 3D APP. www.geeetech.com/firmware/EasyPrint3D_Android.apk Once finishing installation, enter My Center to register and log in. Note: As the EasyPrint 3D APP is continuously upgraded, some UI and workflow may be different, please follow the APP. - Page 34 (换图) Detailed configuration procedures are as follows: ① .In Wi-Fi setting interface on the control panel, choose Wi-Fi button to enter Wi-Fi interface, as shown in the picture below.
- Page 35 ②.Turn on Wi-Fi and click the button “Set “to enter the Config mode, as shown in the picture below. ③.Choose Wi-Fi at the control panel on APP. At the page of pop-up, click the button “Wi-Fi” to enter Wi-Fi configuration, as shown in the picture below.
- Page 37 ④.Click [Next] to start to detect Wi-Fi built in the printer. If not detected, it will pop up a prompt “Printer Wi-Fi is not detected”. Click [OK] and again click [Next] to redetect. If the Wi-Fi is detected, you could see the following picture.
- Page 38 ⑤ Click [Next] after Wi-Fi hotspot is detected, as shown in the picture below.
- Page 39 ⑥ Choose one of the available Wi-Fi hotspots. Click [Next], and, if the Wi-Fi needs the password, the interface will show the Wi-Fi password input box. Just input the correct password, and then click “[OK]”, as shown in the picture below.
- Page 40 ⑦. When you succeed in connecting the Wi-Fi, the interface will show that the configuration is finished, as shown in the picture below.
- Page 41 Then the interface returns back to the control panel of the printer. You can see the prompt, as shown in the picture below. Click the button“Connect”on control panel, the interface will skip to Wi-Fi interface to connect with Network. The icon and status bar of Wi-Fi become blue on Wi-Fi interface. Meanwhile, SSID, IP Address and Server on this interface will display the relevant information, as shown in the picture below.
-
Page 42: Specifications Of E180
Now you can print and control the printing via App. ⑧. If you choose a Wi-Fi hotspot without password, click “Next” and continue your setting from step ⑦. 8. Specifications of E180 Printing parameters Print technology: FDM Build volume: 180x130x130mm Printing precision:0.05mm... - Page 43 Control software: EasyPrint 3D File format: .stl, G-code Temperature: Max heated bed temp: About 110 °C Max extruder temp: About 240°C Electrical: Power supply: Input: 110V-220V Output:DC24V/15A 360W Connectivity: Wi-Fi, USB, TF card (support stand-alone printing) Display screen:3.2 Full color touch screen Mechanical: Chassis: Metal plate + injection molding (a portable cantilever type 3D printer) Build Platform: Aluminum alloy plate...
-
Page 44: Contact Us
24 hours. For more products of Geeetech, please visit www.geeetech.com or send e-mail Sales to sales@geeetech.com In order to improve our products to provide better user experience, please send Feedback your comments and suggestions to Rita.xiang@geeetech.cn.
Need help?
Do you have a question about the E180 and is the answer not in the manual?
Questions and answers