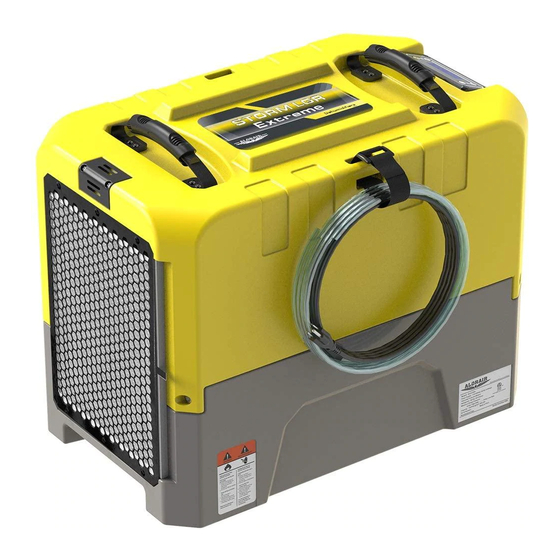
ALORAIR Storm LGR Extreme Manual
- Installation and operation manual (14 pages)
Advertisement
- 1 Safety Instructions
- 2 Identification
- 3 Electrical Supply
- 4 How the Storm Extreme Works
- 5 Guidelines
- 6 Parts Diagram
- 7 Control Panel Guide
- 8 Using the Display-Main Screen
- 9 Using the Display Sub-Menus
- 10 Maintenance Instructions
- 11 Error Codes
- 12 Troubleshooting
- 13 Dehumidifier Storage
- 14 Limited Warranty
- 15 Videos
- 16 Documents / Resources
READ AND SAVE THESE INSTRUCTIONS
Seaira Global LLC
14021 NC Highway 50 Surf City, NC 28445
910-660-0962 sales@seairaglobal.com
Safety Instructions
- Don't adjust or alter the unit in any way.
- The use of unauthorized parts will void your warranty. Contact your approved distributor for assistance.
- Always unplug the unit prior to removing the cover.
- Inspect the power cord prior to use and do not use if it is damaged.
- The unit should only be used with a 115V/60Hz circuit protected by a GFCI outlet.
Identification
Prior to installation of the unit, write down the serial number and date of purchase. You will need this information if you need assistance in the future. The data label on the side of your unit has the necessary information.
Model Number: Storm LGR Extreme
For additional questions concerning your dehumidifier:
- Contact your installing contractor
- Contact Seaira Global: sales@seairaglobal.com
910-660-0962
Electrical Supply
Power Supply: 115V, 60 Hz AC, Single Phase
Outlet Requirement: 3-Prong, GFCI
Cicuit Protector: 15 Amp

Using a 240V outlet may cause serious injury from electric shock.
To reduce risk of injury:
- Always disconnect machine from electrical power before servicing
- Only plug unit into a gounded electrical cicuit
- Do not use an extension cord
- Do not use a plug adapter
How the Storm Extreme Works
The Storm Extreme dehumidifier utilizes its integral humidistat to monitor the conditioned space. Once conditions are outside the desired setpoint, the compresser energizes and air is drawn across an evaporator coil. The evaporator coil is cooler than the dew point of the air so the water vapor will turns into liquid condensation. The air is then reheated through the condenser coil and distributed back into the room.
Guidelines
Operation Notes
- Always make sure that the unit is operated, transported, and stored on a stable surface.
- For maximum efficiency, operate the unit with all windows and doors closed.
- Do not place the unit anywhere that may block the inlet or outlet airflow.
Drain Hose Notes
- The Extreme is equipped with an external drain line connection, making it easy to plug in.
- The drain line can be directed outside or into any sink, drain, etc.
- For more effective draining, uncoil the entire hose before using.
- Never place the end of the hose higher than 15 feet.
- Always ensure that the drain hose is not blocked prior to use.
Transportation Notes
- Always secure the dehumidifier during transportation
- If the unit is transported vertically, return it to a normal horizontal position, and let sit for 30 minutes prior to use.
Parts Diagram


Control Panel Guide

Power Button
 Use this button to turn the dehumidifier on and off. You can also press this button while on a sub-menu if you wish to return to the main screen.
Confirm Button
![]() This button is used to confirm your selected setting, as well as set the humidity level. Each time you press the button, the humidity level will increase 5% (between 35% and 90%). The default humidity level is 50%.
This button is used to confirm your selected setting, as well as set the humidity level. Each time you press the button, the humidity level will increase 5% (between 35% and 90%). The default humidity level is 50%.
Manual Drain Button
![]() Prior to moving or storing the machine, it is helpful to use the Manual Drain Button. Press the Drain button to remove water from the integral pump reservoir.
Prior to moving or storing the machine, it is helpful to use the Manual Drain Button. Press the Drain button to remove water from the integral pump reservoir.
Mode Button
![]() The Mode button is used to switch between standard dehumidifier mode and using the dehumidifier with a duct.
The Mode button is used to switch between standard dehumidifier mode and using the dehumidifier with a duct.
Using the Display-Main Screen
- Power On and Off
- To power on the machine, press the power button once. The display will show:

- To power off the machine, press the power button while on the main display screen. The display will show:

- To power on the machine, press the power button once. The display will show:
- Setting Up the Unit
- Once the machine has powered on, you will see the following display:

- UNIT ON- means the unit is powered on
- 00.0HRS- describes any time the machine is running from power on to power off. It includes defrosting time, but does not include the standby time once the set point is reached. The working time can be reset using the sub-menu. If it is never reset, the time will accumulate with a maximum time of 99.9 hours. Once the maximum is reached, it will reset to zero.
- INLET 00°C 00%" desrcibes the temperature and humidity of air inlet. You can switch the temperature measurement (°F/°C) in the sub-menu.
- When operating in the sub-menu, press the power key to return to the main menu.
- Once the machine has powered on, you will see the following display:
- Defrosting Screen
- When the unit enters defrosting mode, it will show "Defrost 000". This is the countdown until defrosting is finished. After defrost is completed, it will return to the main interface.
NOTE: If you are in a submenu, you will not see the countdown until you return to the main interface.

- If you decide to power the machine off while it is defrosting, you will see "Wait for Defrost" on the screen. This indicates that the unit will power off after defrost is completed.

- When the unit enters defrosting mode, it will show "Defrost 000". This is the countdown until defrosting is finished. After defrost is completed, it will return to the main interface.
- Compressor
- This screen indicates the amount of time until the compressor starts running.

- This screen indicates the amount of time until the compressor starts running.
- Pump
This screen indicates how much time is remaining before the pump has completed working. The countdown will start at 14 seconds.


Using the Display Sub-Menus
- Job hours
- This screen allows you to clear the job hours. To clear the hours select ">". This will clear the hours on the main screen, and "RESET" will no longer display on the sub menu. Once hours have accumulated, "RESET" will appear on the sub menu again.

- This screen allows you to clear the job hours. To clear the hours select ">". This will clear the hours on the main screen, and "RESET" will no longer display on the sub menu. Once hours have accumulated, "RESET" will appear on the sub menu again.
- Life Hours
- "Life Hours" desribes the total working time of the dehumidifier. The life hours cannot be cleared.

- "Life Hours" desribes the total working time of the dehumidifier. The life hours cannot be cleared.
- Inlet/Outlet Temperatures

- "INLET00.00%" describes the temperature and relative humidity of the air inlet
- "OUTLET00°00%" describes the temperature and relative humidity of the air outlet
- Humidistat Mode
- On this screen, you can switch from using the humidity set point to continuous mode.

- When the display shows "ON" you can set the humidity

- When humidistat mode shows "OFF", the unit is in continuous mode
- On this screen, you can switch from using the humidity set point to continuous mode.
- Humidity Setpoint
- This screen is used to select your humidity setpoint. Press the ">" button to set the humidity value between 35% to 90%. Each time you press the button, it will increase 5%.

- This screen is used to select your humidity setpoint. Press the ">" button to set the humidity value between 35% to 90%. Each time you press the button, it will increase 5%.
- Temperature Measurement
- This screen can be used to switch the temperature measurement between °C and °F. Press the > button to switch between the two measurements.

- This screen can be used to switch the temperature measurement between °C and °F. Press the > button to switch between the two measurements.
- Language
- From this screen, you can choose your preferred language. Press the (>) button to switch between German, Spanish, and English.

- From this screen, you can choose your preferred language. Press the (>) button to switch between German, Spanish, and English.
- Coil Temperature
- This screen shows the current temperature of the coils. If the temperature is below zero it will show "-".

- This screen shows the current temperature of the coils. If the temperature is below zero it will show "-".
- Compressor Current
- This screen shows the working current of the compressor

- This screen shows the working current of the compressor


Maintenance Instructions
Before Use
- Check the power cord for signs of damage such as fraying. Replace the cord before use if there is any damage.
- Check the filter for signs of dirt or obstructions. Clean or replace the filter as necessary.
- Check the coils for signs of buildup. Clean if needed.
Cleaning the Machine Body
Use a soft, damp cloth to clean the exterior of the unit. Do not use any soap or solvents.
Filter Maintenance
- Unplug the unit.
- Slide out the filter.

- Check the filter for dirt and buildup.
- For a Pre-Filter or MERV-8: Clean the filter mesh by vacuuming it or washing with warm water (no soap or cleaners).Gently shake the filter dry, then reinsert it.
- For a Carbon, or HEPA Filter: If there is dirt or buildup, replace filter.


Removing the Housing

- Remove the screws on the housing.
- Remove the screws on the air inlet grill and air outlet grill.
Coil Maintenance
- Once per year, clean the coils with an approved coil cleaner.
- Coil cleaner should be a self-rinsing, foaming cleaner such as WEB® Coil Cleaner.
Pump Maintenance
Pump Access:
Remove the screws on the housing, then lift off. Unplug the pump drain line, then remove the screws holding the pump in place.
Cleaning the Pump Reservoir:
Once the screws are removed, lift off the top of the pump and set aside. Use a paper towel to wipe out the base of the pump.
Error Codes
If there is an issue with the dehumidifier, one of the following error codes will appear:

- E1 Error
An E1 error code will appear if the humidity sensor has an error. The unit will not work with an E1 code, however, you can still use the manual pump button - LO Error
A LO error code will appear if the temperature sensor detects the incoming air is below the operating temperature range (33°F). The unit will not work with a LO code, however, you can still use the manual pump button. If the actual temperature is much higher than 33°F, replace the sensor - HI Error
A HI error code will appear if the temperature sensor detects the incoming air is above the operating temperature range (106°F). The unit will not work with a HI code, however, you can still use the manual pump button. If the actual temperature is much lower than 106°F, replace the sensor. - E5 Error Code
An E5 error code indicates that there is a refrigerant leak. Once an E5 error is detected, the unit will run for 30 minutes to verify the issue, then power off. - E4 Error Code
An E4 error code indicates that there is an issue with the pump. The E4 code will appear once a high water level for the pump has been detected.
Troubleshooting
| Symptom | Cause | Solution |
Display is Blank | Poor Connection | Verify that both ends of the power cord are plugged in |
| Power Outage | Reset power | |
No Airflow | Filter is Dirty | Clean the filter |
| Air Inlet or Outlet is Blocked | Clear the blockage | |
Error Code: E1 | Humidity Sensor or Communication Error | Check to ensure that the sensor wire is connected at both ends. if no issues are visible, the sensor may be faulty. |
Error Code: E4 | Problem with Pump | Verify that the pump is properly installed and functioning. If so, unplug the unit for two minutes, then restart. |
Error Code: LO | Room Temperature is below 33°F | Increase the room temperature so it is within operating range (above 33°F). If error still displays, check sensor. |
Error Code: HI | Room Temperature is above 105°F | Decrease the room temperature so it is within operating range (below 105°F). If error still displays, check the sensor |
E5 Error Code | Refrigerant Leak | Contact Your Installer for Assistance |
Dehumidifier Storage
If the unit will be stored for an extended period of time, complete the following steps:
- Turn off the unit and allow it to to dry.
- Clean out the pump reservoir.
- Wrap and secure the power cord
- Cover filter mesh.
- Store in clean, dry space
Limited Warranty
All warranty benefits apply to the original owner only. Warranty cannot be transferred or assigned.
1 YEAR (FROM DATE OF PURCHASE): Seaira Global warrants the dehumidifier will operate free of defects in workmanship and materials. At it's discretion, Seaira will repair or replace any malfunctioning components, free of charge (excluding transportation costs)
3 YEARS (FROM DATE OF PURCHASE): Seaira Global warrants the refrigeration circuit (compressor, condenser and evaporator) will operate free of defects in material or workmanship. At it's discretion, Seaira will replace defective parts, including factory labor or refrigerant. This does not include transportation.
5 YEARS (FROM DATE OF PURCHASE): Seaira Global warrants the compressor, condenser, and evaporator will operate free of any defects in material or workmanship. At it's discretion, Seaira will repair or replace the defective parts. This does not include labor, transportation, or refrigerant.
CUSTOMER RESPONSIBILITIES: In order to take advantage of the warranty service, the customer must do the following:
- Customer must provide normal care and maintenance (including, but not limited to cleaning filters, coils and pumps)
- Removal and re-installation of unit is the sole responsibility of owner.
- If customer cannot return unit to certified repair center, all costs associated with freight shipment are borne by the customer. In addition, all duties related to freight shipments, including but not limited to palletizing, wrapping, labeling, and pickup are associated with customer.
- If shipped, customer is responsible for all risk of loss or damage.
WARRANTY PROCEDURE:
- Customer must mail in warranty registration card to Seaira Global. If no card is submitted, warranty period will begin the day the shipment left the Seaira warehouse. Please be sure to record serial # and date of installation. You will need this information to receive an RA number.
- If warranty service is necessary, customer must contact Seaira Global Tech Support by phone (910-660-0962) to receive a Return Authorization (RA number).
- Once an RA has been issued, it is the customer's job to bring the unit to a certified repair center. If this is not an option, shipping will be arranged to bring the unit back to the Seaira warehouse (at the expense of the customer).
- After the unit has been received by Seaira (whether at a repair center or the warehouse), an initial inspection will be completed, if it is determined to be an invalid warranty claim (see exclusions below), unit will be only be completed after receiving payment from customer for all associated costs.
- If unit is defective, the necessary parts will be repaired or replaced and the unit will be available for pickup at certified repair center or returned via freight shipment (at customer's expense). Keep in mind that work is only done during normal working hours. After being repaired, all units are required to go through a rigorous testing process prior to being returned to customer.
- Once a part is repaired and the dehumidifier is returned, the original warranty period still applies (no extensions).
EXCLUSIONS:
DAMAGE DUE TO THE FOLLOWING IS NOT COVERED UNDER WARRANTY
- ACTS OF NATURE- INCLUDING BUT NOT LIMITED TO:
- FLOODING
- FIRE
- WATER DAMAGE
- HURRICANE/STORM DAMAGE
- IMPROPER USAGE- INCLUDING BUT NOT LIMITED TO:
- POOL/SPA/TUB APPLICATIONS
- MISUSE, ABUSE, OR TAMPERING WHETHER INTENTIONAL OR ACCIDENTAL
- IMPROPER INSTALLATION OR DESIGN
- IMPROPER VOLTAGE
- LACK OF NORMAL CARE
- FAILURE TO FOLLOW INSTRUCTIONS
- CORROSION
- FREEZING
- ANY ADDITIONAL COSTS DUE TO CHANGES IN LAWS OR BUILDING CODES
- FREIGHT CHARGES
- ANY COSTS DUE TO LOST PROFIT OR DELAY
- DAMAGE TO PROPERTY
- CAUSE BEYOND CONTROL
- CONSUMABLE PARTS, INCLUDING BUT NOT LIMITED TO:
- FILTERS
- BATTERIES
- POWER CORDS
- VALVES
- SWITCHES
- RUBBER PARTS
- DIRECT, INDIRECT, COLLATERAL OR INCONSEQUENTIAL DAMAGES OF ANY KIND
THE WARRANTIES AND LIABILITIES SET FORTH ARE IN LIEU OF ALL OTHER WARRANTIES EXPRESSED OR IMPLIED, IN LAW OR IN FACT, INCLUDING IMPLIED WARRANTIES OF MERCHANTABILITY AND FITNESS FOR PARTICULAR PURPOSE. SEAIRA GLOBAL'S TOTAL LIABILITY, REGARDLESS OF NATURE OF CLAIM SHALL NOT EXCEED ORIGINAL PURCHASE PRICE OF THE PRODUCT. IF A PRODUCT OR COMPONENT IS REPLACED WHILE UNDER WARRANTY, THE APPLICABLE WARRANTY PERIOD SHALL NOT BE EXTENDED BEYOND THE ORIGINAL WARRANTY TIME PERIOD.
THE FOREGOING SHALL CONSTITUTE THE TOTAL LIABILITY OF SELLER IN THE CASE OF DEFECTIVE PERFORMANCE OF ALL OR ANY OF THE EQUIPMENT OR SERVICES PROVIDED TO BUYER. BUYER AGREES TO ACCEPT AND HEREBY ACCEPTS THE FOREGOING AS THE SOLE AND EXCLUSIVE REMEDY FOR ANY BREACH OR ALLEGED BREACH OF WARRANTY BY SELLER.
ANY DISHONESTY OR FRAUD IN CONNECTION WITH SEAIRA GLOBAL WARRANTY THOROUGHLY VOIDS ALL WARRANTY POLICIES. SEAIRA GLOBAL EXPRESSLY RESERVES THE RIGHT TO PURSUE LEGAL ACTION IN THE EVENT OF DISHONESTY, FRAUD, OR ATTEMPTED FRAUD.

VideosALORAIR STORM LGR EXTREME - Review Video
Documents / ResourcesDownload manual
Here you can download full pdf version of manual, it may contain additional safety instructions, warranty information, FCC rules, etc.
Advertisement


Need help?
Do you have a question about the Storm LGR Extreme and is the answer not in the manual?
Questions and answers