ALORAIR Storm Elite Installation And Operation Manual
Hide thumbs
Also See for Storm Elite:
- User manual (22 pages) ,
- User manual (22 pages) ,
- User manual (22 pages)

Related Manuals for ALORAIR Storm Elite


Summary of Contents for ALORAIR Storm Elite
- Page 1 Installation and Operation Manual Storm Elite Seaira Global LLC 14021 NC Highway 50 Surf City, NC 28445 910-660-0962...
-
Page 2: Safety Notes
※ ※ • The Storm Elite dehumidifier must always be connected using a grounded electrical connection as required for all electrical appliances. The warranty is voided and all respon- sibility for the operation transfers to the owner if non-grounded wiring is utilized. -
Page 3: Table Of Contents
DEHUMIDIFIERS Table of Contents ※ ※ Introduction....................01 Unit Overview....................03 Operating Instructions..................04 Preparing the Unit for Use................09 Maintenance & Repair..................11 Storing Your Dehumidifier..................15 Troubleshooting....................15 Warranty.......................17 Readiness Checklist..................19 Service Checlist....................20... -
Page 4: Introduction
※ Identification Congratulations on purchasing a Storm Elite dehumidifier! The Storm Elite comes with an extensive warranty plan. To ensure you are eligible, be sure to note the serial number and date of purchase. The serial number can be found on the data on the back of the unit. - Page 5 DEHUMIDIFIERS How Your Storm Dehumidifier Works The Storm Elite dehumidifier utilizes its integral humidistat to monitor the conditioned space. Once conditions are outside the desired setpoint, the compressor energizes and air is drawn across an evaporator coil. The evaporator coil is cooler than the dew point of the air so water vapor will turns into liquid condensation.
-
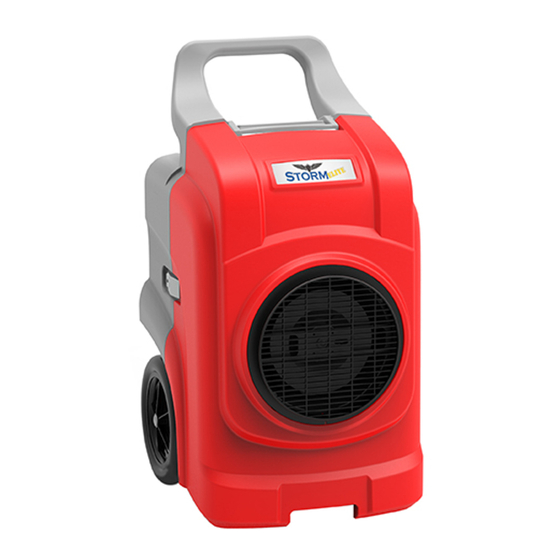
Page 6: Unit Overview
DEHUMIDIFIERS Unit Overview ※ ※ Front View Front Cover Handle Access Latch Air Outlet Wheel Rear View Power Cord Control Panel Tubing & Cord Rack Air Intake Drain Tube Air Filter Connection -3 -... -
Page 7: Operating Instructions
DEHUMIDIFIERS Operating Instructions ※ ※ Select/OK Drain Pump On/Off Menu Up Button Down Button LCD Monitor Control Panel Overview 1. On/Off Button Press the on/off button once to power the dehumidifier on and begin operation. Once it is powered on, the display will show room humidity levels unless another button is being pressed. - Page 8 DEHUMIDIFIERS 4. Select/OK Button Use this button to confirm a selection. 5. Up Button Down Button The up and down buttons are used to adjust the humidity or timer settings.. 6. LCD Display Please note that the LCD monitor will go blank if no buttons are pushed. Push any button to activate the display.
- Page 9 DEHUMIDIFIERS 3. Display During Draining and Defrosting • When you press the “P” button to drain the pump, the second line of the display screen will show draining. Draining will also appear during automatic draining while the dehumidi- fier is operating. 3 2 ℃...
- Page 10 DEHUMIDIFIERS How to Change the Settings NOTE: As long as the machine is plugged into power, the settings can be changed. The unit does not have to be operating to modify the setup. 1. Setting the Humidity Level (Humid) a. Press the Menu (M) button. The screen will show: H u m i i m e T e m p U...
- Page 11 DEHUMIDIFIERS c. Select your desired option- Option 1: “T. on” – Unit will begin running after a selected amount of time Option 2: “T. off” – Unit will run for designated amount of time and then turn off Option 3: “T. I/O” – Unit will cycle “on” and “off” based on the set time. If unit is off, the cycling will start with unit “off”.
-
Page 12: Preparing The Unit For Use
DEHUMIDIFIERS 3. Temperature Scale Settings This selection allows you to switch the machine from displaying temperature in degrees Celsius to degrees Fahrenheit. a. Press the menu key. The screen willl show: Humid, Timer, Tempu, R. H u m T e m p U b. - Page 13 DEHUMIDIFIERS 15’ 3. Firmly insert the power cord into the socket on back of the unit near the top. 4. Turn on the dehumidifer and use the control panel to set up the dehumidifier as desired Optional Duct Installation Ducting of the unit allows you to condition an adjacent room or focus the discharge to a specific area.
-
Page 14: Maintenance & Repair
DEHUMIDIFIERS Maintenance and Repair ※ ※ Exterior Cleaning • Use a soft, slightly damp cloth to wipe the plastic body • Never spray the exterior directly with water or cleaner Filter Cleaning The Elite comes standard with a prefilter and MERV-8 filter, which are washable. NOTE: The carbon filter and HEPA filter (optional accessories) are NOT washable. - Page 15 DEHUMIDIFIERS Accessing Internal Components WARNING Always unplug unit prior to performing any maintenance 1. Remove the screws from the side latches (one per side). Remove the screw and open the latch (one per side) 2. Undo the two latches on the base of the unit by pressing in the safety then opening the latch.
- Page 16 DEHUMIDIFIERS Access screws for electrical Squeeze safety and open latch compartment Cover Pump Integral Pump Maintenance NOTE: This pump requires routine maintenance that is not covered by your 1 year parts warranty. Only a defective pump will be repaired or replaced under the warranty. As with all pumps, preventative maintenance is necessary to prevent issues from dirt and slime that may accumulate in the drain system.
- Page 17 DEHUMIDIFIERS Advanced Pump Cleaning: 1. a. Use the manual pump button (P), to drain any water from reservoir. b. Unplug the unit, and remove pump from reservoir (see page 13) c. Use a wet dry vac or paper towels to remove any remaining water from the pump reservoir.
-
Page 18: Storing Your Dehumidifier
DEHUMIDIFIERS ※ Storing Your Dehumidifier ※ If you plan on storing your dehumidfier for an extended period of time: 1. Turn unit off and allow to dry. 4. Clean the filter. 2. Manually drain pump reservoir. 5. Store in clean,dry environment. 3. - Page 19 DEHUMIDIFIERS Pump Alarm-Error Code E4 If an E4 code appears on the display: 1. Reset the unit by disconnecting the power cord and then reconnecting it . NOTE: The unit will not function until the code has been cleared. 2. Manually check to see if pump is operational by pressing the drain button. Verify that the pump energizes and de-energizes properly.
-
Page 20: Warranty
DEHUMIDIFIERS Warranty ※ ※ All warranty benefits apply to the original owner only. Warranty cannot be transferred or assigned. 1 YEAR (FROM DATE OF PURCHASE): Seaira Global warrants the dehumidifier will operate free of defects in workman- ship and materials. At it’s discretion, Seaira will repair or replace any malfunctioning components, free of charge (excluding transportation costs) 3 YEARS (FROM DATE OF PURCHASE): Seaira Global warrants the refrigeration circuit (compressor, condenser and evaporator) will operate free of defects in material or workmanship. - Page 21 DEHUMIDIFIERS Limited Warranty Exclusions DAMAGE DUE TO THE FOLLOWING IS NOT COVERED UNDER WARRANTY 1. ACTS OF NATURE- INCLUDING BUT NOT LIMITED TO: • FLOODING • FIRE • WATER DAMAGE • HURRICANE/STORM DAMAGE 2. IMPROPER USAGE- INCLUDING BUT NOT LIMITED TO: •...
Need help?
Do you have a question about the Storm Elite and is the answer not in the manual?
Questions and answers