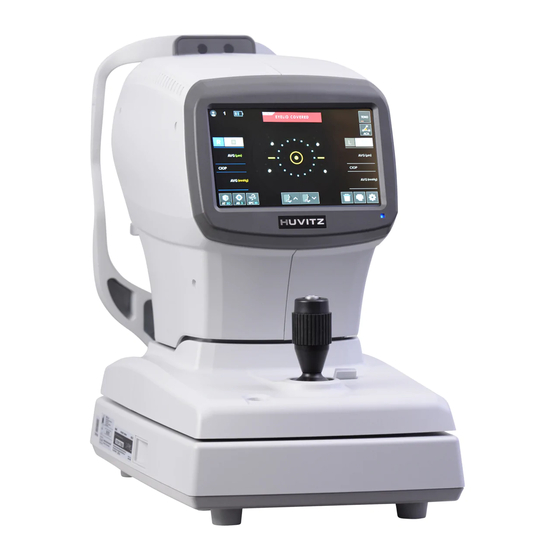
Huvitz HNT-1 User Manual
Non-contact tonometer
Hide thumbs
Also See for HNT-1:
- User manual (82 pages) ,
- Troubleshooting manual (63 pages) ,
- Service manual (60 pages)
Table of Contents
Advertisement
Quick Links
Advertisement
Table of Contents

Related Manuals for Huvitz HNT-1


Summary of Contents for Huvitz HNT-1
- Page 1 Non-Contact Tonometer HNT-1 / 1P USER MANUAL...
- Page 2 HUVITZ reserves the right to make changes in its products or product specifications at any time and without prior notice, and is not required to update this documentation to reflect such changes.
-
Page 3: Table Of Contents
HNT-1/1P CONTENT INTRODUCTION................................5 SAFETY INFORMATION .............................. 6 CHARACTERISTICS..............................17 NOTE FOR USE ................................18 NAMES AND FUNCTIONS OF EACH PART ......................19 INSTALLATION OF EQUIPMENT & PREPARATION OF MEASUREMENT ............29 BASIC OPERATIONS ..............................30 OTHER MODES ................................43... - Page 4 MAINTENANCE................................59 SERVICE INFORMATION ............................65 MANUFACTURER AND AUTHORIZED REPRESENTATIVE................... 66 EMC (ELECTROMAGNETIC COMPATIBILITY) INFORMATION................67 SPECIFICATIONS ............................... 69 ACCESSORIES ................................70 RS-232C INTERFACE SPECIFICATION FOR HNT-1 & 1P ..................72...
-
Page 5: Introduction
HNT-1/1P Introduction 1.1. Intended Use The Non-Contact Tonometer HNT-1 is intended to be used to measure the intraocular pressure of the human eye. HNT-1P is also provided measurement of patient’s central corneal thickness, as well as HNT-1’s function. 1.2. Indication for Use The Non-Contact Tonometer HNT-1/1P is indicated for measuring intraocular pressure to aid in the screening and diagnosis of glaucoma. -
Page 6: Safety Information
Safety Information 2.1. Overview Safety is everyone’s responsibility. The safe use of this equipment is largely dependent upon the installer, user, operator, and maintainer. It is imperative that personnel study and become familiar with this entire manual before attempting to install use, clean, service or adjust this equipment and any associated accessories. - Page 7 HNT-1/1P 2.2. Symbol Explanation 2.2.1. Safety Symbol and Indication The International Electrotechnical Commission (IEC) has established a set of symbols for medical electronic equipment which classify a connection or warn of any potential hazards. The classifications and symbols are shown below.
- Page 8 Use no hook WEEE Symbol – EU only Disposal of your old appliance When this crossed-out wheeled bin symbol is attached to a product it means the product is covered by the European Directive 2002/96/EC. All electrical and electronic products should be disposed of separately from the municipal waste stream via designated collection facilities appointed by the government or the local authorities.
- Page 9 HNT-1/1P COM Port Input power & FUSE rating (Puissance d'entrée et indice FUSE) Consult instructions for use Type B Isolated patient connection Warning: Crushing or insert of hand QR code (QR code) Alternating Current Authorized representative in Switzerland (Representant autorise dans la Suisse)
- Page 10 2.2.2. Safety Symbol location [Front View of HNT-1(P)] [Bottom side of HNT-1(P)] [Package Box]...
- Page 11 A place where the equipment can be exposed to chemical substances or flammable gas. Watch out for dust, especially metal pieces from entering the equipment. Do not disassemble the product. Huvitz will not be held responsible for any negligence regarding such action.
- Page 12 Do not close the thermal ventilation outlet Do not connect the AC power adapter before all parts are fully assembled. It can lead to a malfunction. Always pull the power cord holding the plug and not the cord. This instrument can withstand the following conditions: 1.
- Page 13 If the device cannot be used appropriately or any problem cannot be solved, Stop using the devcie immediately, and contact Huvitz or your authoirzed distributor Do not touch directley if an operator has a hand injury or a significant allergic reaction to the material used in the operaton contact part.
- Page 14 The equipment must be operated only by a, or under direct supervision of properly trained and qualified person/s such as ophthalmologist. Modifications of this equipment may only be carried out by Huvitz’s service technicians or other authorized persons. Be sure to check the safety distance before measurement. If the safety distance is not secured, may touch and injury the patient’s eye.
- Page 15 HNT-1/1P User’s manual or service manual should be kept in the place where the persons in chare of operation and maintenance can access easily any time. Do not force cable connections. If a cable does not connect easily, be sure that the connector (plug) is appropriate for the receptacle (socket).
- Page 16 When instrument is send back to A/S center for repair or maintenance, or before authorized service man is arrived at the place for repair or maintenance, wipe the surfaces of the instrument (especially, the parts that come into contact with the patient) with a clean cloth dampened with rubbing alcohol CAUTION For use of equipment in rated voltage less than 125Vac,minimum 6A,Type SJT or SVT , 18/3AWG,10A, max 3.0m long : One end with Hospital Grade Type, NEMA 5-15P Other end...
-
Page 17: Characteristics
It is provides the automatic calculation function of the compensated IOP based on the central corneal thickness. Intraocular pressure of both eyes is measured by auto alignment function. With auto-tracking and auto shot, HNT-1/1P allows easy and accurate measurement. HNT-1P is the model combining non-contact tonometer and pachymeter in one unit. -
Page 18: Note For Use
So, please do not use them. 8. In case of moving Non-Contact Tonometer HNT-1/1P, carry it holding the lower part of machine body with both hands as fixing the stage after switching the machine off all the time. -
Page 19: Names And Functions Of Each Part
HNT-1/1P Names and functions of each part 5.1. Main Parts [ Front part ] ① LCD Touch Screen : display user interface and the result of measurement ② Operation Lamp : Indicates whether or not the electric power is on ③... - Page 20 [ Back part ] ① Forehead Rest: Preventing the vibration by fixing the forehead. ② Air Nozzle: Measuring the intraocular pressure on eyes. ③ Object lens for Pachy: Object lens for measuring the cornea thickness of examinees. (only in HNT- ④...
- Page 21 HNT-1/1P [ Bottom Part ] ① Power Supply Socket : A socket connecting to exterior power plug ② Serial Interface (RS-232C) Connector : A terminal connecting to the exterior equipment. When exporting the measured data to an external computer with RS-232C connector, connect an interface cable here.
- Page 22 5.2. Explanation of Main Screen 5.2.1. Main Screen of HNT-1 ① [Tracking Mode] A toggle button to change the Tracking mode for measurement (MT / AT2D / AT3D) ② [Shooting Mode] A toggle button to change the Shooting mode for measurement (MS / AS1 / AS3)
- Page 23 HNT-1/1P ③ [SPC Mode] A toggle button to change the SPC mode for measurement range (SPC30 / SPC60 / 30 / 60) ④ [Chinrest Up/Down Button] Move up or down the chinrest ⑤ [Clear Button] Clear measurement data NOTE Press and hold the Clear button for 2 ~ 3 seconds to result the head position.
- Page 24 ⑨ [Compensation mode Button of Cornea Thickness] Display the CCT(Central Cornea Thickness) value and CIOP(Compensated Intra Ocular Pressure) data NOTE Compensation mode button is the feature to display compensated IOP value manually input the CCT values. This button is not necessary in the HNT-1P, because it has the function of measuring CCT itself.
- Page 25 HNT-1/1P [IOP Measurement Data] Display the CIOP, IOP data and IOP average of the last three data [Patient Number (Counter)] Show the patient measurement number Divide into 7 steps by focus position. Too close to the patient`s eye Move the joystick lever to the operator side to move the main body away from the patient`s eye.
- Page 26 NOTE If the main body unit gets out of the working range of auto tracking in the forward and backward, right and left, up and down, the indicator is displayed. According to the indication of the focus indicator, you can manipulate by joystick. So the user can move to the measurement position by operating the joystick in direction of the arrow then motors start to work in their available range.
- Page 27 HNT-1/1P 5.2.2. Main Screen of HNT-1P [Measurement Mode] ① A switch to change the measure mode (TONO / PACHY / TONO-PACHY) NOTE Measure mode button can be displayed differently depending on the setting of the Setup mode. According to “Mode Button Toggle” item of the SETUP mode, if ‘ON’ is selected, it will...
- Page 28 [ “Mode Button Toggle” of the Setup mode ] [Pachy Thumbnail Button] ② Display Pachy Image enlarged Screen (Refer to Section 8.3) ③ [ACA Mode Button] Display ACA(Anterior Chamber Angle) mode screen (Refer to Section 8.4) [Pachy + IOP Measurement Data] ④...
-
Page 29: Installation Of Equipment & Preparation Of Measurement
UNLOCK. [Release of Lock on Stage Section ] 2. Connection of Power Cable Put Non-Contact Tonometer HNT-1/1P on the table. Insert the power cable into power connector. at the bottom of the main body. -
Page 30: Basic Operations
Basic Operations WARNING If the following situations happen, contact to the agents of Huvitz after immediately pushing the power switch off, and pulling the power cord out of AC Power connection part. - In case that smoke comes, or strange smell or sound is heard from the equipment. - Page 31 HNT-1/1P 7.1. Operation Flow Flow Description 1. Turn on the device 1. Turn On the device Refer to Section 7.2 2. Prepare the patient 2. Prepare the patient Refer to Section 7.3 or 7.4 3. Select Mode 3. Select Mode Refer to Section 7.3...
- Page 32 1. Let the power switch “on” The measurement window as shown in the picture below appear on the screen of monitor as system check is completed. • HNT-1 HNT-1P • [ Measurement Screen ] 2. Check the measurement screen appeared on the monitor.
- Page 33 “ON” again in 10 seconds after switching it off. If the measurement screen continues not to appear either, please contact to the agents of Huvitz. 3. Check the user SETUP mode. (Refer to Section 8.1) Check and select the diverse functions relating to measurement including intraocular pressure value or printing condition.
- Page 34 ② Adjustment of the safety distance between the examinee’s eye and device [Safety Button ] Assurez-vous que le candidat ne doit pas mettre ses mains ou ses doigts sous la mentonnière. Les mains ou les doigts peuvent se blesser. Pour la prévention des infections, nettoyez le repose-front avec un solvant tel que l'éthanol pour chaque candidat différent.
- Page 35 HNT-1/1P Pull body of equipment to the front of user by using joystick lever. If necessary, after secure a safety space so that the air nozzle does not the patient’s eye, use to Safety button. Left the right side eye of examinee appears at the center of monitor screen by slowly pushing and rotating joystick lever.
- Page 36 - Réglage de la mise au point: ajustez-le sur le point lumineux en inclinant le levier de commande vers l'avant / l'arrière. • HNT-1 [ Manual mode Measurement Screen ] NOTE As the bright dot and pupil can not keep the same axis during the consecutive measurement, the error can be caused for measurement.
- Page 37 HNT-1/1P It shall memorize the measured values by 10 times for each left/right eye (except for error). It can be seen on the screen of Result mode. ⑥ Measurement of Counter-side eye After measure the right-side eye, measure the left-side eye to the direction of right by operation the joystick lever.
- Page 38 As it is printed, the values measured so far are to be removed. As a thermal printing record, the printed characters are easy to be faded away. Please make it copied if you want to keep it for a long time. • Printed page of HNT-1 [ Example of Print ]...
- Page 39 HNT-1/1P 7.4. Auto Measurement Mode As pushing toggle button of the Tracking mode button, it changes to sequentially. If you change “MT ” to “AT2D ”, it will operate in the Auto or AT3D measurement mode. AT2D mode: Auto tracking in the right and left up and down directions is actived.
- Page 40 ③ Measurement of Another Eye Measure the left eye according to the same procedure by moving the stage to the right side. As the measurement to both eyes is completed, the value of intraocular pressure is to be indicated on the screen.
- Page 41 HNT-1/1P [ “Auto Print” of the Setup mode ] The message selected in SETUP mode is to be printed together with the measured data. • Pachy mode of HNT-1P [ Example of Print ]...
- Page 42 • Tono-Pachy mode of HNT-1P (Example) • Tono mode of HNT-1P (Example) [ Example of Print ]...
-
Page 43: Other Modes
HNT-1/1P Other Modes 8.1. SETUP Mode It is to perform many setups relating to measurement, print-out, etc. As pushing Set up Button on the measurement screen, it entered SETUP mode. [ Setup mode Information (Measure – 1Page) ] [How to Change Tab] As pushing left side`s tab button, it is to enter the tab items. - Page 44 instructed below the explanation for each category. [Exit Button] As pushing Exit button, return to the main measurement screen. [Reload Button] As pushing Reload button, revert to original values of all over the pages. [Print Button] As pushing Print button, print the all over setup values. Patient Count : Patient measurement count On/Off Patient Number : Measurement patient number Auto Tracking :...
- Page 45 HNT-1/1P HNT-1 • HNT-1P • [ Setup mode Information (Measure - 2Page) ] SPC Mode : Air Pressure automatic measurement by patient`s intraocular pressure. SPC 30 : The peak of the air pressue is automatically controlled within the range of 0 to 30 mmHg ...
- Page 46 if ‘ON’ is selected, it will appear only one toggle button such as . Otherwise, it will appear three button such as [ Setup mode Information (Data) ] Use Compensation Ratio : Set whether Corneal Thickness compensation should be applied or not. CCT Average : Setup of average value for Cornea Thickness(as reference) Compensation Ratio : Setup of Compensation ratio(0.0001~1.0000) ...
- Page 47 HNT-1/1P [ Input data of Cornea Thickness ] Cornea Thickness : Input data of Cornea Thickness (Left/Right) [ Setup mode information (Print) ] Print Mode : STD : The measured result & built-in printer of max ten (10) times are to be printed out ...
- Page 48 [ Setup mode information (Result) ] Pressure Unit : Selection of pressure unit (mmHg, hPa) Reliability : Set the reliable offset to remove unreliable IOP measured data. If any IOP measured data is out of reliable range (IOP measured average - reliable offset, IOP measured average + reliable offset), then it is considered unreliable.
- Page 49 HNT-1/1P Date Set: Set of Y(Year)/M(Month)/D(Day) Time Set: Set of H(Hour)/M(Minutes)/S(Second) [ Setup mode information (System- 1Page) ] LCD Brightness : Adjust Brightness of LCD panel (10% ~ 100%). LCD Color Temperature : Adjust Color Temperature of LCD panel (Cool~Warm 7step).
- Page 50 Sleep Time: [ Setup mode information (Message) ] [ Virtual Keyboard ] [Character Input] : Erase of all input. : Erase of text. : Change of line. : Change of uppercase page.
- Page 51 HNT-1/1P : Change of number and special character page. : Save of information. : Exit without save. 8.2. Result Mode You can see the measured results (Max ten(10) units of data) stored in memory in this mode. As pushing R/L button in the measurement mode, it can see measurement data.
- Page 52 [ Result mode Screen ] NOTE In case of HNT-1P, Data list are divided into each of the measurement mode as Tono, Pachy and Tono-Pachy. Measured data at each measurement mode is entered separately. It can be confirmed by pushing mode items on the left side. [Exit Button] As pushing Exit button, return to the main measurement screen.
- Page 53 HNT-1/1P 8.3. Pachy Image Mode (Only in HNT-1P) In case of HNT-1P, If you measure the pachy data, you can see a thumbnail of a corneal slit image captured at the upper left corner of the measurement screen. The corneal slit image at last measurement is saved to memory with the measurement data.
- Page 54 [ Pachy Image mode Screen ] [Exit Button] As pushing Exit button, return to the main measurement screen. [Fitting Button] As pushing Fitting button, display detected edge area of the cornea. [Clear Button] As pushing Clear button, clear the measured image and data. [Press Pachy Image] As pushing Pachy image, enter enlarged pachy image screen.
- Page 55 HNT-1/1P [ Enlarged Pachy Image Screen ] [Exit Button] [Back Button] [Send Button] [Fitting Button]...
- Page 56 8.4. ACA Mode (Only in HNT-1P) In case of HNT-1P, it has another feature of pachymetry. That’s the ACA(Anterior Chamber Angle) function. The anterior chamber is the fluid-filled space inside the eye between the iris and the cornea’s innermost surface. Glaucoma is main pathologies in this area. In glaucoma, blockage of the canal of schlemm prevents the normal outflow of aqueous humor, resulting in accumulation of fluid, increased intraocular pressure.
- Page 57 HNT-1/1P [ ACA Image Screen ] [Exit Button] As pushing Exit button, return to the main measurement screen. [Back Button] As pushing Back button, return to the ACA mode screen. [Angle tool Button] As pushing Angle tool button, measure angle by touching the screen with three points.
- Page 58 8.5. Power saving Mode The power saving function begins to operate if you do not operate the machine at all for three (1/3/5) minutes or so. It is to return to the measurement mode as pushing any button or touch optionally in saving mode.
-
Page 59: Maintenance
HNT-1/1P Maintenance 9.1. Maintenance Items To ensure safe and correct use of the HNT-1(P), the following must be checked before and after use. 9.1.1. User Maintenance Items Item Period Description Check up Before using Power cord and plug for damage ... - Page 60 1. Clean the glass part around air nozzle and try FOUND clearly again. 2. If same error message is displayed again, tu rn off the device and contact Huvitz or your aut horized distributor. EYELID Eye closed. 1. Try again.
- Page 61 HNT-1/1P 9.4. Replacement 9.4.1 Printer paper As red line appears on the paper, immediately change the print paper with new one. ① Open the printer cover ② Cut the paper inserted in the printer, and take it away from it. Take paper roll together with shaft out of the printer, and pull the rotating shaft away from paper roll.
- Page 62 Please use the chinrest paper that provided by Huvitz Co.,Ltd. 9.4.3 Replacing Fuse ① Turn off and raise the Non-Contact Tonometer HNT-1/1P with two arm carefully. ② Remove the Power cord ③ Pick the fuse holder out from the Power inlet ④...
- Page 63 Nettoyez le caoutchouc de l'appuie-tête et la mentonnière avec de l'alcool avant d'envoyer l'appareil à un agent autorisé ou à Huvitz pour l'entretien. 1. Pachy window and glass part of air nozzle ① Check the pachy window and glass part of air nozzle from an oblique direction for any contamination such as dust or soil.
- Page 64 9.6. As changing the installation place of the equipment ① Off the power switch of main body. ② Take the power connection cable apart. ③ Move it while maintain the horizontality of it by holding the bottom of the main body.
-
Page 65: Service Information
Parts below are consumable in their characteristics, or the quality of them shall degraded after the long time use. User should not replace them by him or herself. Please contact to Huvitz`s agent for the replacement if these parts are consumed enough or degraded by the longtime use. -
Page 66: Manufacturer And Authorized Representative
Manufacturer and Authorized Representative ■ How to Contact Huvitz Co., Ltd. Huvitz Co., Ltd. 38, Burim-ro 170beon-gil, Dongan-gu, Anyang-si, Gyeonggi-do, 14055, Republic of Korea Tel: +82-31-428-9100 Fax: +82-31-477-9022(F/A) E-mail : svc@huvitz.com website : www.huvitz.com ■ EU Representative Switzerland Representative ■... -
Page 67: Emc (Electromagnetic Compatibility) Information
Manufacturer announcement – electromagnetic waves trouble • Electromagnetic waves trouble HNT-1/1P should be used in the below mentioned electromagnetic wave environment. HNT- 1/1P purchaser or user needs to confirm whether HNT-1/1P is used in this type of environment. Trouble test Question of appropriateness... - Page 68 Other UT is the a.c. power voltage for before approving the test level. • Electromagnetic waves tolerance HNT-1/1P is to be used in the below mentioned electromagnetic wave environment. HNT-1/1P purchaser or user needs to confirm whether HNT-1/1P is sued at this environment.
-
Page 69: Specifications
Central Cornea Thickness Measurement (HNT-1P only) • Pachymetry Measurement Mode ( AT3D (X, Y, Z), AT2D(X, Y), MT(Manual) ) Measurable range 150~1300um Measurement value 1um step Measurement Accuracy ±5um Common(HNT-1, HNT-1P) • Type Non-contact Working Distance 11mm Data display 10 measurement data Screen... -
Page 70: Accessories
2 rolls Dust cover 9320A000001-A 1 piece Wrench (2.5mm) 9340A00LW25-A 1 piece Operation’s Manual 9000ENG0030-D 1volume Spare Fuse 7610S005031-A 2 units (250V, T 3.15AL) Accessories can be purchased separately. Please contact your local Huvitz representative or Huvitz customer service. - Page 71 HNT-1/1P Safety Module Unlock Move the frame Loosened the screw Pull the safety packing lock Tighten the screw...
-
Page 72: Rs-232C Interface Specification For Hnt-1 & 1P
RS-232C Interface Specification for HNT-1 & 1P Introduction In order to transmit measured data to external PC or device, HNT-1&1P system(HNT) supports data communication protocol via RS-232C serial interface. This protocol is a kind of one-way transfer without requesting any response from the other side. To enable the data transmission, turn on COM Out menu in user setup in HNT system. - Page 73 HNT-1/1P \r\n NO:⌒21\r\n DATE:⌒2016/12/14 12:35\r\n VER:⌒1.0.0\r\n T-R01:⌒10\r\n T-R02:⌒18*\r\n T-R03:⌒10*\r\n T-R-A:⌒10.0\r\n P-R01:⌒513\r\n P-R02:⌒504\r\n P-R03:⌒476*\r\n P-R-A:⌒508.5\r\n T-L01:⌒18\r\n T-L02:⌒18\r\n T-L03:⌒16\r\n T-L04:⌒16\r\n T-L-A:⌒17.0\r\n P-L01:⌒531\r\n P-L02:⌒524\r\n P-L03:⌒527\r\n P-L03:⌒528\r\n P-L-A:⌒527.5\r\n \r\n (‘⌒’: Space character, ‘\r’: Carriage return, ‘\n’: Line feed) At start and end packet of data transmission, a pair of carriage return and line feed character is sent to notify the connected device of start-up and close-up of communication.
- Page 74 Packet Description \r\n Start-up of data transmission NO: 21 Patient number(Maximum 5 digits) DATE: 2016/12/14 Date and Time(year/month/day hour:minute) Data format depends on Date menu option in User setup 12:35 VER: 1.0.0 Software version Measure Type(‘T(Tono)’ or ‘P(Pachy)’), Measure Side(‘R’ or ‘L’), T-R01: 10 P-L01: 531 Measure Count(01~10),...
Need help?
Do you have a question about the HNT-1 and is the answer not in the manual?
Questions and answers