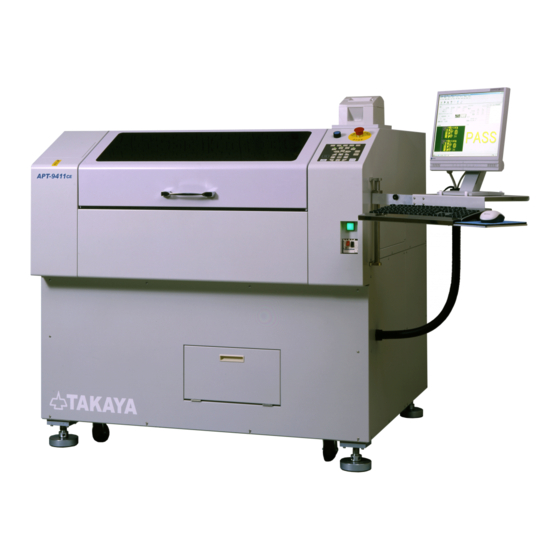
TAKAYA APT-9411 Series Operator's Manual
Extension scanner board
Hide thumbs
Also See for APT-9411 Series:
- Service manual (77 pages) ,
- Operator's manual (63 pages) ,
- Operator's manual (15 pages)
Table of Contents
Advertisement
Advertisement
Table of Contents

Subscribe to Our Youtube Channel
Related Manuals for TAKAYA APT-9411 Series


Summary of Contents for TAKAYA APT-9411 Series
- Page 1 Extension Scanner Board ESC-9500 Operator’s Guide TAKAYA...
-
Page 3: Extension Scanner Board
APT-9411 Extension Scanner Board Preface The Extension Scanner Board ESC-9500 is an option integrated into the Takaya Fixtureless tester APT-9411 Series and the sister models to extend its capabilities. Please read this manual thoroughly before using this option. Then keep this manual handy for answers to any questions you may have. -
Page 4: Introduction
Introduction Safety symbols Symbol Explanation Calls attention to a procedure, practice, or condition that could possibly cause serious accident or death. Calls attention to a procedure, practice, or condition that could possibly cause bodily injury or damage to the product. Calls attention to a procedure, practice, or condition that could possibly damage to the product. -
Page 5: Extension Scanner Board
By integrating the Extension Scanner Board ESC-9500 (hereinafter called “ ESC-9500” ) into the APT-9411 Series and the sister models, the user is able to use max. 64 extension bottom probes (option) for applying the measuring signals to the UUT. Usually the measuring signal to the UUT is applied through the extension bottom probes, but it is also possible for the user to use a dedicated underside fixture jig or plug in the connector directly into the UUT. -
Page 6: Software
Fig.A WS-635-01 (1-32pin) WS-635-02 (33-64pin) HS-645-01 [Fig.3] WS-635-01 TVX-14 (CN3) WS-635-02 TVX-14 (CN4) 1pin 1pin 2pin 2pin 31pin 31pin 32pin 32pin 33pin 33pin 34pin 34pin (Cable connection between TVX-14 PCB and WS-635-01/02) Fig.B HS-645-01 [Fig.4] Software The ESC-9500 will be recognized automatically at the time of startup. (Important reminder) 1. -
Page 7: Test Data Generation
APT-9411 Extension Scanner Board Test Data Generation Basic data generation Listed below is the operating procedure to add new basic data using the extension bottom probes. [ Operating procedure ] Click on Step Edit (or Step List) from Edit menu on the Menu bar. It displays “... - Page 8 It displays the Bottom probe setting screen (Fig.8). [Fig.8] Bottom probe Fill the box “ Polarity +” and select “ Extension Scanner (64pin)” from the right pull-down menu. [Fig.9] Specify the extension bottom probe to use for applying the measuring signal. [Fig.10] Only if you want to use the extension bottom probe for “...
-
Page 9: Automatic Generation Function
APT-9411 Extension Scanner Board The display goes back to Fig.12. Now you can see the Bottom probe column in the Step edit list is substituted by the symbol of “ E1, N, N, E2” . [ E1 ] means the extension bottom probe#1. [ E2 ] means the extension bottom probe#2. [Fig.12] Automatic generation function Listed below is the operating procedure to add new basic data using the extension bottom probes with... - Page 10 Make a series of programming steps to generate “ Pin to ground” steps of IC according to the menu guidance until Fig.15 appears on the display. Teaching system Point system [Fig.15] Specify the ground pin number and fill the box “ Use Bottom ground” . [Fig.16] Select “...
-
Page 11: Setup The Extension Bottom Probes In The Existing Step Data
APT-9411 Extension Scanner Board Now you can see on the Step edit list that the Bottom probe column is substituted by the symbol of “ E11” . [ E11 ] means the extension bottom probe #11. [Fig.19] Setup the extension bottom probes in the existing step data Listed below is the operating procedure to change the existing step data so as to use the extension bottom probes. - Page 12 It displays the Bottom probe setting screen (Fig.22). [Fig.22] Bottom probe Fill either the box “ Polarity +” or “ Polarity – ” that should be changed from the flying probe to the extension bottom probe. In the case of Step 000001 in Fig.23 below, Polarity column is substituted by the symbol of “...
-
Page 13: Setup On Step Data Review
APT-9411 Extension Scanner Board The display goes back to Fig.27. Now you can see the Bottom probe column in the Step edit list is substituted by the symbol of “ E11, N, N, E12” . [ E11 ] means the extension bottom probe #11. [ E12 ] means the extension bottom probe #12. [Fig.27] Setup on Step data review Go to the step that should be changed from the flying probe to the extension bottom probe in Step... - Page 14 Select [Bottom Set] from the pull-down menu, and it displays the Bottom probe setting screen. [Fig.30] Bottom probe Fill either the box “ Polarity +” or “ Polarity – ” that should be changed from the flying probe to the extension bottom probe.
- Page 15 APT-9411 Extension Scanner Board The display goes back to Fig.35. Now you can see the Bottom probe column is substituted by the symbol of “ E1, N, N, E2” . [ E1 ] means the extension bottom probe #1. [ E2 ] means the extension bottom probe #2. [Fig.35] - 13 -...
-
Page 16: Change Ground Pin Of Ic To The Bottom
Change ground pin of IC to the bottom Listed below is the operating procedure to change the ground pin used in the existing “ Pin to ground” steps to the extension bottom probe. The explanation is made for Teaching system and Point system separately. - Page 17 APT-9411 Extension Scanner Board Use your mouse to select “ IC1” and click the Select button, and “ IC1” is displayed in the Select parts column as shown in Fig.39. [Fig.39] Select “ Extension Scanner(64pin)” from the right pull-down menu at Specify the bottom ground and specify the extension bottom probe.
- Page 18 [ Operating procedure (by Point system) ] Click on Step Edit (or Step List) from Edit menu on the Menu bar. 2. Use your mouse to select “ Tool” > “ Bottom probe” > “ Assign Net to Bottom Probe” in order. [Fig.42] It displays the Assign Net to Bottom Probe screen.
- Page 19 APT-9411 Extension Scanner Board Click the OK button to execute your change. [Fig.46] Now you can see on the Step edit list that Pin #1 is substituted by the symbol of “ E11” . [Fig.47] - 17 -...
-
Page 20: Cancel The Extension Bottom Probes
Cancel the extension bottom probes Listed below is the operating procedure to change the existing step data so as to cancel the extension bottom probe. The operating procedure is the same in both the Teaching system and the Point system. [ Operating procedure ] Click on Step Edit (or Step List) from Edit menu on the Menu bar. - Page 21 APT-9411 Extension Scanner Board Fill the box “ Extension Scanner Board” and specify in the box the extension bottom probe to be canceled. [Fig.51] The display goes back to the Step edit list. Now you can see on Step 000008 that the Bottom probe column isn’t substituted by the extension bottom probe.
-
Page 22: Extension Bottom Probes (Option)
Extension bottom probes (option) This chapter describes the way to install the extension bottom probes that are used to hook the ESC-9500 up to the UUT to apply the measuring signals. Position set in Data mode [ Operating procedure ] Use your mouse to select “... - Page 23 APT-9411 Extension Scanner Board Select “ Bottom probe” from the Tabs, and it displays Fig.55 (the left screen). Fill the box “ Use bottom probes” as shown in Fig.55 (the right screen). [Fig.55] Bottom Probe Configure [Number of Bottom Probe], [Bottom probes restricted area] and [Description (20 characters)].
- Page 24 Depress [TEST START] SW on the operation panel, and it displays Fig.57 and Probe 4 moves over the Board reference point. [Fig.57] JOG screen Make sure that the bottom reference point for your bottom probes is viewable from both the top side and the bottom side.
- Page 25 APT-9411 Extension Scanner Board Click the Next button, and it displays Fig.59. [Fig.59] Configure the positions for Bottom tools You should specify the reference point for the bottom probes from the top side again. To do this, open the safety cover and turn the pc board in Y-direction again and close the safety cover, and depress [RESET] SW on the operation panel.
-
Page 26: Installation
Installation Listed below is the operating procedure to place your bottom probes on the predefined positions in Data mode. [ Operating procedure ] Use your mouse to select “ Tool” > “ Mode Setting” > “ Data mode” in order. Move to Bottom tools and select “... - Page 27 APT-9411 Extension Scanner Board It displays Fig.63. Open the safety cover and take the pc board out of the tester. Then close the safety cover and depress [RESET] SW, and depress [TEST START] SW. [Fig.63] It displays Fig.64. [Fig.64] Open the safety cover and place the bottom probe #1 under the target mark whilst monitoring the camera screen.
-
Page 28: Self-Diagnosis / Maintenance
Self-diagnosis / Maintenance The Self-diagnosis function conducts a relay test on the TVX-14 PCB as well as a wiring cable continuity check. [Fig.66] Extension Scanner Board (64pin) Relay Check Clicking on Execute button on Fig.66, it diagnoses the relays on the TVX-14 PCB. [Fig.67] If a relays fails during the ON test, that relay is highlighted in blue and the failure information is displayed in the “... -
Page 29: Open Check
APT-9411 Extension Scanner Board Open Check Open Check function is available for testing possible “ shorts” failure on the wiring cable between the TVX-14 PCB and the Tray. [Fig.68] Failures will be identified as shown below: [Fig.69] Note: Prior to the Open check, make sure that all cables, the connectors, and/or your underside fixture jig are attached properly inside the Tray. -
Page 30: Table Of Contents
Table of contents Extension Scanner Board· · · · · · · · · · · · · · · · · · · · · · · · · · · · · · · · · · · · · · · · · · · · · · · · · · · · · · · · · · · · · · · · · · · · · · · · · · · · · · · · · · · · · · · · · · · · · · · · · · · · · · · · · · · · 1 Preface·... - Page 31 APT-9411 Extension Scanner Board ESC-9500 Operator’s guide (VOL.3) TAKAYA CORP. Issued on: April, 2009 Made in Japan...
Need help?
Do you have a question about the APT-9411 Series and is the answer not in the manual?
Questions and answers