Jet JBM-5 Operating Instructions And Parts Manual
Benchtop mortiser
Hide thumbs
Also See for JBM-5:
- Operating instructions and parts manual (17 pages) ,
- Operating instructions manual (18 pages)
Table of Contents

Related Manuals for Jet JBM-5


Summary of Contents for Jet JBM-5
- Page 1 Operating Instructions and Parts Manual JBM-5 Benchtop Mortiser WMH TOOL GROUP, Inc. 2420 Vantage Drive Elgin, Illinois 60124 Part No. M-708580 Ph.: 800-274-6848 Revision G1 02/08 www.wmhtoolgroup.com Copyright © 2008 WMH Tool Group, Inc.
- Page 2 WMH Tool Group Authorized Service Centers can authorize warranty repair, assist you in obtaining parts, or perform routine maintenance and major repair on your JET® tools. For the name of an Authorized Service Center in your area call 1-800-274-6848.
-
Page 3: Warnings
For your own safety, read this instruction manual before opering the tool. • KEEP GUARDS IN PLACE and in order. • REMOVE ADJUSTING KEYS AND WRENCHES. Form the habit of checking to see that keys and adjusting wrenches are removed from the tool before turning it on. •... -
Page 4: Electrical Requirements
Electrical Requirements In the event of a malfunction or breakdown, grounding provides a path of least resistance for electric current to reduce the risk of electric shock. This tool is equipped with an electric cord having an equipment-grounding conductor and a grounding plug. The plug must be plugged into a matching outlet that is properly installed and grounded in accordance with all local codes and ordinances. -
Page 5: Table Of Contents
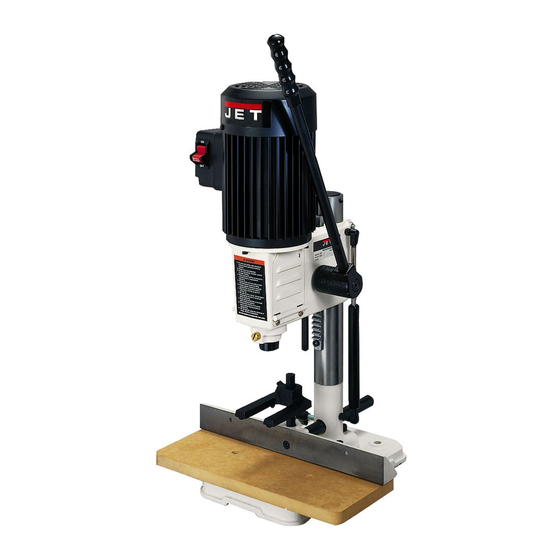
Installing ... 4 Features ... 5 Chisel & Bit Adjustment... 6 Parts List ...7-8 Parts Breakdown... 9 Specifications: Benchtop Mortiser Stock Number ... 708580 Motor ...1/2HP, 1Ph, 115V TEFC RPM ... 1725 Chuck Capacity ...3/8” Chisel Capacity ...1/2” x 1/2”... -
Page 6: Assembly
Assembly , WARNING Never connect the machine to the power source until assembly is completed. Failure to comply may result in serious injury! 1. Screw the handle (A, Fig. 2) into the pinion shaft (B, Fig. 2). 2. Tighten the handle. The handle has a notch (C, Fig. 2) to accommodate a wrench. -
Page 7: Features
On-Off Switch The switch (A, Fig. 5) has a switch key that, when pulled out, allows the switch to be locked in the off position. Handle Adjustment The handle can be adjusted for leverage and comfort. Pulling the spring loaded handle (A, Fig.6) away from the head and turning allows you to change the position of the handle. -
Page 8: Chisel & Bit Adjustment
Using Bits with Short Shanks When using bits with short shanks, it will be necessary to attach the spindle extension. Place an open wrench on the flat part of the motor spindle. Use the chuck key to unscrew and remove the chuck. Attach the spindle extension to the chuck. -
Page 9: Parts List
Parts List for the JBM-5 Benchtop Mortiser Index Part 1 ... 23011045W...Base ..1 2 ... 50302003 ...Lock Washer ... 5/16 ... 3 3 ... 50102018 ...Hex Socket Cap Screw ... M8x1.25x20 ... 3 4 ... 23011002W...Column..1 5 ... - Page 10 58 ... 23011077 ...Key Clip..1 59 ... 50322004 ...Spring Washer ... M5 ... 1 60 ... 50102002 ...Hex Socket Cap Screw ... M5x.8x8 ... 1 61 ... 23011076 ...Chuck Key..1 ... 23010045 ...“JET” Label (not shown)..1...
Need help?
Do you have a question about the JBM-5 and is the answer not in the manual?
Questions and answers