
Related Manuals for Jaton Video-PX6200TC


Summary of Contents for Jaton Video-PX6200TC
- Page 1 Video-PX6200TC series nVIDIA GeForce™ 6200 series User’s Manual Version 3.00 C o p y r i g h t © 2 0 0 6 J a t o n C o r p o r a t i o n , U S A...
-
Page 2: Table Of Contents
INTRODUCTION ... 3 FEATURES AND SPECIFICATIONS ... 4 SYSTEM REQUIREMENT ... 8 CHECK LIST ... 9 HARDWARE DESCRIPTION... 9 DISPLAY DEVICES OUTPUT ... 10 HARDWARE INSTALLATION... 12 NSTALLATION ROCEDURES : ... 13 TEPS SOFTWARE INSTALLATION... 14 ® XP D INDOWS ®... -
Page 3: Introduction
Video-PX6200TC series also feature NVIDIA UltraShadow II technology designed to enhance the performance of shadow-intensive games. Video-PX6200TC series are the industry’s first and only GPUs to feature unique support for Microsoft DirectX 9.0 Shader Model 3.0. Powered by the proven NVIDIA CineFX 3.0 engine, these advanced GPUs enable unlimited programmability and infinite program length, allowing develops to create new class of advanced visuals and effects. -
Page 4: Features And Specifications
Video-PX6200TC series deliver unmatched video features and functionality through the industry’s first on-chip video processor. This dedicated unit on the GPU handles the lion’s share of the video processing load, freeing up the CPU for other tasks. - Page 5 • Bidirectional PCI Express® bandwidth, in conjunction with TurboCache architecture, which improves graphics price/performance CineFX 3.0 Engine The third-generation of the NVIDIA® CineFX™ engine unleashes the power of the latest NVIDIA GPUs and streamlines the creation of complex visual effects. Through the power of the Microsoft® DirectX® 9.0 Shader Model 3.0 and OpenGL®...
- Page 6 NVIDIA CineFX 3.0 is poised to unleash a new level of programming creativity. With full DirectX 9.0 Shader Model 3.0 support, the newest Video-PX6200TC series will soon power a new generation of games with unmatched realism, digital worlds with mind-blowing complexity, and lifelike characters that move through cinematic-quality environments.
- Page 7 unprecedented HD video, stunning picture clarity, smooth video, accurate color, and precise image scaling for all video content to turn your PC into a high-end home theater Unified Driver Architecture (UDA) The Nvidia UDA guarantees forward and backward compatibility with software drivers.
-
Page 8: System Requirement
Microsoft® DirectX® 9.0 Optimizations and Support Ensures the best performance and application compatibility for all DirectX 9 applications. OpenGL® 1.5 Optimizations and Support Ensures the best performance and application compatibility for all OpenGL applications. PCI Express Support PCI Express is a new Intel bus architecture that doubles the bandwidth of the AGP 8X bus, delivering over 4 GB per second in both upstream and downstream data transfers. -
Page 9: Check List
For full 256MB support, system memory must have at least 512MB. ( PX6200TC-128LP Check List • Video-PX6200TC-16, Video-PX6200TC-32, Video- PX6200TC, Video-PX6200TC-32LP, Video-PX6200TC- LP or Video-PX6200TC-128LP Multimedia Accelerator • Mini-DIN 9-pin (TV-Out) converter cable for Composite RCA or S-Video Out connection • DVI to RGB converter •... - Page 10 Video-PX6200TC** 82328A Video-PX6200TC** 82328A * For full 128MB support, the system memory must have at least 512MB ** For full 256MB support, the system memory must have at least 512MB Low profile Bracket DB 15 VGA (RGB out) DVI-I 24Pin...
-
Page 11: Display Devices Output
Video-PX6200TC-128LP 82328B Low profile configuration only available for the 3 models listed above. Accessories for VGA cards are sold separately. Please go to http://Store.anvshopper.net for more details. Display Devices Output Monitor Monitor RGB out - DB15 VGA connector to analog monitor. -
Page 12: Hardware Installation
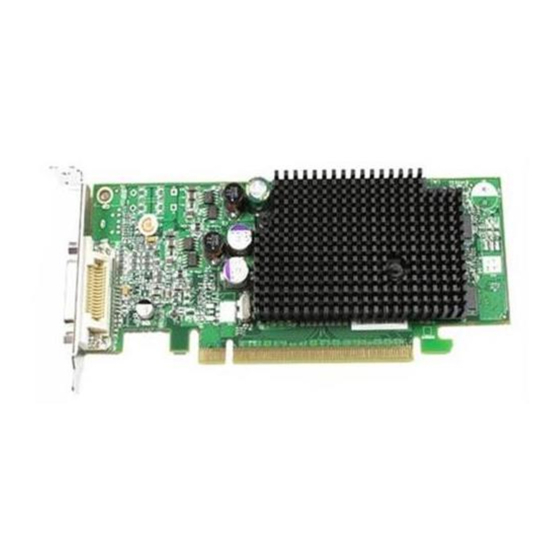
Monitor Monitor Hardware Installation Installation Procedures Quad Output Optional 1. RGB out 2. DVI convert to RGB 3. DVI out 4. TVout DB 15 VGA Connector DVI to RGB Converter DVI out Connector Converter Cable Composite RCA DIM-9Pin S-Video out... -
Page 13: Steps
The manufacturer assumes no liability for any damage, caused directly or indirectly, by improper installation of any components by unauthorized service personnel. If you do not feel comfortable performing the installation, consult with a qualified computer technician Steps: Turn OFF all powers to your system, including any peripherals (printer, external drives, modem, etc.). -
Page 14: Software Installation
1. To add a new adapter, ensure the mainboard has available IRQ for new devices, and there is no conflict between each other. 2. If you try adding this video adapter to an ALL-IN-ONE mainboard (which video port built-in already), then you have to disable that port first. - Page 15 Autorun feature brings-up the “Welcome Screen”, and you may point to “Display Driver” and then press on it. Microsoft InstallShield® Wizard has start loading its setup process; please wait until it has completed.
- Page 16 Click on “Next” to continue the process. The Windows system will copy all driver files from source media to your local hard disk; please wait until the process has completed.
-
Page 17: Windows ® 2000 Driver Installation
Click on “Finish” to restart your computer, the new display driver will be in place after Windows boots-up. ® Windows InstallShield® Program: Microsoft Windows®2000 detects this new hardware and places appropriate display driver from its system folder automatically - it doesn’t matter if you have added a new driver or changed the existing one. - Page 18 Autorun feature brings-up the “Welcome Screen”, and you may point to “Display Driver” and then press on it. Microsoft InstallShield® Wizard has start loading its setup process; please wait until it has completed.
- Page 19 Click on “Next” to continue the process.
-
Page 20: Technical Assistance
Click on “Finish” to restart your computer, the new display driver will be in place after Windows boots-up. Notice: We believe that the all the installation steps mentioned above are clear from manufacturer software’s CD to your operating system. Any procedures other than these processes have not been specified. -
Page 21: Frequently Asked Questions (Faq)
Today, most video drivers are developed for 32-bit processing and may require a channel to Code/Decode. Conflict between device drivers and TSR (terminate- and-stay-resident) programs will inverted the display, and are particularly effectual at crashing computer. The most effective way to check for conflicts is to replace with the original video driver, or delete and re-install the current video driver to the system. - Page 22 Answer The NVIDIA® GeForce™ 6200 with NVIDIA® TurboCache™ technology is a new graphics processing unit (GPU) featuring NVIDIA TurboCache technology which allows the GPU to render directly to system memory at rapid speeds. Q2: How much “actual” memory will be onboard a GeForce 6200 with TurboCache board? Answer It depends on the customer.
-
Page 23: Pinout And Sync Frequencies
Q8: How do I update my old VGA card to DirectX9? Answer Only updating to the latest VGA card will support DirectX9. Updating driver for the old VGA card will not make your old VGA card to support DirectX9. Reason is due to hardware on the VGA card. -
Page 24: Conversion Table: Pin Adapters
Note: Analog monochrome type monitors use green video for all video input and ignore red and blue video. Conversion Table: Pin Adapters If you will be using a 9-to-15-pin adapter cable to link your 9-pin monitor connector to the 15-pin accelerator card connector, check Table carefully before you install the cable. -
Page 25: Digital Visual Interface (Dvi-I) Connector
Analog Video Signals Black Level = 0 V Full Intensity (White) Level = +0.7 V Digital Visual Interface (DVI-I) Connector 24 pin DVI FEMALE connector built-in onboard. Pin Number Ground C1 C2 24 C3 C4 Signals TMDS Data 2 - TMDS Data 2 + TMDS Data 2 Shield No Connection... -
Page 26: Technical Support
In the event you have a technical problem with this product, please read the README files in the software CD_ROM. Updated drivers are available through Jaton Web site. Have following information handy when you contact technical support: Name of the product. - Page 27 Milpitas, CA 95035 (408)-934-9369 In Thailand contact: Jaton (Thailand) Co., Ltd. 93, 93/1-2 Moo 4 Thana City PC Tower 1 Fl. Bangna-Trad KM.14 Bangchalong Bangplee Samutprakarn 10540 Thailand Tel: 662-336-1212 Fax: 662-336-1213 Tech Support: 662-336-0818 In Taiwan contact: In Australia contact: Jaton Technology pty, Ltd.
-
Page 28: Limited Warranty
(2) years from manufacturing date. This limited warranty applies only to the original purchaser of Jaton Product and is not transferable. This limited warranty does not apply if failure to the Product Registration, or over thirty (30) days from purchase (original invoice date). -
Page 29: Other Limits
All Trademarks and Registered Trademarks belong to respective owners. © 2006 Jaton Corporation. All rights reserved. Other Limits The forgoing is in lieu of all other warranties, expressed or implied. Including but not limited to the implied warranties of merchantability and fitness for a particular purpose. -
Page 30: Other Statements
(1) All applicants shall complete service request form from Manufacturer. This warranty applies only for a period of two (2) years from purchase date of Jaton original invoice. This warranty applies only for a period of two (2) years from manufacturing date. -
Page 31: Entire Obligation
(2) All returned checks will be charged a $20.00 fee by Manufacturer. (3) All repair and replacement services allow 4-6 weeks from the date of receiving by Manufacturer. (4) All products without warranties require service processing fee $20 (payment in advance), which is not refundable. Entire Obligation This Limited Warranty states the entire obligation of Manufacturer with respect to the Products. - Page 32 • If you are unsure about installation for a new product, contact your dealer’s service department. We believe it is important for you to know and understand what your warranty coverage provides and what it does not. We also want you to be aware that most hardware warranties only relate to the function of the hardware.
Need help?
Do you have a question about the Video-PX6200TC and is the answer not in the manual?
Questions and answers