Table of Contents
Advertisement
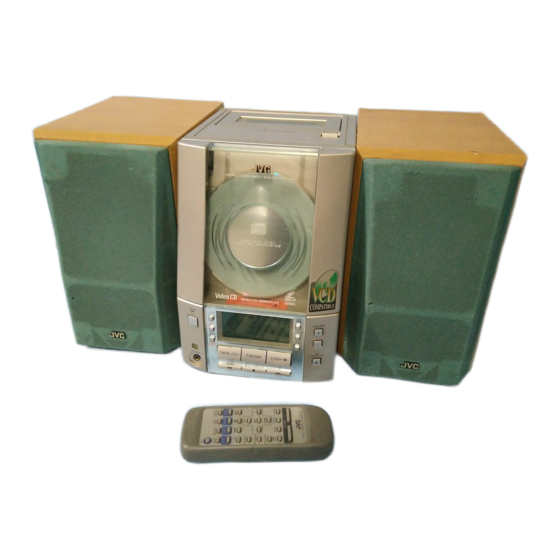
MICRO COMPONENT SYSTEM
UX-V50V
UX-V50GN
FM
AUTO
SLEEP
DISPLAY
MODE
PRESET
TAPE
CD
AUX
FM/AM
CD
VOCAL
VCD NUMBER
REPEAT
ECHO
UP
MASKING
SELECT
PROGRAM
PREV
SET
NEXT
ON
VCD NUMBER
V. INTRO
RANDOM
SCREEN
DOWN
AHB
PRO
BASS
TREBLE
CANCEL
VOLUME
REMOTE CONTROL RM-SUXV50E
AUTO T APE SELECTOR
AUTO REVERSE
T APE
UX-V50V
MICRO COMPONENT SYSTEM
VERTICAL DISC
LOADING MECHANISM
VIDEO CD VERSION 2.0
VIDEO CD VERSION 2.0
STANDBY
AHB
AUX
PRO
REC
TIMER
REV.
MODE
CLOCK
VCD
NUMBER
OPEN/CLOSE
TAPE
FM/AM
CD
SELECT
PHONES
DOWN
MULTI CONTROL
UP
PREV
RETURN
NEXT
INSTRUCTIONS
VOLUME
CD
For Customer Use:
Enter below the Model No. and Serial No.
which are located either on the rear, bot-
tom or side of the cabinet. Retain this
information for future reference.
Model No.
Serial No.
GVT0034-003A
[U/UB/US/UX/UT]
Advertisement
Table of Contents

Subscribe to Our Youtube Channel
Related Manuals for JVC UX-V50GNUB


Summary of Contents for JVC UX-V50GNUB
-
Page 1: Micro Component System
MICRO COMPONENT SYSTEM UX-V50V UX-V50GN AUTO SLEEP DISPLAY MODE PRESET TAPE FM/AM VOCAL VCD NUMBER REPEAT ECHO MASKING SELECT PROGRAM PREV NEXT VCD NUMBER V. INTRO RANDOM SCREEN DOWN BASS TREBLE CANCEL VOLUME REMOTE CONTROL RM-SUXV50E AUTO T APE SELECTOR AUTO REVERSE T APE UX-V50V... - Page 2 Caution –– switch! Disconnect the mains plug to shut the power off completely. The switch in any position does not disconnect the mains line. The power can be remote controlled. CAUTION To reduce the risk of electrical shocks, fire, etc.: 1.
- Page 3 Caution: Proper Ventilation To avoid risk of electric shock and fire, and to prevent damage, locate the apparatus as follows: 1 Front: No obstructions and open spacing. 2 Sides/ Top/ Back: No obstructions should be placed in the areas shown by the dimensions below. 3 Bottom: Place on the level surface.
-
Page 4: Important For Laser Products
REPRODUCTION OF LABELS / 1 CLASSIFICATION LABEL, PLACED ON REAR ENCLO- SURE CLASS LASER PRODUCT 1. CLASS 1 LASER PRODUCT 2. DANGER: Invisible laser radiation when open and interlock failed or defeated. Avoid direct exposure to beam. 3. CAUTION: Do not open the top cover. There are no user serviceable parts inside the Unit;... -
Page 5: Table Of Contents
• With JVC’s COMPU PLAY you can turn on the System and automatically start the Radio, Cassette deck or CD Player with a single touch. The System incorporates Active Hyper Bass PRO circuitry to faithfully reproduce low frequency sounds. -
Page 6: Getting Started
Getting Started Accessories Make sure that you have all of the following items, which are supplied with the System. AC Power Cord (1) AM Loop Antenna (1) Remote Control (1) Batteries (2) FM Wire Antenna (1) AC Plug Adaptor (except for Hong Kong and Argentina) (1) Video Cord (1) If any of these items are missing, contact your dealer immediately. -
Page 7: Connecting The Fm Antenna
CAUTION: Make all connections before plugging the System into an AC power outlet. Connecting the FM Antenna Rear Panel of the Unit Hong Kong only OPTICAL DIGITAL OUT VOLTAGE SELECTOR 230V 110V 127V Connecting the AM Antenna Rear Panel of the Unit Hong Kong only OPTICAL... -
Page 8: Connecting The Speakers
CAUTION: Make all connections before plugging the System into an AC power outlet. Connecting the Speakers For each speaker, connect one end of the speaker wire to the speaker terminal on the back of the System. 1. Open the terminals and insert the speaker wires firmly, then close the terminals. 2. -
Page 9: Connecting The Ac Power Cord
COMPU PLAY The JVC’s COMPU PLAY feature lets you control the most frequently used System functions with a single touch. With One Touch Operation you can play a CD, a tape, turn on the radio, or listen to an external equipment at a single press of the play button for that function. -
Page 10: Common Operations
Common Operations AUTO SLEEP DISPLAY MODE PRESET TAPE FM/AM VOCAL VCD NUMBER REPEAT ECHO MASKING SELECT PROGRAM PREV NEXT BASS VCD NUMBER RANDOM V. INTRO SCREEN DOWN BASS TREBLE CANCEL AHB PRO VOLUME VOLUME +, – REMOTE CONTROL RM-SUXV50V Turning the Power On and Off Turning the System on –––––––––––––––... -
Page 11: Reinforcing The Bass Sound
Reinforcing the Bass Sound (AHB PRO) You can reinforce the bass sound to maintain rich, full bass at low volume (you can use this effect only for playback): To get the effect, press the AHB (Active Hyper Bass) PRO button. The BASS indicator lights up on the display. -
Page 12: Using The Tuner
Using the Tuner FM MODE AUTO SLEEP DISPLAY MODE PRESET AUTO PRESET TAPE FM/AM FM/AM ¢ VOCAL VCD NUMBER REPEAT ECHO MASKING SELECT < PREV PROGRAM PREV NEXT NEXT> VCD NUMBER RANDOM V. INTRO SCREEN DOWN BASS TREBLE CANCEL DOWN VOLUME REMOTE CONTROL RM-SUXV50V When the System is in use, the display shows other items as well. -
Page 13: Presetting Stations
Presetting Stations You can preset up to 30 FM stations and up to 15 AM stations using the Remote Control. Note: Preset numbers may have been set to factory test frequen- cies prior to shipment. This is not a malfunction. You can preset the stations you want into memory by following one of the presetting methods below. -
Page 14: Using The Cd Player (Audio Cds)
Using the CD Player (Audio CDs) AUTO SLEEP DISPLAY MODE PRESET TAPE CD #¥8 FM/AM CD 0 ¢ VOCAL VCD NUMBER REPEAT ECHO MASKING REPEAT SELECT PROGRAM NEXT> PREV NEXT PROGRAM VCD NUMBER V. INTRO RANDOM SCREEN DOWN RANDOM BASS TREBLE CANCEL CANCEL... -
Page 15: Playing A Cd
Basics of Using the CD Player — Normal Play Playing a CD –––––––––––––––––––––––––– 1 Insert a CD. 2 Press the CD #/8 button. The first track of the CD begins playing. Track number Playback time • The track number that has already played disappears from the music calendar. -
Page 16: Repeating Tracks
Playing at Random The tracks will play in no particular order when you use this mode. Press the RANDOM button on the Remote Control. The RANDOM indicator lights up on the display, and tracks will be played in random order. To skip a track during playback, press the ¢... -
Page 17: Using The Video Cd Player (Vcds And Cd-Gs)
You can play video CDs (with or without the Playback Control (PBC) function) and CD Graphics (CD-Gs) to watch the picture on your TV while listening to the sound through your JVC Micro Component System. Before playing video CDs and CD-Gs •... -
Page 18: Playing Video Cds With Pbc Function
Playing Video CDs with PBC Function The System provides Playback Control (PBC) which utilizes a procedure (menu selection) programed into a VCD. What is the Playback Control (PBC) function? PBC allows you to enjoy the following features: • Menu-Driven Play You can interact with the TV screen using a menu display to select and play an entry. - Page 19 Example of playback using Playback Control (PBC) Moving Moving Moving Picture Picture Picture On the Remote Control: 1. Press the VCD NUMBER UP or DOWN button to select the item (“SEL XX”) you want to play. 2. Press the SELECT button to play it back. VCD NUMBER VCD NUMBER DOWN...
-
Page 20: Various Functions To Enhance Your Enjoyment
Various Functions to Enhance Your Enjoyment You can use the following features using the Remote Control. Frame-by-Frame Playback ––––––––––– Frame-by-Frame playback is possible only when moving pictures (of the video CDs with or without PBC) are played. During playback, press the CD #/8 button to pause the video CD and then press the ¢... -
Page 21: Using The Cassette Deck (Listening To A Tape)
Using the Cassette Deck (Listening to a Tape) REV. MODE AUTO SLEEP DISPLAY MODE PRESET TAPE FM/AM TAPE @ # ¢ VOCAL VCD NUMBER REPEAT ECHO MASKING SELECT PROGRAM PREV NEXT VCD NUMBER RANDOM DOWN V. INTRO SCREEN BASS TREBLE CANCEL VOLUME REMOTE CONTROL RM-SUXV50V... -
Page 22: Using The Cassette Deck (Recording)
Using the Cassette Deck (Recording) AUTO SLEEP DISPLAY MODE PRESET TAPE FM/AM CD #¥8 TAPE @ # VOCAL VCD NUMBER REPEAT ECHO MASKING SELECT PROGRAM PREV NEXT VCD NUMBER V. INTRO RANDOM DOWN SCREEN BASS TREBLE CANCEL VOLUME REMOTE CONTROL RM-SUXV50V When the System is in use, the display shows other items as well. -
Page 23: One Track Recording
CD Direct Recording Everything on the CD goes onto the tape in the order it is on the CD, or according to the order you have set in a program. 1 Insert a blank or erasable tape into the Cassette Deck. 2 Insert a CD. -
Page 24: Using External Equipment
Using External Equipment SLEEP DISPLAY MODE TAPE FM/AM VCD NUMBER REPEAT ECHO SELECT PROGRAM PREV VCD NUMBER RANDOM DOWN SCREEN BASS TREBLE AHB PRO VOLUME VOLUME +, – REMOTE CONTROL RM-SUXV50V Listening to External Equipment You can connect various external equipment. For Hong Kong, the external equipment is used as playback and recording device. -
Page 25: Using The Timers
Using the Timers AUTO SLEEP DISPLAY MODE PRESET SLEEP TAPE FM/AM VOCAL VCD NUMBER REPEAT ECHO MASKING SELECT PROGRAM PREV NEXT DISPLAY VCD NUMBER MODE RANDOM DOWN V. INTRO SCREEN BASS TREBLE CANCEL VOLUME REMOTE CONTROL RM-SUXV50V The timers let you control listening and recording functions automatically. -
Page 26: Setting The Recording Timer
4 Select the source. 1. Press the TIMER button on the Unit. “TUNER” flashes on the display. 2. Press the ¢ or 4 button to select the source you want to listen to. The display changes as shown below. 5 Set the volume level. 1. -
Page 27: Setting The Sleep Timer
7 Press the ¢ or 4 button until “TUNER” appears and the REC indicator lights up on the display. The display changes as shown below. 8 Set the volume level. 1. Press the TIMER button on the Unit. The current volume setting flashes on the display. 2. -
Page 28: Using The Microphone
Using the Microphone ECHO AUTO SLEEP DISPLAY MODE PRESET TAPE FM/AM CD #¥8 ¢ VOCAL VCD Number VCD NUMBER REPEAT ECHO REPEAT MASKING SELECT PROGRAM PREV NEXT PROGRAM NEXT > VCD NUMBER RANDOM V. INTRO DOWN RANDOM SCREEN BASS TREBLE CANCEL <... -
Page 29: Microphone Mixing
To cancel the echo, press the ECHO button again until “ECHO OFF” appears on the display. Selecting the Tuner or turning off the power will also cancel the echo. Note: During recording, you cannot switch the echo. CAUTION: Always set the MIC LEVEL control to MIN when connecting or disconnecting the microphone. -
Page 30: Care And Maintenance
Care and Maintenance Handle your CDs carefully, and they will last a long time. Compact Discs • Only CDs bearing these marks can be used with this System. However, continued use of irregular shape CDs (heart-shape, octagonal, etc.) can damage the System. •... -
Page 31: Troubleshooting
Troubleshooting • If you are having a problem with your System, check this list for a possible solution before calling for service. • If you cannot solve the problem from the hints given here, or the System has been physically damaged, call a qualified person, such as your dealer, for service. -
Page 32: Specifications
Specifications UX-V50V (CA-UXV50V and SP-UXV50V) UX-V50GN (CA-UXV50GN and SP-UXV50GN) Amplifier Output Power Input Sensitivity/Impedance (1 kHz) LINE IN (AUX) Output Sensitivity/Impedance (1 kHz) LINE OUT (For Hong Kong only) Optical out (For Hong Kong only) Speaker terminals Phones Cassette Deck Frequency Response Type I (Normal) Type II (CrO... - Page 33 Mains (AC) Line Instruction (not applicable for Europe, U.S.A., Canada, Australia, and U.K.) VOLTAGE SELECTOR 230V 110V 127V IMPORTANT for mains (AC) line BEFORE PLUGGING IN, do check that your mains (AC) line voltage corresponds with the position of the voltage selector switch provided on the outside of this equipment and, if different, reset the voltage selector switch, to prevent from damage or risk of fire/electric shock.
Need help?
Do you have a question about the UX-V50GNUB and is the answer not in the manual?
Questions and answers