Table of Contents
Advertisement
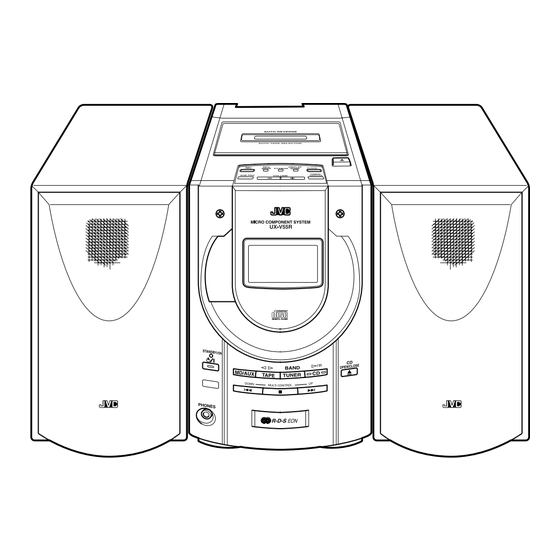
MICRO COMPONENT SYSTEM
MIKRO-KOMPONENTEN-SYSTEM
SYSTEME DE MICROCOMPOSANTS
MIKRO KOMPONENTENSYSTEEM
SISTEMAS DE MICROCOMPONENTES
SISTEMA A MICROCOMPONENTI
MIKROKOMPONENTSYSTEM
UX-V55R
REMOTE CONTROL RM-RXUV5R
DIMMER
SLEEP
DISPLAY
FM MODE
MD/AUX
AUTO
AHB PRO
PRESET
PROGRAM RANDOM
REPEAT
BASS
TREBLE
CANCEL
UP
SET
DOWN
PTY/EON
DISPLAY MODE
TUNER
TAPE
BAND
VOLUME
CD
CD
INSTRUCTIONS
BEDIENUNGSANLEITUNG
MANUEL D'INSTRUCTIONS
GEBRUIKSAANWIJZING
MANUAL DE INSTRUCCIONES
ISTRUZIONI
BRUKSANVISNING
For Customer Use:
Enter below the Model No. and Serial No.
which are located either on the rear, bot-
tom or side of the cabinet. Retain this
information for future reference.
Model No.
Serial No.
LVT0363-001A
[E]
Advertisement
Table of Contents

Subscribe to Our Youtube Channel
Related Manuals for JVC UX-V55R


Summary of Contents for JVC UX-V55R
-
Page 1: Micro Component System
MICRO COMPONENT SYSTEM MIKRO-KOMPONENTEN-SYSTEM SYSTEME DE MICROCOMPOSANTS MIKRO KOMPONENTENSYSTEEM SISTEMAS DE MICROCOMPONENTES SISTEMA A MICROCOMPONENTI MIKROKOMPONENTSYSTEM UX-V55R REMOTE CONTROL RM-RXUV5R DIMMER SLEEP DISPLAY FM MODE MD/AUX AUTO AHB PRO PRESET PROGRAM RANDOM REPEAT BASS TREBLE CANCEL DOWN PTY/EON DISPLAY MODE... - Page 2 2. Stel het toestel niet bloot aan regen of vocht. Per l’Italia: "Si dichiara che il questo prodotto di marca JVC è conforme alle prescrizioni del Decreto Ministeriale n.548 del 28/08/95 pubbli- cato sulla Gazzetta Ufficiale della Repubblica Italiana n.301 del 28/12/95."...
- Page 3 10 cm of meer te plaatsen. Front view Vorderansicht Face Vooraanzicht Vista frontal Vista frontale Sett framifrån 15 cm MICRO COMPONENT SYSTEM UX-V55R 1 cm 15 cm STANDBY/ON BAND MD/AUX TAPE TUNER DOWN MULTI CONTROL PHONES UX-V55R Precaucion: ventilación correcta...
- Page 4 IMPORTANT FOR LASER PRODUCTS/ WICHTIGER HINWEIS FÜR LASER-PRODUKTE / IMPORTANT POUR LES PRODUITS LASER / BELANGRIJKE INFORMATIE VOOR LASERPRODUKTEN / IMPORTANTE PARA LOS PRODUCTOS LÁSER / IMPORTANTE PER I PRO- DOTTI LASER / VIKTIGT BETRÄFFANDE LASERPRODUKTER REPRODUCTION OF LABELS/ANBRINGUNGSORTE FÜR LASER-PRODUKTE/REPRODUCTION DES ETIQUETTES/VERKLARING VAN DE LABELS/REPRODUCCIÓN DE ETIQUETAS/RIPRODUZIONE DELLE ETICHETTE / PLACERING AV ETIKETTER 1 CLASSIFICATION LABEL, PLACED ON EXTERIOR SURFACE 1 KLASSIFIZIERUNGSHINWEIS BEFINDET SICH AUF DER AUS-...
-
Page 5: Table Of Contents
The controls and operations have been redesigned to make them very easy to use, freeing you to just enjoy the music. • With JVC’s COMPU PLAY you can turn on the System and automatically start the Radio, Cassette deck or CD Player with a single touch. -
Page 6: Getting Started
Getting Started Accessories Make sure that you have all of the following items, which are supplied with the System. Power Cord (1) AM Loop Antenna (1) Remote Control (1) Batteries (2) FM Wire Antenna (1) If any of these items are missing, contact your dealer immediately. How To Put Batteries In the Remote Control Match the polarity (+ and –) on the batteries with the + and –... -
Page 7: Connecting The Fm Antenna
CAUTION: Make all connections before plugging the System into an AC power outlet. Connecting the FM Antenna Rear Panel of the Unit Connecting the AM (MW/LW) Antenna Rear Panel of the Unit CAUTION: To avoid noise, keep antennas away from the System, the connecting cord and the AC power cord. -
Page 8: Connecting The Speakers
CAUTION: Make all connections before plugging the System into an AC power outlet. Connecting the Speakers For each speaker, connect one end of the speaker wire to the speaker terminals on the back of the System. 1. Open each of the terminals and insert the speaker wires firmly, then close the terminals. 2. -
Page 9: Connecting The Ac Power Cord
COMPU PLAY JVC’s COMPU PLAY feature lets you control the most frequently used System functions with a single touch. With One Touch Operation you can play a CD, a tape, turn on the radio, or listen to an external equipment with a single press of the play button for that function. -
Page 10: Common Operations
Common Operations REMOTE CONTROL RM-RXUV5R DIMMER SLEEP DIMMER DISPLAY FM MODE MD/AUX DISPLAY AUTO AHB PRO PRESET AHB PRO PROGRAM RANDOM REPEAT BASS TREBLE CANCEL BASS TREBLE AHB PRO DOWN PTY/EON DISPLAY MODE TUNER TAPE BAND VOLUME+,– VOLUME Turning the Power On and Off Turning the System On Press the button. -
Page 11: Reinforcing The Bass Sound
Reinforcing the Bass Sound (AHB PRO) You can reinforce the bass sound to maintain rich, full bass at low volume (you can use this effect only for playback): To get the effect, press the AHB (Active Hyper Bass) PRO but- ton. -
Page 12: Using The Tuner
Using the Tuner REMOTE CONTROL RM-RXUV5R DIMMER SLEEP DISPLAY FM MODE MD/AUX FM MODE AUTO AHB PRO PRESET AUTO PRESET PROGRAM RANDOM REPEAT BASS TREBLE CANCEL < > DISPLAY MODE PTY/EON DOWN DOWN PTY/EON DISPLAY MODE TUNER TAPE BAND TUNER BAND ¢... -
Page 13: Receiving Fm Stations With Rds
4. Press the UP, DOWN, >, or < button within 5 seconds to select the preset number. UP or > button: Increases the preset number by 1. DOWN or < button: Decreases the preset number by 1. • When the > or < button is kept pressed, the preset number changes rapidly. - Page 14 On characters displayed When the display shows PS, PTY or RT signals: • The display cannot show accented letters; For example, “A” may represent accented “A’s” like “Á, Â, Ã, À, Ä and Å”. (see below) To search for a programme by PTY codes ————————————————...
- Page 15 To temporarily switch to a broadcast programme of your choice ————— EON (Enhanced Other Networks) is another convenient RDS ser- vice that allows this unit to switch temporarily to a broadcast pro- gramme of your choice (NEWS, TA or INFO) from the currently selected station, except if you are listening to a non-RDS station (all AM (MW/LW) stations or some FM stations).
-
Page 16: Using The Cd Player
Using the CD Player REMOTE CONTROL RM-RXUV5R DIMMER SLEEP DISPLAY FM MODE MD/AUX AUTO AHB PRO PRESET CD 0 PROGRAM RANDOM REPEAT REPEAT PROGRAM RANDOM BASS TREBLE CANCEL CANCEL < > DOWN PTY/EON DISPLAY MODE DOWN TUNER TAPE BAND ¢ VOLUME When the System is in use, the display shows other items as well. -
Page 17: Programming The Playing Order Of The Tracks
To stop playing the CD, press the button. The following information for the CD is displayed. Total track number Total playback time To stop playing and remove the CD, press the CD OPEN/ CLOSE button on the Unit or CD button on the Remote Con- trol to open the CD cover. -
Page 18: Using The Cassette Deck (Listening To A Tape)
Using the Cassette Deck (Listening to a Tape) REMOTE CONTROL RM-RXUV5R DIMMER SLEEP DISPLAY FM MODE MD/AUX AUTO AHB PRO PRESET PROGRAM RANDOM REPEAT BASS TREBLE CANCEL DOWN PTY/EON DISPLAY MODE TAPE TUNER TAPE BAND ¢ VOLUME The Cassette Deck allows you to play and record audio tapes. With Automatic Tape Detection, you can listen to type I, II or IV tapes without having to change any settings. -
Page 19: Using The Cassette Deck (Recording)
Using the Cassette Deck (Recording) REMOTE CONTROL RM-RXUV5R DIMMER SLEEP DISPLAY FM MODE MD/AUX AUTO AHB PRO PRESET AUTO PRESET PROGRAM RANDOM REPEAT BASS TREBLE CANCEL DOWN PTY/EON DISPLAY MODE TAPE TUNER TAPE BAND VOLUME Recording onto a tape from any of the sound sources is simple. Just place a tape in the Cassette Deck, have the source ready, make one or two settings, and you’re ready to record. -
Page 20: One Track Recording
Notes for using Reverse mode for recording When recording in Reverse mode, the System automatically stops when it reaches the end of the reverse direction. To record on both sides of a tape, make sure that the recording direction for the tape inserted is forward , and that the Tape Direction indicator is also forward... -
Page 21: Using External Equipment
Using External Equipment REMOTE CONTROL RM-RXUV5R DIMMER DISPLAY AHB PRO PROGRAM RANDOM BASS PTY/EON TAPE Listening to External Equipment You can listen to external equipment such as MD recorder, turntable, etc. First make sure that the external equipment is properly connect- ed to the System. -
Page 22: Using The Timers
Using the Timers REMOTE CONTROL RM-RXUV5R DIMMER SLEEP SLEEP DISPLAY FM MODE MD/AUX AUTO AHB PRO PRESET PROGRAM RANDOM REPEAT BASS TREBLE CANCEL DOWN PTY/EON DISPLAY MODE TUNER TAPE BAND VOLUME The timers let you control listening and recording functions auto- matically. -
Page 23: Setting The Sleep Timer
5. Setting the volume level. 1. Press the TIMER/SNOOZE button on the Unit. The current volume setting blinks on the display. ¢ 2. Press the button to select the volume level. : The current volume level will be used. 0 to 50: When the timer is turned on, the Volume will be automatically set to the selected level. -
Page 24: Care And Maintenance
Care And Maintenance Handle your CDs carefully, and they will last a long time. Compact Discs • Only CDs bearing this mark can be used with this System. However, continued use of irregu- larly shaped CDs (heart-shape, octagonal, etc.) can damage the System. •... -
Page 25: Troubleshooting
Troubleshooting • If you are having a problem with your System, check this list for a possible solution before calling for service. • If you cannot solve the problem from the hints given here, or the System has been physically damaged, call a qualified person, such as your dealer, for service. -
Page 26: Specifications
Specifications Amplifier Output Power 34 W (17 W + 17 W) at 4 ohms (Max.) Input Sensitivity/Impedance (1 kHz) LINE IN (AUX) 500 mV/65 kohms Output Sensitivity/Impedance (1 kHz) LINE OUT 500 mV/4.3 kohms Optical out –21 dBm - –15 dBm Speaker terminals 4 - 16 ohms Phones 16 ohms - 1 kohms Cassette Deck... - Page 27 VICTOR COMPANY OF JAPAN, LIMITED EN, GE, FR, NL, SP , IT, SW 0699MNMCREJSC...
Need help?
Do you have a question about the UX-V55R and is the answer not in the manual?
Questions and answers