Table of Contents
Advertisement
Available languages
Available languages
MICRO COMPONENT SYSTEM
SISTEMAS DE MICROCOMPONENTES
UX-V10
UX-V10GN
UX-V10WT
FM
AUTO
SLEEP
DISPLAY
MODE
PRESET
TAPE
CD
AUX
FM/AM
CD
REPEAT
UP
PROGRAM
SET
RANDOM
DOWN
AHB
PRO
BASS
TREBLE
CANCEL
VOLUME
REMOTE CONTROL RM-SUXV10E
AUTO T APE SELECTOR
AUTO REVERSE
COMPACT
DIGITAL AUDIO
VERTICAL DISC
LOADING MECHANISM
UX-V10
MICRO COMPONENT SYSTEM
STANDBY
AUX
REC
REV.
MODE
CLOCK
TAPE
FM/AM
CD
PHONES
DOWN
MULTI CONTROL
UP
INSTRUCTIONS
MANUEL DE INSTRUCCIONES
T APE
AHB
PRO
VOLUME
TIMER
CD
OPEN/CLOSE
For Customer Use:
Enter below the Model No. and Serial No.
which are located either on the rear, bot-
tom or side of the cabinet. Retain this
information for future reference.
Model No.
Serial No.
GVT0031-003A
[U/US/UT/UX/UY/UB]
Advertisement
Chapters
Table of Contents

Related Manuals for JVC UX-V10E


Summary of Contents for JVC UX-V10E
-
Page 1: Micro Component System
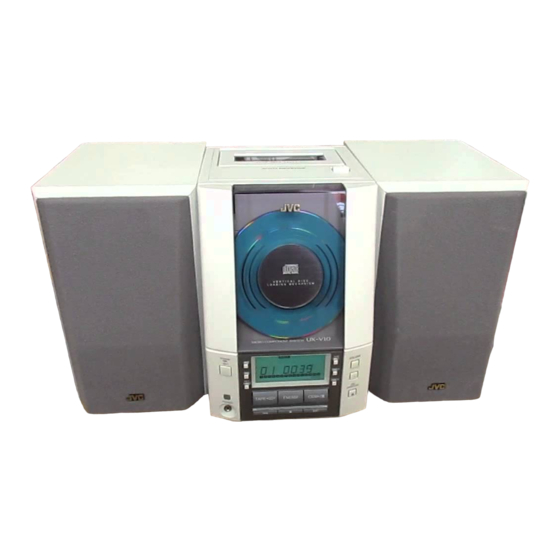
MICRO COMPONENT SYSTEM SISTEMAS DE MICROCOMPONENTES UX-V10 UX-V10GN UX-V10WT AUTO SLEEP DISPLAY MODE PRESET TAPE FM/AM REPEAT PROGRAM RANDOM DOWN BASS TREBLE CANCEL VOLUME REMOTE CONTROL RM-SUXV10E AUTO T APE SELECTOR AUTO REVERSE T APE COMPACT DIGITAL AUDIO VERTICAL DISC LOADING MECHANISM UX-V10 MICRO COMPONENT SYSTEM... - Page 2 Caution –– switch! Disconnect the mains plug to shut the power off completely. The switch in any position does not disconnect the mains line. The power can be remote controlled. Precaución –– Interruptor Desconectar el cable de alimentación para desactivar la alimentación totalmente.
- Page 3 Caution: Proper Ventilation To avoid risk of electric shock and fire, and to prevent damage, locate the apparatus as follows: 1 Front: No obstructions and open spacing. 2 Sides/ Top/ Back: No obstructions should be placed in the areas shown by the dimensions below. 3 Bottom: Place on the level surface.
-
Page 4: Laser Product
IMPORTANT FOR LASER PRODUCTS / IMPORTANTE PARA PRODUCTOS LÁSER REPRODUCTION OF LABELS / REPRODUCCIÓN DE ETIQUETAS / 1 CLASSIFICATION LABEL, PLACED ON REAR ENCLO- SURE 1 ETIQUETA DE CLASIFICACIÓN, PEGADA EN LA PARTE POSTERIOR DE LA CAJA CLASS LASER PRODUCT 1. -
Page 5: Table Of Contents
The controls and operations have been designed to make them very easy to use, freeing you to just enjoy the music. With JVC’s COMPU PLAY you can turn on the System and automatically start the Radio, Cassette deck or CD •... -
Page 6: Getting Started
Getting Started Accessories Make sure that you have all of the following items, which are supplied with the System. AC Power Cord (1) AM Loop Antenna (1) Remote Control (1) Batteries (2) FM Wire Antenna (1) AC Plug Adaptor (except for Hong Kong and Argentina) (1) If any of these items are missing, contact your dealer immediately. -
Page 7: Connecting The Fm Antenna
CAUTION: Make all connections before plugging the System into an AC power outlet. Connecting the FM Antenna Rear Panel of the Unit Hong Kong only OPTICAL DIGITAL OUT VOLTAGE SELECTOR 230V 110V 127V Connecting the AM Antenna Rear Panel of the Unit Hong Kong only OPTICAL... -
Page 8: Connecting The Speakers
CAUTION: Make all connections before plugging the System into an AC power outlet. Connecting the Speakers For each speaker, connect one end of the speaker wire to the speaker terminals on the back of the System. 1. Open each of the terminals and insert the speaker wires firmly, then close the terminals. 2. -
Page 9: Connecting The Ac Power Cord
COMPU PLAY The JVC’s COMPU PLAY feature lets you control the most frequently used System functions with a single touch. With One Touch Operation you can play a CD, a tape, turn on the radio, or listen to an external equipment at a single press of the play button for that function. -
Page 10: Common Operations
Common Operations AUTO SLEEP DISPLAY MODE PRESET TAPE FM/AM REPEAT PROGRAM BASS RANDOM DOWN BASS TREBLE CANCEL AHB PRO VOLUME VOLUME +, – REMOTE CONTROL RM-SUXV10E Turning the Power On and Off Turning the System on ––––––––––––––– Press the button. The STANDBY lamp goes out. -
Page 11: Reinforcing The Bass Sound
Reinforcing the Bass Sound (AHB PRO) You can reinforce the bass sound to maintain rich, full bass at low volume (you can use this effect only for playback): To get the effect, press the AHB (Active Hyper Bass) PRO button. The BASS indicator lights up on the display. -
Page 12: Using The Tuner
Using the Tuner FM MODE AUTO SLEEP DISPLAY MODE PRESET AUTO PRESET TAPE FM/AM FM/AM ¢ REPEAT PROGRAM < > RANDOM DOWN BASS TREBLE CANCEL DOWN VOLUME REMOTE CONTROL RM-SUXV10E When the System is in use, the display shows other items as well. For simplicity, only the items described in this section are shown here. -
Page 13: Presetting Stations
Presetting Stations You can preset up to 30 FM stations and up to 15 AM stations using the Remote Control. Note: Preset numbers may have been set to factory test frequen- cies prior to shipment. This is not a malfunction. You can preset the stations you want into memory by following one of the presetting methods below. -
Page 14: Using The Cd Player
Using the CD Player AUTO SLEEP DISPLAY MODE PRESET TAPE CD #¥8 FM/AM ¢ CD 0 REPEAT REPEAT PROGRAM > PROGRAM RANDOM DOWN RANDOM BASS TREBLE CANCEL < CANCEL VOLUME DOWN REMOTE CONTROL RM-SUXV10E When the System is in use, the display shows other items as well. For simplicity, only the items described in this section are shown here. -
Page 15: Playing A Cd
Basics of Using the CD Player — Normal Play Playing a CD –––––––––––––––––––––––––– 1 Insert a CD. 2 Press the CD #/8 button. The first track of the CD begins playing. Track number Playback time • The track number that has already played disappears from the music calendar. -
Page 16: Repeating Tracks
Playing at Random The tracks will play in no particular order when you use this mode. Press the RANDOM button on the Remote Control. The RANDOM indicator lights up on the display, and tracks will be played in random order. To skip a track during playback, press the ¢... -
Page 17: Using The Cassette Deck (Listening To A Tape)
Using the Cassette Deck (Listening to a Tape) REV. MODE AUTO SLEEP DISPLAY MODE PRESET TAPE FM/AM TAPE @ # ¢ REPEAT PROGRAM DOWN RANDOM BASS TREBLE CANCEL VOLUME REMOTE CONTROL RM-SUXV10E When the System is in use, the display shows other items as well. For simplicity, only the items described in this section are shown here. -
Page 18: Using The Cassette Deck (Recording)
Using the Cassette Deck (Recording) AUTO SLEEP DISPLAY MODE PRESET TAPE FM/AM CD #¥8 TAPE @ # REPEAT PROGRAM RANDOM DOWN BASS TREBLE CANCEL VOLUME REMOTE CONTROL RM-SUXV10E When the System is in use, the display shows other items as well. For simplicity, only the items described in this section are shown here. -
Page 19: One Track Recording
CD Direct Recording Everything on the CD goes onto the tape in the order it is on the CD, or according to the order you have set in a program. 1 Insert a blank or erasable tape into the Cassette Deck. 2 Insert a CD. -
Page 20: Using External Equipment
Using External Equipment SLEEP DISPLAY MODE TAPE FM/AM REPEAT PROGRAM RANDOM DOWN BASS TREBLE AHB PRO VOLUME VOLUME +, – REMOTE CONTROL RM-SUXV10E Listening to External Equipment You can connect various external equipment. For Hong Kong, the external equipment is used as playback and recording device. -
Page 21: Using The Timers
Using the Timers AUTO SLEEP DISPLAY MODE PRESET SLEEP TAPE FM/AM DISPLAY REPEAT MODE PROGRAM RANDOM DOWN BASS TREBLE CANCEL VOLUME REMOTE CONTROL RM-SUXV10E The timers let you control listening and recording functions automatically. Setting the Clock • When you plug the AC power cord into the wall outlet, the CLOCK indicator flashes on the display. -
Page 22: Setting The Recording Timer
4 Select the music source. 1. Press the TIMER button on the Unit. “TUNER” flashes on the display. 2. Press the ¢ or 4 button to select the music source you want to listen to. The display changes as shown below. 5 Set the volume level. -
Page 23: Setting The Sleep Timer
7 Press the ¢ or 4 button until “TUNER” appears and the REC indicator lights up on the display. The display changes as shown below. 8 Set the volume level. 1. Press the TIMER button on the Unit. The current volume setting flashes on the display. 2. -
Page 24: Care And Maintenance
Care and Maintenance Handle your CDs carefully, and they will last a long time. Compact Discs • Only CDs bearing this mark can be used with this System. However, continued use of irregular shape CDs (heart-shape, octagonal, etc.) can damage the System. •... -
Page 25: Troubleshooting
Troubleshooting • If you are having a problem with your System, check this list for a possible solution before calling for service. • If you cannot solve the problem from the hints given here, or the System has been physically damaged, call a qualified person, such as your dealer, for service. -
Page 26: Specifications
Specifications UX-V10 (CA-UXV10 and SP-UXV10) UX-V10GN (CA-UXV10GN and SP-UXV10GN) UX-V10WT (CA-UXV10WT and SP-UXV10WT) Amplifier Output Power Input Sensitivity/Impedance (1 kHz) LINE IN (AUX) Output Sensitivity/Impedance (1 kHz) LINE OUT (For Hong Kong only) Optical out (For Hong Kong only) Speaker terminals Phones Cassette Deck Frequency Response... -
Page 27: Características
Los mandos y las funciones han sido rediseñados para que resulten muy fáciles de utilizar y pueda dedicarse sólo a disfrutar de la música. Con el COMPU PLAY de JVC puede poner en marcha el sistema y escuchar automáticamente la radio, la •... -
Page 28: Cómo Empezar
Cómo empezar Accesorios Asegúrese de tener todos los componentes siguientes que fueron suministrados con el sistema. Cable de alimentación de CA (1) Antena de cuadro AM (1) Mando a distancia (1) Pilas (2) Antena monofilar de FM (1) Adaptador de enchufe de CA (Excepto para Hong Kong y Argentina) (1) Si faltara alguno de estos artículos, contacte de inmediato con su proveedor. - Page 29 CUIDADO: Realice todas las conexiones antes de enchufar el equipo a la toma de corriente. Conexión de la antena FM Panel posterior del aparato Sólo Hong Kong OPTICAL DIGITAL OUT VOLTAGE SELECTOR 230V 110V 127V Conexión de la antena de AM Panel posterior del aparato Sólo Hong Kong...
- Page 30 CUIDADO: Realice todas las conexiones antes de enchufar el equipo a la toma de corriente. Conexión de los altavoces Para cada altavoz, conecte un extremo del cable a los terminales del altavoz que están en la parte trasera del sistema. 1.
-
Page 31: Compu Play
COMPU PLAY La función COMPU PLAY de JVC le permite controlar las funciones más frecuentes utilizadas en el sistema con un simple botón. Con el sistema de un sólo botón puede reproducir un CD, una cinta, encender la radio o escuchar una fuente externa con sólo pulsar el botón Play de la función. -
Page 32: Funciones Comunes
Funciones comunes AUTO SLEEP DISPLAY MODE PRESET TAPE FM/AM REPEAT PROGRAM BASS RANDOM DOWN AHB PRO BASS TREBLE CANCEL VOLUME VOLUME +, – REMOTE CONTROL RM-SUXV10E Encendido y apagado del equipo Encendido del sistema ––––––––––––––– Pulse el botón El lámpara de modo de espera STANDBY se apagará. El Sistema queda preparado para reproducir la fuente que se estaba reproduciendo la última vez que se desconectó... - Page 33 Potenciación de los sonidos graves (AHB PRO) Puede potenciar los sonidos graves para mantener un buen nivel de graves incluso a bajo volumen (sólo podrá utilizar este efecto en la reproducción): Para activarlo, pulse el botón AHB (Active Hyper Bass) PRO. En la pantalla se encenderá...
-
Page 34: Uso Del Sintonizador
Uso del sintonizador FM MODE AUTO SLEEP DISPLAY MODE PRESET AUTO PRESET TAPE FM/AM FM/AM ¢ REPEAT PROGRAM < > RANDOM DOWN BASS TREBLE CANCEL DOWN VOLUME REMOTE CONTROL RM-SUXV10E Cuando se utiliza el sistema, la pantalla también muestra otros datos. Para mayor sencillez, mostramos sólo los puntos descritos en esta sección. - Page 35 Presintonía de emisoras Se pueden prefijar hasta 30 emisoras de FM y hasta 15 emisoras de AM con el mando a distancia. Nota: Antes del empaquetado puede que haya algún número de presintonía memorizado en fábrica para realizar pruebas. No se trata de un mal funcionamiento. Puede prefijar en la memoria las emisoras que desee siguiendo uno de los métodos siguientes: Prefijado manual –––––––––––––––––––––...
-
Page 36: Uso Del Reproductor De Cd
Uso del reproductor de CD AUTO SLEEP DISPLAY MODE PRESET TAPE FM/AM CD #/8 CD 0 ¢ REPEAT REPEAT PROGRAM > PROGRAM RANDOM DOWN RANDOM BASS TREBLE CANCEL CANCEL < VOLUME DOWN REMOTE CONTROL RM-SUXV10E Cuando se utiliza el sistema, la pantalla también muestra otros datos. Para mayor sencillez, mostramos sólo los puntos descritos en esta sección. - Page 37 Instrucciones básicas para la utilización del reproductor de CD — reproducción normal Para reproducir un CD ––––––––––––––– 1 Inserte un CD. 2 Pulse el botón CD #/8. Se inicia la reproducción de la primera pista del CD. Número de pista Tiempo de reproducción •...
- Page 38 Para reproducir al azar Las pistas se reproducirán en una secuencia aleatoria. Presione el botón RANDOM en el mando a distancia. El indicador RANDOM se enciende en la pantalla, y las pistas se reproducen en orden aleatorio. Para saltar una pista durante la reproducción, pulse el botón ¢...
-
Page 39: Uso De La Platina (Escuchar Una Cinta)
Uso de la platina (Escuchar una cinta) REV. MODE AUTO SLEEP DISPLAY MODE PRESET TAPE FM/AM TAPE @ # ¢ REPEAT PROGRAM DOWN RANDOM BASS TREBLE CANCEL VOLUME REMOTE CONTROL RM-SUXV10E Cuando se utiliza el sistema, la pantalla también muestra otros datos. Para mayor sencillez, mostramos sólo los puntos descritos en esta sección. -
Page 40: Uso De La Platina (Grabación)
Uso de la platina (Grabación) AUTO SLEEP DISPLAY PRESET MODE TAPE FM/AM CD #¥8 TAPE @ # REPEAT PROGRAM RANDOM DOWN BASS TREBLE CANCEL VOLUME REMOTE CONTROL RM-SUXV10E Cuando se utiliza el sistema, la pantalla también muestra otros datos. Para mayor sencillez, mostramos sólo los puntos descritos en esta sección. La grabación en casete desde cualquiera de las fuentes de audio es muy simple. - Page 41 Notas para el uso del modo de inversión (Reverse) en grabación Cuando grabe en el modo de inversión, el equipo se parará automáticamente cuando llega a final del recorrido invertido 2. Para grabar ambas caras de la cinta, asegúrese de que la dirección de grabación de la cinta va en dirección correcta 3 y de que el indicador de la dirección de la cinta también señala hacia delante 3, antes de empezar la grabación.
-
Page 42: Uso De Equipos Externos
Uso de equipos externos SLEEP DISPLAY MODE TAPE FM/AM REPEAT PROGRAM RANDOM DOWN BASS TREBLE AHB PRO VOLUME VOLUME +, – REMOTE CONTROL RM-SUXV10E Para escuchar equipos externos Puede conectar diversos equipos exteriores. Para Hong Kong, el equipo exterior se utiliza como dispositivo de reproducción y de grabación. -
Page 43: Uso De Los Temporizadores
Uso de los temporizadores AUTO SLEEP DISPLAY SLEEP MODE PRESET TAPE FM/AM DISPLAY REPEAT MODE PROGRAM RANDOM DOWN BASS TREBLE CANCEL VOLUME REMOTE CONTROL RM-SUXV10E Los temporizadores le permiten controlar automáticamente las funciones de reproducción y grabación. Ajuste del reloj •... - Page 44 4 Para seleccionar la fuente de audio. 1. Presione el botón TIMER en el equipo. En la pantalla parpadea “TUNER”. 2. Presione el botón ¢ o 4 para seleccionar la fuente de audio que desee escuchar. La pantalla cambia como se muestra. 5 Cómo ajustar el nivel del volumen.
- Page 45 6 Presione el botón TIMER en el equipo. 7 Pulse el botón ¢ o 4 hasta que aparezca “TUNER” y se encienda el indicador REC en la pantalla. La pantalla cambia como se muestra. 8 Cómo ajustar el nivel del volumen. 1.
-
Page 46: Cuidado Y Mantenimiento
Cuidado y mantenimiento Si trata sus CD con cuidado, durarán mucho tiempo. Discos compactos • Sólo se pueden utilizar en este equipo los CD que lleven este distintivo. El uso continuado de discos de perfil irregular (en forma de corazón, octogonales, etc.) puede dañar el equipo. -
Page 47: Solución De Problemas
Solución de problemas • Si tiene problemas con su sistema, compruebe en esta lista la posible solución antes de acudir al servicio técnico. • Si no puede solucionar el problema o si el sistema se ha dañado físicamente, avise a un técnico cualificado, como por ejemplo su distribuidor oficial, para que lleve a cabo la reparación. -
Page 48: Características Técnicas
Características técnicas UX-V10 (CA-UXV10 y SP-UXV10) UX-V10GN (CA-UXV10GN y SP-UXV10GN) UX-V10WT (CA-UXV10WT y SP-UXV10WT) Amplificador Potencia de salida Sensibilidad de entrada/impedancia (1 kHz) Sensibilidad de salida/impedancia (1 kHz) LINE OUT (Sólo Hong Kong) Salida óptica (Sólo Hong Kong) Terminales del altavoz Platina de casete Respuesta en frecuencia Fluctuación y trémolo... - Page 49 Mains (AC) Line Instruction (not applicable for Europe, U.S.A., Canada, Australia, and U.K.) Instrucción sobre la línea de la red (CA) (no aplicable para Europa, EE.UU., Canadá, Australia, ni el Grã-Bretanha) VOLTAGE SELECTOR 230V 110V 127V IMPORTANT for mains (AC) line BEFORE PLUGGING IN, do check that your mains (AC) line voltage corresponds with the position of the voltage selector switch provided on the outside of this equipment...
Need help?
Do you have a question about the UX-V10E and is the answer not in the manual?
Questions and answers