Renesas RYZ014A Integration Manual
Hide thumbs
Also See for RYZ014A:
- User manual (39 pages) ,
- Datasheet (35 pages) ,
- Quick start manual (20 pages)
Table of Contents
Advertisement
Quick Links
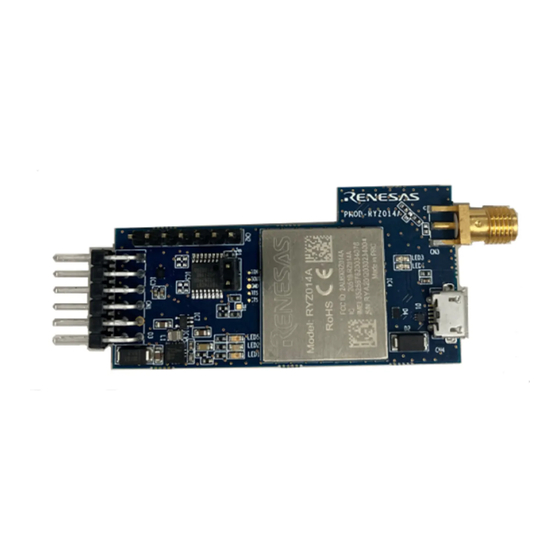
RYZ014A
Module Integration Guide
Introduction
This Application note helps customers creating their own board(s) based on the RYZ014A module
successfully integrate and test their product.
It presents Integration Guidelines for:
•
All RYZ014A Interface Requirements
•
Tips and "how-to"s for troubleshooting
The rules and tips laid out in this document improve the quality of the final product. The process is split into
three sections:
1.
System Overview
2.
Hardware and software design guidelines
3.
Bring-up verification and test
Target Device
RYZ014A
Related Documents
•
RYZ014A LTE Category M1 Module Datasheet (R19DS0111)
R19AN0084EU0110 Rev.1.10
Jun.27.22
Application Note
Page 1 of 30
Advertisement
Table of Contents
Troubleshooting

Related Manuals for Renesas RYZ014A


Summary of Contents for Renesas RYZ014A
- Page 1 Application Note RYZ014A Module Integration Guide Introduction This Application note helps customers creating their own board(s) based on the RYZ014A module successfully integrate and test their product. It presents Integration Guidelines for: • All RYZ014A Interface Requirements • Tips and “how-to”s for troubleshooting The rules and tips laid out in this document improve the quality of the final product.
-
Page 2: Table Of Contents
RYZ014A Module Integration Guide Contents Overview ..........................5 System Architecture ..........................5 Recommended Design Flow ........................5 1.2.1 Design Modifications ..........................5 1.2.2 Schematics Review ..........................6 1.2.3 PCB Placement and Layout Review ..................... 6 1.2.4 Optimization ............................6 1.2.5 Functional Validation .......................... - Page 3 RYZ014A Module Integration Guide 2.4.2 Circuit Diagram Example ........................14 2.4.3 Test Points and Measurement Access ....................15 2.4.4 Antennas and RF Design Considerations ................... 15 2.4.4.1 Antenna Impedance Matching ......................15 2.4.4.2 ESD Protection ..........................15 2.4.4.3 Standard Impedance Transmission Lines ..................15 2.4.4.4 ANT_LTE Specific Footprint Design ....................
- Page 4 RYZ014A Module Integration Guide A Abbreviations ..........................27 Revision History ..........................30 R19AN0084EU0110 Rev.1.10 Page 4 of 30 Jun.27.22...
-
Page 5: Overview
Module Integration Guide 1. Overview 1.1 System Architecture Figure 1-1 provides an overview of the Host - RYZ014A interfaces. They are detailed later in this document. This picture includes: The digital interfaces between the RYZ014A and the host platform •... -
Page 6: Schematics Review
A thorough testing of the design performance is required in order to undergo the final conformance checks confidently. Sharing the tests’ results with Renesas helps identify any particular problem fixable at an early stage and increases the likelihood of qualification success. This should be done for all the tests that involve Renesas’... -
Page 7: Power Supply
2.1 Power Supply 2.1.1 Synthesis of the Power Supplies Table 2-2 provides an overview of the power supplies and their characteristics. Please refer to the RYZ014A Datasheet for more information.. Note: Each output reference voltage (pads 3, 9, 11) is switched off when the module is in deep sleep mode. -
Page 8: Power Supply Circuit Example
RYZ014A Module Integration Guide 2.1.3 Power Supply Circuit Example 2.1.3.1 Test Points and Measurement Access Figure 2-1. Power Supply System Example A test point access is recommended on all supply nets so that the supply voltages can be measured. Gaps filled with 0 Ω series bridges (as shown in Figure 2-1) are recommended on all supply nets. The 0 Ω... -
Page 9: Special Layout Considerations
Place the SIM tray as close as possible to the RYZ014A. • A good ground connection must exist between the SIM card and the RYZ014A. • If the application handles SIM card hot swapping, the SIM slot must contain a card detector in order for •... -
Page 10: General Notes On Uart Connections
Renesas’s or RYZ014A’s reference designs schematics. 2.3.2 General Notes on UART Connections RYZ014A uses the DCE-DTE convention for UART lines. It is designed for use as DCE (Data Communication Equipment). The output from the device at one end of the link connects to the input at the other end of the link and vice versa. -
Page 11: Uart0 Interface
• See the Section Table 2-6 for usage of UART 0. • If not used, the UART0 signals should be connected to test points. Table 2-7 lists the RYZ014A pads dedicated to the UART0. Table 2-7. UART0 Interface Signals Electrical... -
Page 12: Uart1 Interface
See the Section Host Communications Signals for usage of UART 2. • If not used, the UART2 signals should be connected to test points. Table 2-9 lists the RYZ014A pins related to the UART2 interface. R19AN0084EU0110 Rev.1.10 Page 12 of 30... -
Page 13: Default Configuration
RYZ014A Module Integration Guide Table 2-9. UART2 Interface Signals Electrical Notes Trace Style Pin Name Number Direction Characteristics RXD2 Digital 1.8 V UART 2 RXD. TXD2 Digital 1.8 V UART 2 TXD GPIO28/RTS2 Digital 1.8 V UART 2 RTS GPIO27/CTS2 Digital 1.8 V... -
Page 14: Circuit Diagram Example
RYZ014A Module Integration Guide 2.4.2 Circuit Diagram Example Important: Figure 2-3 should be strictly followed as a topology reference. It is advised to copy the schematics verbatim. This document also describes the imperative layout constraints. Figure 2-3. RF Typical Circuit Note: The RF connector called X1 is for example purpose only. -
Page 15: Test Points And Measurement Access
2.4.4.2 ESD Protection ESD protection is a discretionary requirement and only required, if necessary, for higher ESD specifications than those provided by the RYZ014A. It is recommended to select an ESD device with very low capacitance and small size (0201) to avoid impacting the RF impedance. -
Page 16: Ant_Lte Specific Footprint Design
• Avoid routing of noisy signal tracks adjacent to RF transmission lines to minimize cross-coupling into RYZ014A’s RF ports. • The component pads of the SMD parts used in the 3-component π/T-type matching circuit are effectively very short transmission lines. To minimise the RF insertion loss (s11, VSWR) caused by the width step, use tapered ends. -
Page 17: Reset And Environmental Signals
RYZ014A Module Integration Guide 2.5 Reset and Environmental Signals Table 2-12 lists the Reset and other environmental signals and the following subsections describe their purpose and termination requirements. Table 2-12 Non-Interfacing Signals Electrical Notes Trace Style Pin Name Number Direction... -
Page 18: Pcb Layout Rules
Keep them in a similar quadrant than the other parts they interface with Choose the orientation to keep track crossings to a bare minimum Keep every part as close as possible to the RYZ014A module. R19AN0084EU0110 Rev.1.10 Page 18 of 30... -
Page 19: Trace Characteristic Design
• All SIM signals, with decoupling capacitors placed as close as possible to the SIM connector. 11. The tracks between the SIM connector and the RYZ014A should be kept as short as possible, and away from the antenna. 12. Data and clock signals should be routed as far as possible from the antenna area. -
Page 20: Controlled Impedance Traces
RYZ014A Module Integration Guide 2.6.2.4 Controlled Impedance Traces • Calculation of traces width and spacing: Use simple RF design tools to calculate the copper trace thicknesses based upon: (a) The thickness of the dielectric substrate lying between the RF copper trace and the ground plane. -
Page 21: Grounding
Evaluate the board’s performances. 3.2 Prerequisites Hardware Qualification consist of: • Checking for RF losses between the RYZ014A RF ports and the board’s RF output • A sanity check of the connections to the RYZ14A • Debugging, if necessary Hardware Qualification procedures make use of: 1. -
Page 22: Functional Verification Without Assembled Module
VBAT1 can be tested. Check at each voltage test point, as illustrated on Figure 3-2, that the voltage value corresponds to what is expected. The value of VBAT1 must be in the range specified in the RYZ014A Datasheet, section Electrical Operating Conditions. - Page 23 RYZ014A Module Integration Guide Figure 3-2. Measuring Voltage Value (RYZ014A) R19AN0084EU0110 Rev.1.10 Page 23 of 30 Jun.27.22...
-
Page 24: Troubleshooting
Figure 3-3 provides an overview of the equipment configuration for this test. The connection to the block labeled “RF” is a connection to the RYZ014A pin 54, using an RF soldered coaxial probe and RF cable connected to the SMA RF connector. -
Page 25: Power Supply
Confirm that the current is nominal from the Host power supply 3.4.1.2 Troubleshooting • Excessive current draw Check all RYZ014A voltage supplies. Confirm that there is no RYZ014A supply short circuits. Voltage should be nominal. • No, or too little, current: Check the external power supply wiring Check for dry joint between adjacent RYZ014A pin(s) and the power supply source. -
Page 26: Gpios
Make sure that the version of the firmware used is correct. • Unexpected GPIO behavior: Ensure that there exists no short or open circuit between the test point and the RYZ014A. 3.4.4 SIM Communication 3.4.4.1 Procedure Use AT+SMST? to check the SIM, as described in the Manual. Wait for the response: +SMST=<status>. -
Page 27: Appendix
RYZ014A Module Integration Guide Appendix A Abbreviations Table A-1 Abbreviations (1/2) Alternate Current ACLR Adjacent Channel Leakage Ratio LTE_ANT0 Antenna 0 for LTE AT Command Modem-type commands prefixed with AT characters Answer To Reset (SIM) Bill Of Material cDRX Connected Discontinuous Reception... - Page 28 RYZ014A Module Integration Guide Table A-1 Abbreviations (2/2) Medium Access Control protocol layer Medium Independent Interface Multiple Input/Output Signal Analyzer Signal Generator Internal format for data representation Opaque Binary Blob file format Power amplifier Personal Computer Printed Circuit Board PMIC...
- Page 29 RYZ014A Module Integration Guide Website and Support Renesas Electronics Website http://www.renesas.com/ Inquiries http://www.renesas.com/inquiry/ All trademarks and registered trademarks are the property of their respective owners. R19AN0084EU0110 Rev.1.10 Page 29 of 30 Jun.27.22...
- Page 30 RYZ014A Module Integration Guide Revision History Description Rev. Date Page Summary 1.00 Aug.19.21 — First release document 1.10 Jun.27.22 — Added 2.1.2 Peak Current Consumption Removed ADC, GNSS Removedd Appendix Checklist Update all pages R19AN0084EU0110 Rev.1.10 Page 30 of 30...
- Page 31 Unit Products The following usage notes are applicable to all Microprocessing unit and Microcontroller unit products from Renesas. For detailed usage notes on the products covered by this document, refer to the relevant sections of the document as well as any technical updates that have been issued for the products.
- Page 32 Renesas Electronics disclaims any and all liability for any damages or losses incurred by you or any third parties arising from the use of any Renesas Electronics product that is inconsistent with any Renesas Electronics data sheet, user’s manual or other Renesas Electronics document.
Need help?
Do you have a question about the RYZ014A and is the answer not in the manual?
Questions and answers