Advertisement
Quick Links
Advertisement

Related Manuals for Thundercomm TurboX C6490


Summary of Contents for Thundercomm TurboX C6490
- Page 1 Thundercomm TurboX C6490 Development Kit Quick Start Guide Rev. V1.0 tc-x1-2110...
-
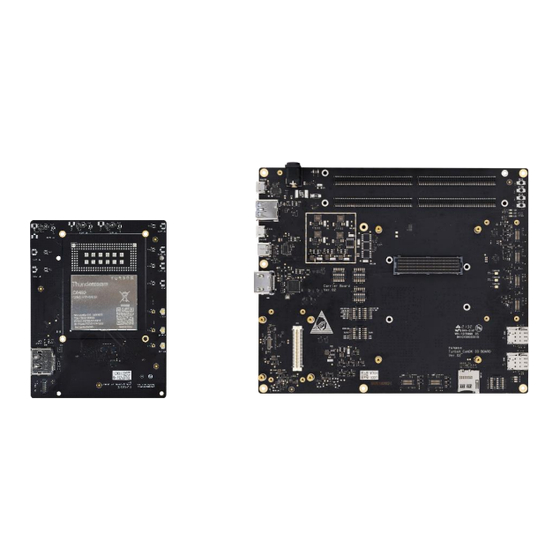
Page 2: Package List
Package List C6490 Interposer Board LCD Touch Panel* Main Board Audio Board + Senser Board (assembly) Power Adapter Camera Module Wi-Fi/BT Antenna Speaker (x2) Optional Copyright© 2022 Thundercomm Technology Co., Ltd. All rights reserved. - Page 3 SW4, SDM_FAST_BOOT_2 SW5, SDM_FAST_BOOT_3 SW6, CBL_PWR_N J3900 USB Type-C port, adb/download/host/device SW4403 Key, Force USB boot button J3800 HDMI out interface, 2.0 SW4401 Key, Volume up button Copyright© 2022 Thundercomm Technology Co., Ltd. All rights reserved.
- Page 4 Only HS 2.0 signal is available on C6490 SOM. C6490 USB0 is a complete Type-C port. By default, USB3900 is not used. C6490 has only one group of DSI0, and thus all LCD1 interfaces are unavailable. Unavailable on C6490. Copyright© 2022 Thundercomm Technology Co., Ltd. All rights reserved.
- Page 5 DisplayPort, which is not supported with software temporarily. This connector is reserved for internal CSI signal test only, and is thus unavailable to users. Reserved for BT standalone antenna solution; unavailable on C6490. Copyright© 2022 Thundercomm Technology Co., Ltd. All rights reserved.
- Page 6 Right WSA883x speaker connector J3201M 4 x 80-pin B2B connector J1101 J1102 Unavailable on C6490. C6490 uses WSA8835 as the speaker amplifier, and thus J3201M and J3200M are available for C6490 speaker connection. Copyright© 2022 Thundercomm Technology Co., Ltd. All rights reserved.
-
Page 7: Let's Get Started
Type-C USB port (connector 25) if adb tool is needed. Micro USB port (for UART debug) (connector 28) if debug function is needed. 7. Press Power on button (connector 1) to boot up the device. Copyright© 2022 Thundercomm Technology Co., Ltd. All rights reserved. - Page 8 The products described in this document are not intended for use in implantation or other life support applications failure to claim or delay in claiming such rights shall not be deemed to be a waiver of such rights by Thundercomm.
Need help?
Do you have a question about the TurboX C6490 and is the answer not in the manual?
Questions and answers