Table of Contents
Advertisement
Quick Links
Advertisement
Table of Contents

Related Manuals for YOKOGAWA AQ1200


Summary of Contents for YOKOGAWA AQ1200
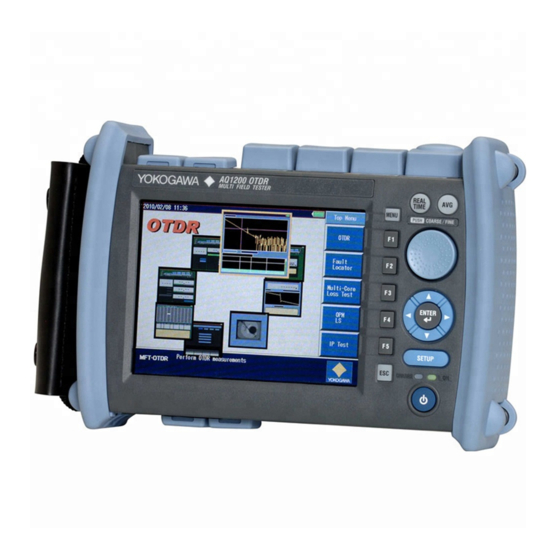
- Page 1 User’s Manual AQ1200 OTDR Multi Field Tester IM AQ1200-01EN 2nd Edition...
- Page 2 Thank you for purchasing the AQ1200 OTDR (Optical Time Domain Reflectometer) Multi Field Tester. This user’s manual explains the features, operating procedures, and handling precautions of the AQ1200. To ensure correct use, please read this manual thoroughly before operation. Keep this manual in a safe place for quick reference in the event that a question arises.
-
Page 3: Conventions Used In This Manual
Hard Key Names and Soft Key Names in Bold Characters Indicate panel keys that are used in the procedure and soft keys and menu items that appear on the screen. Unit Denotes 1000. Example: 12 kg, 100 kHz IM AQ1200-01EN... -
Page 4: Table Of Contents
Chapter 5 Waveform Display Waveform Display Screen ....................5-1 Zooming the Waveform Display Scale ................5-2 Moving the Waveform Display Position ................5-5 Initializing the Waveform Display Scale ................5-6 Setting the Waveform Information Display ............... 5-7 Index IM AQ1200-01EN... - Page 5 Locating Breaks (Faults) in Optical Fibers ..............13-1 Chapter 14 Checking Fiber End Faces 14.1 Using Fiber Inspection Probes to View the Status of Optical Fiber End Faces ....14-1 Chapter 15 IP Testing (Option) 15.1 Performing an IP Test ..................... 15-1 IM AQ1200-01EN...
- Page 6 Configuring the Language, Beep, Start Menu, USB Function, and Screen Color ..17-1 17.2 Configuring Power Save Settings ................... 17-2 17.3 Resetting the AQ1200 to Its Factory Default Settings ............ 17-3 17.4 Setting Operation Restrictions ..................17-4 17.5 Assigning Menus Items That Are Displayed on the Top Menu ........17-6 17.6...
-
Page 7: Chapter 1 Features
• Loss-measurement light source and visible light source • Optical power meter • Loss measurement (loss testing) • Multicore loss testing Visible light source (/VLS option) Generation of visible light Fault Locator Location of breaks (faults) in optical fibers Index IM AQ1200-01EN... - Page 8 You can use a fiber inspection probe to photograph a fiber end face and display its state on the screen. * For information about compatible fiber inspection probes, contact your nearest YOKOGAWA dealer. IP Testing (/LAN option) Simple connection testing that uses PING...
- Page 9 The AQ1200 uses the measured power level to determine the distance to the different points (splices, breaks, etc.) of the optical fiber and the loss and other phenomena that occur at those points.
- Page 10 Take appropriate precautions to avoid communication interference. In this situation, the AQ1200 will not be able to perform measurements correctly either. Check that there is no communication light present in the optical fiber before you use the AQ1200. For details on the fiber-in-use alarm, see section 3.5.
-
Page 11: Waveform Display
Dynamic range (SNR = 1) Near-end Reflection This is the reflection that occurs at the point where the AQ1200 and the optical fiber are connected. This also includes the AQ1200’s internal reflection. In the section where this near-end reflection is detected, even if there are other connections, the loss and reflections that occur at these points cannot be detected. - Page 12 (horizontally). A rectangular frame that shows the display position is displayed on the overview screen that appears in the bottom right of the screen. This is the same rectangular frame that shows the zoom position. IM AQ1200-01EN...
- Page 13 Measuring Distance The AQ1200 measures the time that it takes for an incident optical pulse to be reflected and return to the device. It uses this information and the following equation to calculate the distance (L).
- Page 14 The AQ1200 measures the distance and the loss between the specified points. 2 Point Markers The AQ1200 measures the distance and the loss between two points. If reflection is detected between the two points, the return loss is also measured. The splice loss value changes depending on the approximation method that you have specified.
- Page 15 (km) 5 Point Markers The AQ1200 uses the following five points to perform the measurement: the near-end point (n), a point (N) that is used to calculate the near-end side’s approximated line, a point (E) where splice loss is detected, a point (F) that is used to calculate the far-end side’s approximated line, and the far-end point (f).
- Page 16 You can insert and delete events on the event screen. Measurement reference point Event number 1 Event number 2 Detected fiber-end event E ▲ ▲ ▲ ▲ ▲ ▲ ▲ ▲ ▲ ▲ E E E E 1-10 IM AQ1200-01EN...
- Page 17 CWDM: You can set the wavelength to a value from 1270 to 1610 nm in 20 nm steps along the CWDM wavelength grid. You can select the modulation frequency of the incident rays from a list of presets. You can also select CW Index (continuous). 1-11 IM AQ1200-01EN...
- Page 18 In addition, you can use cursors to calculate the optical power at a specified location or the maximum, minimum, and average within a specified area. The logging results can be saved to a file in CSV format. 1-12 IM AQ1200-01EN...
- Page 19 To perform loss testing, connect one end of the fiber that you want to perform loss testing on to the AQ1200 light source port, and connect the other end to the optical power measurement port of the same AQ1200.
-
Page 20: Loss Test (Option)
Master and Slave Connect two AQ1200s and specify the optical power meter as the master and the light source as the slave. You can also use the AQ1100 multi-field tester series instead of the AQ1200 as the master or slave. -
Page 21: Fault Locator
You can specify the wavelength and the loss level that is used to determine if a fault is a fiber end face or not when the AQ1200 searches for faults. -
Page 22: Checking Fiber End Faces
You can use a fiber inspection probe to take a photograph that shows the state of a fiber end face. You can display this photograph on the AQ1200 screen and save it. * For information about compatible fiber inspection probes, contact your nearest YOKOGAWA dealer. -
Page 23: Ip Test (Option)
To ping an address (perform a simple IP test), specify the address and configure the Tx frame settings listed below. The results of pinging the address appear on the screen. The frame length, Tx mode (continuation, number of frames to send, and transmission time), and measurement interval Index 1-17 IM AQ1200-01EN... -
Page 24: Other Features
1.11 Other Features In addition to the features described so far, the AQ1200 also has the following features. • Data saving and loading • Language selection • Beep on/off • Startup menu selection • USB function selection (storage/communication) • Screen color selection •... - Page 25 When you turn the AQ1200 on and it starts, the top screen appears. To use the various AQ1200 features, first select a feature from this top screen, and then configure the feature or carry out the measurement that corresponds to the feature you have selected.
- Page 26 • Up to five features can be displayed. When you exceed this number, the feature that was displayed in the position by soft key F5 is deleted from the top menu. • You can configure the top menu that is displayed when the AQ1200 starts. For details, see section 17.1.
-
Page 27: Key, Rotary Knob, And Arrow Key Operations
Set the approximation method (LSA, TPA). Index • Step numbers are used when there are many operations and when operations must be performed in different menus. • The explanation for returning to the previous menu is omitted. IM AQ1200-01EN... - Page 28 • The explanations of rotary knob, arrow key, and ENTER key operations are omitted. • The explanation of how to reset the selected item to its previous setting is omitted. • The explanation for returning to the previous menu is omitted. IM AQ1200-01EN...
-
Page 29: Shortcut Keys
Shortcut Keys The AQ1200’s OTDR feature has a shortcut key feature. You can use the rotary knob and the SETUP key as shortcut keys. You can assign actions to each shortcut key. Using the rotary knob and ENTER, select OTDR. - Page 30 Displays the visible light source menu Starts saving Starts printing Switches the resolution between coarse and fine for the cursor movement that you control Coarse / Fine by turning the rotary knob Normal pulse light output level Low pulse light output level IM AQ1200-01EN...
-
Page 31: Entering Strings
Note • If there is a limit to the length of the string, you will not be able to enter characters after the limit is reached. • You can also enter strings using a USB keyboard. Index IM AQ1200-01EN... - Page 32 Using the rotary knob and ENTER, choose the string that you want to enter. The string appears in the edit screen. Note Entered strings are saved to the input history when you confirm them. Up to 50 strings can be saved. Newer strings appear at the top of the input history. IM AQ1200-01EN...
-
Page 33: Chapter 3 Optical Pulse Measurement And Analysis Conditions
• Pulse width • Event search The measurement conditions that are available when the AQ1200 is in Simple (Full Auto) mode are listed below. You can view these conditions in the measurement condition information (see section 5.1) that is displayed on the screen. -
Page 34: Simple (Full Auto) Mode
Using the rotary knob and ENTER, set Mode to Simple to display the following screen. Set Mode to “Simple.” Set the wavelength . The available options vary depending on the model. For details, see the explanation in section 3.5. Explanation Selecting the Measurement Wavelength For details, see “Explanation” in section 3.5. IM AQ1200-01EN... -
Page 35: Automatically Saving Measured Data
Using the rotary knob and ENTER, set Mode to Simple to display the following screen. Set Mode to “Simple.” Turns automatic saving of the measured result on or off Explanation Automatically Saving the Measured Results For details, see “Explanation” in section 3.5. Index IM AQ1200-01EN... -
Page 36: Selecting The Approximation Method (Marker)
Press SETUP and then the Analysis Setup soft key. Using the rotary knob and ENTER, set Mode to Simple to display the following screen. Set Mode to “Simple.” Set the approximation method (LSA, TPA). Approximation Method (Marker) For details, see section 3.6. IM AQ1200-01EN... -
Page 37: Detail Mode And Multi Wl Mode
Press this soft key to display the File List screen and set where you want to save files to. See the description of the File List screen that follows. Index File list display (when the mode is UserDefine) Current save destination See section 16.2. IM AQ1200-01EN... - Page 38 Specify a distance range value that is greater than the length of the optical fiber that you will measure. If you specify a shorter value, the AQ1200 will not be able to perform measurements properly. The longer the distance that you specify, the more time measurements will take.
- Page 39 The maximum number of sample data points is 100,000. The shortest sample interval is determined by the distance range. Normal: The AQ1200 uses the optimum sample interval for the measurement method to perform measurements. Hi-Resolution: The AQ1200 uses the shortest sample interval to perform measurements.
- Page 40 (excluding extremely large reflections caused by sections of the fiber such as the open end of the fiber) occur. In Hi-Reflection mode, the AQ1200 sets the optimum attenuation according to the backscattering light level for each section, and performs the measurement. Therefore, the measurement time is longer than in Hi-Speed mode.
- Page 41 When you turn this feature on, you can prevent light from being transmitted from the AQ1200 optical pulse output port if an optical fiber is not connected to the AQ1200 or if the fiber is not connected correctly.
-
Page 42: Setting Analysis Conditions
This phenomenon is known as backscattering. The backscattering light level setting is used when the AQ1200 calculates the return loss and total return loss.If you do not set the correct backscattering light level, the return loss and total return loss measurements will be incorrect. - Page 43 • Least squares approximation (written as LSA below) • Two point approximation (written as TPA below) The AQ1200 calculates the loss between two points by using the least squares method on all the data between the two points. This method has the following characteristics.
- Page 44 Because the end of fibers is handled as either a splice loss or a reflection, there is no fault event just for the end of fibers. OK/No Good Judgement If you have turned the fault event display on, NG (no good) or OK and the number of fault events are displayed. 3-12 IM AQ1200-01EN...
- Page 45 Normal: Pulse light is generated at the maximum power. Low: Pulse light is generated at low power. You cannot set the pulse light output level on the AQ1200A. Index 3-13 IM AQ1200-01EN...
-
Page 46: Giving Notifications When Installations Are Complete
(the extension work point or the work completion point) and turn on the work completion confirmation notification. When the fiber end detection position (the event) during real-time measurement is the same as the cursor position (CheckPoint), the AQ1200 gives a notification that the installation is complete. - Page 47 Off: The AQ1200 does not sound an alarm. On: The AQ1200 sounds an alarm. Confirmation When the AQ1200 checks the work completion, a message confirming whether you have set the cursor to a position that is a little after the installation point is displayed. No Check: The confirmation message is not displayed.
-
Page 48: Chapter 4 Measuring Optical Pulses
Press the OK soft key to start real-time measurement. If the fiber end moves the distance indicated by the cursor position, the AQ1200 displays a message or sounds an alarm. Press REAL TIME to clear the message or turn off the alarm. - Page 49 Move the cursor to a position a little after the installation point before you perform real-time measurement. If the fiber end detection position is the same as the cursor position when you perform real-time measurement, the AQ1200 displays a message on the screen or sounds an alarm. For details, see section 3.8.
-
Page 50: Performing Averaged Measurements
This is effective when you want to detect faint events that are buried in noise. WARNING During measurement, the AQ1200 optical pulse output port transmits light, so do not remove the optical fiber that is connected to this port. Visual impairment may occur if the light enters the eye. -
Page 51: Taking Snapshots
Taking Snapshots You can measure waveforms while retaining the previous waveform on the screen (a snapshot). The AQ1200 displays the measured waveform and the snapshot waveform at the same time. Procedure Snapshot Screen Using the rotary knob and ENTER, select OTDR. -
Page 52: Waveform Display Screen
Procedure Display Screen Using the rotary knob and ENTER, select OTDR to display the following screen. Date and time See the operation guide, IM AQ1200-02EN. Value per division on the vertical axis Progress during averaged measurements (AVG) Waveform display area... -
Page 53: Zooming The Waveform Display Scale
(see section 5.4) displayed waveform area is. Zooming the Displayed Waveform Press the arrow keys to zoom the displayed waveform in or out. Note You can zoom the waveform during measurement or when measurements are stopped. IM AQ1200-01EN... - Page 54 Zoom out on the waveform in the horizontal direction. Cursor position Press the left arrow key to zoom the waveform display horizontally. Cursor position Cursor position Press the down arrow key to zoom the waveform display vertically. Cursor position Index IM AQ1200-01EN...
- Page 55 The cursor on the waveform display screen is shown in the center of the zoomed display. • Zoom the waveform at event positions When the AQ1200 has detected events during event analysis, the selected event is zoomed and displayed. Overview Display The overview display is linked to the zoomed waveform display.
-
Page 56: Moving The Waveform Display Position
The green box indicates where in the entire waveform display area the currently displayed waveform area is. When you move the screen, When you select to shift the the box that represents the vertical and horizontal axes, display area also moves. “Shift” is displayed. Index IM AQ1200-01EN... -
Page 57: Initializing The Waveform Display Scale
Set the amount the cursor moves (Fine, Coarse). See section 5.2. Executes auto zoom (See section 5.2.) Initializes the display scales Explanation Initialization When you initialize the display scale, the waveform is displayed with the total distance range that has been specified. IM AQ1200-01EN... -
Page 58: Setting The Waveform Information Display
Distance Unit You can select the distance unit that is displayed on the screen from the units shown below. If you set the AQ1200 language to JAPANESE, the distance unit is fixed to km. km, mile, kfeet Example of when the distance unit is set to mile All the distance units on the screen become miles (mi). - Page 59 Marker Line Note Line is often used outside of Japan. Marker is often used within Japan. It is used on existing YOKOGAWA models. Displaying the Cursor dB Values You can display not only the distance at the cursor position, but also the dB value.
- Page 60 AQ1200 detects C as an event. Because the AQ1200 measures all the reflected light rays, A, C, and D, C is also detected as an event in the same manner that an actually generated reflection is. Therefore, while there is no actual event in this location, it appears as if an event has in fact occurred.
- Page 61 Each time that you select a different event, the zoom ratio of the vertical and horizontal axes is adjusted automatically. For details about event editing, see section 7.2. Tooltips You can configure the AQ1200 to display an explanation screen (Tooltip) for each measurement condition when it is selected. Off: Tooltips are not displayed.
- Page 62 Line(|) Uses a line to indicate a position on the waveform. Line display Crosshair display Event List You can select the items that you want to display in event analysis. Select the items to display. Preview Index 5-11 IM AQ1200-01EN...
- Page 63 If you assign Coarse/Fine to a shortcut key, you can select whether the cursor moves a large amount or a small amount each time that you turn the rotary knob. Coarse: The cursor moves a large amount. Fine: The cursor moves a small amount. For the shortcut key setup procedure, see section 2.3. Index IM AQ1200-01EN...
- Page 64 See “Distance Reference” later in this section. See “Distance Reference” later in this section. Turns the cursor link on or off Note When you set the marker positions, set them so that the marker is the measurement start point (the distance reference). IM AQ1200-01EN...
- Page 65 Set the distance reference. Set the distance reference (marker R) to the cursor position. Delete the distance reference. Delete the distance reference (marker R). Note The color of the displayed waveform to the left of the specified distance reference changes. Index IM AQ1200-01EN...
- Page 66 Switches to the screen that is used to move the measurement reference point Switches to the screen that is used to delete markers and the cursor A marker measurement outline is displayed on the screen. For details, see “Explanation” later in this section. IM AQ1200-01EN...
- Page 67 Only perform collective settings on all the markers when the cursor is displayed. • Press the soft key to select either the cursor or a marker, and then turn the rotary knob to display and move it. “C” represents that the cursor is selected. Index IM AQ1200-01EN...
- Page 68 3.6. 4 Point Markers This mode is only enabled when the Marker Mode is set to Marker. The AQ1200 uses the following four points to perform the measurement: the measurement start point , the splice loss start point the splice loss end point Y2, and the measurement end point .
- Page 69 5 Point Markers This mode is only enabled when the Marker Mode is set to Line. The AQ1200 uses the following five points to perform the measurement: the near-end point (n), a point (N) that is used to calculate the near-end side’s approximated line, a point (E) where splice loss is detected, a point (F) that is used to...
-
Page 70: Measuring Distances
For details on the cursor, see section 6.1. • The location where the AQ1200 and the optical fiber are connected is the distance reference. To perform more accurate measurements, zoom in on the waveform. Using Markers to Measure the Distance Follow the procedure below to measure the distance between two markers. - Page 71 Turn the rotary knob to move the distance reference (marker R) to the measurement start point. Original reference point Distance reference (marker R) Cursor If you set the distance reference, the distance from the distance reference to the cursor is measured Note For details on the soft keys, see section 6.1. Index IM AQ1200-01EN...
-
Page 72: Measuring The Splice Loss
Set marker F. Far-end point Set marker f. Measured splice loss (result) Note • For details on the soft keys, see section 6.1. • For details on the marker modes, see section 5.5. 6-10 IM AQ1200-01EN... -
Page 73: Measuring The Return Loss Or Reflection Level
Press the Marker soft key and then the 2 Point Markers soft key to display the following screen. Event detection start position Set marker Peak value The AQ1200 detects the peak between the markers, and calculates the level between the peak and the rising start point of the event. Event detection end position... - Page 74 • Select Hi-Reflection for the average method, and perform the measurement again. • Select a large pulse width value, and perform the measurement again. • When reflections are small (less than or equal to about 0.5 dB), the return loss and reflection level are not displayed. 6-12 IM AQ1200-01EN...
-
Page 75: Analyzing Sections
Set the reference level adjustment. Set marker to the cursor position. Clear the settings. Press this to delete the start point, end point, and reference level adjustment markers. Measured value between and E Index 6-13 IM AQ1200-01EN... - Page 76 , which represents the reference point, the return loss is measured with this location as the reference. The AQ1200 uses the backscattering light level of the reference point to calculate the return loss. If you do not set the reference point, the start point is used as the reference point.
-
Page 77: Chapter 7 Event Analysis
Waveform display List display Screen display item: List Press the Display soft key to display the following screen. Measurement conditions For details on the measurement conditions, see section 3.5. Set the displayed items to “List.” List display Index IM AQ1200-01EN... - Page 78 If the distance reference is not specified, the measurement reference point (S) is the measurement reference. Event Types The type of each event is displayed using the following symbols. : Positive splice loss : Negative splice loss : Reflection IM AQ1200-01EN...
- Page 79 You can select the operation that occurs when you turn the rotary knob from the following. Cursor: The cursor moves continuously. Event: The cursor moves directly between detected events. Event Detection Events are detected automatically. For details, see section 3.5. Index IM AQ1200-01EN...
-
Page 80: Editing Waveforms
Turn the rotary knob to select the event that you want to delete. The selected event’s color changes. The event is deleted virtually. When the event is deleted, the following event numbers are each decreased by one. The deleted event is also deleted from the list. IM AQ1200-01EN... - Page 81 If you delete the distance reference, the S point is displayed again at its original position. • If you delete the E event, the event that has the largest number becomes the E event. Index IM AQ1200-01EN...
- Page 82 Producing Measurement Light WARNING • While the AQ1200 is producing light, do not remove the optical fiber cable, because light is emitted from the light source port. Visual impairment may occur if the light enters the eye. • Close the covers of any light source ports that do not have optical fiber cables connected to them.
- Page 83 The light for a single mode (SM) optical fiber is emitted from optical port 2. Firmly connect the optical fiber to the port that the light will be transmitted from. Modulation Mode You can set the frequency of the light to one of the following options. CW (continuous light), 270 Hz, 1 kHz, 2 kHz IM AQ1200-01EN...
-
Page 84: Turning On The Visible Light
Turning On the Visible Light WARNING • While the AQ1200 is producing light, light is emitted from the light source port. Do not look directly at this light. Visual impairment may occur if the light enters the eye. • Close the covers of any light source ports that do not have optical fiber cables connected to them. - Page 85 Using the rotary knob and ENTER, select Visible Light Source to display the following screen. Turns the light on The visible light turns on. A mark appears on the AQ1200 display to indicate that the light is on. Turns the light off The light turns off. The light mark disappears.
- Page 86 Optical Power Meter (Option) Making Preparations for Measurements Remove the optical fiber cables from the AQ1200 and close the optical connector covers, or make sure that the power meter is not receiving any light, and then start the optical power meter zero set procedure.
-
Page 87: Setting Optical Power Measurement Conditions And Holding The Display
Turns the interlocking of the light source and optical power meter settings on and off Set the offset (–9.900 to 9.900 dB). Set the threshold values (–80 to 40 dBm). You can set the upper and lower values. IM AQ1200-01EN... - Page 88 This feature is available on models with the /SLT, /HLT or /PPM option. Wavelength The light receiving element of the optical power measurement section has a wavelength sensitivity characteristic. The AQ1200 measures optical power more accurately by adjusting the sensitivity according to the specified wavelength. Models with /SLT or /HLT option The wavelength ranges and steps vary depending on the wavelength mode that you set in the detailed setup screen.
- Page 89 Turning the Interlocking of the Light Source and Optical Power Meter Settings On and Off You can connect an optical fiber between the light source port of an AQ1200 and the optical power measurement port of another AQ1200 and use this setting so that the power meter settings are synchronized to the light source wavelength and modulation mode settings.
-
Page 90: Logging Measured Values And Saving Logged Results
Horizontal Date and time Remaining battery power or AC zoom factor See the operation guide, See the operation guide, IM AQ1200-02EN. IM AQ1200-02EN. Value per division Set Display to “Logging.” on the vertical axis Select the cursor (C1, C2). Cursor... - Page 91 The cursor moves to the left. Zooming in on the Graph Display Press an arrow key to zoom the graph display in or out at the cursor position. NOTE You can zoom the graph display during measurement or when measurements are stopped. IM AQ1200-01EN...
- Page 92 This feature is available on models with the /SLT, /HLT or /PPM option. Creating and Saving Logs The AQ1200 is always measuring power when the Power Meter screen is displayed. To save the measured values, you must log them. • To start logging, press the Logging START soft key. During logging, on the menu, “Logging START”...
- Page 93 Zoom in and out horizontally. The right arrow key zooms in, and the left arrow key zooms out. Zoom factors are ×1, ×2, ×5, ×10, ×20, and ×50. You cannot zoom in on the graph so much that there are less than 11 logging data points on the screen. IM AQ1200-01EN...
- Page 94 Overview Display The overview display is linked to the zoomed graph display. The blue box indicates where in the entire graph display area the zoomed graph display is showing. For details, see “Overview Display” in section 5.2. Index IM AQ1200-01EN...
-
Page 95: Selecting And Saving Core And Tape Numbers
When “Display” is set to “List” Use the rotary knob and the Core no. arrow keys to select a core Save area number. You can save up to three sets of data in the save area of the specified core. 9-10 IM AQ1200-01EN... - Page 96 Type is set to a-b(2), ..., up to 12 tapes when Tape no. Type is set to a-h(8)). Saving Data to a File Press SETUP and then the File soft key to display the file save screen. Follow the procedure in section 16.2 to save the data. Index 9-11 IM AQ1200-01EN...
- Page 97 This feature is available on models with the /SLT or /HLT option. You can specify core numbers and tape number types and save data (measurement conditions and measured values) to the AQ1200 internal memory. You can also save the data to a file. Displayed List You can set the list to show to one of the following options.
- Page 98 10 to 100 fibers a-b(2) 10 to 50 tapes a-c(3) 10 to 33 tapes a-d(4) 10 to 25 tapes a-e(5) 10 to 20 tapes a-f(6) 10 to 16 tapes a-g(7) 10 to 14 tapes a-h(8) 10 to 12 tapes Index 9-13 IM AQ1200-01EN...
- Page 99 Perform zero set whenever necessary, such as after you have turned on the power or when the ambient temperature changes. Performing zero set adjusts the internal deviation of the optical power measurement section and enables you to obtain more accurate absolute optical power values. Index 10-1 IM AQ1200-01EN...
-
Page 100: Setting Pon System Optical Power Measurement Conditions And Holding The Display
Set the signal direction (ONU -> OLT, OLT -> ONU). Set the unit (dB, W). Lower threshold Upper threshold line line These lines indicate the upper and lower threshold values (see the detailed setup screen in section). When the Signal Direction Is OLT -> ONU 10-2 IM AQ1200-01EN... - Page 101 1, 10, 50, 100 Offset For each wavelength, the value that you specify (the offset value) is added to the measured optical power values that are displayed. The range is –9.900 to 9.900 dB. Index 10-3 IM AQ1200-01EN...
- Page 102 When you press the HOLD soft key, the updating of the measured values and bar graph is held. The values at the time that you pressed the HOLD soft key remain displayed. To release the hold on the display, press the HOLD soft key again. The display is being held. Not updated 10-4 IM AQ1200-01EN...
-
Page 103: Selecting And Saving Core And Tape Numbers
When “Display” is set to “List” Use the rotary knob and the Core no. arrow keys to select a core Save area number. You can save up to three sets of data in the save area of the specified core. Index 10-5 IM AQ1200-01EN... - Page 104 (or tapes) that you set in the detailed setup screen. Core List A list of core numbers and the saved data of the highlighted core number are displayed. List The core numbers and saved data are displayed. 10-6 IM AQ1200-01EN...
- Page 105 10 to 100 fibers a-b(2) 10 to 50 tapes a-c(3) 10 to 33 tapes a-d(4) 10 to 25 tapes a-e(5) 10 to 20 tapes a-f(6) 10 to 16 tapes Index a-g(7) 10 to 14 tapes a-h(8) 10 to 12 tapes 10-7 IM AQ1200-01EN...
-
Page 106: Chapter 11 Loss Testing (Option)
Adjusting the Optical Power WARNING • While the AQ1200 is producing light, do not remove the optical fiber cable, because light is emitted from the light source port. Visual impairment may occur if the light enters the eye. • Close the covers of any light source ports that do not have optical fiber cables connected to them. - Page 107 • Optical power adjustment begins when you press the Execute soft key. When it ends normally, the AQ1200 returns to the previous screen. During adjustment, “Execute” changes to “Abort.” All soft keys other than the Abort soft key are unavailable.
-
Page 108: Performing An Auto Loss Test
Press SETUP and then the OPM SETUP soft key to display the following screen. Set the offset (–9.900 to 9.900 dB). Set the threshold values (–80 to 40 dBm). You can set the upper and lower values. Index 11-3 IM AQ1200-01EN... - Page 109 Executing an Auto Loss Test WARNING • While the AQ1200 is producing light, do not remove the optical fiber cable, because light is emitted from the light source port. Visual impairment may occur if the light enters the eye. • Close the covers of any light source ports that do not have optical fiber cables connected to them.
- Page 110 Deletes the data of all the selected cores Deletes all the core data Use the rotary knob and the arrow If you delete data, the Save keys to select a core number. Data menu is displayed. Index 11-5 IM AQ1200-01EN...
- Page 111 This feature is available on models with the /SLT or /HLT option. You can use the AQ1200 as a light source and as an optical power meter to perform loss testing for up to three wavelengths on an optical fiber or line.
- Page 112 Saving Data You can specify core numbers and tape number types and save data (measurement conditions and measured values) to the AQ1200 internal memory. You can also save the data to a file. Display List, Skipping, Saving, Deleting Data, Starting Core...
-
Page 113: Performing A Loop-Back Loss Test
Using the rotary knob and ENTER, select Auto Loss Test. Press the Function Select soft key and then the Loop Back soft key to display the following screen. When you start a loss test, the AQ1200 generates the specified wavelengths in order. The current wavelength appears here. - Page 114 Connect one end of the optical fiber or line that you need to perform loss testing on to the AQ1200 optical power measurement port, and connect the other end to the light source port of the same AQ1200.
- Page 115 To perform loop-back loss testing, configure the optical power meter and light source settings, connect one end of the optical fiber or line that you need to perform loss testing on to the AQ1200 optical power measurement port, and connect the other end to the light source port of the same AQ1200.
-
Page 116: Chapter 12 Multicore Loss Testing (Option)
..., up to 12 tapes when Tape no. Type is set to a-h(8)). Set the wavelength (SM 1310nm, SM 1550nm). Cancels the project settings. The AQ1200 returns to the previous screen. Set the offset (–9.900 to 9.900 dB). Loss Test Screen Press the Complete soft key to display the following screen. - Page 117 Saving Project Information You can save project information to a file. For the procedure for saving project information to a file, see section 16.2. You can load saved files to both the master and the slave (see section 12.2). 12-2 IM AQ1200-01EN...
-
Page 118: Sharing Projects
Sending a Project WARNING • While the AQ1200 is producing light, do not remove the optical fiber cable, because light is emitted from the light source port. Visual impairment may occur if the light enters the eye. • Close the covers of any light source ports that do not have optical fiber cables connected to them. - Page 119 Using the rotary knob and ENTER, select Multi-Core Loss Test. Press the Previous Project soft key to display the following screen. Display Example: Master Loads the previous project The lost test screen appears with the previous lost test data retained. 12-4 IM AQ1200-01EN...
- Page 120 Data is maintained even when you turn the AQ1200 off. • You must be performing the loss test with the same project.
-
Page 121: Performing A Multicore Loss Test
Executing a Multicore Loss Test WARNING • While the AQ1200 is producing light, do not remove the optical fiber cable, because light is emitted from the light source port. Visual impairment may occur if the light enters the eye. • Close the covers of any light source ports that do not have optical fiber cables connected to them. - Page 122 Displayed List For list examples, see section 9.4. Saving Multicore Loss Test Results You can save multicore loss test results to a file. For the procedure for saving project information to a file, see section 16.2. Index 12-7 IM AQ1200-01EN...
-
Page 123: Optical Power Adjustment
Optical Power Adjustment WARNING • While the AQ1200 is producing light, do not remove the optical fiber cable, because light is emitted from the light source port. Visual impairment may occur if the light enters the eye. • Close the covers of any light source ports that do not have optical fiber cables connected to them. -
Page 124: Chapter 13 Fault Locator
Fault Locator 13.1 Locating Breaks (Faults) in Optical Fibers The AQ1200 is equipped with a feature that you can use to locate and display faults in optical fibers. This feature works by performing an OTDR averaged measurement and then automatically performing an OTDR event analysis. - Page 125 You can select the distance unit that is displayed on the screen from the units shown below. km, mile, kfeet If you set the AQ1200 language to JAPANESE, the distance unit is fixed to km. For the setup procedure, see section 5.5.
-
Page 126: Chapter 14 Checking Fiber End Faces
Connect the fiber inspection probe’s USB cable to the USB Type A port on the AQ1200. Just connecting the probe to the AQ1200 will display the picture on the screen. If you disconnect the USB cable, the picture will disappear. -
Page 127: Chapter 15 Ip Testing (Option)
Frames 1 to 3600 Time 1 to 3600 s Measurement Interval Set the interval at which to measure the ping test items (see the next page) to one of the following Index values. 100 ms, 1 s 15-1 IM AQ1200-01EN... - Page 128 Pinging is executed according to the Tx mode that you set. • When it ends normally, the AQ1200 returns to the previous screen. During pinging, “PING Start” changes to “PING Stop.” All soft keys other than the PING Stop soft key are unavailable.
-
Page 129: Chapter 16 File Operation And Printing
Do not connect and disconnect a USB device repetitively. Provide a 10-second interval between removal and connection. • Do not connect or disconnect a USB device during the time from when the AQ1200 is turned on until key operation becomes available. •... -
Page 130: Saving And Loading Data
Setup screen in the next section). Using the rotary knob and ENTER, select the file save destination. Saves the file For the procedure to load files, see section 12.2. The file name candidate for the next save operation 16-2 IM AQ1200-01EN... - Page 131 Set the ID number (0 to 9999). Specify a comment (up to 30 characters). To enter a comment, follow the procedure in section 2.4. File Name The file name that is produced by the above settings is displayed. Index 16-3 IM AQ1200-01EN...
- Page 132 .SOR File in a format that conforms to Telcordia SR-4731 or Bellcore GR-196-CORE. (The file must contain data of measurement conditions that can be set using the AQ1200.) .SET Information file that contains the measurement conditions that have been saved using the AQ1200 .CFG...
- Page 133 Internal memory The AQ1200 internal memory USB memory The USB storage medium connected to the USB Type A port on the AQ1200. Note • Do not save files directly to the root directory. Create a folder, and save files to that folder. If there are many folders in the root directory, it will take some time to save files to a folder that is at a lower level in the folder hierarchy.
- Page 134 • For information about loading files when multicore loss testing is selected on models with the /SLT or /HLT option, see section 12.2. Select a file that contains project information and multicore loss test results and load it. 16-6 IM AQ1200-01EN...
-
Page 135: Deleting And Copying Files
Action setting. When you press the Dest. Folder soft key, a screen for selecting the copy destination folder appears. In that screen, select the destination folder and press the Execute soft key to copy the files. Index 16-7 IM AQ1200-01EN... - Page 136 Using the mini B USB port on the AQ1200, you can send the files and folders in the AQ1200 internal memory to a PC. To do this, set the AQ1200 mini B USB port function to Storage (see section 17.1). When the PC accesses the AQ1200 and downloads the files, the download speed depends on the performance of the PC.
-
Page 137: Changing File Names
After you have entered the file name, press mark: . To deselect a file, press ENTER the Commit soft key in the character input again. dialog box to change the file name to the name that you entered. Index 16-9 IM AQ1200-01EN... - Page 138 Depending on the model and the selected feature, the operations for opening the file operation screen and the screens that appear vary. On models with the /SLT or /HLT option, you cannot change file names when multicore loss testing is selected. 16-10 IM AQ1200-01EN...
-
Page 139: Creating Folders
Depending on the model and the selected feature, the operations for opening the file operation screen and the screens that appear vary. Index On models with the /SLT or /HLT option, you cannot create folders when multicore loss testing is selected. 16-11 IM AQ1200-01EN... -
Page 140: Deleting And Copying Folders
Make sure that the copy destination and source drives are different (see the explanation later in this section). In the screen that appears, select the destination folder and press the Execute soft key to copy the files. 16-12 IM AQ1200-01EN... - Page 141 Using the mini B USB port on the AQ1200, you can send the files and folders in the AQ1200 internal memory to a PC. To do this, set the AQ1200 mini B USB port function to Storage (see section 17.1). When the PC accesses the AQ1200 and downloads the files, the download speed depends on the performance of the PC.
-
Page 142: Initializing The Internal Memory
Using the mini B USB port on the AQ1200, you can send the files and folders in the AQ1200 internal memory to a PC. To do this, set the AQ1200 mini B USB port function to Storage (see section 17.1). When the PC accesses the AQ1200 and downloads the files, the download speed depends on the performance of the PC. - Page 143 Print Setup Specify the maker of the printer connected to the AQ1200 and the print color. • Connect the printer to the USB Type A port on the AQ1200. • You can use printers that comply with USB Printer Class Ver 1.1.
-
Page 144: Specifying The Items That Are Displayed In The File List
You can specify the items you want to display in the file list. • File size, date the file was saved, and tree view on or off • Date format, what to sort by, and the sort order 16-16 IM AQ1200-01EN... -
Page 145: Chapter 17 Other Operations
Initialize (see section 17.3). Explanation Display Language Set the language to display on the AQ1200 screen. The options that appear vary depending on the product’s language specification. Turning the Beep On and Off You can make the AQ1200 beep whenever an operation error occurs or an error message is displayed. -
Page 146: Configuring Power Save Settings
If you do not perform any operations for 5 seconds, the backlight turns off again. This feature is useful when you move the AQ1200 to a dark place after setting LCD Brightness to Off. Procedure Power Save Screen Press SETUP. -
Page 147: Resetting The Aq1200 To Its Factory Default Settings
Using the mini B USB port on the AQ1200, you can send the files and folders in the AQ1200 internal memory to a PC. To do this, set the AQ1200 mini B USB port function to Storage (see section 17.1). When the PC accesses the AQ1200 and downloads the files, the download speed depends on the performance of the PC. -
Page 148: Setting Operation Restrictions
Press ESC to return to the screen that appeared in step 2. Press ESC again to return to the top screen. Initializing the PIN When you initialize the settings, the administrator and user PINs are also initialized. For details, see IM AQ1200-01EN, which is contained in the included CD. 17-4 IM AQ1200-01EN... - Page 149 • During multicore loss testing, when the Execute soft key for optical power adjustment is pressed (light source, loop-back test) • While the AQ1200 is being used as a light source for auto loss testing, when the Loss Test START soft key for executing loop-back testing is pressed •...
-
Page 150: Assigning Menus Items That Are Displayed On The Top Menu
Select Use Frequency Order or Fixed. Use Frequency Order: Functions are displayed in the order that they are used. The function assignments are invalid. Fixed: Functions are displayed in their assigned positions. Select the functions (when Button Order is set to Fixed). 17-6 IM AQ1200-01EN... -
Page 151: Configuring Network Settings (Option)
IP testing is available on models with the /LAN option. You can use communication commands through the Ethernet port to control the AQ1200 or access the AQ1200 from a PC that has an FTP client and download the data that is stored on the AQ1200 internal memory. - Page 152 Range: 1 to 3600 s or Infinite The AQ1200 will not time out if you set the timeout value to Infinite. If the AQ1200 is connected to a network and the connection between the AQ1200 and another device is broken abnormally due to an external cause, the AQ1200 will remain connected to the network until the power is turned off.
- Page 153 1 See the operation guide, IM AQ1200-02EN. 2 When it is likely that the usage limitations of the AQ1200 will be exceeded, the AQ1200 will display a warning message and turn off automatically to prevent damage. For the conditions under which messages appear, see section 18.2.
-
Page 154: Error Messages
18.2 Error Messages Error Messages Messages may appear on the screen while you are using the AQ1200. This section explains the meanings of the error messages and how to respond to them. You can display the error messages in English or Japanese (see section 17.1). If servicing is necessary to solve the problem indicated by a message, contact your nearest YOKOGAWA dealer. - Page 155 FAT. Cannot save onto the media. This media is for read-only. 617 to 619 Can not recognize file system. - Internal memory:Contact Yokogawa’s representatives. - USB memory:Try the other media or format again with FAT.
- Page 156 No paper (USB printer) USB printer cannot be found. Perform the power cycle. The printer is out of order, and needs to be repaired. Please contact Yokogawa’s representatives. Event list cannot be printed because event analysis is not performed. Cannot execute it while printing.
- Page 157 There is incoming light. Or, optical module may be damaged. Incorrect date and time setting. Set the correct date and time. The ambient temperature is out of range. The light source cannot be turned on. Please use AC adapter. Index 18-5 IM AQ1200-01EN...
-
Page 158: Viewing The Product Information
Press SETUP and then the Product Info. soft key to display the following screen. Saves a screen image Explanation The following information about the AQ1200 is displayed. Model Name, Serial Number, Suffix Code, Mac Address, Version Information, etc. Executing Screen Image Save When you execute Screen Image Save, an image of the screen is saved to SystemInfo.BMP in the root directory of... - Page 159 If the results of the self test are normal, “Test succeeded” appears. If an error occurs, “Test Error occurred” appears. When an Error Occurs during a Self Test If an error occurs, contact your nearest YOKOGAWA dealer. Index 18-7 IM AQ1200-01EN...
-
Page 160: Updating The Firmware
• When the firmware update fails, “Cannot load this file. Invalid file ∙∙∙∙∙∙” appears. Make sure that there are no problems with the firmware update file. • For instructions on how to view the version of your AQ1200, see section 18.3. • Connect the AC adapter. -
Page 161: Performing A Mechanical Inspection And Checking Operations
• All switches and moving parts can be operated smoothly. If there are any problems, contact your nearest YOKOGAWA dealer. Checking Operations Turn on the AQ1200, perform the typical operations, and make sure that the AQ1200 performs normally. Index 18-9... -
Page 162: Replacing The Battery Pack
• To prevent electric shock, turn the AQ1200 off, and disconnect the AC adapter power supply from it. • When you remove the battery pack cover, do not do so with the back of the AQ1200 facing down. Also, after you attach the battery pack, be sure to close the battery cover completely. - Page 163 • Avoid storing the battery pack for an extended period of time when it is fully charged (after it has just been charged) or when it has no power left (when the AQ1200 will not turn on). Storing the battery pack under these conditions will degrade its performance and reduce its longevity.
- Page 164 If the battery pack is hot, wait for it to return to room temperature before you charge it. • The battery run time depends on how you use the AQ1200: whether or not you make the screen bright, use the printer, etc.
-
Page 165: Replacing An Optical Adapter
18.8 Replacing an Optical Adapter WARNING When you replace an optical adapter, turn the AQ1200 power off so that you do not accidentally emit light from the light source port. If you replace an optical adapter (universal or connector adapter) while the power is on, you may accidentally get light in your eyes, damage them, and impair your vision. - Page 166 18.8 Replacing an Optical Adapter Attachment Make sure that the AQ1200 power is off. Open the optical port cover. Insert the optical adapter directly into the rear shell. Pull the optical adapter lock lever down and outwards to lock it. If the adapter is screwed in, turn the knob to the right to tighten it.
-
Page 167: Routine Maintenance
Cleaning the Outside of the AQ1200 To clean the LCD and the outside of the AQ1200, turn off the power; remove the power cord from the outlet; use a damp, well-wrung cloth to wipe the LCD and the outside of the AQ1200; and then wipe them off with a dry cloth. -
Page 168: Storage Precautions
To prevent against over discharge, if you will not be using the AQ1200 for a week or more, charge the battery pack, remove it from the AQ1200, and place it in a location where it will not be exposed to direct sunlight and where the temperature is 10 to 30°C. -
Page 169: Recommended Replacement Parts
18.11 Recommended Replacement Parts YOKOGAWA guarantees the AQ1200 for the period and under the conditions of the product warranty. Under the conditions of the three-year warranty, the following consumable parts and parts with limited service lives are excluded. For part replacement, contact your nearest YOKOGAWA dealer. -
Page 170: Calibration
18.12 Calibration Periodic calibration is an effective means of keeping the instrument performing correctly for a long time and of detecting malfunctions at an early stage. We recommend that you have the AQ1200 calibrated once a year. 18-18 IM AQ1200-01EN... -
Page 171: Appendix
Appendix Appendix 1 Data File Formats CSV File Formats The following examples show the saved data being displayed in a spreadsheet program. Optical Pulse Measurement (OTDR) Waveform Data Optical Pulse Measurement (OTDR) Event Data Index App-1 IM AQ1200-01EN... - Page 172 Appendix 1 Data File Formats Optical Power Meter Logging Results Measured Data from the Optical Power Meter Loss Test Results App-2 IM AQ1200-01EN...
- Page 173 Appendix 1 Data File Formats Project Information Index App-3 IM AQ1200-01EN...
-
Page 174: Index
..........1-16, 14-1 core, starting number............9-12 file formats ................App-1 Index core list ................. 9-12 file list.................. 16-16 CSV file formats..............App-1 file name ................16-5 Cumul-Loss ................7-2 file names, changing............. 16-9 Index-1 IM AQ1200-01EN... - Page 175 ............3-13 marker ..................5-8 pulse width............... 1-7, marker auto setup..............6-14 marker information..............5-10 marker R ................. 6-9 markers, displaying............6-2, master................... 1-14 maximum and minimum value display........9-4 maximum and minimum value menu ........9-4 Index-2 IM AQ1200-01EN...
- Page 176 ................2-1 TPA ..................3-11 trademarks...................i troubleshooting ..............18-1 two point approximation............3-11 Tx frame ................15-1 Tx mode................15-1 Page unit ..................9-3 updating ................18-8 USB function................. 17-1 Index USB port (Type A)..............16-1 user name................17-7 Index-3 IM AQ1200-01EN...
Need help?
Do you have a question about the AQ1200 and is the answer not in the manual?
Questions and answers