Table of Contents
Advertisement
Quick Links
Advertisement
Table of Contents

Subscribe to Our Youtube Channel
Related Manuals for HIKVISION iDS-TCV907-BIR


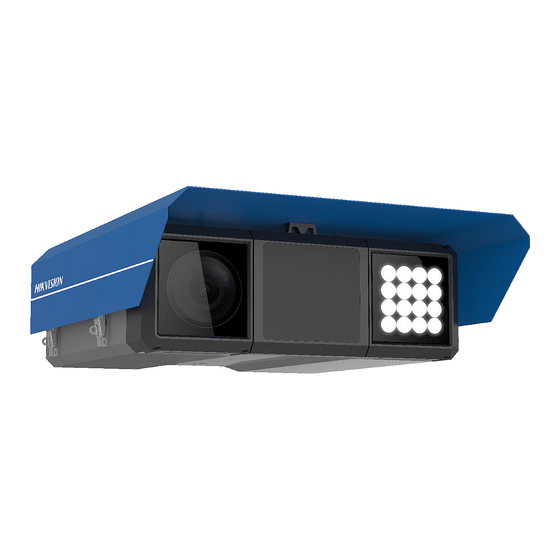
Summary of Contents for HIKVISION iDS-TCV907-BIR
- Page 1 Network Traffic Camera Operation Manual...
- Page 2 With the philosophy of "Technology for the Good", Hikvision requests that every end user of video technology and video products shall comply with all the applicable laws and regulations, as well as ethical customs, aiming to jointly create a better community.
- Page 3 Network Traffic Camera Operation Manual control, selecting a suitable network environment (the Internet or Intranet) where video products are connected, establishing and constantly optimizing network security. Video products have made great contributions to the improvement of social security around the ●...
- Page 4 WITHOUT LIMITATION, MERCHANTABILITY, SATISFACTORY QUALITY, OR FITNESS FOR A PARTICULAR PURPOSE. THE USE OF THE PRODUCT BY YOU IS AT YOUR OWN RISK. IN NO EVENT WILL HIKVISION BE LIABLE TO YOU FOR ANY SPECIAL, CONSEQUENTIAL, INCIDENTAL, OR INDIRECT DAMAGES,...
- Page 5 Network Traffic Camera Operation Manual DEVELOPMENT OR PRODUCTION OF WEAPONS OF MASS DESTRUCTION, THE DEVELOPMENT OR PRODUCTION OF CHEMICAL OR BIOLOGICAL WEAPONS, ANY ACTIVITIES IN THE CONTEXT RELATED TO ANY NUCLEAR EXPLOSIVE OR UNSAFE NUCLEAR FUEL-CYCLE, OR IN SUPPORT OF HUMAN RIGHTS ABUSES.
- Page 6 Network Traffic Camera Operation Manual Symbol Conventions The symbols that may be found in this document are defined as follows. Symbol Description Indicates a hazardous situation which, if not avoided, will or could Danger result in death or serious injury. Indicates a potentially hazardous situation which, if not avoided, could Caution result in equipment damage, data loss, performance degradation, or...
-
Page 7: Table Of Contents
Network Traffic Camera Operation Manual Contents Chapter 1 Activation and Login ....................1 1.1 Activation ..........................1 1.1.1 Default Information ...................... 1 1.1.2 Activate via SADP ......................1 1.1.3 Activate via Web Browser ..................... 2 1.2 Login ............................3 Chapter 2 Live View and Local Configuration ................4 2.1 Live View .......................... - Page 8 Network Traffic Camera Operation Manual 4.1.2 Set FTP ........................14 4.1.3 Set SDK Listening ......................15 4.1.4 Set Arm Host ....................... 16 4.1.5 Set ISAPI Listening ....................... 17 4.1.6 Set Cloud Storage ......................18 4.2 Set Quota ..........................19 4.3 Set Record Schedule ......................20 Chapter 5 Encoding and Display ....................
- Page 9 Network Traffic Camera Operation Manual 8.1 Exception Alarm ........................43 8.2 Set Email ..........................43 8.3 Set Email Event ........................45 Chapter 9 Safety Management ....................46 9.1 Manage User ........................46 9.2 Set IP Address Filtering ......................46 9.3 Enable User Lock ........................47 9.4 Set HTTPS ..........................
- Page 10 Network Traffic Camera Operation Manual 10.8.3 Set Image Format ...................... 56 10.9 Export Parameters ......................56 10.10 Import Configuration File ....................56 10.11 Export Debug File ......................57 10.12 Export Diagnosis Information ..................57 Appendix A. Communication Matrix and Device Command ............58...
-
Page 11: Chapter 1 Activation And Login
Get the SADP software from the supplied disk or the official website ( http:// ● www.hikvision.com/ ), and install it according to the prompts. The device and the computer that runs the SADP tool should belong to the same network ●... -
Page 12: Activate Via Web Browser
Network Traffic Camera Operation Manual Figure 1-1 Activate via SADP Status of the device becomes Active after successful activation. 5. Modify IP address of the device. 1) Select the device. 2) Change the device IP address to the same network segment as your computer by either modifying the IP address manually or checking Enable DHCP (Dynamic Host Configuration Protocol). -
Page 13: Login
Network Traffic Camera Operation Manual Caution STRONG PASSWORD RECOMMENDED-We highly recommend you create a strong password of your own choosing (using a minimum of 8 characters, including upper case letters, lower case letters, numbers, and special characters) in order to increase the security of your product. And we recommend you reset your password regularly, especially in the high security system, resetting the password monthly or weekly can better protect your product. -
Page 14: Chapter 2 Live View And Local Configuration
Network Traffic Camera Operation Manual Chapter 2 Live View and Local Configuration 2.1 Live View 2.1.1 Start/Stop Live View Click to start live view. Click to stop live view. 2.1.2 Select Image Display Mode Click to select an image display mode. 2.1.3 Select Window Division Mode Click to select a window division mode. -
Page 15: Start/Stop Two-Way Audio
Network Traffic Camera Operation Manual Steps 1. Click to start live view. 2. Click to start recording. 3. Click to stop recording. 4. Optional: Click Configuration → Local → Record File Settings to view the saving path of record files. 2.1.7 Start/Stop Two-Way Audio The device supports two-way audio with terminals, such as computers. -
Page 16: Enable Regional Focus
Network Traffic Camera Operation Manual The area will be zoomed in. 4. Click any position of the image to restore to normal image. 5. Click to disable digital zoom. 2.1.10 Enable Regional Focus Steps Note The function varies with different models. The actual device prevails. 1. -
Page 17: Select Video Mode
Network Traffic Camera Operation Manual 2.1.12 Select Video Mode Set the video mode when adjusting the device focus during construction. Click and select when the device is running normally. 2.2 PTZ Operation Click Live View. Click and click to show the PTZ control panel. Note The PTZ supports power-off memory. -
Page 18: Local Configuration
Network Traffic Camera Operation Manual Button Description Hold under the manual focus mode to make near objects ● become clear and distant objects become vague. Hold to make distant objects become clear and near ● objects become vague. Iris + and Iris – Hold to increase the iris diameter when in a dark ●... - Page 19 Network Traffic Camera Operation Manual Figure 2-3 Local Configuration Protocol Type Select the network transmission protocol according to the actual needs. Ensures complete delivery of streaming data and better video quality, but the real-time transmission will be affected. Provides real-time audio and video streams. HTTP Gets streams from the device by a third party client.
- Page 20 Network Traffic Camera Operation Manual Main Stream Select it to get the high-quality image when the network condition is good. Sub-Stream Select it to get the fluent image when the network condition is not good enough. Live View Performance Shortest Delay The video is real-time, but its fluency may be affected.
- Page 21 Network Traffic Camera Operation Manual Save downloaded files to Set the saving path of the download files. Save snapshots in live view to Set the saving path of the manually captured pictures in live view mode. Save downloaded pictures to Set the saving path of the downloaded pictures.
-
Page 22: Chapter 3 Playback
Network Traffic Camera Operation Manual Chapter 3 Playback You can search, play back, and download videos that stored on the storage card. Steps 1. Click Playback. 2. Select a channel. 3. Select a date. 4. Click Search. 5. Click to start playback. 6. -
Page 23: Chapter 4 Record And Capture
Network Traffic Camera Operation Manual Chapter 4 Record and Capture 4.1 Set Storage Path 4.1.1 Set Storage Card If you want to store the files to the storage card, make sure you insert and format the storage card in advance. Before You Start Insert the storage card to the device. -
Page 24: Set Ftp
Network Traffic Camera Operation Manual 4.1.2 Set FTP Set FTP parameters if you want to upload the captured pictures to the FTP server. Before You Start Set the FTP server, and ensure the device can communicate normally with the server. Steps 1. -
Page 25: Set Sdk Listening
Network Traffic Camera Operation Manual The connection is made for long-term data transmission, which will be broken only when the device is disconnected from the FTP server. 5. Optional: Enable upload functions. Note Supported functions vary with different models. The actual device prevails. Not Upload Plate Close-up The close-up pictures of a license plate will not be uploaded. -
Page 26: Set Arm Host
Network Traffic Camera Operation Manual Steps 1. Go to Configuration → Network → Data Connection → SDK Listening . Figure 4-3 Set SDK Listening 2. Enable SDK listening. 3. Set IP Address/Domain and Port if you need to upload the alarm information and pictures. 4. -
Page 27: Set Isapi Listening
Network Traffic Camera Operation Manual Figure 4-4 Set Arm Host 2. Select Protocol Type. Note Supported functions vary with different models. The actual device prevails. License Plate Upload Protocol Uploads arming alarm images of the license plate. You can enable Upload Binary Image if you need to upload binary images full of black or white pixel points. -
Page 28: Set Cloud Storage
Network Traffic Camera Operation Manual Figure 4-5 Set ISAPI Listening 2. Set ANPR IP/Domain, ANPR Port, and Host URL. 3. Optional: Enable Upload Binary Image if you need to upload images which are full of black or white pixel points. Note Enable Output Binary Image in BMP Format if you want to output images in this format. -
Page 29: Set Quota
Network Traffic Camera Operation Manual Figure 4-6 Set Cloud Storage 2. Check Enable. 3. Select Version. V1.0 a. Enter IP Address and Port b. Enter User Name and Password. c. Enter Cloud Storage ID and Violation Cloud Storage ID according to the server storage area No. -
Page 30: Set Record Schedule
Network Traffic Camera Operation Manual Figure 4-7 Set Quota 2. Set Capture Quota Ratio and Video Quota Ratio according to the actual needs. Note The percentage sum of the capture and video quota ratio should be 100 %. 3. Click Save. What to do next Format the storage card after the settings. - Page 31 Network Traffic Camera Operation Manual Figure 4-8 Set Record Schedule 4. Select Record Type. 5. Drag the cursor on the time bar to set a recording time. Note Up to 8 time periods can be set on a time bar. 6.
-
Page 32: Chapter 5 Encoding And Display
Network Traffic Camera Operation Manual Chapter 5 Encoding and Display 5.1 Set Video Encoding Parameters Set video encoding parameters to adjust the live view and recording effect. When the network signal is good and the speed is fast, you can set high resolution and bitrate to ●... -
Page 33: Set Image Parameters
Network Traffic Camera Operation Manual Scalable Video Coding (SVC) is an extension of the H.264/AVC and H.265 standard. Enable the function and the device will automatically extract frames from the original video when the network bandwidth is insufficient. Bitrate Type Select the bitrate type to constant or variable. - Page 34 Network Traffic Camera Operation Manual Figure 5-1 Set Image Parameters 2. Set the camera parameters. Note The supported parameters vary with different models. The actual device prevails. General Parameter Enable Dual-Shutter Set the stream type after enabling it. Saturation It refers to the colorfulness of the image color. Sharpness It refers to the edge contrast of the image.
- Page 35 Network Traffic Camera Operation Manual light correction coefficient. The higher the sensitivity is, the easier this function can be enabled. Enable Gamma Correction The higher the gamma correction value is, the stronger the correction strength is. Black and White Mode at Night When ICR is in night mode, you can check it to keep the video in black and white mode.
-
Page 36: Set Icr
Network Traffic Camera Operation Manual 3. Optional: Click Capture Test to check the image. 5.3 Set ICR ICR adopts mechanical IR filter to filter IR in the day to guarantee the image effect, and to remove the IR filter at night to guarantee full-spectrum rays can get through the device. Steps 1. -
Page 37: Set Privacy Mask
Network Traffic Camera Operation Manual 2. Select Stream Type. 3. Set ROI region. 1) Check Enable. 2) Select Area Code. 3) Click Draw Area. 4) Drag the mouse on the live view image to draw a fixed area. 5) Select the fixed area that needs to be adjusted and drag the mouse to adjust its position. 4. - Page 38 Network Traffic Camera Operation Manual Figure 5-3 Set Privacy Mask 2. Check Enable Privacy Mask. 3. Enable the privacy mask area(s). 1) Check Enable. 2) Select Area Code. 3) Select Type. 4. Draw the privacy mask area. 1) Click Draw Area. 2) In the live view image, drag the mouse to draw the privacy mask area of the selected area code.
-
Page 39: Set Osd
Network Traffic Camera Operation Manual 5. Optional: Repeat step 3 and 4 to draw more privacy mask areas. Note Up to four privacy mask areas are supported. 6. Click Save. 5.6 Set OSD You can customize OSD information on the live view. Steps 1. - Page 40 Network Traffic Camera Operation Manual Note Up to 6 items of custom information can be added. 4. Set display properties (font, color, etc.). 5. Select Alignment. Note If you select Align Left or Align Right, set Min. Horizontal Margin and Min. Vertical Margin. 6.
-
Page 41: Chapter 6 Network Configuration
Network Traffic Camera Operation Manual Chapter 6 Network Configuration 6.1 Set IP Address IP address must be properly configured before you operate the device over network. IPv4 and IPv6 are both supported. Both versions can be configured simultaneously without conflicting to each other. - Page 42 Network Traffic Camera Operation Manual Select it when the two network interfaces are connected to two network cables respectively. When one network interface fails, the other network interface will be employed automatically without influencing the data transmission. Multi-Network Isolation Select it when different LANs are connected. Set the IP addresses of different network segments.
-
Page 43: Connect To Platform
Network Traffic Camera Operation Manual Enter IPv6 Address, IPv6 Subnet Mask, and IPv6 Default Gateway. Consult the network administrator for required information. It stands for maximum transmission unit. It is the size of the largest protocol data unit that can be communicated in a single network layer transaction. The valid value range of MTU is 1280 to 1500. -
Page 44: Connect To Hik-Connect
Network Traffic Camera Operation Manual Figure 6-2 Connect to ISUP Platform 2. Check Enable. 3. Select Protocol Version. 4. Select Address Type. 5. Enter Sever IP Address, Server Port, and Device ID. Note You need to enter Key if you select Protocol Version as v5.0. 6. -
Page 45: Set Ddns
Network Traffic Camera Operation Manual Before You Start Connect the device to the Internet. ● Set the IP address, subnet mask, gateway, and DNS server of the LAN. ● Steps Note This function varies with different models. The actual device prevails. 1. -
Page 46: Set Snmp
Network Traffic Camera Operation Manual Steps 1. Go to Configuration → Network → Network Parameters → DDNS . Figure 6-4 Set DDNS 2. Check Enable DDNS. 3. Enter the server address and other information. Note You can select IPServer, DynDNS, and NO-IP for the DDNS type. 4. -
Page 47: Set Qos
Network Traffic Camera Operation Manual Note The SNMP version you select should be the same as that of the SNMP software. ● Use different versions according to the security levels required. SNMP v1 is not secure and ● SNMP v2 requires password for access. SNMP v3 provides encryption and if you use the third version, HTTPS protocol must be enabled. -
Page 48: Set Port
Network Traffic Camera Operation Manual Figure 6-5 Set IEEE 802.1X 2. Check Enable 802.1X. 3. Select Protocol Type and EAPOL Version. Protocol Type The authentication server must be configured. Register a user name and password for 802.1X in the server in advance. Enter the user name and password for authentication. EAPOL Version The EAPOL version must be identical with that of the router or the switch. - Page 49 Network Traffic Camera Operation Manual Figure 6-6 Set Port HTTP Port It refers to the port through which the browser accesses the device. For example, when the HTTP Port is modified to 81, you need to enter http://192.168.1.64:81 in the browser for login. HTTPS Port It refers to the port through which the browser accesses the device, but certificate verification is needed.
- Page 50 Network Traffic Camera Operation Manual Note After editing the port, access to the device via the new port. ● Reboot the device to bring the new settings into effect. ● The supported ports vary with different models. The actual device prevails. ●...
-
Page 51: Chapter 7 Serial Port Configuration
Network Traffic Camera Operation Manual Chapter 7 Serial Port Configuration 7.1 Set RS-485 Set RS-485 parameters if the device needs to be connected to other peripheral devices controlled by RS-485 serial port. Before You Start The corresponding device has been connected via the RS-485 serial port. Steps Note The number of available RS-485 serial port varies with different models. -
Page 52: Set Rs-232
Network Traffic Camera Operation Manual 7.2 Set RS-232 Set RS-232 parameters if you need to debug the device via RS-232 serial port. Before You Start The debugging device has been connected via the RS-232 serial port. Steps 1. Go to Configuration → System → System Settings → Serial Port → RS-232 . Figure 7-2 Set RS-232 2. -
Page 53: Chapter 8 Event And Alarm
Network Traffic Camera Operation Manual Chapter 8 Event and Alarm 8.1 Exception Alarm Set exception alarm when the network is disconnected, the IP address is conflicted, etc. Steps Note The supported exception types vary with different models. The actual device prevails. 1. - Page 54 Network Traffic Camera Operation Manual Figure 8-1 Set Email 3. Set email parameters. 1) Enter the sender's email information, including Sender, Sender's Address, SMTP Server, and SMTP Port. 2) Select Email Encryption. None Emails are sent without encryption. Emails are sent after being encrypted by TLS. 3) Optional: If you want to upload no-plate data, check Upload No-Plate Data.
-
Page 55: Set Email Event
Network Traffic Camera Operation Manual 8.3 Set Email Event When the set event occurs, the device can be set to send an email with alarm information to the user. Before You Start The email has been enabled and related email parameters have been configured. Steps 1. -
Page 56: Chapter 9 Safety Management
Network Traffic Camera Operation Manual Chapter 9 Safety Management 9.1 Manage User The administrator can add, modify, or delete other accounts, and grant different permissions to different user levels. Steps 1. Go to Configuration → System → User Management → User List . 2. -
Page 57: Enable User Lock
Network Traffic Camera Operation Manual 3. Set Filtering Mode. Blocklist Mode The added IP addresses are not allowed to access the device. Allowlist Mode The added IP addresses are allowed to access the device. 4. Click Add, enter the IP address, and click OK. Note The IP address only refers to the IPv4 address. -
Page 58: Install Authorized Certificate
Network Traffic Camera Operation Manual 9.4.2 Install Authorized Certificate If the demand for external access security is high, you can create and install authorized certificate via HTTPS protocol to ensure the data transmission security. Steps 1. Go to Configuration → Network → Network Parameters → HTTPS . 2. -
Page 59: Set Timeout Logout
Network Traffic Camera Operation Manual 9.7 Set Timeout Logout You can improve network access security by setting timeout logout. Steps 1. Go to Configuration → System → Security → Security Service → Timeout Logout . 2. Enable timeout logout for static page. 3. -
Page 60: Chapter 10 Maintenance
Network Traffic Camera Operation Manual Chapter 10 Maintenance 10.1 View Device Information Basic Information and Algorithms Library Version Go to Configuration → System → System Settings → Basic Information to view the basic information and algorithms library version of the device. You can edit Device Name and Device No. -
Page 61: Search Log
Network Traffic Camera Operation Manual Steps Note The function varies with different models. The actual device prevails. 1. Go to Configuration → System → Maintenance → Debug → Log . 2. Check the module(s) according to your needs. 3. Click Save. 10.2.3 Search Log Log helps to locate and troubleshoot problems. -
Page 62: Reboot
Network Traffic Camera Operation Manual 10.4 Reboot When the device needs to be rebooted, reboot it via the software instead of cutting off the power directly. Steps 1. Go to Configuration → System → Maintenance → Upgrade & Maintenance → Device Maintenance . -
Page 63: Set Dst
Network Traffic Camera Operation Manual Manual Synchronization Select it to synchronize the device time with that of the computer. Set time manually, or check Sync. with computer time. Satellite Time Select it to synchronize the device time with that of the satellite. Set Interval. If the remote host has been set for the device, select it to synchronize time via the remote host. -
Page 64: Vehicle Capture And Recognition Service
Network Traffic Camera Operation Manual Steps 1. Go to Configuration → Capture → Advanced → System Service . 2. Check the debug information according to your needs. Enable Algorithm POS Information Debug The algorithm POS information will be overlaid on the playback image when you play back the video with the dedicated tool. - Page 65 Network Traffic Camera Operation Manual Steps Note The function varies with different models. The actual device prevails. 1. Go to Configuration → Capture → Advanced → Vehicle Capture and Recognition Service . 2. Check the service(s) according to your needs. Note The supported services vary with different models.
-
Page 66: Set Image Format
Network Traffic Camera Operation Manual 3. Click Save. 10.8.3 Set Image Format You can enable smartJPEG which can save the storage space without influencing the resolution. Steps 1. Go to Configuration → Capture → Advanced → Image Service . 2. Check smartJPEG. 3. -
Page 67: Export Debug File
Network Traffic Camera Operation Manual 1. Go to Configuration → System → Maintenance → Upgrade & Maintenance → Advanced Settings → Data Import . 2. Select Importing Method. Note If you select Import Part, check the parameters to be imported. 3. -
Page 68: Appendix A. Communication Matrix And Device Command
Network Traffic Camera Operation Manual Appendix A. Communication Matrix and Device Command Scan the QR code below to get the communication matrix of the device. Scan the QR code below to get the device command. - Page 69 UD29405B...
Need help?
Do you have a question about the iDS-TCV907-BIR and is the answer not in the manual?
Questions and answers