Table of Contents
Advertisement
Advertisement
Table of Contents

Related Manuals for Clarion OHM102/OHM153


Summary of Contents for Clarion OHM102/OHM153
- Page 2 The Clarion OHM102/OHM153 overhead monitor systems are designed for strictly for rear seat entertainment. Viewing the monitor while operating a motor vehicle can result in serious injury and/or property damage. Clarion is not responsible for any injury and/or property damage as a result of the improper use or viewing of the monitor.
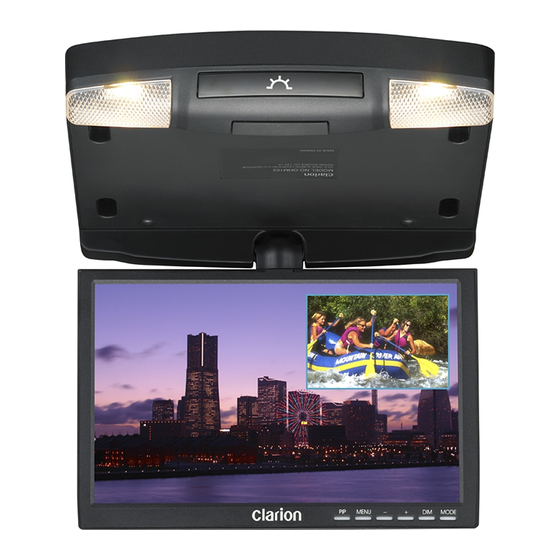
- Page 3 Introduction The Clarion OHM102/OHM153 are exclusively designed for the ultimate in rear seat mobile video entertainment. With the built-in A/V switcher, any Clarion video source or game station can be enjoyed on these monitors. The built-in A/V switcher also incorporates PIP (picture in picture) and split screen operation.
-
Page 4: Table Of Contents
Table of contents Opening the Overhead Monitor ..4 Precautions ......5 Care And Maintenance . -
Page 5: Opening The Overhead Monitor
Opening the Overhead Monitor Opening the Overhead Monitor Press the “OPEN” button to release the overhead monitor. Gently push down on the bottom of the Press the “OPEN” button to release the overhead monitor. Gently push down on the bottom of the monitor until it reaches the desired position. -
Page 6: Precautions
In the event that the unit should become wet, turn off the power and contact a local Clarion dealer for assistance. To clean the monitor, use a clean soft cloth and gently wipe the screen. If possible, use specially designed... -
Page 7: Operating Ohm102/153 Monitor
OPERATING OHM102/OHM153 MONITOR In the event a problem arises with the OHM102/OHM153 overhead monitor system, do not attempt to disassemble or repair the monitor yourself. Opening or attempting to service the monitor will void the warranty; instead contact a local Clarion dealer for assistance. -
Page 8: Setting The Screen Mode
Setting the Screen Mode The OHM102/OHM153 has 4 different screen modes: NORMAL, WIDE, ZOOM, and FULL. Pressing the MODE button on the front control panel or the remote control can access the different screen modes. The current mode is displayed on the screen first. Each time the MODE... - Page 9 Note: The screen mode will set after 5 seconds, pending that the MODE button is not pressed. The display image may appear coarse or grainy when viewed in Zoom mode. Changing the Display Settings (Picture In Picture/Split Screen) The display setting can be adjusted by pressing the PIP (Picture In Picture) button on the control panel or remote control.
-
Page 10: Dimmer Button
Selecting the AV Sources for Main and Sub Screen MAIN SCREEN Press the (DOWN Button) to select the desired AV source. The sources will be changed in following sequence: SUB SCREEN Press the (UP button) to select the desired AV source. The sources will be changed in following sequence: NOTE: Same video input cannot be viewed simultaneously. -
Page 11: Operating The Remote Control
OPERATING THE REMOTE CONTROL 1. Power button Press the Power button to turn ON/OFF the monitor. 2. FM button Press to turn ON/OFF the FM modulator (FM200 not included) 3. DIMMER button Press to adjust the brightness of the screen. 4. -
Page 12: Battery Installation
POS button Press to select the location of the PIP (Picture In Picture) image. SIZE button Press to select the size of the PIP (Picture In Picture) image. INPUT button Press to select AV source for Sub Screen. Mode button Press to change the screen format: Normal, Full, Zoom, and Wide. -
Page 13: Operating The Headphones
OPERATING THE HEADPHONES 1. Power switch Press to activate the headphones. The power on the headphones will turn off automatically, if an audio signal is not detected for over a minute. 2. Source selector switch Switches between the audio sources. 3. -
Page 14: Installation Instructions
INSTALLATION INSTRUCTIONS About the Installation The installation of the OHM102/OHM153 overhead monitor system requires experience in both mechanical and electrical procedures. If you do not posses the necessary experience or tools to attempt this installation, contact a local Clarion dealer for assistance. Improper installation can result in damage to the monitor and/or the vehicle. - Page 15 12. Ground the Black wire of the power harness to a clean ground spot. Note: Make sure you keep the ground wire of the OHM102/OHM153 and video source as short as possible to prevent any type of unwanted vehicle noise.
- Page 16 Roof Beam Headliner Screws (Not Provided) Metal Bracket (Included) Screws (Not Provided)
-
Page 17: Complete System Diagram
COMPLETE SYSTEM DIAGRAM IR Transmitter DOME Light Control OEM Head Unit Audio Output FM200 +12V +12V AV Input 4 Ground AV Input 1 Ground AV Input 2 Video Out AV Input 3 DVD(VS735) DVD(VS735) VMA7191 VCR(VDH910) N e ga ti ve Posi t i ve... -
Page 18: Connection Diagram
Please refer the to the connection diagram on Page 16 for the proper wiring conditions for the OHM102/OHM153 overhead monitor. If you are uncertain as to what the proper connections are OHM102/OHM153 overhead monitor. If you are uncertain as to what the proper connections are please contact a qualified Clarion technician for further installation assistance. -
Page 19: Package Contents
If NO MENU appears, check all fuses and power connections to the OHM102/OHM153. NOTE: The OHM102/OHM153 has an operating temperature of apr. 5 degrees C to 40 degrees C (41 degrees F to 104 degrees F.). If the temperature is outside this operating range, the unit will turn on, or the screen may be slow to react to image changes. -
Page 20: Specifications
SPECIFICATIONS Supply: 12V DC (10V-16V) Test Voltage: 12V, negative ground Current Consumption: (OHM102) 1 Amp, (OHM153) 1.9 Amps Max Current Consumption: (OHM102) 1.1 Amps, (OHM153) 2 Amps Operating Temperature: (OHM102) 0 ~ 60 C, (OHM153) 0~50 C Storage Temperature: (OHM102) -30 C ~ 85 C (OHM153) -20 C ~ 60 C Video System: Auto NTSC and PAL Screen: (OHM102) 10.2”... -
Page 21: Warranty Information
5. The sole responsibility of Clarion under this limited warranty shall be limited to the repair of the product or replacement of the product, at the sole discretion of Clarion. - Page 22 Authorized Warranty Service Centers in your area. You may also contact the Clarion Customer Service at the address listed below for any service help you may need with Clarion products.
Need help?
Do you have a question about the OHM102/OHM153 and is the answer not in the manual?
Questions and answers