Table of Contents
Advertisement
Available languages
Available languages
Quick Links
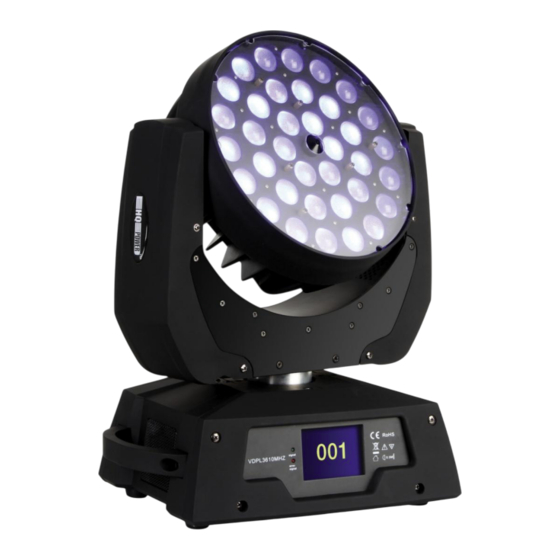
VDPL3610MHZ
ARAS 3610 – LED MOVING HEAD WITH ZOOM
ARAS 3610 – MOVING HEAD MET ZOOM
ARAS 3610 – PROJECTEUR LYRE AVEC ZOOM
ARAS 3610 – CABEZA MÓVIL CON ZOOM
ARAS 3610 – LED "MOVING HEAD"-SCHEINWERFER MIT ZOOM
USER MANUAL
GEBRUIKERSHANDLEIDING
MODE D'EMPLOI
MANUAL DEL USUARIO
BEDIENUNGSANLEITUNG
3
11
20
29
37
Advertisement
Table of Contents

Related Manuals for Velleman HQ Power ARAS 3610


Summary of Contents for Velleman HQ Power ARAS 3610
- Page 1 VDPL3610MHZ ARAS 3610 – LED MOVING HEAD WITH ZOOM ARAS 3610 – MOVING HEAD MET ZOOM ARAS 3610 – PROJECTEUR LYRE AVEC ZOOM ARAS 3610 – CABEZA MÓVIL CON ZOOM ARAS 3610 – LED "MOVING HEAD"-SCHEINWERFER MIT ZOOM USER MANUAL GEBRUIKERSHANDLEIDING MODE D'EMPLOI MANUAL DEL USUARIO...
- Page 2 Modifier la ligne du contrôleur de 3 broches en 5 broches (fiche et contact). Modificar la línea del controlador de 3 polos y 5 polos (conector y contacto). Die Controller-Linie von 3-Pin nach 5-Pin anzupassen (Stecker und Kontakt). V. 01 – 07/06/2013 ©Velleman nv...
-
Page 3: Safety Instructions
The maximum ambient temperature is 40 °C. Do not operate the device at higher temperatures. General Guidelines Refer to the Velleman® Service and Quality Warranty on the last pages of this manual. Keep this device away from dust and extreme temperatures. Make sure the ventilation openings are clear at all times. -
Page 4: Installation
0 % to 100 % switching. The installation has to be approved by an expert before the device is taken into service. V. 01 – 07/06/2013 ©Velleman nv... -
Page 5: Operation
If you accidentally push the device and change its pan or tilt position, you can let the device correct its position automatically. 1. In the main menu, press [Setup]. 2. Select [Code Wheel] and press [Enter]. 3. Set to [ON] to let the device automatically correct the pan and tilt position. V. 01 – 07/06/2013 ©Velleman nv... - Page 6 1. Connect nothing to the DMX input [2] of the device. 2. In the main menu, press [Run Mode]. 3. Select [Sound] and press [Enter] to confirm. A check mark (√) appears next to the option. V. 01 – 07/06/2013 ©Velleman nv...
- Page 7 DMX cable, the set colour is still on. If the function is inactive, the set colour will be off. 1. In the main menu, press [Setup]. 2. Select [Signal Link] and press [Enter]. 3. Set to [ON] to activate the memory function. V. 01 – 07/06/2013 ©Velleman nv...
- Page 8 White 0 Red Green Blue 255 White 0 Red 255 Green 255 Blue 255 White 255 Red 0 Green 0 Blue 0 White 0 Red 242 Green 204 Blue 5 White 227 V. 01 – 07/06/2013 ©Velleman nv...
-
Page 9: Troubleshooting
1. In the main menu, press [Setup]. 2. Select [Reset] and press [Enter]. [YES] appears on the display. Press [Enter] to reset the moving head. The moving head moves to the default position. Press [Return] to quit without resetting. V. 01 – 07/06/2013 ©Velleman nv... -
Page 10: Cleaning And Maintenance
The information in this manual is subject to change without prior notice. © COPYRIGHT NOTICE The copyright to this manual is owned by Velleman nv. All worldwide rights reserved. No part of this manual may be copied, reproduced, translated or reduced to any electronic medium or otherwise without the prior written consent of the copyright holder. -
Page 11: Algemene Richtlijnen
De maximale omgevingstemperatuur bedraagt 40 °C. Gebruik het toestel niet bij hogere temperaturen. Algemene richtlijnen Raadpleeg de Velleman® service- en kwaliteitsgarantie achteraan deze handleiding. Bescherm dit toestel tegen stof en extreme temperaturen. Zorg dat de verluchtingsopeningen niet verstopt geraken. Voorzie een minimumafstand van 15 cm tussen het toestel en elk ander voorwerp. - Page 12 Monteer het toestel niet zelf indien u er geen ervaring mee heeft. Een slechte montage kan leiden tot verwondingen. Voor montage op een lichtbrug, gebruik een geschikte klem (niet meegelev.) en draai een M10-bout doorheen het midden van de (geplooide) beugel. V. 01 – 07/06/2013 ©Velleman nv...
- Page 13 1. In het hoofdmenu, druk op [Setup]. 2. Selecteer [Pan Reverse] en druk op [Enter]. 3. Stel in op [ON] voor een omgekeerde panbeweging en druk op [Enter]. Stel in op [OFF] voor een normale panbeweging. V. 01 – 07/06/2013 ©Velleman nv...
- Page 14 [Run Time]: de totale werkingsduur van het toestel, weergegeven in uren/minuten. [Soft Ver]: de softwareversie. [Running Mode]: de huidige werkingsmodus, bijvoorbeeld [DMX Mode], [Auto Mode], [Sound Mode]. [DMX Address]: het huidige DMX-startadres (001-512). V. 01 – 07/06/2013 ©Velleman nv...
- Page 15 1. Wijs eerst een ID-code toe aan de toestellen: in het hoofdmenu, druk op [Setup]. 2. Selecteer [ID Code] en druk op [Enter]. 3. Gebruik [Up] en [Down] om een ID-code te selecteren (0-25). 4. Herhaal deze stappen voor de andere toestellen. V. 01 – 07/06/2013 ©Velleman nv...
- Page 16 Fijnregeling panbeweging (16-bit) Fijnregeling tiltbeweging (16-bit) Snelheid pan-/tiltbeweging Zoom 16-kanaalsmodus: Kanaal Beschrijving Dimmer Rood Groen Blauw Dimmer voor kleurenmenging van de testfunctie Tilt Fijnregeling panbeweging (16-bit) Fijnregeling tiltbeweging (16-bit) Snelheid pan-/tiltbeweging Zoom Stroboscoop traag naar snel V. 01 – 07/06/2013 ©Velleman nv...
- Page 17 Toestellen met ID-code 13 controleren Toestellen met ID-code 14 controleren Toestellen met ID-code 15 controleren Toestellen met ID-code 16 controleren Toestellen met ID-code 17 controleren Toestellen met ID-code 18 controleren Toestellen met ID-code 19 controleren V. 01 – 07/06/2013 ©Velleman nv...
-
Page 18: Problemen En Oplossingen
1. Ontkoppel het toestel van de netspanning voor u de zekering vervangt. 2. Maak de zekeringhouder achteraan het toestel los met een geschikte schroevendraaier. 3. Verwijder de oude zekering en plaats een nieuwe. 4. Plaats de zekeringhouder terug en zet vast met de schroevendraaier. V. 01 – 07/06/2013 ©Velleman nv... -
Page 19: Technische Specificaties
480 x 350 x 400 mm gewicht 9 kg Gebruik dit toestel enkel met originele accessoires. Velleman nv is niet aansprakelijk voor schade of kwetsuren bij (verkeerd) gebruik van dit toestel. Voor meer informatie over dit product en de laatste versie van deze handleiding, zie www.hqpower.eu. -
Page 20: Consignes De Sécurité
élevées. Directives générales Se référer à la garantie de service et de qualité Velleman® en fin de notice. Protéger contre la poussière et les températures extrêmes. Veiller à ce que les fentes de ventilation ne soient pas bloquées. Laisser une distance de minimum 15 cm entre l‟appareil et tout autre objet. -
Page 21: Caractéristiques
Pour un montage en suspension, utiliser un crochet de suspension approprié (non incl.). Passer un boulon M10 à travers le support (plié). Déterminer l‟angle d‟inclinaison par un support de montage et serrer les vis de support. Enlever tout matériau inflammable dans un rayon de 0,5 m autour de l‟appareil. V. 01 – 07/06/2013 ©Velleman nv... - Page 22 1. Dans le menu principal, appuyer sur [Setup]. 2. Sélectionner [Pan Reverse] et appuyer sur [Enter]. 3. Régler sur [ON] pour un mouvement pan inversé et appuyer sur [Enter]. Régler sur [OFF] pour un mouvement pan normal. V. 01 – 07/06/2013 ©Velleman nv...
- Page 23 [Run Time]: la durée de fonctionnement totale de l'appareil, affichée en heures/minutes. [Soft Ver]: la version logicielle. [Running Mode]: le mode de fonctionnement actuel, p.ex. [DMX Mode], [Auto Mode], [Sound Mode]. [DMX Address]: l'adresse de départ DMX actuelle (001-512). V. 01 – 07/06/2013 ©Velleman nv...
- Page 24 1. Assigner d'abord un code ID aux appareils : dans le menu principal, appuyer sur [Setup]. 2. Sélectionner [ID Code] et appuyer sur [Enter]. 3. Utiliser [Up] et [Down] pour sélectionner un code ID (0-25). 4. Répéter ce processus pour les autres appareils. V. 01 – 07/06/2013 ©Velleman nv...
- Page 25 Variateur pour le mixage de couleurs de la fonction de test Mouvement pan Mouvement tilt réglage fin du mouvement pan (16-bits) Réglage fin du mouvement tilt (16-bits) Vitesse du mouvement pan/tilt Zoom Stroboscope de lent à rapide V. 01 – 07/06/2013 ©Velleman nv...
- Page 26 Contrôler les appareils avec code ID 15 Contrôler les appareils avec code ID 16 Contrôler les appareils avec code ID 17 Contrôler les appareils avec code ID 18 Contrôler les appareils avec code ID 19 V. 01 – 07/06/2013 ©Velleman nv...
-
Page 27: Problèmes Et Solutions
2. Dévisser le porte-fusible du dos de l‟appareil avec un tournevis approprié. 3. Retirer le fusible défectueux et remplacer par un fusible du même type. 4. Remettre le porte-fusible et serrer avec le tournevis. V. 01 – 07/06/2013 ©Velleman nv... -
Page 28: Spécifications Techniques
480 x 350 x 400 mm poids 9 kg N’employer cet appareil qu’avec des accessoires d’origine. La SA Velleman ne peut, dans la mesure conforme au droit applicable être tenue responsable des dommages ou lésions (directs ou indirects) pouvant résulter de l’utilisation de cet appareil. -
Page 29: Manual Del Usuario
La temperatura ambiente máx. es 40 °C. No utilice el aparato a temperaturas más altas. Normas generales Véase la Garantía de servicio y calidad Velleman® al final de este manual del usuario. No exponga este equipo a polvo. No exponga este equipo a temperaturas extremas. Asegúrese de que los orificios de ventilación no estén bloqueados. -
Page 30: Instalación
Ajuste el ángulo de inclinación a su gusto mediante un soporte de montaje y fije los tornillos del soporte. Quite todo material inflamable en un radio de 0,5 m alrededor del aparato. La conexión eléctrica debe llevarla a cabo un electricista cualificado. V. 01 – 07/06/2013 ©Velleman nv... - Page 31 3. Seleccione [ON] para invertir el movimiento pan y pulse [Enter]. Seleccione [OFF] para un movimiento pan en dirección normal. 4. Seleccione [Tilt Reverse] y pulse [Enter]. 5. Seleccione [ON] para invertir el movimiento tilt y pulse [Enter]. Seleccione [OFF] para un movimiento tilt en dirección normal. V. 01 – 07/06/2013 ©Velleman nv...
- Page 32 1. No conecte nada a la entrada DMX [2] del aparato. 2. En el menú principal, pulse [Run Mode] y seleccione [Auto]. 3. Pulse [Enter] y seleccione un programa incorporado (AUTO1-AUTO8). Una marca de verificación (√) aparece al lado de la opción. V. 01 – 07/06/2013 ©Velleman nv...
- Page 33 Ponga canal 16 entre 30 y 39 para controlar los 5 aparatos con el código ID 003. Ponga canal 16 entre 0 y 9 para desactivar los códigos de identificación y controlar todos los aparatos de manera normal con su dirección DMX. V. 01 – 07/06/2013 ©Velleman nv...
- Page 34 Salto (Jump) de lento a rápido; para el color seleccionado con canal 15 transición de colores suave (Fade) de lento a rápido; para el color seleccionado con canal 15 Modo independiente (programa automático) Modo controlado por la música V. 01 – 07/06/2013 ©Velleman nv...
- Page 35 Controlar aparatos con el código de identificación 21 Controlar aparatos con el código de identificación 22 Controlar aparatos con el código de identificación 23 Controlar aparatos con el código de identificación 24 Controlar aparatos con el código de identificación 25 V. 01 – 07/06/2013 ©Velleman nv...
-
Page 36: Solución De Problemas
© DERECHOS DE AUTOR – Velleman NV dispone de los derechos de autor para este manual del usuario. Todos los derechos mundiales reservados. Está estrictamente prohibido reproducir, traducir, copiar, editar y guardar este manual del usuario o partes de ello sin previo permiso escrito del derecho habiente. - Page 37 Sorgen Sie für einen Abstand von min. 0,5 m zwischen dem Gerät und entflammbaren und explosiven Gegenständen oder Stoffen. Sorgen Sie für einen Abstand von min. 15 cm von Decken oder Wänden. Die max. Umgebungstemperatur ist 40 °C. Verwenden Sie das Gerät nicht bei höheren Temperaturen. V. 01 – 07/06/2013 ©Velleman nv...
-
Page 38: Allgemeine Richtlinien
VDPL3610MHZ Allgemeine Richtlinien Siehe Velleman® Service- und Qualitätsgarantie am Ende dieser Bedienungsanleitung. Schützen Sie das Gerät vor Staub. Schützen Sie das Gerät vor extremen Temperaturen. Beachten Sie, dass die Lüftungsschlitze nicht blockiert werden. Beachten Sie eine minimale Entfernung von 6" (± 15 cm) zwischen dem Gerät und jedem anderen Gegenstand. - Page 39 4. Wählen Sie [Display Reverse] aus und drücken Sie auf [Enter]. 5. Wählen Sie [ON] oder [OFF] um zwischen dem normalen und dem gedrehten Display zu schalten. 6. Drücken Sie auf [Enter], um zu bestätigen. V. 01 – 07/06/2013 ©Velleman nv...
- Page 40 Für die Systeminformation, drücken Sie auf [Sys Info] im Hauptmenü. Das Display zeigt folgende Information [On Time]: die Zeit, die das Gerät seit der letzten Einschaltung funktioniert hat, wird in Stunden/Minuten/Sekunden angezeigt. [Run Time]: Die Gesamtzeit, die das Gerät funktioniert hat, wird in Stunden/Minuten/Sekunden angezeigt. V. 01 – 07/06/2013 ©Velleman nv...
- Page 41 Häkchen (√) erscheint neben der Option. 3. Drücken Sie auf [Return] um zum Hauptmenü zurückzukehren und drücken Sie auf [Address]. 4. Verwenden Sie [Up] und [Down], um die DMX-Startadresse (001-512) einzustellen und drücken Sie dann auf [Enter]. V. 01 – 07/06/2013 ©Velleman nv...
- Page 42 PAN-Feineinstellung (16 bit) TILT-Feineinstellung (16 bit) Geschwindigkeit der PAN/TILT-Bewegung Zoom 16-Kanal-Modus: Kanal Beschreibung Dimmer Grün Blau Weiß Dimmer für die Farbmischung der Testfunktion PAN (Schwenkbewegung) TILT (Neigebewegung) PAN-Feineinstellung (16 bit) TILT-Feineinstellung (16 bit) Geschwindigkeit der PAN/TILT-Bewegung V. 01 – 07/06/2013 ©Velleman nv...
- Page 43 Geräte mit ID-Code 10 kontrollieren Geräte mit ID-Code 11 kontrollieren Geräte mit ID-Code 12 kontrollieren Geräte mit ID-Code 13 kontrollieren Geräte mit ID-Code 14 kontrollieren Geräte mit ID-Code 15 kontrollieren Geräte mit ID-Code 16 kontrollieren V. 01 – 07/06/2013 ©Velleman nv...
-
Page 44: Problemlösung
2. Machen Sie den Sicherungshalter auf der Rückseite der Basis mit einem geeigneten Schraubendreher los. 3. Entfernen Sie die defekte Sicherung und setzen Sie eine neue Sicherung gleichen Typs ein. 4. Bringen Sie den Sicherungshalter wieder in das Gehäuse ein. V. 01 – 07/06/2013 ©Velleman nv... -
Page 45: Technische Daten
480 x 350 x 400 mm Gewicht 9 kg Verwenden Sie dieses Gerät nur mit originellen Zubehörteilen. Velleman NV übernimmt keine Haftung für Schaden oder Verletzungen bei (falscher) Anwendung dieses Gerätes. Für mehr Informationen zu diesem Produkt und die neueste Version dieser Bedienungsanleitung, siehe www.hqpower.eu. - Page 46 Tous nos produits répondent à des exigences de qualité - se calcula gastos de transporte de y a Velleman® si el aparato ya You will be delivered a replacing article or a refund at the value of rigoureuses et à...
Need help?
Do you have a question about the HQ Power ARAS 3610 and is the answer not in the manual?
Questions and answers