Table of Contents
Advertisement
Quick Links
Advertisement
Table of Contents

Related Manuals for Stairville TinyBright IP Q15


Summary of Contents for Stairville TinyBright IP Q15
- Page 1 TinyBright IP Q15 LED Floodlight...
- Page 2 Thomann GmbH Hans-Thomann-Straße 1 96138 Burgebrach Germany Telephone: +49 (0) 9546 9223-0 Internet: www.thomann.de 21.04.2022, ID: 497678 (V2)
-
Page 3: Table Of Contents
1.1 Further information........................... 6 1.2 Notational conventions........................7 1.3 Symbols and signal words....................... 7 Safety instructions..........................10 Features............................... 13 Installation and starting up........................ 15 Components and functions........................ 21 Technical specifications........................25 Cleaning............................... 27 Protecting the environment......................28 TinyBright IP Q15 LED Floodlight... - Page 4 TinyBright IP Q15 LED Floodlight...
-
Page 5: General Information
Our products and user manuals are subject to a process of continuous development. We there‐ fore reserve the right to make changes without notice. Please refer to the latest version of the user manual which is ready for download under www.thomann.de. TinyBright IP Q15 LED Floodlight... -
Page 6: Further Information
Our online guides provide detailed information on technical basics Online guides and terms. Personal consultation For personal consultation please contact our technical hotline. If you have any problems with the device the customer service will Service gladly assist you. TinyBright IP Q15 LED Floodlight... -
Page 7: Notational Conventions
The letterings for connectors and controls are marked by square brackets and italics. Examples: [VOLUME] control, [Mono] button. 1.3 Symbols and signal words In this section you will find an overview of the meaning of symbols and signal words that are used in this manual. TinyBright IP Q15 LED Floodlight... - Page 8 This combination of symbol and signal word indicates a pos‐ sible dangerous situation that can result in material and environmental damage if it is not avoided. Warning signs Type of danger Warning – high-voltage. Warning – dangerous optical radiation. TinyBright IP Q15 LED Floodlight...
- Page 9 General information Warning signs Type of danger Warning – suspended load. Warning – danger zone. TinyBright IP Q15 LED Floodlight...
-
Page 10: Safety Instructions
Extend the operating life of the device by regular breaks and by avoiding frequent switching on and off. The device is not suitable for continuous operation. TinyBright IP Q15 LED Floodlight... - Page 11 Do not modify the mains cable or the plug. Failure to do so could result in electric shock/death or fire. If in doubt, seek advice from a registered electrician. WARNING! Eye damage caused by high light intensity Never look directly into the light source. TinyBright IP Q15 LED Floodlight...
- Page 12 Incorrectly inserted batteries may destroy the device or the batteries. Ensure that proper polarity is observed when inserting bat‐ teries. NOTICE! Possible damage by leaking batteries Leaking batteries can cause permanent damage to the device. Take batteries out of the device if it is not going to be used for a longer period. TinyBright IP Q15 LED Floodlight...
-
Page 13: Features
For technological reasons, the light output of LEDs decreases over their lifetime. This effect increases with higher operating temperature. You can extend the service life of the illuminants by providing adequate ventilation and operating the LEDs with the lowest possible brightness. TinyBright IP Q15 LED Floodlight... - Page 14 (resistance to changing ambient conditions as well as against the effects of sun‐ light and UV rays). The seals and screw connections of the equipment must be checked regularly to ensure a fault-free operation. In cases of doubt, consult a specialist workshop in due time. TinyBright IP Q15 LED Floodlight...
-
Page 15: Installation And Starting Up
Risk of injury caused by falling objects Make sure that the installation complies with the standards and rules that apply in your country. Always secure the device with a secondary safety attachment, such as a safety cable or a safety chain. TinyBright IP Q15 LED Floodlight... - Page 16 Use the openings of the bracket provided for mounting. Always work from a stable platform whenever installing, moving or servicing the unit. In doing so, the area underneath the unit must be cordoned off. TinyBright IP Q15 LED Floodlight...
- Page 17 Installation and starting up The safety cable must be attached to the bracket. Please note that this device must not be connected to a dimmer. TinyBright IP Q15 LED Floodlight...
- Page 18 Proceed as follows to connect the DMX-IP65 connectors: Insert the plug completely and straight into the coupling. Make sure that the flexible sealing ring has complete contact. Turn the union nut straight onto the thread of the coupling. Hand-tighten the union nut. TinyBright IP Q15 LED Floodlight...
- Page 19 Make sure that there is no objects between the the two IR sensors which may cause interfer‐ control ence problems . Create all connections while the device is off. Use the shortest possible high-quality cables for all connections. Take care when running the cables to prevent tripping hazards. TinyBright IP Q15 LED Floodlight...
- Page 20 Slide the battery holder back into the remote until it clicks into place. When shipping, the battery is already installed in the remote and protected against discharge by a transparent plastic foil. Remove the plastic foil prior to first use. TinyBright IP Q15 LED Floodlight...
-
Page 21: Components And Functions
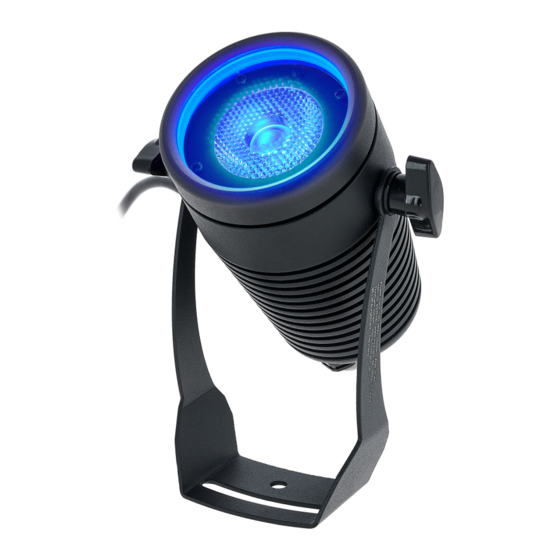
Components and functions Components and functions & TinyBright IP Q15 ö TinyBright IP Q15 LED Floodlight... - Page 22 Components and functions 1 Bracket for floor placement or hanging 2 Locking screw for the bracket. 3 Infrared sensor for remote control 4 Removable ground spike 5 Pressure compensating valve 6 Power cord TinyBright IP Q15 LED Floodlight...
- Page 23 Press the button to activate the programme mode. Use [–] or [+] to set the desired pro‐ gramme. 10 [SPEED] Press the button to activate the setting mode for programme speed. Use [–] or [+] to set the desired speed. TinyBright IP Q15 LED Floodlight...
- Page 24 Components and functions 11 [–] Decreases the set value 12 [+] Increases the set value TinyBright IP Q15 LED Floodlight...
-
Page 25: Technical Specifications
Dimensions (W × H × D) w/ bracket, w/o ground spike 122 mm × 144 mm × 136 mm w/ bracket, w/ ground spike: 122 mm × 353 mm × 136 mm Weight 0.95 kg TinyBright IP Q15 LED Floodlight... - Page 26 Technical specifications Ambient conditions Temperature range 0 °C…40 °C Relative humidity 20 %…80 % (non-condensing) Further information Outdoor housing shape Garden LED type x-in-1 Base housing Fanless Remote control included wireless DMX Housing colour Black TinyBright IP Q15 LED Floodlight...
-
Page 27: Cleaning
The frequency of cleaning depends on the operating environment: wet, smoky or particularly dirty surroundings can cause more accumulation of dirt on the optics of the device. Clean with a soft cloth using our lamp and lens cleaner (item no. 280122). Always dry the parts carefully. TinyBright IP Q15 LED Floodlight... -
Page 28: Protecting The Environment
Protect used lithium batteries against short circuits, for example by covering the poles with adhesive tape. Permanently built-in lithium batteries must be disposed of together with the device. Please inquire about an appropriate collection point. TinyBright IP Q15 LED Floodlight... - Page 29 Dispose of this device through an approved waste disposal firm or through your local waste facility. When discarding the device, comply with the rules and regulations that apply in your country. If in doubt, consult your local waste disposal facility. TinyBright IP Q15 LED Floodlight...
- Page 30 Notes TinyBright IP Q15 LED Floodlight...
- Page 32 Musikhaus Thomann · Hans-Thomann-Straße 1 · 96138 Burgebrach · Germany · www.thomann.de...
Need help?
Do you have a question about the TinyBright IP Q15 and is the answer not in the manual?
Questions and answers