Intermec 6640 Technical Reference
Windows 2000
Hide thumbs
Also See for 6640:
- Technical reference (258 pages) ,
- User manual (70 pages) ,
- Installation instructions manual (14 pages)

Related Manuals for Intermec 6640


Summary of Contents for Intermec 6640
- Page 1 6640/6650 Windows 2000 TECHNICAL REFERENCE " " " " " " " " " " " " " " " " " " " " " P/N 978-054-011 Revision A February 2001...
- Page 2 The information contained herein is proprietary and is provided solely for the purpose of allowing customers to operate and service Intermec manufactured equipment and is not to be released, reproduced, or used for any other purpose without written permission of Intermec.
-
Page 3: Table Of Contents
..........6640/6650 Windows 2000 Technical Reference CONTENTS "... - Page 4 Installing Toolkit Components Setting Up the Driver Loading Windows 2000 Pen Drivers Loading General Utilities Loading Intermec 802.11 Windows 2000 Drivers Setting Up the Ashtech G8 GPS Radio Setting Up the GSM Motorola D10 Radio Setting Up the Mobitex Rim 902 Radio Setting Up the Proxim LAN Radio Setting Up the Sierra Wireless Inc.
- Page 5 ........6640/6650 Windows 2000 Technical Reference...
- Page 6 INDEX 6640/6650 Windows 2000 Technical Reference ........... . .
-
Page 7: Introduction
6640 and 6650 Computers and is intended for experienced application program- mers and information systems engineers. About this Book Use the 6640 Computer User ’s Guide (P/N: 961-054-018) or the 6650 Computer User ’s Guide (P/N: 961-054-023) for hardware components, maintenance, and troubleshooting information. -
Page 8: 6640/6650 Computer
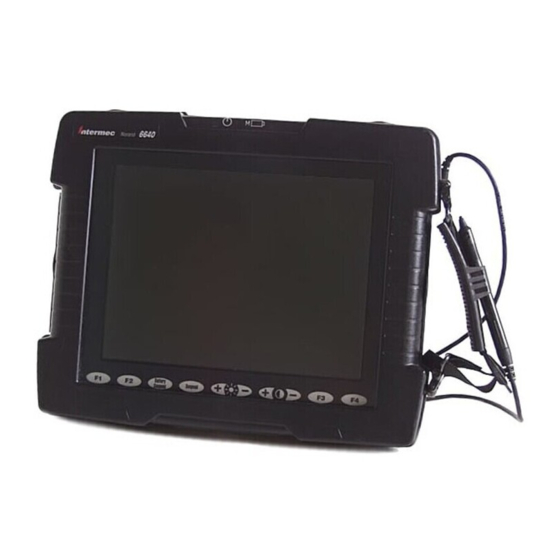
" NOTE: Tool icons are shown to the left of related menu options. The 6640/6650 Computer is a ruggedized, ergonomic, battery-powered, touch- based computer, with input from finger touch, pen, keyboard, or scanner. It has integrated communications and various combinations of external and internal peripherals. -
Page 9: Fat32 To Ntfs
Another difference is that for DOS to access the drive, the USB floppy drive must be attached when the 6640/6650 Computer is turned on. This is because the BIOS, during POST, must be able to detect the drive and its type and then ini- tialize the system to use it. -
Page 10: Nonbootable (Drive B: In Dos)
The default function of the pen is the left mouse button, or left clicks. To switch to the right-click operation, press and hold the button on the pen, then tap the screen. 6640/6650 Windows 2000 Technical Reference SECTION 1... -
Page 11: Indicator Leds
Options desktop icon to access the Power Options Properties window, which allows for changes to power management options. Processor A 266 MHz MMX Pentium processor is supported for the 6640 Computer. A 333 MHz PII Pentium processor is supported for the 6650 Computer. Scanner The computer can be ordered with either a standard 5-volt CCD tethered (exter- nal) wand scanner or a laser scanner. -
Page 12: Dock Connections
Note the general system design of the target computer, such as the file sys- " tem (FAT32 in NTFS), size of hard drive (660 MB SanDisk, 12 GB hard drive, etc.), or an SVGA screen. 6640/6650 Windows 2000 Technical Reference SECTION 1... -
Page 13: System Configuration
[F3] hotkey. e. Click the [F2] hotkey to load the default configuration. Click the [F2] hotkey again to select the Exit Saving Changes option, then click [F2] to exit the PhoenixBIOS Setup Utility. 6640/6650 Windows 2000 Technical Reference Introduction... -
Page 14: Windows 2000
One of the major benefits of the open-system approach is that you can acquire development equipment and software from many different vendors, including Intermec Technologies Corporation. This provides you with greater flexibility in selecting equipment and software tools best suited to your particular develop- ment needs. -
Page 15: Other Environments
For example, Power Builder uses over 3 MB of DLLs in addition to Win- dows just to run “Hello World.” The 6640 Computer uses a 266 MHz MMX Pentium processor. The 6650 Com- puer uses a 333 MHz PII Pentium processor. Test your application performance on a similar computer. - Page 16 Introduction SECTION 1 1-10 6640/6650 Windows 2000 Technical Reference...
-
Page 17: Bios Setup
<F4> button to go up the menu. Press the right side of the <F4> button to go down the menu. " " " " " " " 6640/6650 Windows 2000 Technical Reference Section 2 BIOS Setup " " " " " "... -
Page 18: Main
Set the system date in the MM/DD/YYYY format. Use the tab key to move be- tween the month, day, and year fields. Diskette A: Selects the floppy drive type as either “USB Floppy” (default) or “1.44 MB, 3Ω” with the computer supporting a 1.44 MB floppy. 6640/6650 Windows 2000 Technical Reference SECTION 2... - Page 19 (Submenu — press [Enter] to access.) Configures the primary slave IDE adapter with the same options as under Hard Disk Type. Set Primary Slave to “None.” Press the [Esc] key or tap the “Exit Submenu” item to return to the Main menu. 6640/6650 Windows 2000 Technical Reference...
-
Page 20: Advanced
RF Switch option is installed. Resolution Expansion: Defines whether the screen is expanded when the resolution is less than 800x600 pixels. The default is to “Disable” the expansion. 6640/6650 Windows 2000 Technical Reference SECTION 2... - Page 21 Set to 338, this serial port’s base address cannot be modified. IRQ: Sets the IRQ for this serial port. Values include: IRQ 5, IRQ 7, or IRQ 9 (default). One or more IRQs may be used by another device. 6640/6650 Windows 2000 Technical Reference BIOS Setup...
- Page 22 (Read-Only) The base I/O address is set to “378/IRQ7” for the LPT port and is not modifiable. Press the [Esc] key or tap the “Exit Submenu” item to return to the “Ad- vanced” menu. 6640/6650 Windows 2000 Technical Reference SECTION 2...
- Page 23 Selects between high and low frequency clicks on a scale from low (1) to high (10). Default is 5. Press the [Esc] key or tap the “Exit Submenu” item to return to the Ad- vanced menu. 6640/6650 Windows 2000 Technical Reference BIOS Setup...
-
Page 24: Security
ACPI (Advanced Configuration and Power Interface) support is only available on this product when used with Windows 2000. ACPI Auto Detect: Controls autodetection of the operating system installed on the 6640/6650 Computer. If Windows 2000 is detected, ACPI will be enabled. Otherwise, ACPI will be disabled. -
Page 25: Power
Whether the system resumes from the “Suspend to RAM” mode when external charge is applied. Resume on Modem Ring: (Default is disabled) Defines if system resumes from the “Suspend to RAM” mode when the modem receives a call. 6640/6650 Windows 2000 Technical Reference BIOS Setup... -
Page 26: Boot
Defines if system supplies power to PC Card slot when suspended to RAM. CRT Mode: (Default is Auto) (For Intermec use only) “On” enables and “Off” disables the external CRT driver. “Auto” enables the CRT driver when the debug board is connected at boot. -
Page 27: Information
SECTION 2 Information The information on this page is read-only and cannot be modified. Information includes BIOS, CPU, memory, and battery level. 6640/6650 Windows 2000 Technical Reference BIOS Setup 2-11... -
Page 28: Exit
Exits the utility without saving Setup data to BIOS. Load Setup Defaults: Loads default values for all Setup items. Discard Changes: Loads previous values from BIOS for all Setup items. Saves Changes Saves Setup data to BIOS. 2-12 6640/6650 Windows 2000 Technical Reference SECTION 2... -
Page 29: Hotkeys (Virtual Screen Keys)
" " " " " Contrast Enter F3 (left) F3 (right) “N” F4 (left) F4 (right) Brightness up/down 6640/6650 Windows 2000 Technical Reference Section 3 " " " " " " " Contrast up/down Arrow left Arrow right Arrow up... -
Page 30: Windows Hotkeys
Change Accesses a dialog that changes the name, sequence, alignment, or typematic sta- tus of a hotkey. Go to page 3-4 to learn more about this dialog. 6640/6650 Windows 2000 Technical Reference SECTION 3... - Page 31 Press each hotkey as the test pro- gresses. You have three chances with each hotkey, if the first press was inaccu- rate. Note that if you click Cancel, the hotkey in question is considered “FAILED.” 6640/6650 Windows 2000 Technical Reference...
-
Page 32: Change/New Dialog
Bottom A single row of hotkeys along the bottom of the display. All these hotkeys are aligned to be as tall as the tallest hotkey and extend to the bottom of the display. 6640/6650 Windows 2000 Technical Reference SECTION 3... -
Page 33: Hotkey Commands
//Windows Right Click Key //BIOS call to decrease brightness //BIOS call to increase brightness //BIOS call to decrease contrast //BIOS call to increase contrast device driver //Windows Key. (start) 6640/6650 Windows 2000 Technical Reference Hotkeys (Virtual Screen Keys) “Del” “Delete” “F1” “F10” “F4”... -
Page 34: Registry Hotkey Values
“FO” (Finger Only), or “PF” (Pen and Finger). This lets you enable or disable the pen or finger input on the control panel. " NOTE: The InputMode stays in the controller until set to a new value. 6640/6650 Windows 2000 Technical Reference 0-Disabled, 1-Enabled REG_DWORD REG_DWORD [1–255]... -
Page 35: Creating A Hotkey
6. Check Typematic if for this hotkey to simulate multiple keystrokes. Click OK to quit and assign the new hotkey to the list. Be sure to align the posi- tion of the new hotkey. Hotkeys (Virtual Screen Keys) 6640/6650 Windows 2000 Technical Reference... - Page 36 Hotkeys (Virtual Screen Keys) SECTION 3 6640/6650 Windows 2000 Technical Reference...
-
Page 37: Toolkit For The Computer
6650 Windows Toolkit CD, without paper copy of manual** 235-050-001 * The “manual” refers to the 6640/6650 Windows 2000 Technical Reference P/N: 978-054-011 ** The manual is provided on the CD in PDF format. The files and documentation in the Toolkit are available to purchasers of the computer who hold a Windows 2000 license through Intermec Technologies Cor- poration. -
Page 38: Installing Toolkit Components
C: drive. 2. Double-click the Drvsetup folder, then double-click the drvsetup desktop icon to access the Windows 2000 Toolkit Components Installation screen. Read the information, then click Next. 6640/6650 Windows 2000 Technical Reference SECTION 4... - Page 39 General Utilities Intermec 802.11 Windows 2000 Drivers Ashtech G8 GPS GSM Motorola D10 Mobitex — Rim902 Proxim LAN Sierra Wireless Inc — SB300 Create Recovery Diskettes 6640/6650 Windows 2000 Technical Reference Toolkit for the Computer Executable PEN2K.EXE GENERAL.EXE 80211W2K.EXE GPS.EXE GSM.EXE RIM902.EXE...
- Page 40 Click Abort Installation to move to the next component or to the end " of the installation without loading this component. Click Continue Installation to continue loading this component onto " the computer. 6640/6650 Windows 2000 Technical Reference SECTION 4...
- Page 41 Some components, when loaded onto the computer, will generate an Install prompt. Click OK to reboot the system or Cancel to load the next component. Toolkit for the Computer 6640/6650 Windows 2000 Technical Reference...
-
Page 42: Setting Up The Driver
Close the Notepad application and click Finish via the Installation Completed screen (page 4-5) to return to the desktop. Go to page 5-1 to reinstall the Windows 2000 Pen drivers, beginning with uninstalling the existing drivers. 6640/6650 Windows 2000 Technical Reference SECTION 4 4-11 4-13... -
Page 43: Loading General Utilities
Loading Intermec 802.11 Windows 2000 Drivers These drivers install the Intermec 802.11 Windows 2000 Utility onto the 6640/6650 Computer. See page 5-16 to learn about the 802.11 Client Manager. Do not insert the PC Card until prompted. You will be prompted to select a location for these drivers via the Choose Destination Location screen (page 4-5). -
Page 44: Setting Up The Ashtech G8 Gps Radio
Ashtech Radio. If you elect to set up the Evaluate application another time, click No to finish the installation, then click Finish on the Installation Completed screen (page 4-5) to return to the desktop. 6640/6650 Windows 2000 Technical Reference SECTION 4... - Page 45 5. The second screen lists the license agreement to be accepted to install the Ashtech Evaluate application. Drag the scroll arrows to read through the document, then click Accept to continue. Toolkit for the Computer 6640/6650 Windows 2000 Technical Reference...
- Page 46 Yes to open a text editor with the README.TXT with information about the SYSTEM.INI file. To view the README.TXT file another time, click No to finish the installation. Click Finish on the Installation Completed screen (page 4-5) to return to the desktop. 4-10 6640/6650 Windows 2000 Technical Reference SECTION 4...
-
Page 47: Setting Up The Gsm Motorola D10 Radio
D10 Radio. Click Browse to change this location, if necessary. Click Next to accept the location and continue. 3. Click Yes to set up the GSM Audio Capability application that comes with the GSM Motorola D10 Radio. Toolkit for the Computer 6640/6650 Windows 2000 Technical Reference 4-11... - Page 48 6. Click OK to finish the CS PEEK installation. Click Finish on the Installa- tion Completed screen (page 4-5) to return to the desktop. 4-12 6640/6650 Windows 2000 Technical Reference SECTION 4...
-
Page 49: Setting Up The Mobitex Rim 902 Radio
The two README.TXT files provided with the Proxim LAN Radio refer to a 7100 ISA Card and a 7110 PCI Card. These cards are not supported by Intermec Technologies Corporation. Also, ignore references to an RL2W2KB4.EXE file which is a zipped up self-extracting executable. -
Page 50: Setting Up The Sierra Wireless Inc. Sb300
InstallShield Wizard for the Watcher 4–2 Setup is in place, the Welcome screen is displayed. Click Next to start the installation. 2. Click Yes to accept the standard license agreement and continue. 4-14 6640/6650 Windows 2000 Technical Reference SECTION 4... - Page 51 “C:\Program Files\Sierra Wireless Inc\Watcher 4.2.” Click Browse to change this location. Click Next to accept the location and continue. 4. If the TCP/IP stack or a modem profile is missing from the 6640/6650 Com- puter, you may be prompted to install either missing component after this setup.
- Page 52 Toolkit for the Computer 5. The Watcher 4–2 Setup will install the following components onto the 6640/6650 Computer: CDPD Watch, CSC Watcher, Toolkit, and Wireless Expert. Go to Section 5, starting on page 5-57, to learn about these compo- nents. Click Next to continue.
-
Page 53: Setting Up To Create Recovery Diskettes
Create a Partition Magic Shrink and Save diskette (page 4-28). " Create a firmware update floppy or diskette that flashes both H8 and BIOS " (page 4-30). Create an emergency BIOS recovery diskette (page 4-30). " Toolkit for the Computer 6640/6650 Windows 2000 Technical Reference 4-17... -
Page 54: Microsoft File Sharing
If not, go to the next step to install this component. 3. Click Install to access the Select Network Component Type. 4. Select Service, then click Add to access the Select Network Service. 4-18 6640/6650 Windows 2000 Technical Reference SECTION 4... - Page 55 SECTION 4 Toolkit for the Computer 5. Select “File and Printer Sharing for Microsoft Networks,” then click OK to return to the Local Area Connection Properties. Click OK to quit the Local Area Connection Properties. 6640/6650 Windows 2000 Technical Reference 4-19...
-
Page 56: Bootable Network Recovery Diskette
System Properties. Click the Network Identification tab and note the Full computer name entry. Note that spaces and wild characters (asterisk or exclamation point) in the computer name may cause unpredictable results. 4-20 6640/6650 Windows 2000 Technical Reference SECTION 4... - Page 57 Toolkit for the Computer 2. Select the network protocol for the diskette, then click Next to continue. If NetBEUI is selected: " Enter the information required for the NetBEUI SYSTEM.INI file, then click Next to continue. 6640/6650 Windows 2000 Technical Reference 4-21...
- Page 58 Next to continue — same as information required for NetBEUI as shown on the previous page. If both protocols are selected, enter the information required in all " three of the screens shown in this step. 4-22 6640/6650 Windows 2000 Technical Reference SECTION 4...
- Page 59 Custom Image This option allows for using a .PQI file that is not on the toolkit CD. Usually a custom *.PQI file can be created to contain the application and configuration. Toolkit for the Computer 6640/6650 Windows 2000 Technical Reference 4-23...
- Page 60 6. After files are transferred to the location previously designated, you will be cautioned against write-protecting the newly created recovery disk. Click Finish to quit, then click Finish on the Installation Completed screen (page 4-5) to return to the desktop. 4-24 6640/6650 Windows 2000 Technical Reference SECTION 4...
-
Page 61: Bootable Network Cloning Diskette
Next to continue — same as information required for NetBEUI. If both protocols are selected, enter the information required in all " three of the screens shown in this step. Toolkit for the Computer 6640/6650 Windows 2000 Technical Reference 4-25... - Page 62 OK to continue. Use “C:\temp\recovery” for a temporary C: drive location. " NOTE: Do not use the “C:\” root directory as the destination directory because it will overwrite AUTOEXEC.BAT, MSDOS.SYS, and other system files. 4-26 6640/6650 Windows 2000 Technical Reference SECTION 4...
- Page 63 Click Finish to complete the network cloning. Click Finish on the Installation Completed screen (page 4-5). Bootable Network Diskette This diskette boots the 6640/6650 Computer to DOS with network support. 1. Select the default protocol to enter information, then click Next to continue (page 4-21).
-
Page 64: Partition Magic Shrink And Save Diskette
Enter the information required for the TCP/IP PROTOCOL.INI file, then click Next to continue (page 4-22). Enter the information required for the TCP/IP SYSTEM.INI file, then click Next to continue — same as information required for NetBEUI. 4-28 6640/6650 Windows 2000 Technical Reference SECTION 4... - Page 65 (similar to page 4-27) appears with a caution against write-pro- tecting the newly created recovery disk. Click Finish to complete the shrinkage. Click Finish on the Installation Completed screen (page 4-5) to return to the desktop. Toolkit for the Computer 6640/6650 Windows 2000 Technical Reference 4-29...
-
Page 66: Firmware Update Floppy (Flashes H8 And Bios)
6-2 for instructions on using this diskette. 1. Select for which terminal this firmware update floppy is to be created, ei- ther a 6640 Computer which uses a Pentium MMX processor or a 6650 Computer which uses a Pentium II processor, then click Next to continue. - Page 67 CRISIS.TXT file in the “\Docs” directory on the Toolkit CD #1. Click Finish to complete the emergency update diskette, then click Finish on the Installation Completed screen (page 4-5) to return to the desktop. 6640/6650 Windows 2000 Technical Reference 4-31...
-
Page 68: Support Files
<filename>.ROM File which contains the flash BIOS. Type “Flash40” without any parameters for system help. * H8FLASH.EXE Power controller update program. Usage: H8FLASH <filename>.MOT <filename>MOT File which contains the power controller firmware. 4-32 6640/6650 Windows 2000 Technical Reference SECTION 4... - Page 69 WIPECMOS (no parameters) Creates SAVECMOS.DAT file in the current working directory. Restores CMOS settings from SAVECMOS.DAT file in current working directory. Clear CMOS with flash files. Deletes CMOS flash backup. 6640/6650 Windows 2000 Technical Reference Toolkit for the Computer 4-33...
- Page 70 Toolkit for the Computer SECTION 4 4-34 6640/6650 Windows 2000 Technical Reference...
-
Page 71: Desktop Applications
Click the Hardware tab to access the Device Manager. Click Device Manager in the Device Manager area to access the computer devices. Desktop Applications " " " " " " " 6640/6650 Windows 2000 Technical Reference Section 5 " " " " " "... - Page 72 Desktop Applications 2. Expand the Mouse and Other Pointing Devices component, then select to highlight the “Intermec 6640/6650 Pen” device. Right-click this device for a pop-up menu, then select Uninstall to remove this device. 3. Click OK to confirm this deletion.
-
Page 73: Reinstall The Pen Drivers
2. The next window prompts for the location of the MOUCLASS.SYS file. Click Browse to enter the location where the Pen Drivers files were installed. Default location is “C:\Utilities\Pen2k.” Click OK to continue. Desktop Applications 6640/6650 Windows 2000 Technical Reference... - Page 74 Desktop Applications SECTION 5 3. Click Finish to complete the installation, then click Yes to reboot the unit. When the computer is started again, you will need to recalibrate the pen. 6640/6650 Windows 2000 Technical Reference...
-
Page 75: Recalibrate Or Realign The Pen
Tap two more times in this same way at the center of this target. 3. Continue the three-tap process as the crosshair moves to the upper-right corner, the lower-left, and lower-right corners of the screen. Desktop Applications 6640/6650 Windows 2000 Technical Reference... - Page 76 Works like SlowerVert, except the movement is in the horizontal direction. FasterHorz Works like FasterVert, except the movement is in the horizontal direction. When finished, click Save to permanently save the new values or click Cancel to continue using the old calibration. 6640/6650 Windows 2000 Technical Reference SECTION 5...
-
Page 77: Radio Components
Verify PC Card Support Double-click W2K_SP1E.EXE within the “C:\Utilities\80211w2k” folder to en- sure that you have the latest PC Card support. The Intermec 802.11 Radio will not work without the latest support. Click OK to continue, then click OK again to exit this setup. -
Page 78: Install 802.11 Radio Drivers
Do so before clicking Next to continue. 2. The default location for the 802.11 Windows 2000 drivers appear on this screen, which is “C:\Program Files\Intermec.” Click Browse to change the location. Click Next to continue. 6640/6650 Windows 2000 Technical Reference... - Page 79 SECTION 5 3. The default name of the folder in which to store the 802.11 Windows 2000 drivers appear in this screen, which is “Intermec.” Select another folder or type a different name for the folder. Click Next to continue.
-
Page 80: Install A Device Driver
Reboot the 6640/6650 Computer if this action was not already taken, then insert the Intermec 802.11 PC Card into the PC Card slot in the unit. Windows 2000 will automatically install a device driver deemed correct for this radio. This pro- cedure cannot be stopped. -
Page 81: Access The Device Driver Properties
Network and Dial-up Connections desktop icon to access the dial-up connections for this unit. 2. Double-click the Local Area Connection x desktop icon for the Intermec 802.11 radio network connection. The “x” is the LAN connection number. -
Page 82: Update The 802.11 Device Driver
Desktop Applications SECTION 5 4. Click the Driver tab, then click Update Driver to change the driver. Update the 802.11 Device Driver 1. Click Next to initiate the device driver update. 5-12 6640/6650 Windows 2000 Technical Reference... - Page 83 Desktop Applications 2. Leave the selection on the Search for a suitable driver for my device option, and click Next to continue. 3. Leave the Specify a location option checked, then click Next to continue. 6640/6650 Windows 2000 Technical Reference 5-13...
- Page 84 Desktop Applications 4. Click Browse to locate the WLLUC48.INF file via the “C:\Intermec Driver” folder created earlier, then click OK to return to the previous screen. 5. Click Install one of the other devices, then click Next to continue. 5-14...
- Page 85 6. Select the “ORiNOCO PC Card (5 Volt)” option, then click Next to continue. 7. Click Browse to locate the WLLUC48.SYS file via the “C:\Intermec Driver” folder, then click OK to return to the previous screen. 6640/6650 Windows 2000 Technical Reference...
-
Page 86: Orinoco Client Manager
Client Manager and a Firmware Upgrade feature. ORiNOCO Client Manager From the Windows desktop, select Start " Programs " Intermec " 802.11 Client to activate the client monitor. This appears minimized by default. Click the bar graph icon in the desktop system tray to access the ORiNOCO Client Manager which provides status information, impact, and details about the infrastructure network. -
Page 87: Add/Edit Configuration Profile
On the Basic page, enter the name of the network to be connected to, such as “INTERMEC.” If you want to connect to a network but do not know the name or are using the 6640/6650 Computer in a multiple LAN infrastructure, use “ANY” in all capital letters. Con- sult your LAN administrator for the name of the network. - Page 88 Click the Encryption tab, then click Enable Data Security to c. Click the Advanced tab to set the following parameters: 5-18 6640/6650 Windows 2000 Technical Reference enable Wired Equivalent Privacy (WEP) encryption (uncheck to dis- able). WEP keys are only needed if your access point expects them, and there are two types: 64-bit (5-character strings, 12345 —...
- Page 89 Network Name. If Enable Data Security is checked, the system will automatically list the last five characters of the network name. access the Administrator Settings which sets MAC addresses and the distance between access points. 6640/6650 Windows 2000 Technical Reference Desktop Applications 5-19...
-
Page 90: Select Configuration Profile
Using this feature may temporarily break communications with the 802.11 PC card. Select Advanced " Card Diagnostics to access the Card Diagnostics which checks the status of the 802.11 PC Card used in the 6640/6650 Computer. Click Done to exit. -
Page 91: Link Test
Signal strength from both sides of the wireless connection and levels of interference (noise) are measured at preset intervals on the following Test Results page. Click Advice for trouble- shooting suggestions. 6640/6650 Windows 2000 Technical Reference 5-21... - Page 92 The Log Settings page enables you to write log measurement data to a file, such as sending information to customer support, archiving data for later compari- sons, or to add to spreadsheet or chart information. 5-22 6640/6650 Windows 2000 Technical Reference...
-
Page 93: Site Monitor
The Site Monitor page provides access point infor- mation and allows you to reset or freeze the information. Click Help for addi- tional information. Use the Selection page to choose an infrastructure network to monitor. 6640/6650 Windows 2000 Technical Reference 5-23... - Page 94 Use the Log Settings page to write log measurement data to a file. Use the AP names page to create names for the access points displayed in the site monitor for easier identification as opposed to reading MAC addresses of those access points. 5-24 6640/6650 Windows 2000 Technical Reference...
-
Page 95: Version Info (Information)
802.11 Client driver when updating the 802.11 PC Card. Click Help for online information. 1. The embedded software version of the 802.11 PC Card and the current 802.11 Client driver in the 6640/6650 Computer are shown. Click Close to exit, or click Update to continue. Desktop Applications... - Page 96 PC Card. To update another 802.11 PC Card, insert the PC Card, then click Update to do the update. If done updating PC Cards, click Close to quit. 5-26 6640/6650 Windows 2000 Technical Reference SECTION 5...
-
Page 97: Ashtech G8 Gps
The required settings may change. Consult the README.TXT file for current information. 1. Enter a name and select an icon to describe this connection, then click OK to continue. 2. Change the connection to “Direct to Com 3,” then click OK to continue. Desktop Applications 6640/6650 Windows 2000 Technical Reference 5-27... -
Page 98: Ashtech Evaluate
If, for some reason, the Ashtech Evaluate application needs to be set up again, double-click the Setup desktop icon within the “C:\Utilities\Ashtech” folder to install the Ashtech Evaluate application and follow the steps starting on page 4-9. 5-28 6640/6650 Windows 2000 Technical Reference SECTION 5... -
Page 99: Using The Ashtech Evaluate Application
If Connection Parameters does not appear, select GPS " Connect from the menu bar to access this screen. 2. Use the Connection Parameters screen to connect to the COM 2 port, then click Port Setup to do settings for this port. Desktop Applications 6640/6650 Windows 2000 Technical Reference 5-29... - Page 100 If the GPS Receiver is responding, an acknowledgement is sent. Click OK to quit this screen. GPS " Terminal (page 5-32) and View " Skychart (page 5-32) from the Ashtech Evaluation screen are activated. 5-30 6640/6650 Windows 2000 Technical Reference SECTION 5...
- Page 101 GPS receiver. If connection is still unsuccessful, the following message appears. Click OK to return to the GPS Receiver Initialization screen, then click Cancel con- tinually until reaching the Ashtech Evaluate screen. 6640/6650 Windows 2000 Technical Reference 5-31...
-
Page 102: Gps Receiver Terminal
If enabled, select View " Skychart to use the Skychart feature to view satel- lites, their tracks, azimuth, and elevation and to see a summary information about the satellites. Use the online help for more information about this feature. 5-32 6640/6650 Windows 2000 Technical Reference... -
Page 103: Gsm Motorola D10
The required settings may change. Consult the README.TXT file for current information. 1. Enter a name and select an icon to describe this connection, then click OK to continue. 2. Change the connection to “Direct to Com 1,” then click OK. Desktop Applications 6640/6650 Windows 2000 Technical Reference 5-33... - Page 104 Messages can be sent to the radio and the radio will re- spond to these commands with various pieces of information. Use the online help for more information about using the HyperTerminal ap- plication. 5-34 6640/6650 Windows 2000 Technical Reference...
-
Page 105: Cs Peek
3. Change Value to “0x20,” then click OK to return to the register screen. The new value for the “Left Aux #1 Input Control” register and all other regis- ters appear upon return. Select File " Exit to quit the application. Desktop Applications 6640/6650 Windows 2000 Technical Reference 5-35... -
Page 106: Mobitex Rim 902
902 radio. Use this executable as an alternative to the wradtst application. Double-click pia95 within the “C:\Utilities\rim902” folder to access the Win- dows version of this program. Below is a sample screen. Select the appropriate options to print results in the text area. 5-36 6640/6650 Windows 2000 Technical Reference SECTION 5... -
Page 107: Proxim Lan
2. Power on the computer and log onto the Windows 2000 desktop. The fol- lowing Found New Hardware Wizard application should activate with a de- scription of the new hardware found. Click Next to search for the appropri- ate driver. Desktop Applications 6640/6650 Windows 2000 Technical Reference 5-37... - Page 108 SECTION 5 3. Leave the selection on the Search for a suitable driver for my device option, and click Next to continue. 4. Leave the Specify a location option checked, then click Next to continue. 5-38 6640/6650 Windows 2000 Technical Reference...
- Page 109 “C:\Utilities\Proxim” folder, then click OK to return to the previous screen. 6. Click Install one of the other devices, then click Next to continue. 7. Click Yes on the Digital Signature Not Found message (page 5-3) to continue. Desktop Applications 6640/6650 Windows 2000 Technical Reference 5-39...
- Page 110 2. Expand the Network Adapters component. If “Proxim RangeLAN2 7400 PC Card Adapter” is listed, then close the Device Manager, and click OK to quit the System Properties. If not, go to page 5-37. to install the adapter. 5-40 6640/6650 Windows 2000 Technical Reference SECTION 5...
-
Page 111: Reinstalling The Rangelan2 7400 Pc Card Adapter
2. Expand the Network Adapters component. Select to highlight the “Pro- xim RangeLAN2 7400 PC Card Adapter” device, then right-click this device for a pop-up menu. Select Uninstall to remove this device. 3. Click OK to confirm this deletion. Desktop Applications 6640/6650 Windows 2000 Technical Reference 5-41... - Page 112 By default, Windows 2000 will hide these file types. Within My Computer, select Tools Folder Options, then click the View tab. Select Show hidden files and folders under the “Hidden files and folders” component, click Apply to save, then click OK to close. 5-42 6640/6650 Windows 2000 Technical Reference SECTION 5 "...
-
Page 113: Verify Rangelan2 Pc Card Adapter Removal
Each function within this window is accompanied with its online help. Use this help for definitions and information about each function. The following pages contain a summary of each of the functions provided in the program: 6640/6650 Windows 2000 Technical Reference 5-43... -
Page 114: Masters
Click Done to quit the Master List window, the system will reinitial- ize this unit. Snoop Click Snoop to scan for signal strength versus frequency. Snoop is a simpler version of a “spectrum analyzer” and displays in the 2.4 GHz frequency range operated by RangeLAN2. 5-44 6640/6650 Windows 2000 Technical Reference... -
Page 115: Configuration
All cards must have the same security ID in order to communicate. " NOTE: The Network Domain (in the Configuration screen) and Security ID (on the next page) must match the Access Point device Network Domain and Security ID respectively. Desktop Applications 6640/6650 Windows 2000 Technical Reference 5-45... -
Page 116: Site Survey
Use the online help for explanations and definitions of these features. " NOTE: If no nodes are displayed, then none of the matching security IDs and Domains are within the range of this unit. 5-46 6640/6650 Windows 2000 Technical Reference SECTION 5... -
Page 117: Sierra Wireless Inc
“Internet Protocol (TCP/IP)” in the list of components. If “Internet Pro- tocol (TCP/IP)” is missing, to go to step 3 to install this protocol. If not, click OK to close the Local Area Connection Properties. Desktop Applications “C:\Utilities\sb300” 6640/6650 Windows 2000 Technical Reference 5-47... - Page 118 4. Select “Internet Protocol (TCP/IP),” then click OK to quit. Click OK to exit the Local Area Connection Properties, then click Close to return to the Control Panel. Go back to page 4-14 and do the toolkit driver installation. 5-48 6640/6650 Windows 2000 Technical Reference SECTION 5...
-
Page 119: Install A Modem Profile In Windows 2000
Phone and Modem Options desktop icon. Click Modems, then click Add to activate the Add/Remove Hardware Wizard. 2. Check Don’t detect my modem; I will select it from a list, then click Next to continue. Desktop Applications 6640/6650 Windows 2000 Technical Reference 5-49... - Page 120 4. Leave Selected ports checked and select the communications port to which the SB30X CDPD modem is attached. Click Next to continue. 5. Click Yes on the Digital Signature Not Found message (page 5-3) to continue. 5-50 6640/6650 Windows 2000 Technical Reference SECTION 5...
-
Page 121: Wireless Expert - Locating Modem
“C:\Program Files\Sierra Wireless Inc\Watcher 4–2” folder to access the WirelessExpert. Select “SB300” from the modem drop-down list and “COM4” from the COM port drop-down list, then click Next for the WirelessExpert to detect the modem. Desktop Applications 6640/6650 Windows 2000 Technical Reference 5-51... - Page 122 CDPD only, then click Next to continue. 4. Enter the IP and DNS addresses for the network, such as 192.100.100.023 and 136.179.76.2 respectively. Click Run Test to test the CDPD setup. 5-52 6640/6650 Windows 2000 Technical Reference SECTION 5...
-
Page 123: Setting Up The New Connection
Select Properties to access the properties of the WatcherCDPD connection. Click the Networking tab, then select “SLIP: Unix Connec- tion” for Type of dial-up server I am calling. Select to highlight “Inter- net Protocol (TCP/IP), then click Properties. Desktop Applications 6640/6650 Windows 2000 Technical Reference 5-53... - Page 124 192.100.100.023. Select Use the following DNS server addresses, then enter the Preferred DNS server IP address for the DNS of your network, such as 136.179.76.2. Click Advanced to access the advanced TCP/IP settings. 5-54 6640/6650 Windows 2000 Technical Reference...
- Page 125 4. Click the Security tab, then click Browse to access the Browse Dial-Up Scripts. Double-click the SWICSCDPD.SCP file within the “C:\WINNT\System32\ras” folder to return to the Security page. Click OK to exit the Properties screen. Desktop Applications 6640/6650 Windows 2000 Technical Reference 5-55...
-
Page 126: Starting A Dial-Up Networking Connection
Double-click the new WatcherCDPD dialup networking icon to access the Connect WatcherCDPD screen, then click Dial to start a networking connection. Right-click the new WatcherCDPD dialup networking icon for a pop-up menu, then select Status for general and detailed information about this connection. 5-56 6640/6650 Windows 2000 Technical Reference... -
Page 127: Cdpd Watcher
COM 4, baud rate 19200 bps, 8 data bits, no parity, and 1 stop bit. " NOTE: The required settings may change. Consult the README.TXT file for current information. 1. Enter a name and select an icon to describe this connection, then click OK to continue. 6640/6650 Windows 2000 Technical Reference 5-57... - Page 128 If contact is successful with the Sierra Wireless radio, the radio returns an affir- mative response. AT-type messages can be sent to the radio, such as AT, ATI, ATI3, ATI5, etc. The radio will respond to these commands with various pieces of information. 5-58 6640/6650 Windows 2000 Technical Reference SECTION 5...
-
Page 129: Create Shortcut Icons
C:\Program Files\Sierra Wireless Inc.\Watcher 4–2\watcher.exe For the WirelessExpert application: " C:\Program Files\Sierra Wireless Inc.\Watcher 4–2\WirelessExpert.exe 4. Rename the icon from the executable filename in Type a name for this shortcut. Click Finish to create the shortcut. Desktop Applications 6640/6650 Windows 2000 Technical Reference 5-59... -
Page 130: Windows 2000 On-Screen Keyboard
Note the Acceleration area with its four pointer speeds. The lower the speed se- lected, the more the mouse seems to have a tail, thus select “High” to remove the appearance of a tail. Click Apply, then click OK to quit the Mouse Properties. 5-60 6640/6650 Windows 2000 Technical Reference SECTION 5... -
Page 131: Recovery Procedures
DriveImage application. Contact your Account Executive for information. Each toolkit CD contains the factory-installed hard drive image created specifi- cally for the 6640/6650 Computer using software from PowerQuest. The image is located in the “\images” folder on either toolkit CD. -
Page 132: Bios Recovery Procedure
See page 4-30 to create a BIOS recovery diskette, then return here for in- structions on using this diskette. Boot the 6640 Computer or the 6650 Computer with this diskette. Click Update to initiate the update. The system will automatically reboot the unit when done. -
Page 133: Shared Location Recovery Process
3. Right-click the Local Area Connection icon, then select “Properties” from the pop-up menu. 4. If “File and Printer Sharing for Microsoft Networks” is listed, then click OK to quit. If not, go to page 4-18 to install this component. Recovery Procedures 6640/6650 Windows 2000 Technical Reference... -
Page 134: Determine Name Of Shared Location
Shared As. Type “CDROM” or the desired “share” name in Share name. Click Apply to save changes, if necessary, then click OK to quit Properties and Windows Explorer. 6640/6650 Windows 2000 Technical Reference SECTION 6... -
Page 135: Ensure Netbeui Protocol Is Available
“Protocol” to access the Select Network Protocol. 5. Select “NetBEUI Protocol,” then click OK to apply the selection. Click Close to exit the Properties, then exit out of the Network and Dial-up Connections. Recovery Procedures 6640/6650 Windows 2000 Technical Reference... -
Page 136: Create Network Recovery Media
6-4) in the field, using the format given in the screen. In the Destination Location screen (sample on page 4-24), the floppy disk " drive should be selected. Click OK to copy the Toolkit CD contents to the floppy disk. 6640/6650 Windows 2000 Technical Reference SECTION 6... -
Page 137: Shared Location Reimaging Process
(U.S.A or Canada) or 425-356-1799 for assistance. Be sure to select option 2. Have your name, your company name and address, phone number or fax num- ber, equipment model, and software or firmware version information ready when you call. Recovery Procedures 6640/6650 Windows 2000 Technical Reference... -
Page 138: System Cloning Process
(or master) computer. 2. Press the power button to reboot the computer (power off/power on). 3. Press [1], then [Enter] to select the “Network Image Creation (Intermec 6640)” option from the Microsoft Windows 2000 Startup Menu screen. -
Page 139: Advanced Topics
If the default is changed, the override name is saved as the new default. Supporting Programs Developed by Intermec The following programs are created by Intermec Technologies Corporation to support the recovery procedures. FIXINI.EXE Used in the AUTOEXEC.BAT files of the recovery floppies for TCP/IP support. - Page 140 Recovery Procedures SECTION 6 6-10 6640/6650 Windows 2000 Technical Reference...
-
Page 141: General Index
2-4 I/O device configuration, 2-5 installed O/S, 2-8 internal speaker, 2-7 IR port, 2-5 large disk access mode, 2-8 LPT port, 2-6 resolution expansion, 2-4 6640/6650 Windows 2000 Technical Reference General Index " " " " " " RF switch, 2-4... - Page 142 (B: drive in DOS), 1-4 parallel floppy, 1-4 USB floppy, 1-3 Dump utility, 1-8 ECP, BIOS setup, 2-6 Index-2 6640/6650 Windows 2000 Technical Reference Edit configuration profile, 5-17 access points, 5-17 peer-to-peer groups, 5-20 residential gateways, 5-19 Emergency BIOS update diskettes, 4-30...
- Page 143 Phone numbers, customer support, sierra wireless, 5-57 Pointer trails, 5-60 Port settings Ashtech Evaluate, 5-30 Ashtech G8 GPS, 5-27, 5-28, 5-58 6640/6650 Windows 2000 Technical Reference GENERAL INDEX GSM Motorola D10, 5-33, 5-34 Sierra Wireless, 5-57 Power Builder, 1-9 Power controller update program, 4-32...
- Page 144 4-14 Wireless Expert, 5-51 Signal strength 802.11 client manager, 5-21 scan, 5-44 Index-4 6640/6650 Windows 2000 Technical Reference Single dock keyboard connector, 1-6 network connector, 1-6 parallel port, 1-6 serial port, 1-6 Site Survey & Configuration Tool, 5-43...
-
Page 145: Files Index
NETRLAPI.PNF, 5-42 NETWAKE.EXE, 6-9 OEMx.INF, 5-42 OEMx.PNF, 5-42 P2BIOS.ROM, 6-2 PART40.EXE, 4-33, 6-9 PEN2K.EXE, 4-3 PENCAL2K.EXE, 5-5 PENPORT.INF, 4-6 PHDISK.EXE, 4-33 6640/6650 Windows 2000 Technical Reference Files Index " " " " " " PIA95.EXE, 5-36 PIIX4.EXE, 4-7 PQDISHR.TXT, 6-9 PQMAGIC.EXE, 4-29... - Page 146 FILES INDEX Index-6 6640/6650 Windows 2000 Technical Reference...
Need help?
Do you have a question about the 6640 and is the answer not in the manual?
Questions and answers