Table of Contents
Advertisement
Advertisement
Table of Contents

Related Manuals for Olympus CH10


Summary of Contents for Olympus CH10
- Page 1 BIOLOGICAL MICROSCOPE CH10 / CH20 REPAIR MANUAL OLYMPUS...
- Page 2 BIOLOGICAL MICROSCOPE CH10 / CH20 REPAIR MANUAL OLYMPUS All rights reserved. Reproduction in whole or in part without written permission is prohibited. (9B)
-
Page 3: Table Of Contents
CH10/CH20 CONTENTS A. OUTLINE OF PRODUCT 1. Kinds of Product ....................A-1 2. Outline ........................A-1 3. Features........................A-1 4. Using Conditions ....................A-2 5. Specifications ......................A-2 6. Dimensions......................A-4 B. INSPECTION STANDARD 1. Inspection Items and Methods ................B-1 1-1 Microscope frame and stage ................B-1 1-2 Observation tube ...................B-2... - Page 4 CH10/CH20 1-3 Condenser center adjustment .................D-1 1-4 Voltage adjustment..................D-2 2. Observation Tube (C20−BI45) Adjustment.............D-3 2-1 Adjustment procedure ...................D-3 2-2 Preparations ....................D-3 2-3 Left / right optical axis adjustment, parfocality adjustment ......D-4 2-4 Exit pupil center check ..................D-5 E. JIGS AND TOOLS 1.
-
Page 5: Outline Of Product
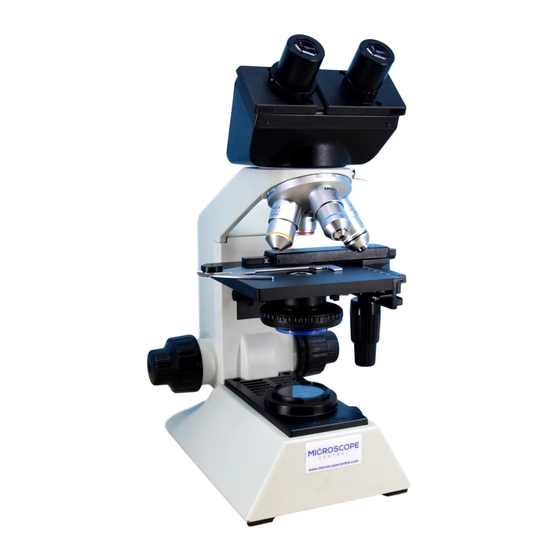
(1) CH20 and CH10 are low-price, economical biological microscopes, which offer an advanced range of functions and specifications required for clinical and educational use. (2) CH20 and CH10 are LB optical microscopes, which are substitutes up-graded in specifications for the conventional CHK2. -
Page 6: Using Conditions
CH10/CH20 A. OUTLINE OF PRODUCT (3) The dust-proof observation tube keeps off dust and also anti-fungus treatment for it is effective for protecting from fungus. (4) The handhold enable you to hold the microscope frame easily. (5) LB objective of 45 mm focal distance is employed. - Page 7 4) Dial continuous light intensity control: indicating the position by graduation Filter Blue filter (KB-P) is attached directly to the lower part of the condenser. Weight CH20F: 4.4 kg at CH10/20BIMF CH10F: 3.4 kg setting ž Wooden box (CH20) Storing case ž Plastic case (CH10)
-
Page 8: Dimensions
CH10/CH20 A. OUTLINE OF PRODUCT 6. Dimensions [Unit: mm]... -
Page 9: Inspection Standard
CH10/CH20 B. INSPECTION STANDARD 1. Inspection Items and Methods 1-1 Microscope frame and stage Part Item Standard Method Illumination Illumination center Deviation to Set the centering telescope (KN0029) optical axis of to the right sleeve, and read the collector lens:... -
Page 10: Observation Tube
CH10/CH20 B. INSPECTION STANDARD 1-2 Observation tube Part Item Standard Method Binocular Interpupillary 53 mm or less at Set the observation state, insert a thin paper with tube distance min. - 75 mm or graduations at the eye point position and measure adjustment more at max. -
Page 11: Disassembly And Assembly Procedures
CH10/CH20 C. DISASSEMBLY AND ASSEMBLY PROCEDURES 1. Focusing Unit 1-1 Base plate and arm … ‚ ƒ • „ Parts name Screw Grease Adhesive Remarks • DAIAL ‚ PLATE ACU3X4SA (*1) ƒ WASHER OT2008 „ BASE PLATE CUKSK3X6SA (*2) 5 Remove the base pcs. -
Page 12: Coarse / Fine Adjustment Knob
CH10/CH20 C. DISASSEMBLY AND ASSEMBLY PROCEDURES 1-2 Coarse / fine adjustment knob Figure-A (Fine adjustment gear set) Parts name Screw Grease Adhesive Remarks • FINE ADJ. OT1131 Apply adhesive on the attaching part of ± KNOB fine adj. shaft ‚... - Page 13 CH10/CH20 C. DISASSEMBLY AND ASSEMBLY PROCEDURES Insert the gear ass’y Š into the groove of ± GEAR ASS’Y ± coarse adj.shaft and engage the big gear A at the right side with the gear inside of ± the cam ±...
-
Page 14: Guide Unit
CH10/CH20 C. DISASSEMBLY AND ASSEMBLY PROCEDURES 1-3 Guide unit Parts name Screw Grease Adhesive Remarks • STAGE AB3X8SA (*1) 3 pcs. ‚ FRONT Remove the base. ( See C-1.) COVER ƒ OUTER AB3X12SA (*2) 3 pcs. OT2008 Apply grease on the fitting surface of wire guide „... - Page 15 CH10/CH20 C. DISASSEMBLY AND ASSEMBLY PROCEDURES ± ROLLER NP2.5X22UO (*7) (8 pcs.) ± WIRE OT2008 GUIDE (2 pcs.) ± OT2008 Apply grease on the fitting ± surface of wire guide Inner guide working force: 1 - 1.5 N {100 - 150 g}...
-
Page 16: Revolving Nosepiece
CH10/CH20 C. DISASSEMBLY AND ASSEMBLY PROCEDURES 2. Revolving Nosepiece Parts name Screw Grease Adhesive Remarks • SCREW ‚ NOSEPIECE Absolute optical axis: within 0.3 SPRING Click removing force: 6.4 - 8.8N {650 - 900g} Optical axis adjustment of revolving nosepiece (See Repair Procedure, D-1.) -
Page 17: Stage
CH10/CH20 C. DISASSEMBLY AND ASSEMBLY PROCEDURES 3. Stage 3-1 X/Y-knob ass’y Parts name Screw Grease Adhesive Remarks • X-KNOB 6N4SA (*1) OT1131 Apply adhesive on the nut. Rotation force: 0.4±0.1N {50±10g} ‚ WASHER OT2008 ƒ SPRING OT2008 WASHER „ WASHER OT2008 …... -
Page 18: X-Guide Unit And Stage Clip Holder
CH10/CH20 C. DISASSEMBLY AND ASSEMBLY PROCEDURES 3-2 X-guide unit and stage clip holder... - Page 19 CH10/CH20 C. DISASSEMBLY AND ASSEMBLY PROCEDURES Parts name Screw Grease Adhesive Remarks • BODY AB3X8SA (*1) OT1028 Apply adhesive on the assembly 2 pcs. surface for lateral guide-1ˆ. ‚ CLIP HOLDER 3PUK2X8SA (*2) OT1131 Apply adhesive on the screw head.
-
Page 20: Y-Guide Unit
CH10/CH20 C. DISASSEMBLY AND ASSEMBLY PROCEDURES 3-3 Y-guide unit Parts name Screw Grease Adhesive Remarks • BODY AB3X10SA (*1) 3 pcs. ‚ Y-RACK 3PUK2X6SA (*2) 2 pcs. OT1131 Apply adhesive on the screw head. HWB2SA (*3) 2 pcs. ƒ VERTICAL AB3X10SA (*4) 4 pcs. -
Page 21: Observation Tube
CH10/CH20 C. DISASSEMBLY AND ASSEMBLY PROCEDURES 4. Observation Tube 4-1 Sleeves and cover Parts name Screw Grease Adhesive Remarks • DIVISION PLATE Parfocality adjustment (See Repair procedure, D-4.) ‚ SOCKET Apply grease on the sliding surface of socket‚. ƒ L-SLEEVE OT1892 „... -
Page 22: Prism Ass'y And Mirror Ass'y
CH10/CH20 C. DISASSEMBLY AND ASSEMBLY PROCEDURES 4-2 Prism ass’y and mirror ass’y Parts name Screw Grease Adhesive Remarks • DOVETAIL CSK3X5SA PLATE (*1) 4 pcs. ‚ DOVETAIL Assemble the bent side of the dovetail spring SPRING inwards. ƒ MIRROR OT2008 Apply grease on the dovetail sliding surface. -
Page 23: Condenser
CH10/CH20 C. DISASSEMBLY AND ASSEMBLY PROCEDURES 5. Condenser 118° 118° 92.5° Figure-A (Showing the assembly of lower frame and rotary ring) Attach the lower frame (AD1994) at the position in which the left end of minimum groove (width; 92.5°) in the rotary ring comes in contact with the boss on the lower frame. -
Page 24: Collector Lens Part
CH10/CH20 C. DISASSEMBLY AND ASSEMBLY PROCEDURES 6. Collector Lens Part ‚ † ‡ ˆ … „ Frosted surface ƒ *3 • Parts name Screw Grease Adhesive Remarks • LAMP COVER CUK3X4SA With directional properties. (*1) 2 pcs. ‚ BASE COVER... -
Page 25: Repair Procedure
CH10/CH20 D. REPAIR PROCEDURE 1. Centering of Optical System and Voltage Adjustment 1-1 Optical axis adjustment of revolving nosepiece Standard eyepiece (KN0048; with adapter-1) ž Set the jigs as shown in the left figure. ž Turn on the power of the microscope frame, loosen two SCREWS ‚, and... -
Page 26: Voltage Adjustment
CH10/CH20 D. REPAIR PROCEDURE 1-4 Voltage adjustment ž When variable resistance (KR431400) and transformer (DL150400, DL150500) are replaced, it is necessary to adjust the minimum voltage. The adjustment procedures are as follows: ž Setup Tools required: digital multimeter i. Turn on the power, and fully turn the VARIABLE RESISTANCE (KR431400) •... -
Page 27: Observation Tube (C20-Bi45) Adjustment
CH10/CH20 D. REPAIR PROCEDURE 2. Observation Tube (C20-BI45) Adjustment 2-1 Adjustment procedure 1. Preparations (See 2-2 Preparations, D-3.) 2. Left / right optical axis adjustment, parfocality adjustment (See 2-3 Left / right optical axis, parfocality adjustment, D-4.) 3. Exit pupil center check (See 2-4 Exit pupil center check, D-5.) -
Page 28: Left / Right Optical Axis Adjustment, Parfocality Adjustment
CH10/CH20 D. REPAIR PROCEDURE 2-3 Left / right optical axis adjustment, parfocality adjustment ž Loosen two screws (CUKK3X6SA) securing temporarily the MIRROR ASS’Y•. ž Move the MIRROR ASS’Y • back and forth and horizontally so that the left/right optical axis and the absolute CUKK3X6SA optical axis can meet the standards. -
Page 29: Exit Pupil Center Check
CH10/CH20 D. REPAIR PROCEDURE SLEEVE ƒ. ž Set the centering telescope (KN0029) to the right sleeve. ž Focus on the objective’s exit pupil. 2-4 Exit pupil center check ž Make sure that the exit pupil center meets the standard. When it is out of standard, change the prism (LP167000). -
Page 30: Jigs And Tools
CH10/CH20 E. JIGS AND TOOLS 1. List of Jigs and Tools Description Page L B standard objective for optical axis KN0015 B-2, D-1, 3 L B standard objective for tube length KN0016 B-2, D-3, 4 C entering telescope... -
Page 31: Lubricants And Chemicals
CH10/CH20 F. LUBRICANTS AND CHEMICALS 1. List of Lubricants Description Page G rease (light) OT1892 C-11 G rease (heavy) OT2006 G rease (medium) OT2008 C-1, 2, 3, 4, 5, 6, 7, 9, 10, 11, 12, 13 2. List of Chemicals...