
Subscribe to Our Youtube Channel
Related Manuals for Daktronics ST-3170


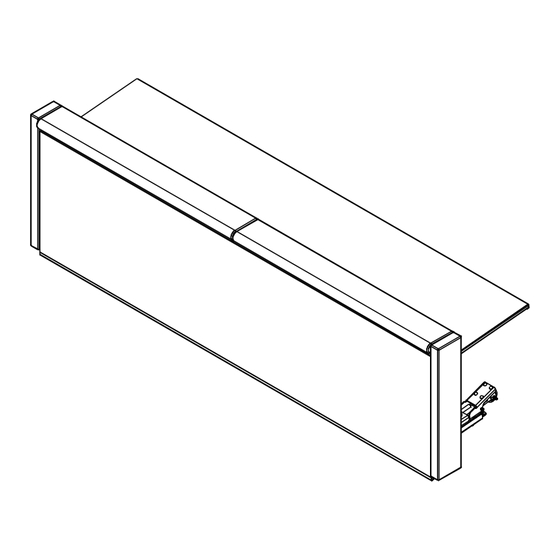
Summary of Contents for Daktronics ST-3170
- Page 1 ST-3170 BACKLIT SCORERS TABLES DISPLAY MANUAL P2307 DD4980007 Rev 02 03 May 2022 201 Daktronics Drive Brookings, SD 57006-5128 www.daktronics.com/support 800.325.8766...
- Page 2 Daktronics trademarks are property of Daktronics, Inc. All other trademarks are property of their respective companies.
-
Page 3: Table Of Contents
Light Strip Driver ...........................28 Replacing a Driver ��������������������������������������������������������������������������������������������������������������������������29 Setting the Driver Address �������������������������������������������������������������������������������������������������������������30 Tabletop Possession Indicators ......................30 Daktronics Exchange and Repair & Return Programs ����������������������������������������������������31 Exchange Program ..........................31 Repair & Return Program ........................32 Daktronics Warranty & Limitation of Liability ...................32 A Reference Drawings �����������������������������������������������������������������������������������������������������������33... - Page 4 This page intentionally left blank.
-
Page 5: Introduction
This manual explains the installation, maintenance, and troubleshooting of Daktronics backlit scorers tables. For additional information regarding safety, installation, operation, or service, refer to the telephone numbers listed in Section 6: Daktronics Exchange and Repair & Return Programs (p�31). This manual is not specific to a particular installation. -
Page 6: Resources
• detailed product appearance with part numbers and quantities Daktronics identifies manuals by the DD or ED number located on the cover page. Ensure all applicable materials have been gathered before beginning the installation. Contact a Daktronics sales coordinator or project manager. -
Page 7: Light Strip Controllers
Light Strip Controllers Daktronics scorers tables equipped with optional End-of-Period (EOP) and/or Clock Stop light strips require an All Sport 5000 console to control them. For operating instructions, ® refer to the All Sport 5000 Series Control Console Operation Manual (ED-11976), available online at www.daktronics.com/manuals. -
Page 8: Uncrating
Uncrating Use a pry bar to carefully remove the side panels of the crate, and then remove the top of the crate. Each crate may contain one, two, or three tables. Attach Caster Bases 1� Locate a caster base assembly under the table. Each table has two caster base assemblies regardless of width. - Page 9 5� Use a T30 Torx bit to remove the two 1/4” Torx screws toward the front of the caster base. Refer to Figure 7. Be careful to not lose these screws; they will be reinstalled after the caster base is attached to the table. Figure 7: Remove Torx Screws 6�...
- Page 10 7� Locate a caster base vert underneath the table, and line up the caster base with the holes. Refer to Figure 9. Figure 9: Line up Caster Base Assembly with Caster Base Vert 8� Use the 5/16" Allen wrench to reinstall the red wheels from inside the caster base to attach it to the bottom of the table.
-
Page 11: Remove Table From Shipping Brackets
10� Place the Caster Base Tool diagonally from upper-left to bottom-right in the caster base. Refer to Figure 12. Store the tool in this location whenever the table is not in use. Figure 12: Caster Base Tool in Storage Position (Tool Highlighted Orange for Clarity) 11�... - Page 12 2� Use a 3/4" socket to loosen the four shipping bracket bolts. Refer to Figure 14. Figure 14: Loosen Four Shipping Brackets 3� With one person standing on either end of the table to support it, use a 3/4" socket to remove both top shipping bracket bolts.
-
Page 13: Mechanical Installation
(15.2 m), or 75' (22.9 m) of a power outlet. Caster Base Tool Each table comes with one Caster Base Tool (Daktronics part # HS-4939703) located in the bottom channel of each caster base (two per table). Refer to Figure 16. These tools serve a dual purpose of helping to pull down the caster base pivot arms when setting up the table as well as setting the display face to the desired angle. - Page 14 Table Setup – Transport to Stationary Mode 1� With the table in its desired location, move to the rear and roll it backwards slightly so the front caster on each caster base is rotated fully forward. Note the orientation of the front caster as shown in Figure 17.
- Page 15 3� Use the offset end of the Caster Base Tool as leverage to pull down the pivot arm and lower the right side of the table to the floor. Refer to Figure 19. Note: Do not push on the top of the table during this process as that may cause the front caster to rotate and make the table difficult to move/reposition as described in Step 5.
- Page 16 5� After both pivot arms are lowered, adjust the position of the table as necessary. Refer to Figure 21. Lift up slightly on the rear of one caster base so the table is supported by the rollers on the front of the caster base, and push/pull the table forward/backward. Repeat for the other caster base on the other end of the table as needed.
- Page 17 7� Move to the rear of the table and stand at the center of the tabletop. 8� Grab the bottom edge of the tabletop with both hands spread slightly wider than shoulder width apart and lift up the tabletop. Refer to Figure 23. Figure 23: Lift up Tabletop 9�...
- Page 18 Figure 25: Ensure All Latches Engaged 11� Repeat Steps 1–10 for all scorers tables. Table Teardown – Stationary to Transport Mode 1� Move to the left rear side of the tabletop. 2� While supporting the tabletop with your right hand, use your left hand to feel underneath the left edge to find the tabletop release handle.
- Page 19 5� Grab and lift up on the rear of the left caster base pivot arm to raise that side of the table off the floor. Refer to Figure 27. Again, the tabletop should be pushed up flush against the rear of the display cabinet to be secured in place by the pivot arms. CAUTION! Keep fingers/thumb clear between the top of the pivot arms and tabletop surface to avoid being pinched.
-
Page 20: Adjust Tabletop Level
Figure 29: Transport Mode Adjust Tabletop Level The tabletop supports are turnbuckle style connecting rods that will allow for fine tuning of the tabletop to be level across its width and in relation to the floor. Refer to Figure 30. To raise the tabletop, rotate the turnbuckles counterclockwise by hand until the •... -
Page 21: Multiple Table Connection
Multiple Table Connection If more than one scorers table is to be used as part of a single display face, they must be lined up in the appropriate arrangement and connected together. One table attaches to another using two latches on the right side of the table (as viewed from the rear) and the provided 5/16"... -
Page 22: Attach End Pads
5� Using the provided 5/16" T-handle hex wrench, latch both latches on the left table to the right table (as viewed from the rear). The wrench must be rotated 285° or a little over a 3/4 turn to fully engage the latch. Refer to Figure 33 for the location of these latches and proper T-handle wrench rotation. -
Page 23: Attach Top Pads
4� Verify all four bolts are hooked securely into the end of the table to prevent damage to the end pad or possible injury to a player. Figure 34: Align End Pad Bolts with Keyhole Cutouts 5� Repeat Steps 1–4 for the end pad at the opposite end of the table. To remove an end pad, lift it up and pull it away from the table. -
Page 24: Adjust Display Face Angle
Adjust Display Face Angle All display face angles are pre-set at the factory to 5°. Adjustment of this angle is typically only needed if the protective face panel causes unwanted glare for TV cameras. If a different face angle is desired, the Caster Base Tools and the tabletop surface must be adjusted. - Page 25 3� Re-install the two M5 flathead screws. 4� Repeat Steps 1–3 for every slide stop for every table that is to be connected together as a single display. (Default) Desired 0° 5° 10° 15° Face Angle Adjustment 1-5/8" 1-1/4" 13/16" Bolt Setting 3/8"...
-
Page 26: Electrical Installation
Consider implementing a separate circuit for the display using an isolation transformer or dedicated transformer. • Daktronics assumes no liability for any issues caused by line voltage fluctuations or other improper power conditions. Power Connection The power cable is available in 25' (7.6 m), 50' (15.2 m), or 75' (22.9 m) lengths. -
Page 27: End-Of-Period And Clock Stop Light Strip Kits
Reference Drawings: Light Strip Attachment ..................DWG-4889870 Daktronics scorers tables may have optional End-of-Period (EOP) light strips running along the bottom front of the table that illuminate at the end of the period. Tables may also feature Clock Stop light strips along the rear cable tray. EOP light strips are typically factory installed, while rear Clock Stop light strips must be installed on site using clips and screws as described in DWG-4889870. -
Page 28: Possession Indicator
Possession Indicator Daktronics scorers tables may have an optional possession indicator that sits atop the table padding. Refer to Figure 43. Possession indicators are designed so they can be positioned anywhere along the length of the top pad to best align with the center of a single table or a row of tables. -
Page 29: Maintenance & Troubleshooting
Maintenance & Troubleshooting Turn off power before performing any repair or maintenance work. Only qualified service personnel may access internal electronics� Disconnect power when not using the display� Problem Possible Cause Solution/Items to Check Check that the main circuit breaker for the display is on. -
Page 30: Recommended Tools
TH-1068 Removes LED edge light strips The only tool provided with the table is the T-handle wrench. Additional replacement tools may be ordered directly from Daktronics. Refer to Daktronics Exchange and Repair & Return Programs (p�31). Component Location & Access Scorers tables are designed for either front or rear access, depending on site requirements and customer preference. -
Page 31: Rear Access
Rear Access 1� Disconnect the power to the display. 2� Lift the tabletop upward and secure in place as described in Table Setup – Transport to Stationary Mode (p�10). 3� Use a T25 Torx bit to remove the two screws securing the appropriate access door. 4�... -
Page 32: Replacing A Power Supply
Replacing a Power Supply Caution! Disconnect display power before servicing the power supplies to avoid electrical shock� Power supplies run on high voltage and may cause injury if touched� 1� Access the table from the rear as described in Rear Access (p�27). 2�... -
Page 33: Replacing A Driver
Refer to Figure 50 for the components of an optional light strip driver tray. SIGNAL IN CUR. LOOP SIGNAL OUT TB-31 Signal Terminal Block SIGNAL Address Jack POWER Power Terminal Block Driver Status TB-42 POWER Indicators SIGNAL Light Strip Output Terminal Block 4-Column SHOT... -
Page 34: Setting The Driver Address
6� Reconnect all plugs to the driver. These are keyed connectors and will attach in one way only. Do not force the connections. 7� Ensure the new driver is set to the correct address. This will be the same address as the old driver being replaced. -
Page 35: Daktronics Exchange And Repair & Return Programs
Fill out and attach the enclosed UPS shipping document. c� Ship the part to Daktronics. 3� The defective or unused parts must be returned to Daktronics within 5 weeks of initial order shipment� If any part is not returned within five (5) weeks, a non-refundable invoice will be presented to the customer for the costs of replenishing the exchange parts inventory with a new part. -
Page 36: Repair & Return Program
Repair & Return Program For items not subject to exchange, Daktronics offers a Repair & Return Program. To send a part for repair, follow these steps: 1� Call Daktronics Customer Service� United States & Canada: 1-800-DAK-TRON (325-8766) Outside the U.S. & Canada: +1-605-275-1040 2�... -
Page 37: A Reference Drawings
Schematic; 4Col Drvr-16V Clk Stop/EOP Control ......... DWG-3702158 Block Dgrm; Clk Stop/EOP Light Strip Cntrl ............ DWG-4800725 Block Diagram ST-31XY Backlit ................ DWG-4880855 Light Strip Attachment ..................DWG-4889870 Mechanical Spec; ST-3170 ................DWG-4909964 Daktronics Exchange and Repair & Return Programs... - Page 38 This page intentionally left blank.
- Page 39 THE CONCEPTS EXPRESSED AND DETAILS SHOWN ON THIS DRAWING ARE CONFIDENTIAL AND PROPRIETARY. DO NOT REPRODUCE BY ANY MEANS WITHOUT THE EXPRESS WRITTEN CONSENT OF DAKTRONICS, INC. OR ITS WHOLLY OWNED SUBSIDIARIES. COPYRIGHT 2016 DAKTRONICS, INC. (USA) ST-23XX TABLES PROJECT: SCHEM;...
- Page 40 THE CONCEPTS EXPRESSED AND DETAILS SHOWN ON THIS DRAWING ARE CONFIDENTIAL AND PROPRIETARY. DO NOT REPRODUCE BY ANY MEANS WITHOUT THE EXPRESS WRITTEN CONSENT OF DAKTRONICS, INC. OR ITS WHOLLY OWNED SUBSIDIARIES. COPYRIGHT 2017 DAKTRONICS, INC. (USA) ST A3 PROJECT: SCHEMTATIC;...
- Page 41 THIRD ANGLE PROJECTION THE CONCEPTS EXPRESSED AND DETAILS SHOWN ON THIS DRAWING ARE CONFIDENTIAL AND PROPRIETARY. DO NOT REPRODUCE BY ANY MEANS WITHOUT THE EXPRESS WRITTEN CONSENT OF DAKTRONICS, INC. OR ITS WHOLLY OWNED SUBSIDIARIES. COPYRIGHT 2021 DAKTRONICS, INC. (USA) CR1+ ST-B1 PROJECT: BLOCK DGRM;...
- Page 42 THIRD ANGLE PROJECTION THE CONCEPTS EXPRESSED AND DETAILS SHOWN ON THIS DRAWING ARE CONFIDENTIAL AND PROPRIETARY. DO NOT REPRODUCE BY ANY MEANS WITHOUT THE EXPRESS WRITTEN CONSENT OF DAKTRONICS, INC. OR ITS WHOLLY OWNED SUBSIDIARIES. COPYRIGHT 2021 DAKTRONICS, INC. (USA) ST-31XY PROJECT:...
- Page 43 THE CONCEPTS EXPRESSED AND DETAILS SHOWN ON THIS DRAWING ARE CONFIDENTIAL AND PROPRIETARY. DO NOT REPRODUCE BY ANY MEANS WITHOUT THE EXPRESS WRITTEN CONSENT OF DAKTRONICS, INC. OR ITS WHOLLY OWNED SUBSIDIARIES. FRONT VIEW COPYRIGHT 2021 DAKTRONICS, INC. (USA) ST-31XY...
- Page 44 THE CONCEPTS EXPRESSED AND DETAILS SHOWN ON THIS DRAWING ARE CONFIDENTIAL AND PROPRIETARY. DO NOT REPRODUCE BY ANY MEANS WITHOUT THE EXPRESS WRITTEN CONSENT OF DAKTRONICS, INC. OR ITS WHOLLY OWNED SUBSIDIARIES. COPYRIGHT 2021 DAKTRONICS, INC. (USA) ST-3170 TABLES PROJECT: MECHANICAL SPEC;...
-
Page 45: B Daktronics Warranty And Limitation Of Liability
Daktronics Warranty and Limitation of Liability This section includes the Daktronics Warranty & Limitation of Liability (SL-02374). Daktronics Warranty and Limitation of Liability... - Page 46 This page intentionally left blank.
- Page 47 Warranty Coverage. Daktronics warrants to the original end user (the “End User”, which may also be the Purchaser) that the Equipment will be free from Defects (as defined below) in materials and workmanship for a period of one (1) year (the “Warranty Period”). The Warranty Period shall commence on the earlier of: (i) four weeks from the date that the Equipment leaves Daktronics’...
- Page 48 In no event shall Daktronics be liable for loss, damage, or injury of any kind or nature arising out of or in connection with this Warranty in excess of the Purchase Price of the Equipment. The End User’s remedy in any dispute under this Warranty shall be ultimately limited to the Purchase Price of the Equipment to the extent the Purchase Price has been paid.
- Page 49 For End User’s protection, in addition to that afforded by the warranties set forth herein, End User may purchase extended warranty services to cover the Equipment. The Extended Service Agreement, available from Daktronics, provides for electronic parts repair and/or on-site labor for an extended period from the date of expiration of this warranty. Alternatively, an Extended Service Agreement may be purchased in conjunction with this Warranty for extended additional services.
- Page 50 This page intentionally left blank.
Need help?
Do you have a question about the ST-3170 and is the answer not in the manual?
Questions and answers