Table of Contents
Advertisement
Advertisement
Table of Contents

Subscribe to Our Youtube Channel
Related Manuals for Fisher & Paykel DE7060P1


Summary of Contents for Fisher & Paykel DE7060P1
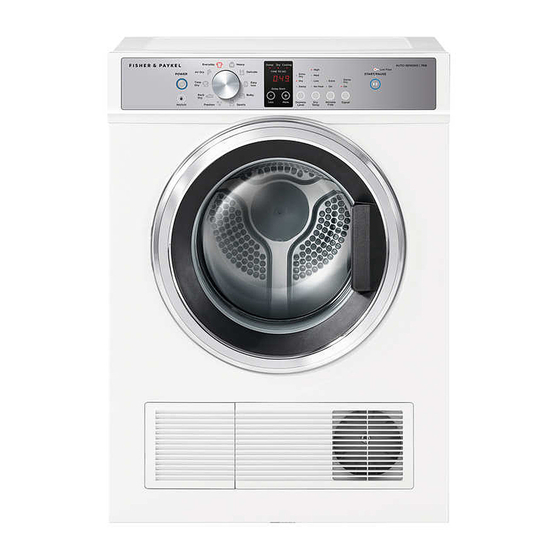
- Page 1 SERVICE MANUAL DE7060P1 DE7060G1 DE6060P1 DE6060G1 DE5060G1 Vented Dryer AU,NZ...
- Page 2 FEATURED PRODUCT & CONTACT ADDRESSES BRAND MODEL MARKET Fisher & Paykel DE7060P1 92270 Fisher & Paykel DE7060G1 92269 Fisher & Paykel DE6060P1 93174 Fisher & Paykel DE6060G1 93175 Fisher & Paykel DE5060G1 93176 Fisher & Paykel DE7060P2 93275 Fisher & Paykel...
-
Page 3: Table Of Contents
CONTENTS 1 HEALTH & SAFETY Electrical safety Electrostatic discharge Good working practices Insulation test Sheet metal edges Diagnostics 2 INSTALLATION Venting Installation options Inverted and wall mounting Completing the installation 3 MODEL / SERIAL NUMBER LOCATION & IDENTIFICATION 4 SPECIFICATIONS Dimensions Packed dimensions and weights Ducting... - Page 4 8 DIAGNOSTICS Self diagnostic mode Diagnostic levels Fault codes User warnings 9 DRYING CYCLES DE7060P DE6060P DE7060G DE6060G DE5060G Customising cycle 10 WIRING DIAGRAMS 11 TROUBLE SHOOTING...
-
Page 6: Health & Safety
1 HEALTH & SAFETY IMPORTANT ! When servicing the appliance, health and safety issues must be considered at all times. Specific safety issues are listed below. Electrical safety Ensure the mains power has been disconnected before servicing the dryer. If the mains supply is required to be on to service the dryer, make sure it is turned off when removing any electrical component or connection to avoid electric shock. -
Page 7: Installation
2 INSTALLATION 2.1 Venting Correct installation is very important for all dryers to ensure maximum efficiency and safety. IMPORTANT! Never run the dryer unless the airflow system is free from obstruction. There must be adequate ventilation to avoid the back flow of gases into the room from appliances burning fuels, including open fires, when operating the dryer. -
Page 8: Installation Options
2.2 Installation options There are two different ways your dryer can be positioned. Freestanding or inverted and mounted on a wall. Free standing The dryer stands on the floor and can easily be moved into position. Move the dryer into the desired position. Do not lift the dryer by the top panel. -
Page 9: Inverted And Wall Mounting
2.3 Inverted and wall mounting Your dryer has been designed to be inverted and mounted on the wall above a washer or tub. A wall mounting kit must be used. Inverting allows access to the dryer control panel. Tools and parts required: Drill and 3 mm bit ●... - Page 10 Inverting the panel Unplug your dryer from the wall. Invert the panel of the dryer by unscrewing the screws on the side of the console ( Remove the console from the dryer ( Unscrew six screws on the inside of the console. Rotate the grey panel 180˚...
- Page 11 Mounting dryer on wall Determine the position of the dryer on the wall and mark the bracket position. A minimum of 50 mm is needed between the top of the dryer and the ceiling for ease of installation. If mounting above a washing machine, allow sufficient room to open the lid of the washer.
- Page 12 Before a rear venting option is installed the dryer must be changed from the front venting factory setup. Remove the outlet grille from the front left-hand side and replace with the outlet cover from the rear left-hand side. These covers should be gently pried at the sides to prevent damage. External venting options The dryer can be vented with a kit that can be positioned to vent ●...
-
Page 13: Completing The Installation
2.4 Completing the installation Installation test cycle IMPORTANT! Ensure the installation test cycle is completed before you dry any items in your dryer. This is to check that your dryer is installed correctly and that it is functioning properly prior to use. Turn your dryer on by pressing the ‘Power’... -
Page 14: Model / Serial Number Location & Identification
3 MODEL / SERIAL NUMBER LOCATION & IDENTIFICATION The serial plate is located on the bottom of the door and on the back panel. The last 9 digits of serial number indicate where the dryer is manufactured, the date of manufacture and the sequential number. -
Page 15: Specifications
4 SPECIFICATIONS 4.1 Dimensions DE6060P DE7060P DE5060G DE6060G DE7060G Capacity (kg)* DIMENSIONS (mm) Width Depth Height ELECTRICAL Volts 220 – 240 220 – 240 220-240 Amps (maximum) Rated Power (W) 1750 1750 1750 Capacity refers to the maximum dry weight of items the dryer can dry at any one time. -
Page 16: Component Testing Procedures
5 COMPONENT TESTING PROCEDURES Power Door Heater Motor Switch Display COMPONENT WIRING COLOUR READING Yellow-Yellow Door closed- closed circuit Door switch Door open- open circuit Blue- Red or White NTC Closed circuit Thermal cut-out Red- Red/ White - White 0 °c NTC 1/ NTC2 33KΩ... -
Page 17: Technical Overview
6 TECHNICAL OVERVIEW 6.1 Principle of operation Drum The ambient air is drawn into the cabinet by the fan which is attached to the motor. This air pressurises the cabinet and is forced over the heating element and heated. The heated air then enters from the rear of the drum and meets with the clothes, the humid hot air exits through the lint filter and exhaust duct. -
Page 18: Door Catch And Strike
6.5 Door catch and strike This is a mechanical type strike and catch, when the door is pushed closed the strike is locked into the catch and holds the door shut. 6.6 Door micro switch The door switch is connected to the electronic controller ensuring that when the door is open, voltage to the motor and elements are cut. -
Page 19: Disassembly Procedures
7 DISASSEMBLY PROCEDURES 7.1 Removal of the control panel • With the door closed, remove one screw from either side of the control panel • Tilt the panel forward from the top and lift gently upwards to release the locking clips 7.2 Removal of top panel •... -
Page 20: Removal Of Belt
7.10 Removal of belt • Remove rear panel as per sec. 7.3 • Remove screws holding element panel and remove the wiring from the element and thermostats • The belt can now be removed by tilting the motor within the cradle so as to take the tension off the belt and rolling it off the motor pulley Reassemble in the reverse order Note: The pulley and small belt are not available as a spare part at this stage and the motor must be... -
Page 21: Diagnostics
8 DIAGNOSTICS 8.1 Self diagnostic mode Turn the dryer on at the supply and on at the control panel, touch the "Keylock" and "Dryness level" buttons for 3 seconds. 2 beeps will sound to signify that the self diagnostic mode has been entered. Door lock Air dry Dry temp... -
Page 22: Fault Codes
8.3 Fault codes NTC1 open circuit or short circuit Err3 Temperature is > 98°c Heater or sensor faulty Err4 NTC1 temperature is <35°c or there is less than 5°c change in temperature within 40 mins of run time NTC2 open circuit or short circuit Err9 Temperature is >... -
Page 23: Drying Cycles
9 DRYING CYCLES 9.1 DE7060P DE6060P Your dryer has a number of drying cycles to suit your laundry needs. Selecting the most appropriate cycle for each particular load will help ensure you get the best result. DEFAULT DEFAULT MAX. LOAD CYCLE DESIGNED FOR DESCRIPTION... -
Page 24: De7060G De6060G De5060G
9.2 DE7060G DE6060G DE5060G Your dryer has a number of drying cycles to suit your laundry needs. Selecting the most appropriate cycle for each particular load will help ensure you get the best result. DEFAULT DEFAULT MAX. LOAD CYCLE DESIGNED FOR DESCRIPTION DRYNESS DRYING... -
Page 25: Customising Cycle
9.3 Customising cycle After using your dryer a few times you may discover there are some drying options you prefer for some cycles. You can programme your dryer to remember the drying options you prefer for each drying cycle. For instance, you may want to set the ‘Easy Iron’... -
Page 26: Wiring Diagrams
10 WIRING DIAGRAMS DE7060P DE6060P Circuit diagram DE6060P1 Power Encoder switch Door switch NTC1 NTC2 Display panel Temperature Temperature limiter limiter Capacitor Heater1 Heater2 Motor Thermalcut-out... - Page 27 DE7060G DE6060G DE5060G Circuit diagram DE6060G1/DE5060G1 Power switch Door switch NTC1 NTC2 Display panel Temperature Temperature limiter limiter Capacitor Heater1 Heater2 Motor Thermalcut-out...
-
Page 28: Trouble Shooting
11 TROUBLE SHOOTING PROBLEM POSSIBLE CAUSES WHAT TO DO Dryer is Drying cycle selected Select an appropriate cycle taking too not appropriate for the for the load. long/ results load. were not Dryness level selected Select a higher dryness level. satisfactory. - Page 29 PROBLEM POSSIBLE CAUSES WHAT TO DO Dryer is Dryer has a fault. Refer to page 21 for detailed beeping, fault code. displaying unfamiliar light patterns and/ or a message on the digital display. Noises. Dryer is overloaded. Remove some items from the dryer.
- Page 30 PROBLEM POSSIBLE CAUSES WHAT TO DO Tangling. Loads not separated Try separating out larger during loading. items from smaller items. Items loaded into the Load items individually dryer incorrectly. into the dryer. Do not place folded items in the dryer. Incorrect cycle Try using the ‘Easy Iron’...
- Page 31 www.fisherpaykel.com Copyright © Fisher & Paykel 2019.. All rights reserved. The product specifications in this manual apply to the specific model described at the date of issue. Under our policy of continuous product improvement, these specifications may change at any time. NZ AU 479748 11.19...
Need help?
Do you have a question about the DE7060P1 and is the answer not in the manual?
Questions and answers