Tyco DV-5A Summary Instructions
Automatic water control valve remote-resetting, pressure-reducing deluge fire protection systems
Hide thumbs
Also See for DV-5A:
- Manual (28 pages) ,
- Quick start manual (9 pages) ,
- Summary instructions (3 pages)
Advertisement
Quick Links
Summary Instructions
DV-5
Automatic Water Control Valve
A
Remote-Resetting, Pressure-Reducing
Deluge Fire Protection Systems
Summary Instructions
DV-5
Automatic Water Control Valve
NOTICE
A
The procedures provided are summary instructions of the complete procedures appearing in
Remote-Resetting, Pressure-Reducing
Technical Data Sheet TFP1326. If problems occur, consult full document.
Deluge Fire Protection Systems
NOTICE
The procedures provided are summary instructions of the complete procedures appearing in
Technical Data Sheet TFP1326. If problems occur, consult full document.
J
G
J
R
G
Item
Description
A
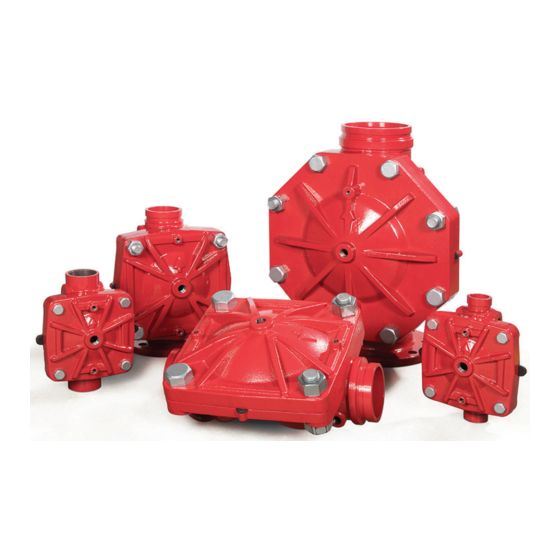
DV-5
Valve
A
R
B
System Main Control Valve
C
Waterflow Pressure Switch
D
Main Drain Valve
E
System Drain Valve
F
Automatic Drain Valve
G
Alarm Test Valve
Item
Description
H
Alarm Control Valve (Optional)
A
DV-5
Valve
A
B
System Main Control Valve
C
Waterflow Pressure Switch
D
Main Drain Valve
E
System Drain Valve
F
Automatic Drain Valve
G
Alarm Test Valve
H
Alarm Control Valve (Optional)
TFP1326 Appendix A
MARCH 2021
Worldwide
Contacts
Worldwide
Contacts
D
K
A
E
D
B
K
A
Q
E
P
B
Q
Item
Description
P
J
Water Supply Gauge
K
Diaphragm Gauge
L
(Not Used)
M
Manual Control Station
N
Solenoid Valve
P
Diaphragm Supply Valve
Q
Diaphragm Supply Strainer
Item
Description
R
Inverted Flare Shut-Off Valve
J
Water Supply Gauge
K
Diaphragm Gauge
L
(Not Used)
M
Manual Control Station
N
Solenoid Valve
P
Diaphragm Supply Valve
Q
Diaphragm Supply Strainer
R
Inverted Flare Shut-Off Valve
www.tyco-fire.com
www.tyco-fire.com
C
H
C
N
H
F
N
M
F
M
Close auxiliary drain valves and S
the Main Drain Valve (D) open. Ens
Valve (H) are open.
3. Depress plunger of Automatic D
Valve Setting Procedure
4. Clean Diaphragm Supply Strai
1. Close System Main Control Valv
Valve (P).
2. Open Main Drain Valve (D), Sys
5. Reset electric detection system
Close auxiliary drain valves and Sy
ergize Solenoid Valve (N).
the Main Drain Valve (D) open. Ens
6. Open Manual Control Station (
Valve (H) are open.
stops discharging, slowly close the
3. Depress plunger of Automatic D
Observe Diaphragm Gauge (K) to
4. Clean Diaphragm Supply Strain
7. With diaphragm chamber press
Valve (P).
observe Diaphragm Gauge (K) for
5. Reset electric detection system
leaks before proceeding.
ergize Solenoid Valve (N).
8. If Diaphragm Gauge (K) indica
6. Open Manual Control Station (
Valve (P) and proceed.
stops discharging, slowly close the
9. Partially open System Main Co
Observe Diaphragm Gauge (K) to
discharges from Main Drain Valve
7. With diaphragm chamber press
are leaks, correct the leakage pro
observe Diaphragm Gauge (K) for
10. When System Main Control Val
leaks before proceeding.
Chamber may increase. If pressure
8. If Diaphragm Gauge (K) indica
sure to at least valve trim pressure
Valve (P) and proceed.
shown on Water Supply Gauge (J
9. Partially open System Main Con
11. Close hinged cover of Manual C
discharges from Main Drain Valve
through the top of the enclosing b
are leaks, correct the leakage prob
12. Open System Main Control Va
10. When System Main Control Valv
13. After setting fire protection sys
Chamber may increase. If pressure
for monitoring proprietary and/or
sure to at least valve trim pressure r
shown on Water Supply Gauge (J)
Adjusting Pilot Valve Pressure
1. To set pressure in the field, trip
11. Close hinged cover of Manual C
is tripped electrically to test entire
through the top of the enclosing b
2. Remove Tamper Cap of Pilot Va
12. Open System Main Control Va
3. If surging flow occurs, attempt t
13. After setting fire protection sys
for monitoring proprietary and/or c
4. Loosen Lock Nut on Adjusting
increase outlet pressure or counte
Adjusting Pilot Valve Pressure
5. Observe Outlet Pressure Gauge
1. To set pressure in the field, trip
is achieved.
is tripped electrically to test entire
7. After desired pressure is attaine
2. Remove Tamper Cap of Pilot Va
8. Replace Tamper Cap and tighte
3. If surging flow occurs, attempt t
9. Ensure that system is properly d
4. Loosen Lock Nut on Adjusting
increase outlet pressure or counte
Drop in Water Supply Pressure B
5. Observe Outlet Pressure Gauge
1. Note water supply pressure by
is achieved.
within normally expected range.
7. After desired pressure is attaine
2. If below normal range, correct a
system.
8. Replace Tamper Cap and tighte
3. When water supply pressure is
9. Ensure that system is properly d
Setting Procedure.
Drop in Water Supply Pressure B
Waterflow Alarm Test Procedure
1. Note water supply pressure by t
1. Open Alarm Test Valve (G), allow
within normally expected range.
Water Motor Alarm. Close the Alar
2. If below normal range, correct a
2. Depress plunger on Automatic
system.
3. When water supply pressure is
Setting Procedure.
Waterflow Alarm Test Procedure
1. Open Alarm Test Valve (G), allow
Water Motor Alarm. Close the Alar
2. Depress plunger on Automatic D
Advertisement

Subscribe to Our Youtube Channel
Related Manuals for Tyco DV-5A


Summary of Contents for Tyco DV-5A
- Page 1 Close auxiliary drain valves and S Worldwide www.tyco-fire.com the Main Drain Valve (D) open. Ens Contacts Valve (H) are open. 3. Depress plunger of Automatic D Valve Setting Procedure 4. Clean Diaphragm Supply Strai 1. Close System Main Control Valv Valve (P).
- Page 2 Valve Setting Procedure Electric Actuation Op 1. Close System Main Control Valve (B) and Diaphragm Supply Valve (P). 1. To prevent water fro Main Drain Valve (D). 2. Open Main Drain Valve (D), System Drain Valve (E), and all auxiliary drains in the system. Close auxiliary drain valves and System Drain Valve (E) after water stops discharging.
- Page 3 4. Loosen union securing Actuation Trim and remove Actuation Trim. 5. Remove union between Diaphragm Cover and MRA-1 Manual Reset Actuator (N). Remove MRA-1 Manual Reset Actuator (N) subassembly. Electric Actuation Operation Test Procedure 1. To prevent water from flowing beyond riser, close System Main Control Valve (B). Open 6.
Need help?
Do you have a question about the DV-5A and is the answer not in the manual?
Questions and answers