Table of Contents
Advertisement
January 2006
Installation & SERVICE
INSTRUCTIONS
FOR
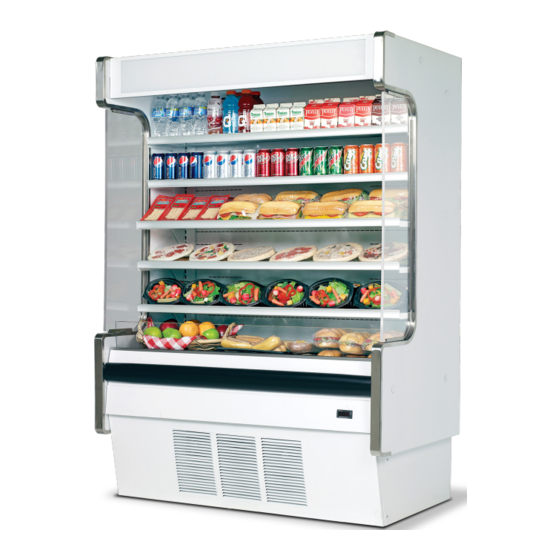
DDS – DDSS SELF-CONTAINED AND REMOTE
Multi-deck, Spot display
Refrigerator Merchandisers
First Call for help (US and Canada):
1-800-922-1919
Soporte Tècnico y Asistencia (Mèxico):
01-800-522-1900
For a Service Network Locator and other
Information visit us at
www.hussmann.com
select Worldwide Locations
P/N OII – DDS, DDSS Merchandisers
January 2006
HUSSMANN - GLOVERSVILLE
Advertisement
Table of Contents

Subscribe to Our Youtube Channel
Related Manuals for Hussmann DDS


Summary of Contents for Hussmann DDS
- Page 1 January 2006 INSTALLATION & SERVICE INSTRUCTIONS DDS – DDSS SELF-CONTAINED AND REMOTE Multi-deck, Spot display Refrigerator Merchandisers First Call for help (US and Canada): 1-800-922-1919 Soporte Tècnico y Asistencia (Mèxico): 01-800-522-1900 For a Service Network Locator and other Information visit us at www.hussmann.com...
-
Page 2: Table Of Contents
SECTION 1 General Information SECTION 2 Installation SECTION 3 Refrigeration Self Contained Models SECTION 4 Refrigeration Remote Models SECTION 5 Electrical SECTION 6 Replacement Parts List SECTION 7 User Instructions SECTION 8 Service Tips and Wiring Diagrams TABLE OF CONTENTS Page 3 Page 4 Page 5... -
Page 3: General Information
Page 3 GENERAL INFORMATION MODEL DESCRIPTION The DDS model series are multi-deck, spot merchandisers designed for medium temperature applications such as: deli/dairy/beverage/floral. They are available as either remote type models, which require separate condensing unit connections, or self-contained models. Each self-contained model will have it’s own condensing unit, factory installed beneath the display... -
Page 4: Installation
Blocking or restricting air circulation through these panels can cause poor performance and damage the refrigeration system. INSTALL THE REFRIGERATOR NO CLOSER THAN (4) FOUR INCHES FROM A WALL OR OTHER STORE FIXTURES. HUSSMANN - GLOVERSVILLE... -
Page 5: Refrigeration
REFRIGERANT CHARGE MODEL REFRIGERANT DDS/DDF-4B DDS/DDF-4D/G DDS/DDF-6D/G DDS/DDF-8D/G DDS – 4D/G c/w Hp Condensing Unit DDSS – 4D/G CONTROLS and ADJUSTMENTS REFRIGERATION CONTROLS DISCHARGE AIR TEMPERATURE FREQUENCY 28 to 34 F A refrigeration thermostat controls refrigeration temperature. -
Page 6: Remote Models
Refrigerant lines should be sized as shown on the refrigeration legend (furnished by the owner). If a legend has not been furnished, refer to Section 12 of the Hussmann Application Engineering Manual for guidance. OUTLET LOCATION The refrigerant line outlet is located at the right hand end of the refrigerator beneath the display pans. -
Page 7: Expansion Valve Adjustment
07/02/03 EXPANSION VALVE ADJUSTMENT Expansion valves must be adjusted to fully feed the evaporator. Before attempting to adjust valves, make sure the evaporator is either clear of / or only lightly covered with frost, and that the fixture is within 10 F of it’s expected operating temperature. Adjust the valve as follows: Attach a probe to the suction line near the expansion valve bulb. - Page 9 A pump down system is recommended for outdoor condensing units. DEFROST: DDS models have defrost cycles that are time initiated and time terminated. REFRIGERATION CONTROLS Discharge...
- Page 10 The thermostat controls a liquid line solenoid (optional) or a suction line solenoid (optional). The use of an evaporator pressure regulator (EPR) is recommended to allow fixture to refrigerate at steady levels. DEFROST: DDS models have defrost cycles that are time initiated and time terminated. MODEL REFRIGERATION CONTROLS...
- Page 11 The defrost timer controls the valve for defrost; closing the valve for initiation; opening the valve at termination. The remote control kit timer must be synchronized with the timer of the unit. HUSSMANN - GLOVERSVILLE...
-
Page 13: Electrical
All electrical connections have been terminated inside the control panel and “pig-tailed” for ease of connecting field wiring. See appropriate wiring diagram in this section. CAUTION: THE FIXTURE MUST BE ELECTRICALLY GROUNDED. NOTE: ALL WIRING AND CONNECTIONS MUST COMPLY WITH N.E.C., STATE, PROVINCIAL AND LOCAL CODES. HUSSMANN - GLOVERSVILLE SECTION 5... - Page 14 Although all field installed wiring must be sized to the Serial Plate amperages, the actual current or amps may be less than specified. DDS Serial Plate is located on the upper left hand corner of the top interior panel inside the case.
-
Page 15: Replacement Parts List
03-S-286 19-S-757 19-S-766 02-S-631 17-S-507 03-S-562 14114 03-S-559 03-S-560 NOTE: Items 1 through 5 are standard parts for both the DDS-4B and DDS-4R HUSSMANN - GLOVERSVILLE SECTION 6 DESCRIPTION Fan Motor, Fan Blade Bulb Ballast – Expansion Valve - R-22... - Page 16 07/02/03 REPLACEMENT PARTS LIST: DDS – 4 D/G ITEM # HUSSMANN PART # 21-S-138 21-S-136 06-S-214 06-S-187 17-S-390 17-S-541 04-S-067 03-S-286 03-S-559 03-S-560 17-S-507 14114 03-S-568 02-S-632 19-S-757 19-S-766 HUSSMANN - GLOVERSVILLE SECTION 6 DESCRIPTION Fan Motor Fan Blade Bulb Ballast - Expansion Valve –...
- Page 17 19-S-757 19-S-766 17-S-507 03-S-562 03-S-568 02-S-633 NOTE: Items 1 through 5 are standard parts for both the DDS-6D/G and DDS-6R Models Items 6 through 13 are standard parts for only the DDS-6D/G Model HUSSMANN - GLOVERSVILLE SECTION 6 DESCRIPTION Fan Motor,...
- Page 18 07/02/03 REPLACEMENT PARTS LIST: DDS - 8 D/G and DDS - 8R ITEM # HUSSMANN PART # 21-S-138 21-S-136 06-S-214 06-S-187 17-S-545 04-S-067 03-S-286 03-S-560 19-S-757 19-S-766 17-S-507 03-S-563 03-S-298 02-S-638 HUSSMANN - GLOVERSVILLE SECTION 6 DESCRIPTION Fan Motor Fan Blade...
-
Page 19: Care And Cleaning
EMPTY INTO A FLOOR DRAIN BUT INTO A LIMITED CAPACITY EVAPORATOR PAN WHICH WILL OVERFLOW IF EXCESS WATER IS USED IN CLEANING. SOME PANS ARE EQUIPPED WITH A SIDE OUTLET DRAIN TUBE, OTHERS HAVE A TUBE COMING DOWN FROM THE DRAIN. HUSSMANN - GLOVERSVILLE CAUTION:... - Page 20 WILL RESULT IN POOR REFRIGERATION PERFORMANCE. Dirt accumulation inside the condensate evaporator pan will reduce the pan’s capacity and affect the efficiency of the heater causing a burned out heater and an overflow of defrost water onto the store floor. HUSSMANN - GLOVERSVILLE...
- Page 21 Slide along the honeycomb, pressing the front edge upward into the ledge. Be careful no to damage the cells or cut yourself on the edges of the honeycomb HUSSMANN - GLOVERSVILLE SECTION 8 WARNING...
- Page 23 Remove the screws that fasten the canopy to the exterior top of the case Pull the top of the canopy forward and rotate it down to remove it from the case Replace or service the ballast as required and replace the canopy in reverse order of removal. HUSSMANN - GLOVERSVILLE...
Need help?
Do you have a question about the DDS and is the answer not in the manual?
Questions and answers