Table of Contents
Advertisement
Quick Links
Advertisement
Table of Contents

Related Manuals for Hussmann IMPACT Elite E1


Summary of Contents for Hussmann IMPACT Elite E1
-
Page 1: Operation Manual
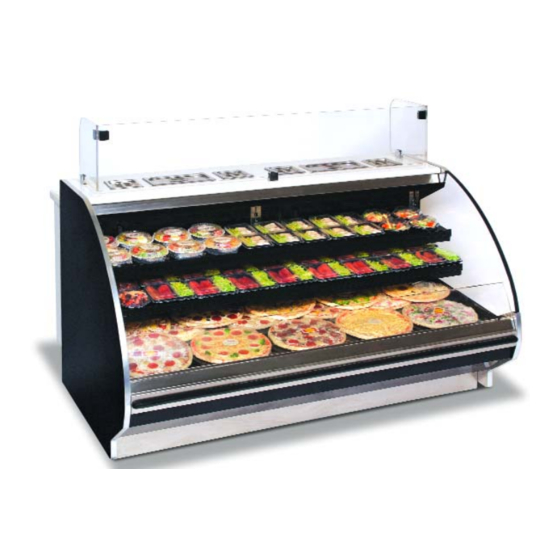
Self-Service Meat, Delicatessen, Dairy and Produce Merchandisers Installation & Operation Manual Shipped With Case Data Sheets I I M M P P O O R R T T A A N N T T P/N 0453523 Impact Elite Keep in store for Series future reference! December 2005... -
Page 2: Table Of Contents
INSTALLATION NSF Certification ..... 1-1 Location ......1-1 Shipping Damage . -
Page 3: Installation
HUSSMANN CORPORATION • BRIDGETON, MO 63044-2483 U.S.A. INSTALLATION The exterior frames on these cases provide space ®... -
Page 4: Merchandisers Shipped
NSTALLATION MERCHANDISERS SHIPPED WITH END INSTALLED Be careful not to damage the factory installed end while moving the case. Tools must be positioned past the end and beneath the merchandiser’s support bar. WARNING Do NOT remove shipping braces until the merchandisers are positioned for installation. -
Page 5: Joining Instructions
On multi-deck cases remove the lower back panel first. To remove a panel lift it up from its bottom edge and out. No tools are required. HUSSMANN CORPORATION • BRIDGETON, MO 63044-2483 U.S.A. Apply Silicone Gasket Pad 1. Apply a continuous bead... - Page 6 NSTALLATION Insert Alignment Rod and Pins 1. Insert the alignment rod into the right end of the left case as indicated in the detail below. Verify alignment pins are properly seated in the left case. Canopy Alignment Apply Gaskets 1. Apply in.
- Page 7 Do not squeeze joint so hard as to force cement out of the joint—a dry joint may result. HUSSMANN CORPORATION • BRIDGETON, MO 63044-2483 U.S.A. 6. Apply tape (2 in. duct tape recommended) across face of seam to secure plexiglass from shifting while cement dries.
-
Page 8: Installing Bumpers
NSTALLATION INSTALLING BUMPERS Elite bumpers are shipped as a continuous roll. Once installed the continuous bumper helps to disguise the joint locations, giving the lineup a smoother look. 1. Unroll the bumper and allow it to rest at room temperature for 24 hours prior to installa- tion to minimize bumper shrinkage after installation. -
Page 9: Refrigeration / Electrical
Or the inter- connecting piping may be run outside the case in the raceway area shown. HUSSMANN CORPORATION • BRIDGETON, MO 63044-2483 U.S.A. CAUTION When brazing pipes, be sure to use the insulation blanket shipped with the merchandiser to prevent damage to the plastic case bottom. -
Page 10: Insulation
EFRIGERATION INSULATION The suction and liquid lines should be clamped or taped together and insulated for a minimum of 30 ft (9144 mm) from the merchandiser. Additional insulation for the balance of the liquid and suction lines is recommended wherever con- densation drippage is objectionable or lines are exposed to ambient conditions. -
Page 11: Refrigeration Thermostat
Refer to the data sheets for application data. Standard Defrost Termination Thermostat HUSSMANN CORPORATION • BRIDGETON, MO 63044-2483 U.S.A. The Time Clock initiates defrost. The evaporator fans continue to circulate air across the evapora- tor coil, melting any frost build-up. Defrost can be terminated by either temperature or time. -
Page 12: Merchandiser Electrical Data
EFRIGERATION MERCHANDISER ELECTRICAL DATA Merchandiser data sheets are included with this manual. The data sheets provide case electrical data, electrical schematics, parts lists and perfor- mance data. Refer to the merchandiser data sheets and case serial plate for electrical information. ELECTRICAL CONNECTIONS All wiring must be in compliance with NEC and local codes. -
Page 13: Drip Piping And Lower Panels
4. Avoid long runs of drip piping. Long runs make it impossible to provide the pitch necessary for good drainage. HUSSMANN CORPORATION • BRIDGETON, MO 63044-2483 U.S.A. Splashguard brackets MUST be installed before piping case. 5. Provide a suitable air break between flood rim of the floor drain and outlet of drip pipe. -
Page 14: Installing Lower Front Panels
IPING AND INSTALLING LOWER FRONT PANELS The lower front panels are shipped inside each merchandiser. A merchandisers have been FTER leveled and joined, and all drip piping, electrical and refrigeration work has been completed, install the lower front panel. To Install Lower Front Panel 1. -
Page 15: Start Up / Operation
T NO TIME SHOULD MERCHANDISERS BE STOCKED BEYOND THE LOAD LIMITS INDICAT LOAD LIMIT O NOT BLOCK HONEYCOMB HUSSMANN CORPORATION • BRIDGETON, MO 63044-2483 U.S.A. START UP / OPERATION STOCKING Product should NOT be placed in merchandisers until case is at proper operating temperature. -
Page 16: Multi-Deck Shelf Alignment
TART UP Discharge Air Honeycomb Load Limit MULTI-DECK SHELF ALIGNMENT Taped to one of the shelves of each merchandiser is a small plastic bag containing shelf alignment strips. These strips are designed to enhance the appearance of the shelves by aligning the front edge of each shelf with that of an adjacent shelf. - Page 17 C5, and D6 models. Note that other models will have fewer rows of shelves. Socket with Cap Installed HUSSMANN CORPORATION • BRIDGETON, MO 63044-2483 U.S.A. Light Switch Location Starting from the left-hand bottom section, choose the location for the first shelf, X-1.
-
Page 18: Installing Fda/Nsf Required Thermometer
TART UP 7. Working from left to right, install the next shelf, X-2, to the right of the first shelf you installed. Always work from left to right and from the bottom up in each 8 ft (2438 mm) and 12 ft (3685 mm) case. - Page 19 Required Thermometer Thermometer — Hussmann P/N 430108 Double Stick Tape Flexible Plastic Fits in Price Tag Moldings HUSSMANN CORPORATION • BRIDGETON, MO 63044-2483 U.S.A. — Inside End Panel — Shelf Price Tag Molding — Return Air Grille Suggested Mounting Locations...
- Page 20 Keep with merchandiser or give to store manager — do not destroy. Hussmann P/N 429971A P/N 0453523 PERATION Excerpt from 1999 FDA Food Code: 4-204.112...
-
Page 21: Maintenance
•Solvent, oil or acidic based cleaners on any interior surfaces. •A hose on rail lights, canopy lights or any other electrical connection. HUSSMANN CORPORATION • BRIDGETON, MO 63044-2483 U.S.A. MAINTENANCE •Remove the product and all loose debris to avoid clogging the waste outlet. -
Page 22: Cleaning Honeycomb Assemblies
AINTENANCE CLEANING HONEYCOMB ASSEMBLIES Honeycombs should be cleaned every six months. Dirty honeycombs will cause merchandisers to perform poorly. The honeycombs may be cleaned with a vacuum cleaner. Soap and water may be used if all water is removed from the honeycomb cells before replacing. -
Page 23: Cleaning Bumpers
Use paper towels to remove debris that may have fallen below the pans. Do not put water into the area below food bins. Always follow NSF guidelines and local code. Clean under bins Food Bin Elite Medium Temperature HUSSMANN CORPORATION • BRIDGETON, MO 63044-2483 U.S.A. -
Page 24: Service
8. Reconnect fan to wiring harness. 9. Turn on power. 10. Verify that motor is working and blade is turning in the correct direction. HUSSMANN CORPORATION • BRIDGETON, MO 63044-2483 U.S.A. SERVICE WARNING Always disconnect the electrical power at the main disconnect when servicing or replacing any electrical component. -
Page 25: Replacing Fluorescent Lamps
‘nub’ which fits inside the groove of specially designed end caps. Impact End-Cap IMPORTANT! Always replace lamp holders and end caps with Hussmann lamp holders and end caps. Use of non-Hussmann parts may result in poor electrical contact and short lamp life. Groove Impact Lamp Holder... -
Page 26: Replacing Electronic Ballasts
5. Reconnect the electrical power. Lower Front Panel Ballast located inside raceway HUSSMANN CORPORATION • BRIDGETON, MO 63044-2483 U.S.A. Canopy and Shelf Lamp Ballasts These ballast are located at the top of the merchandiser inside the canopy. The switch in the canopy operates both the canopy and the shelf lamps. - Page 27 ERVICE Prep Case Ballast The prep case ballast is located in the raceway, behind the lower back panel at the left-hand end of the merchandiser. To gain access: 1. D ISCONNECT THE ELECTRICAL POWER TO THE MERCHANDISER 2. Remove screws that secure the access panel, then remove the panel.
-
Page 28: Replacing Damaged Drain Fitting
Drain Fitting Viewed from Inside Merchandiser HUSSMANN CORPORATION • BRIDGETON, MO 63044-2483 U.S.A. 2. Apply an ABS and PVC compatible primer- sealer to outside of PVC coupling and inside of drain. Insert coupling into drain fitting. -
Page 29: Repairing Aluminum Coils
ERVICE REPAIRING ALUMINUM COIL The aluminum coils used in Hussmann merchan- disers may be easily repaired in the field. Materials are available from local refrigeration wholesalers. Hussmann recommends the following solders and technique: Solders Aladdin Welding Products Inc. P.O. Box 7188 1300 Burton St. - Page 30 ® To obtain warranty information or other support, contact your Hussmann representative. Please include the model and serial number of the product. Hussmann Corporation, Corporate Headquarters: Bridgeton, Missouri, U.S.A. 63044-2483 01 July 2005...
Need help?
Do you have a question about the IMPACT Elite E1 and is the answer not in the manual?
Questions and answers