Table of Contents

Related Manuals for Lumens VC-TA50


Summary of Contents for Lumens VC-TA50
- Page 1 VC-TA50 Auto Tracking Camera (PTZ Video Camera) User Manual - English [Important] To download the latest version of Quick Start Guide, multilingual user manual, software, or driver, etc., please visit Lumens https://www.MyLumens.com/support...
-
Page 2: Table Of Contents
Table of Contents Chapter 1 Package Contents ..................2 Chapter 2 Product Overview and Interface .............. 3 2.1 I/O functions Introduction ................3 2.2 Description of LED indicator ................4 Chapter 3 Instruction for installation ................ 5 3.1 Scenario ......................5 3.2 Camera Size ..................... -
Page 3: Chapter 1 Package Contents
Chapter 1 Package Contents RS232/RS422 Camera Quick Installation Guide Connection Instruction Remote Control Power Adapter Power Cord Appearance may vary depending on country/region RS-422 Connector Metal Plate A Metal Plate B M3 Screws Silver x 8 / Black x 2 English -2... -
Page 4: Chapter 2 Product Overview And Interface
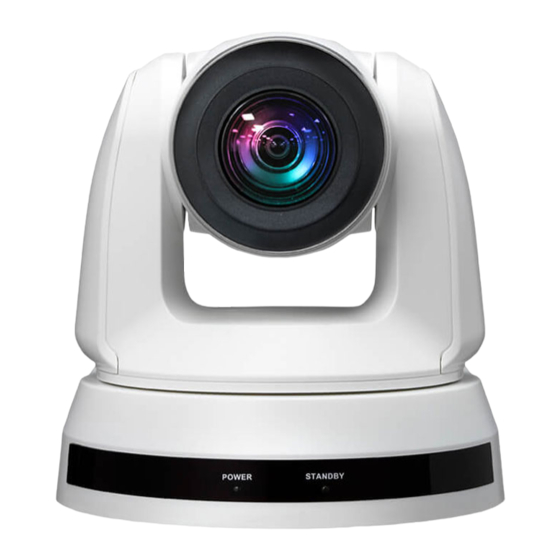
Chapter 2 Product Overview and Interface 2.1 I/O functions Introduction Item Function Descriptions 1. Camera lens HD camera lens 2. Power LED Display the status, please refer to 2.2 Description of LED indicator 3. Standby LED Display the status, please refer to 2.2 Description of LED indicator Item... -
Page 5: Description Of Led Indicator
Red light Tally mode 2 Green light Red light Tracking Mode Flickering green light No indicator <Remark> The Tally mode can be enabled via RS-232 command control. Please download the file for RS-232 Command Set from the Lumens website English -4... -
Page 6: Chapter 3 Instruction For Installation
Chapter 3 Instruction for installation 3.1 Scenario 3.1.1 Applicable distance range of VC-TA50: 4 - 15 m, best tracking target distance recommended: 3.1.2 Mounting height: 2 - 3 m, best height recommended: 2.4 m <Note> For maintaining the best tracking results, avoid images of people on posters, screens, monitors, TVs in the background 3.2 Camera Size... -
Page 7: Preparation Before Installation
3.2.1 Dimensions of the bottom of the machine The camera can be mounted on a 1/4”-20 UNC PTZ tripod deck by using the lock holes on the bottom for the tripod 3.3 Preparation before installation Installation and connection of HD camera requires special skills. To install by yourself, please follow necessary steps, ensure steady and tight installation of the device, and pay attention to your safety to avoid any accident. - Page 8 3.4.1.2 Installation steps 1. Please adjust DIP switch at first prior to installation Please refer to Chapter 6 DIP Switch Setting for the relevant descriptions on DIP switch. 2. Place the camera on a flat desk directly to ensure the normal vertical and horizontal operation of the machine 3.4.2 I would like to install the camera on the ceiling 3.4.2.1 Prepare for the parts and equipment required during the installation...
- Page 9 3.4.2.2 Metal Plate size diagram Metal plate A - machine side Metal plate A locking screw Metal plate A - machine side English -8...
- Page 10 Metal plate B - ceiling side Metal plate B locking bolt Metal plate B locking screw M3 threaded hole M3 threaded hole M3 threaded hole Metal plate B - ceiling side English -9...
- Page 11 3.4.2.3 Precautions for installation Before installation, please confirm the orientation of the machine relative to the object to be captured It is recommended that the machine should be set at a distance of more than 1.5 meter away from the object to be captured.
- Page 12 black screw 3.4.2.5 How to remove 1. Remove the connecting wires from the camera 2. Uninstall the camera together with the ceiling, loosen the three screws that fix the metal plates A and B and push to the left to remove the machine 3.
- Page 13 3.4.4 RS-232 connection (at most 7 Lumens cameras can be connected) <Note> Only one of RS-422/RS-232 can be selected for control, please refer to 6.4 System Switch, DIP1 setting RS-232 pins definition instructions English -12...
- Page 14 3.4.5 RS-422 connection (at most 7 Lumens cameras can be connected) <Note> Only one of RS-422/RS-232 can be selected for control, please refer to 6.4 System Switch, DIP1 setting RS-422 pins definition instructions English -13...
-
Page 15: Chapter 4 Introduction Of Remote Control And Setting Menu
Chapter 4 Introduction of Remote Control and Setting Menu 4.1 Remote Control The below functions are listed alphabetically Item Description ,,, Move the lens On/Off: Enable/Disable Auto Tracking Full: Full body tracking Auto Tracking Upper: Half body tracking ... -
Page 16: Setting Menu
4.2 Setting Menu <Remark> Press [Menu] on the remote control to enter the setting menu; the bold underlined values in the following table are defaults. Level Level Minor Items Level Adjustment Values Function Descriptions Major Items Full Auto / Shutter Pri / Iris Pri / Mode Exposure mode setting Manual / White Board... - Page 17 Level Level Minor Items Level Adjustment Values Function Descriptions Major Items Type Tracking Auto Tracking / Auto Framing Picture effect OFF / Neg / B&W Sharpness 0~A~14 2D NR Off / 1 / 2 / 3 3D NR Off / Low / Standard / Highest The user may customize his/her desired Image Mode Mode 1 ~ 6 / Self-defined...
- Page 18 Level Level Minor Items Level Adjustment Values Function Descriptions Major Items This function can only be enabled in the Manual Focus (MF) mode When PTZ Assist is enabled and PTZ PTZ Assist On / Off control is in operation, the focus will be triggered.
- Page 19 Level Level Minor Items Level Adjustment Values Function Descriptions Major Items The Protocol set to Pelco D allows the Pelco D Address 1 ~255 camera ID address to be assigned Factory Reset Resume the factory default setting On / Off Display the current setting status Status English -18...
-
Page 20: Chapter 5 Network Function Settings Description
(default IP address) Enter administrator’s account and password <Remark> For the first-time login, please refer to 5.2.9 System Settings - User to change the default password Lumens Network Camera Account: admin Password: 9999 (Default) English -19... - Page 21 5.1.3 Using Lumens VMS Software to View the Images Open LUMENS VMS software (Please download from the Lumens official website) Search Camera: Press [automatically search for the device] button to locate the Camera Click camera in the list and start operation after connecting to network <Remark>...
-
Page 22: Web Page Menu Function Description
5.2 Web Page Menu Function Description 5.2.1 Login Screen ○ ○ ○ ○ ○ Item Function Descriptions User Login Account Enter user login account (default: admin) Enter user password (default: 9999) User Password <Remark> For the first-time login, please refer to 5.2.9 System Settings - User to change the default password... - Page 23 AF/MF Switch AF/MF Camera Setting Please refer to 5.2.2.1 Camera Setting Enlarge the preview Zooming in/out the preview image window 5.2.2.1 Camera Setting ○ ○ ○ ○ ○ ○ Item Function Descriptions Mode: Select exposure mode (Full Auto / Shutter Pri / Iris Pri / Manual) Gain Level: Adjust the gain level (adjustable only under the “Manual”) ...
- Page 24 Image Effect: Set picture effect, Off/Neg/Black and White Image Mode: The user may customize his/her desired image mode Image Mode Load: Adjustable when the Image mode is set to Custom. After selected, the corresponding Image mode parameters will be read and applied to Custom Photo ...
- Page 25 according to change of the number of people in conference <Remark> If the image is not zoomed according to the actual number of people, please click to perform viewfinder correction. Zoom ratio Zoom In/Zoom Out ratio Pan/Tilt setting Adjust the Pan/Tilt position of the camera screen Click and drag the mouse to select an area and then click , the...
- Page 26 5.2.3.1 Stage 1. Select [Stage] for Tracking Mode, and click box to select an area (orange box) 2. After the selection, click to set, and the preview screen will display the selected area, then click to access the settings 3. Set the Left/Right Border ...
- Page 27 5.2.3.2 Partition 1. Select [Partition] for Tracking Mode, and click to access the settings 2. Use PTZ function to adjust to the screen to be partitioned, and then click to save. The partition icon below will be changed to the saved position 3.
- Page 28 5.2.4 Audio ○ ○ ○ ○ ○ ○ ○ Item Function Descriptions Audio Enable Turn on/off sound Soundtrack effect Set MIC In/Line In setting Encode Type AAC / G.711 Set Encode sample rate 48 KHz (AAC) 44.1 KHz (AAC) Encode sample rate ...
- Page 29 Item Function Descriptions Copy the RTMP web address provided by the RTMP service platform and paste it to the RTMP connection address to publish the camera images on the RTMP RTMP/RTMPS Setting service platform To upload to YouTube for live streaming, please refer to 5.2.4 Settings - Audio turn on the audio function ...
- Page 30 5.2.6 System Settings - Device ○ ○ ○ Item Function Descriptions Change camera ID here Supporting 1 - 30 characters for the camera ID Camera ID Please mix uppercase and lowercase letters or numbers for characters. Special symbols such as “/” and “space” cannot be used Modify the location of the camera, such as Room 1 ...
- Page 31 5.2.7 System Settings - Network ○ ○ ○ ○ Item Function Descriptions Network setting of camera. Change of setting is available when DHCP function is DHCP closed HTTP port Set HTTP port. The default Port value is 80 HTTPS port Set HTTPS port.
- Page 32 5.2.8 System Settings - Date & Time Function Descriptions Display date and time of the current camera/PC. You may set the synchronization method and modify date and time 5.2.9 System Settings - User ○ ○ ○ ○ Item Function Descriptions Enter a user name and password to add a new user Select the user account to be modified and click to edit the password...
- Page 33 Setting Profile setup parameters If the machine operates abnormally, the error log can be exported for reference of Lumens technicians Error Log <Remark> When an error code appears, please try to clear it to make sure whether the issue has occurred repetitively...
- Page 34 5.2.11 About Function Descriptions Display the firmware version, serial number, running time and other related information of the camera For technical support, please scan the QR code at the bottom right English -33...
-
Page 35: Chapter 6 Dip Switch Setting
Chapter 6 DIP Switch Setting 6.1 OUTPUT Switch Output Mode Setting Output Mode Setting 1920x1080/60p 1920x1080/50p 1920x1080/30p 1920x1080/25p 1920x1080/60i 1920x1080/50i 1280x720/60p 1280x720/50p 1080/59.94p 1080/59.94i 1080/29.97p 720/59.94p 6.2 IR SELECT Setting 6.3 Camera Address Selector Setting Function Descriptions ID 0~7 Reserved 6.4 System Switch 功能說明... -
Page 36: Chapter 7 Troubleshooting
Chapter 7 Troubleshooting This chapter describes problems you may encounter while using VC-TA50. If you have questions, please refer to related chapters and follow all the suggested solutions. If the problem still occurred, please contact your distributors or the service center. -
Page 37: Chapter 8 Safety Instructions
Chapter 8 Safety Instructions Always follow these safety instructions when setting up and using this product: 1 Operation 1.1 Please use the product in the recommended operating environment, away from water or source of heat. 1.2 Do not place the product on a tilted or unstable trolley, stand or table. 1.3 Please clean the dust on the power plug prior to usage. -
Page 38: Supplier's Declaration Of Conformity 47 Cfr § 2.1077 Compliance Information
Supplier's Declaration of Conformity 47 CFR § 2.1077 Compliance Information Manufacturer:Lumens Digital Optics Inc. Product Name:VC-TA50 Model Number:PTZ Video Camera Responsible Party – U.S. Contact Information Supplier:Lumens Integration, Inc. 4116 Clipper Court, Fremont, CA 94538, United States :support@mylumens.com e-mail FCC Compliance Statement This device complies with Part 15 of the FCC Rules. -
Page 39: Copyright Information
Lumens is a trademark that is currently being registered by Lumens Digital Optics Inc. Copying, reproducing or transmitting this file is not allowed if a license is not provided by Lumens Digital Optics Inc. unless copying this file is for the purpose of backup after purchasing this product.
Need help?
Do you have a question about the VC-TA50 and is the answer not in the manual?
Questions and answers