Table of Contents

Subscribe to Our Youtube Channel
Related Manuals for i-team imop Lite


Summary of Contents for i-team imop Lite
- Page 1 Lite Auto scrubber for floor surfaces User manual i-team Professional b.v. H oppenkuil 27b, 5626 DD Eindhoven, The Netherlands T elephone: +31402662400 Email: hello@ i- teamglobal.com Internet: w ww .i- teamglobal.com...
- Page 2 FASTER: Cleans 50% faster than conventional mopping and 20% faster than equal size scrubber dryers proven by cleaning rates of up to 1300 m per hour. CLEANER: Powerful twin counter-rotating 500 RPM brushes for soil removal proven by ATP test data, reflecting up to 90% cleaner surfaces. GREENER: Takes advantage of every bit of chemical and every drop of water, which is proof that it reduces environmental impact by over 75%.
-
Page 3: Preface
Lite, the auto scrubber that cleans faster, cleaner, safer, ® greener, and is better for everyone. The imop Lite's compact design allows you to clean right to the edge and under obstacles, minimizing manual scrubbing. The battery operated imop Lite is equipped with two counter-rotating brushes that provide a deep scrub and a great cleaning result. -
Page 4: Purpose Of The User Manual
These instructions must be considered to avoid risks that could lead to physical and/or material damage. T arget audience This user manual is intended for operators of the imop Lite and their supervisors, as well as partners and importers. O perators of the imop L ite... -
Page 5: Reading Guide
R eading guide The following symbols and terms are used throughout this manual to alert the reader to safety issues and important information: Symbol Term Explanation WARNING Indicates a hazardous situation which, if the safety instructions are not followed, can lead to injuries of the operator or bystanders and light and/or moderate damage to the product or the environment. -
Page 6: Table Of Contents
C ontent Preface ......................................3 Purpose of the user manual ..............................4 Target audience ..................................... 4 Operators of the imop Lite ................................ 4 Reading guide ....................................5 Content ......................................6 Introduction ................................... 8 1.1. Intended use of the product ..........................8 1.2. - Page 7 5.2. Assembly .................................. 19 5.2.1 Charging the battery ..........................19 5.2.2 Attaching the brushes ..........................19 5.2.3 Attaching the squeegee ..........................20 5.2.4 Installing the cleaning solution tank ..................... 20 5.2.5 Installing the recovery tank ........................21 Operation ..................................... 22 6.1.
-
Page 8: Introduction
You will be pleasantly surprised by the fast and effective use of the battery operated imop Lite. The batteries must be fully charged before use. Please see the user manual of the class I battery charger for correct procedure. -
Page 9: Non-Intended Use Of The Product
• by trained adults only. 1.3. Lifespan Each imop Lite is guaranteed to operate for at least 2000 hours. The wear on brushes and squeegee heavily depends on the roughness of the surface. They need to be checked regularly. CAUTION To ensure proper and safe operation throughout the life of the imop Lite, the machine must be checked by an authorized i-team partner every 500 hours.. -
Page 10: Specifications
1.5. Specifications Figure 2 Product size: 120 x 43 x 38 cm Product size in store position: 120 x 43 x 34 cm Weight (including Battery): 12.5 kg Li-on battery: DC (18V, 12.48Ah, 250Wh) Battery capacity: 1 Battery Operation time of batteries: 45 min Brush pressure: 13 kg... -
Page 11: Warranty
The imop Lite should be used as intended and described in this manual. Using the ® imop Lite outside will void the warranty on the product. 1.7. Identification The ID tag, containing a serial number and production number, can be found on the bar behind the wastewater tank. -
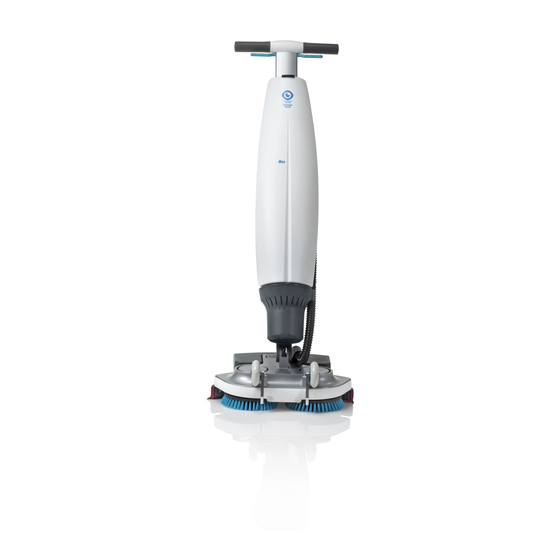
Page 12: Description
The body that contains the motor, cleaning solution tank, recovery tank, handle with • triggers and control panel. The scrub deck that contains the brushes and squeegee. • The imop Lite can be folded into a store position; this is recommended for storage. The imop Lite consists of: Figure 4 Legend Trigger Battery Control panel –... -
Page 13: Safety
Lite in an upright position when inserting cleaning fluid or ® battery. 3.1.4 Antibacterial tanks Always keep the antibacterial tanks of the imop Lite out of direct sunlight. This can cause discoloration. 3.1.5 Strong magnets CAUTION Please be aware of the integrated magnets that hold the fluid tanks in place and on the scrub deck. -
Page 14: Risks During Operation
Therefore, it is advised to mark the job site to warn passersby. 3.2.3 Careful when parking Do not park the imop Lite on ramps or slopes. Always park the imop Lite on a level, hard surface. 3.3. Risks after operation 3.3.1 Remove battery... -
Page 15: Transport And Storage
4. T ransport and storage 4.1. General CAUTION Always keep the body of the imop Lite in an upright position when filling the ® cleaning solution tank or inserting the battery. Before storage or transport, drain the machine and remove the battery after each use. 4.2. -
Page 16: Transport Outside
1. Put the imop Lite in store position, see section 4.2. ® 2. Carry the imop Lite with one hand while holding the handle (Figure 6, pos 1) with your other hand. CAUTION The transport wheels are not designed to roll over dirty surfaces, sand can cause the wheels to block. -
Page 17: Transport In A Vehicle
Please contact our sales department for more information. The imop Lite is a compact machine and fits in the trunk of your car. Before loading the imop Lite into your vehicle, make sure both tanks and the battery are removed. -
Page 18: Assembly And Installation
Lite does not require much assembly. Most importantly, you will have to attach the ® brushes and squeegee. 5.1. Unboxing The imop Lite body is packed in a single box. The battery and charger are delivered in a separate box and can be ordered separately. Figure 8 1x imop... -
Page 19: Assembly
5.2. Assembly 5.2.1 Charging the battery Charge the battery according to the instructions in the battery charger manual. Make sure the battery is charged regularly. 5.2.2 Attaching the brushes Figure 9 To attach the brushes: 1. Put the imop Lite in store position, see section 4.2. ®... -
Page 20: Attaching The Squeegee
5.2.3 Attaching the squeegee Figure 10 To attach the squeegee: 1. Hold the scrub deck firmly with one hand. 2. Align the pins on the scrub deck (Figure 10, pos 2) with the holes on the squeegee (Figure 10, pos 1). 3. -
Page 21: Installing The Recovery Tank
5.2.5 Installing the recovery tank 1. Put the tank (Figure 12, pos 1) on the imop Lite with the bottom first. ® 2. Position the tank on the nipples. 3. Push the tank in place, the magnet will lock the recovery tank in place. Figure 12... -
Page 22: Operation
® Figure 13 1. Put the imop Lite in store position, see section 4.2. 2. Push the battery (Figure 13, pos 1) in the battery slot. A click indicates that the battery is locked in place by the retaining clip (Figure 13, pos 4). -
Page 23: Filling The Cleaning Solution Tank
4. Put the imop Lite in store position, see ® section 4.2. 5. Put the tank on the imop Lite with the valve first (Figure 14, pos 1). 6. Press the tank downward to break the valve seal. 7. Push the tank in place, the magnet will lock the solution tank in place. -
Page 24: Operation Procedure
2. Hold the handle with one hand (Figure 15, pos 1). 3. Don't forget to bring a wet floor marker. 4. Walk slowly and pay extra attention if you pull the imop Lite over obstacles. 5. To lift the imop Lite over obstacles, always use two hands. -
Page 25: At The Job Site
6.2.2 At the job site 1. Mark the job site using a wet floor marker. 2. Crouch down while holding the scrub deck firmly with one hand (Figure 16, pos 2). 3. Push the handle forward with your other hand (Figure 16, pos 1). 4. - Page 26 Brush and Eco and vacuum 6. Hold the handle with both hands. 7. Squeeze the trigger on the handle (Figure 17, pos 5). This will also start the imop Lite 8. Once the trigger is squeezed the imop Lite will move forward.
- Page 27 To turn, stop walking and use your inside hand (the hand in the direction you want to go to) to turn the handle. The imop Lite can swivel 360 degrees making it possible to reverse direction.
-
Page 28: Eco Mode
Figure 19 6.2.4 Turning off the imop Lite ® Releasing the trigger (Figure 20, pos 1) will automatically stop the imop Lite. Note that the vacuum motor will continue to run for approximately 3 more seconds. Figure 20 6.2.5 Emptying tanks Dispose of water or cleaning solution from both tanks in an appropriate drain. -
Page 29: Cleaning And Storage
0.5 to 1 liter of clean water. 2. Press the Brush and Cleaning solution and Vacuum buttons on the control panel. 3. Use the trigger to start the imop Lite and allow it to flush the system. Figure 21 6.3.2 Cleaning the tanks 1. -
Page 30: Removing The Battery
3. While pressing the retaining clip inwards (Figure 23, pos 1), pull the battery away (Figure 23,pos 2). 4. When the imop Lite isn't used regularly, store the charged battery in a dry, clean place. 5. Make sure the battery is charged monthly. -
Page 31: Store In An Upright Position
2. Put the imop Lite in store position, see section 4.2. 3. Store the imop Lite close to a wall (Figure 24, pos 1) with the handle pointing facing away from the wall and the brushes towards the wall. -
Page 32: Maintenance
5. Turn the right brush clockwise until you feel resistance or see the motor disk turning as well. 6. Pull the brush towards you, off the motor disk. 7. Visually inspect the motor disks. 8. Clean the imop Lite scrub deck with a clean, dry cloth before you install the brushes. -
Page 33: Squeegee Replacement
7.2. Squeegee replacement The squeegee blades come in pairs and wear out over time. When you notice the floor is no longer being dried properly, replace the squeegee blades. 7.2.1 Detaching the squeegee 1. Put the imop Lite in store position, see ®... -
Page 34: Attaching The Squeegee
8. Place the new hose by following the above steps in reversed order. 9. Reinstall the squeegee. 7.4. Recommended additional cleaning Clean the exterior of the imop Lite weekly with a non-abrasive, non-solvent cleaner or a clean, damp cloth. To clean the scrub deck, remove the brushes. -
Page 35: Recommended Service Time
For more information please contact our sales department, or the partner who provided the imop Lite. -
Page 36: Troubleshooting
8. T roubleshooting Problem Cause Solution No power No battery Insert battery Empty battery Charge battery Battery incorrectly placed Remove and reinstall battery Insufficient/no Wrong program Check the operating mode on the control panel water flow Eco mode on Check the ECO mode light on the control panel Empty tank Fill the tank... -
Page 37: Decommissioning And Disposal
It is the responsibility of the imop Lite owner to dispose of the product ® responsibly. After decommissioning, the imop Lite still contains valuable resources and needs to be disposed of according to your local laws and regulations regarding recycling of electrical equipment. Before disposal please: 1. -
Page 38: Attachments
10. A ttachments 10.1. CE Certificate... -
Page 39: Specifications
10.2. Specifications Product size: 120 x 43 x 38 cm Product size in store position: 120 x 43 x 34 cm Weight (including Battery): 12.5 kg Li-on battery: DC (18V, 12.48Ah, 250Wh) Battery capacity: 1 Battery Operation time of batteries: 45 min Brush pressure: 13 kg... -
Page 40: The I-Story
Made Blue simultaneously ensures someone else on the planet gets access to clean water. For every liter that the i-mop uses in operations, the i-team and Made Blue mirror clean drinking water in a developing country. The planet is a beautiful place with over 7 billion people. - Page 43 Professional b.v. Hoppenkuil 27b, 5626 DD Eindhoven, The Netherlands Telephone: +31402662400 Email: hello@i-teamglobal.com Internet: www.i-teamglobal.com...
Need help?
Do you have a question about the imop Lite and is the answer not in the manual?
Questions and answers