Table of Contents
Advertisement
Quick Links
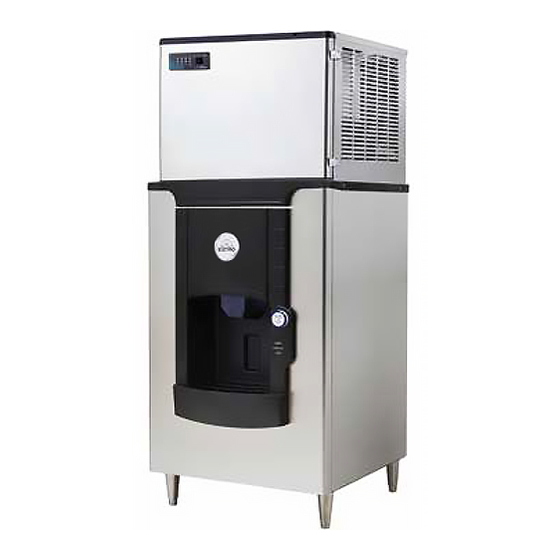
HOTEL DISPENSER
Product Manual
MODEL : ID - H250 - 30
※ This machine cannot be used in any other country
where the electric voltage for its power supply is not available.
※ This product is designed for indoor installation.
Please be sure to install it indoors.
※ The external appearance, design, color, and/or components
of this machine may be changed without prior notice for the sake
of the Company's product manufacture.
※ Please read the preparations for safety.
※ For maximum hygiene, be sure to clean and sterilize the product
on a daily basis
ID
- H150 - 22
Advertisement
Table of Contents

Subscribe to Our Youtube Channel
Related Manuals for icetro ID-H250-30


Summary of Contents for icetro ID-H250-30
- Page 1 HOTEL DISPENSER Product Manual MODEL : ID - H250 - 30 - H150 - 22 ※ This machine cannot be used in any other country where the electric voltage for its power supply is not available. ※ This product is designed for indoor installation. Please be sure to install it indoors.
-
Page 2: Table Of Contents
Table of Contents This product manual provides the user with information on installation, use and cleaning, maintenance and repair methods.. 1. Precautions for Safety 2. Introduction of Product 3. Specifications and Limitations 4. Product Size and Description 5. Structural Description 6. -
Page 3: Precautions For Safety 3~7
1. Safety Precautions When there is a risk of causing physical problems such as death or serious Warning injury in the event of improper use. When injury or damage to property such as house or furniture may occur Caution in the event of improper use. SHOULD BE DONE PROHIBITION DO NOT... - Page 4 Warning Do not place heavy objects or containers containing water on the ice maker. ◆ The objects or containers may fall and cause water to leak and the insulation may be weakened, resulting in a fire due to a short circuit. Do not install the product in a humid place or where there is a risk of water splashing.
- Page 5 Warning Disassembly forbidden Do not modify or repair the product yourself. ◆ Ignition or abnormal operation is dangerous and may cause more trouble. Prohibition Do not allow electrical cords or plugs to be pinched or twisted. ◆ The cord or plug may be peeled and there is a risk of fire or electric shock.
- Page 6 Warning Disconnect power plug When not in use for a long time, remove ice and water (to prevent winter frost), and unplug the power cord from the outlet. Disconnect power plug When cleaning dust or replacing parts, unplug the power plug first. ◆...
- Page 7 Caution Caution If there is a risk of slippery water or oil on the floor near the ice maker, please wipe it. ◆ There is a risk of injury if you slip on the ice maker or get hands or feet in the bottom of the side.
-
Page 8: Introduction Of Product
2.Introduction of Product ID-H250-30 / ID-H150-22 is a hotel ice dispenser. This dispenser is designed for use with the ICETRO ice maker IM SERIES on top. REGULAR , DICE , HALF shaped ice cubes are used as the ice source. It is not recommended to use thin ice or nugget ice. -
Page 9: Product Size And Description
4. Product Size and Description POWER SUPPLY... -
Page 10: Structural Description
5. Structural Description The interior is made of hygienic plastic, and the storage bin has a 13-blade pedal wheel and a stainless steel arm that agitates the ice. There is a separate small door that can be removed on the top front of the storage bin, so you can clean the inside of the storage bin without removing the ice maker, and the inner pedal paddle and steel arm can be removed. -
Page 11: Unpacking
6.Unpacking After removing the packaging, check the control foot packaging in the storage container. Install the product by inserting the bolt part of the control foot all the way to the bottom of the product. Turn the control foot so that the product is level and fix the installation position. Check where the drain line and electrical connections can be made. -
Page 12: Plumbing Installation
7. Plumbing Installation All models of the dispenser have a PT ¾ drain screw on the bottom of the rear panel. After tightening the screws in the attached parts, connect the drain hose. In most installations, the drain tube connects to the building drain. Use a PVC hose for the connection hose and connect it to the drain hole. -
Page 13: Electrical And Ice Maker Connection
8. Electrical and Ice Maker Connection The power cord is connected to the back. Do not connect it to an extension cord, connect it to a wall outlet. The outlet must use a grounded cord. The dispenser must be installed as a separate piece of equipment from the ice maker. The drain and electrical supply must be separated. -
Page 14: Final Installation Inspection And Initial Operation
- The accessory mount bracket between ice maker head and dispenser is not compatible with the other manufacturer’s ice makers. In the event mounting other brand’s ice maker heads, consult with local distributor or ICETRO. - Attach the slim insulation sponge tape to seal the gap at front between ice maker head and dispenser after mounting it up. -
Page 15: How To Use
10. How to Use After the ice maker has been running for several hours, the dispenser can be used if there is ice in the storage bin. If you press the PUSH button with a container under the ice chute, the paddle wheel in the storage bin rotates and ice falls from the ice chute into the storage container. -
Page 16: General Care And Cleaning Methods 16~17
11. General Care and Cleaning Methods Inspect and clean regularly to maintain 5) Lift the auxiliary lid on the front to remove it. optimum operating conditions. 6) Put your hand in the hole, find the hairpin Wash the outside of the dispenser with warm and pull it out of the shaft. - Page 17 10) Clean the ice maker, sink, mixing bar assemble the parts in the reverse order and rotating wheel using ice maker cleaning of disassembly, and be sure to reinsert solution. the hairpin. Be sure to rinse the parts with clean water. 14) Reassemble the disassembled panel.
-
Page 18: Maintenance
12. Maintenance Fallen ice and user debris fall directly into the drain plate underneath.. Occasionally you will need to clean the drain plate to remove debris and prevent backflow of water. CAUTION: If the drain plate is not cleaned, it may overflow and leak out of the product. -
Page 19: Control Function
13. Control Function It is preset by the manufacturer. Very little adjustment is required. Agitation standard time is 2 seconds every 4 hours. If the instrument is installed in a low temperature environment, adjust it to agitate more frequently. However, if the ice produced by the ice maker is cloudy and brittle, adjust it to be less agitated. -
Page 20: Service Diagnosis
14. Service Diagnosis Occurrence Possible cause Actions Make sure the dispenser is receiving No power adequate power. No ice Check the ice maker Check the door switch Door switch not closed Check the chute for proper movement Ice is not ejected Check that the door lock is Does the button work properly? working properly. - Page 21 MEMO...
- Page 22 MEMO...
- Page 23 MEMO...
- Page 24 Online Internet Service http://www.icetro.com...
Need help?
Do you have a question about the ID-H250-30 and is the answer not in the manual?
Questions and answers