Table of Contents
Advertisement
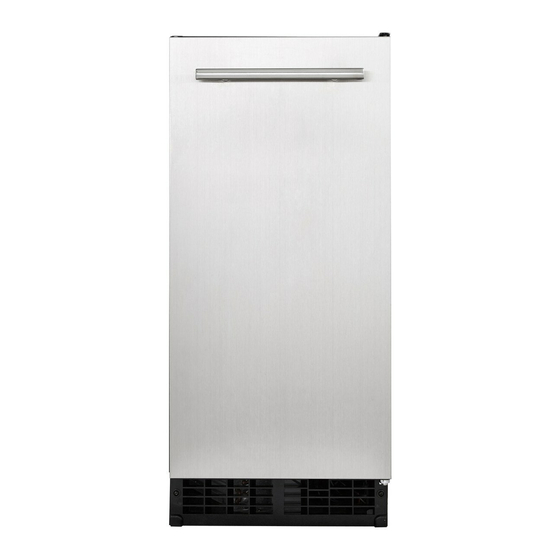
A25B15, A25B15O, IU-0070-AB, IU-0070-ABP
A25O15, A25B15P, WU-0070-AB, A25O15P, 44R213
IU-0070-OU, IU-0070-OUP, OU-0070-AB
A25B15POD, 3597
Do not use where the supply voltage is different from the unit's requirements.
●
This product is designed for indoor/outdoor use.
●
The external appearance, design, color, and components of this machine
●
may be changed without prior notice.
Advertisement
Table of Contents

Subscribe to Our Youtube Channel
Related Manuals for icetro A25B15O


Summary of Contents for icetro A25B15O
- Page 1 A25B15, A25B15O, IU-0070-AB, IU-0070-ABP A25O15, A25B15P, WU-0070-AB, A25O15P, 44R213 IU-0070-OU, IU-0070-OUP, OU-0070-AB A25B15POD, 3597 Do not use where the supply voltage is different from the unit’s requirements. ● This product is designed for indoor/outdoor use. ● The external appearance, design, color, and components of this machine ●...
-
Page 2: Table Of Contents
Contents 1. Safety Cautions Power supply related items Installation related items 2. Part names 3. Installation specifications 7~10 Gravity Drain Pipe Model Drain Pump Model 4. What to check prior to installation 5. Installation of the Product 12~13 6. Specific Features 7. -
Page 3: Safety Cautions
1. Safety Cautions To prevent any safety-related accident and to ensure convenient usage of this product with better understanding, cautions and warnings are accompanied by symbols and figures. Make sure you understand the symbols and figures below before proceeding. Using the product without taking careful note of this symbol may cause Danger death or serious injury to the user or fire. -
Page 4: Power Supply Related Items
■ Power supply related items ■ Avoid putting any object on Stop using the product the power cord and make if the power cord sure that the cord does not is damaged. get tangled or tied. It may cause fire or It may cause fire or electric electric shock. -
Page 5: Installation Related Items
■ Installation related items ■ Keep away any heating Do not install the product appliance from the power cord. at a place where moisture It may melt the coating of the or dust gathers easily or cord, causing fire or electric where rain or water spatters. -
Page 6: Part Names
2. Part names 【 FRONT 】 Top cover Water tank Door handle Door Operation switch Front panel Bottom grill 【 BACK 】 Back cover Water supply socket (Inlet) Drain hose Power cord... -
Page 7: Installation Specifications 7~10
3. Installation specifications Space requirements for installation When moving the ice maker, check whether the prepared opening dimensions,electric rating, and piping position are correct. Refer to the installation specifications and drawings shown on pages 9 and 10. Figures 4, 5, 6 and 7 show the entire dimensions of the product. This product is a gravity drain pipe model that requires a drain pipe to run from the exhaust hole at the back of the product to appropriate drain pipe. - Page 8 Requirements for plumbing Plan the arrangement of the water supply pipes. Connect a 1/4" diameter copper cable with the tap water pipe. Install a shutoff valve between the tap water pipe and the product so that the user can operate the valve. Do not install the shutoff valve at the back of the product. “Do not use a self-piercing valve.
-
Page 9: Gravity Drain Pipe Model
Gravity Drain Pipe Model Before connecting the drain tube and the water supply pipe with the ice maker, pipes should necessarily be arranged. The horizontal distance of the drain tube should be 1/4" at every 12" (305) distance. An air gap is required between the drainage tube Shut-Off Valve of the ice maker and the drain pipe or sewage Drain Tube... -
Page 10: Drain Pump Model
Drain Pump Model 1) Arrange the ice maker at the front of the opening of installation. Shut-Off Valve Water Inlet Tube 2) Adjust the horizontality leg so as to meet the height. Water Filter 3) Install the inlet pipe (copper pipe with a diameter of 1/4”) on the wall and connect the water supply Drain Tube valve. -
Page 11: What To Check Prior To Installation
4. What to check prior to installation ■ Follow this process! ■ Water source valve 115V~60Hz Water source tub Drain hose - The water supply valve may have different shapes depending on the installation condition. - The filter may be located close to the water source or back of the product depending on the situation. Avoid uneven surface or any place with too much moisture, direct sunlight, too much dust, or spattering water. -
Page 12: Installation Of The Product 12~13
5. Installation of the Product Changing Door-opening Method The direction in which the door fixed with hinges opens may be changed. The hinges are attached to the right-hand side of the door when the product is shipped from the factory. However, the ice maker is designed so that the hinges may be installed on either side. - Page 13 Installation Checklist Important Information : The installation engineer should check whether any installation part ha been omitted and follow the check list below to ensure safe and proper installation. If you have any questions or problems regarding installation, address your queries to the distributor or dealer.
-
Page 14: Specific Features
6. Specific Features Fig. 9 Solid figure ■ Sink-Mounted Ice Maker ■ The gravity drain-type naturally drains water, whereas the drain pump-type drains water to an adjacent sink using a built-in pump. ■ A perfect and unified design system with 24.6" (625) of depth. ■... -
Page 15: Guide To Operating The Ice Maker 15~17
7. Guide to Operating the Ice Maker Initial operation ① Open the water supply valve connected with the ice maker. ② Insert the plug of the ice maker into the electric outlet. ③ Open the door and turn the switch at the lower end of the product to the “ICE”... - Page 16 Operation time It takes about 20-35 minutes to produce a set of 24 ice pieces. The length of one cycle of the ice maker (ice production and ice removal) differs depending upon the cleanness of the ice maker, the surrounding temperature, and the temperature of the water supplied to the ice maker.
- Page 17 [ Cautions for cleaning the external panel(stainless steel) ] ※ How to remove rust How to clean rusted parts 1. Rust spots in early stage - Rust spots in early stage mean that the stainless steel itself is not severely affected, thus mild detergent or any commercially available cleaning agent will restore original state.
-
Page 18: Washing The Ice Maker 18~24
8. Washing the Ice Maker ■ Cleaning the nozzle / ice slide / water tank ■ 1. Open the door and remove two front injection bolts on the top cover. 2. Pull the top cover to remove it. 3. Slightly lift the ice slide to remove it. 4. - Page 19 5. Clean the gap of the nozzle frame fixed on the vessel sheet (water tank). 6. Lift the drain projectile inside the vessel sheet (water tank), clean it, and drain the water. * Make sure that the drain projectile is assembled back in the correct position after cleaning;...
- Page 20 2. Open the front door and remove the filter screens from the bottom of the ice tank and water tank. < Water tank > < Ice tank > 3. Rinse the screens with running water, and then assemble them back to the tanks.
- Page 21 ■ Cleaning the condenser ■ 1. Remove two screws on the front panel at the center of the inside. 2. Remove dust from the surface of the condenser with a vacuum cleaner for home use or a portable cleaner. 3. Reassemble the screw to the panel after cleaning.
- Page 22 ■ Ice Machine cleaning and sanitizing ■ The type and concentration of sanitizing agent(Ice Maker Cleaner, Sanitizer, mild or neutral detergent, and so forth)recommended Comply with 40 CFR 180.9403 or Be registered with the USA Office of pesticides program Antimicrobials Division As a food contact sanitizer and - If produced by a device, as defined per 40 CFR 152.5003, be demonstrable to be efficacious per USEPA performance.
- Page 23 ● Wash the ice scoop regularly. Wash it with other food containers. ● The handle of the ice scoop can be easily exposed to germs by hands and so forth. Caution ● The detergent may cause burns. ● If you accidentally drink the detergent, do not force yourself to vomit. ●...
-
Page 24: Maintenance Of The Ice Maker
To adjust the three items, an inspection kit is required. If the ice maker is adjusted by the user at his/her discretion, a serious incident may occur. Important Information : The three items mentioned above should be adjusted by the engineer of an A/S center designated by ICETRO. -
Page 25: Specifications
10. Specifications A25B15, A25B15O, IU-0070-AB, IU-0070-ABP A25O15, A25B15P, WU-0070-AB, A25O15P, 44R213 CATEGO RY UNI T IU-0070-OU, IU-0070-OUP, OU-0070-AB, A25B15POD, 3597 Maximum kg/day Manufacturing Capacitor lb/day 61.7 WxDxH 380 x 625 x 857 ( Include Handle, Leg, Hinge) (mm ) Dimension WxDxH 14.9 x 24.6 x 33.7 ( Include Handle, Leg, Hinge ) -
Page 26: Troubleshooting Guide
11. Troubleshooting guide PROBLEM POSSIBLE CAUSE POSSIBLE SOLUTION Ice maker is unplugged Plug ice maker in. Breaker tripped Reset breaker - if it happens again, call a authorized service center. Ice maker does Switch turned to “OFF” Turn switch to “ICE”. not operate The ice maker has stopped since the ice detection sensor inside the tank is activated. - Page 27 MEMO...
- Page 28 Online Internet Service http://www.icetro.com 3 2 4 0 4 0 2 - 0 0...
Need help?
Do you have a question about the A25B15O and is the answer not in the manual?
Questions and answers