Table of Contents
Advertisement
Quick Links
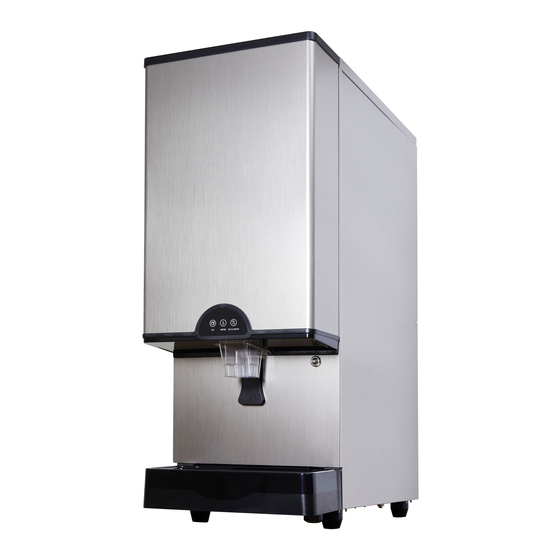
Dispenser Ice Maker
MODEL : ID-0450-AN
※ This machine cannot be used in any other country
where the electric voltage for its power supply is not available.
※ This product is designed for indoor installation.
Please be sure to install it indoors.
※ The external appearance, design, color, and/or components
of this machine may be changed without prior notice for the sake
of the Company's product manufacture.
※ Please read the preparations for safety.
※ For maximum hygiene, be sure to clean and sterilize the product
on a daily basis.
Manual
Advertisement
Table of Contents

Related Manuals for icetro ID-0450-AN


Summary of Contents for icetro ID-0450-AN
- Page 1 Dispenser Ice Maker Manual MODEL : ID-0450-AN ※ This machine cannot be used in any other country where the electric voltage for its power supply is not available. ※ This product is designed for indoor installation. Please be sure to install it indoors.
-
Page 2: Table Of Contents
INDEX 1. Safety Precautions 2. Product Specification 9~10 3. Appearance Size 11~15 4. How to install 11~12 - The installation place - Internal structure diagram - Connection method for water supply and drainage - About grounding 5. How to start the product 16~19 - Button operation - Function button description (FND display window) -
Page 3: Safety Precautions
1. Safety Precautions When there is a risk of causing physical problems such as death or serious injury Warning in the event of improper use. When injury or damage to property such as house or furniture may occur Caution in the event of improper use. SHOULD BE DONE PROHIBITION DO NOT... - Page 4 Warning Do not place heavy objects or containers containing water on the ice maker. ◆ The objects or containers may fall and cause water to leak and the insulation may be weakened, resulting in a fire due to a short circuit. Do not install the product in a humid place or where there is a risk of water splashing.
- Page 5 Warning Disassembly forbidden Do not modify or repair the product yourself. ◆ Ignition or abnormal operation is dangerous and may cause more trouble. Prohibition Do not allow electrical cords or plugs to be pinched or twisted. ◆ The cord or plug may be peeled and there is a risk of fire or electric shock.
- Page 6 Warning Disconnect power plug When not in use for a long time, remove ice and water (to prevent winter frost), and unplug the power cord from the outlet. Disconnect power plug When cleaning dust or replacing parts, unplug the power plug first. ◆...
- Page 7 Caution Caution If there is a risk of slippery water or oil on the floor near the ice maker, please wipe it. ◆ There is a risk of injury if you slip on the ice maker or get hands or feet in the bottom of the side. Hand over When transferring this ice maker to another person, please hand it along with the instruction manual...
-
Page 8: Product Specification
2. Product Specification Specification Category Model ID-0450-AN Ice shape Nugget ※ Maximum capacity (kg / day) Ambient temperature 10 ℃, Water temperature 10 ℃ Storage capacity (kg) Max storage 14kg ※ Size (W X D X H mm) 421 X 672 X 1095 (FOOT included) -
Page 9: Appearance Size 9~10
3. Appearance and Size Unit : mm Front Rear Display panel Water supply Ice spout power Ice dispensing lever Drain Drain box Rubber feet Air filter Bottom Upper vent... - Page 10 Left side Right side Detachable to the front...
-
Page 11: How To Install 11~15
4. How to install The installation place is like this ... ⊙ Where there is no heat source ... Install in a place where there is no heating device such as ◆ a fireplace or a gas range, and do not install in an area outside the range of 10 ~ 38 ℃. - Page 12 ⊙ Where good ventilation is secured... If the ventilation is poor, the ICE MAKING ◆ ability will decrease. ⊙ Installation is on a flat ... Unstable installation may cause vibration and noise. ◆ (Installed within 1˚) It is recommended to install it on a flat surface because ◆...
-
Page 13: Internal Structure Diagram
Internal structure diagram Front view Structure of the back side Ice moving wing Power switch Water supply tank Cooling control valve Control box Function selection switch cooler Drain valve Water selection valve Ice making motor Discharge solenoid Kiosk connection jack Water supply Power line Ejection lever Cooling motor Drainage connection Condenser Rubber feet Air filter Right side slope Left rear slope... -
Page 14: Connection Method For Water Supply And Drainage
Connection method of water supply and drainage [ Connection of water and drainage hoses ] Division Proper water temperature Water pressure Hose to be used OD ø6.35 ICE MAKING water supply 10 ~ 32 ℃ 1 ~ 5 ㎏f/㎠ PE TUBE ICE MAKING drainage ID ø20 hose If the temperature of the ICE MAKING water supply is too high, the amount of ICE MAKING... -
Page 15: About Grounding
About grounding ※ Please be sure to ground to prevent electric shock. ⊙ Grounding method - When there is grounding terminal Grounding If you are using an AC 115V outlet with ground AC 115V terminals terminals, you do not need to ground it separately. only outlet Grounding is not... -
Page 16: How To Start The Product 16~19
5. How to start the product ⊙ Water supply hose protection Do not place heavy objects on the water supply hose leading to the water supply, or keep the hose from treading. ⊙ Proper water pressure, water temperature, ambient temperature Water pressure: 1~5 kgf / ㎠... -
Page 17: Button Operation
Button Operation FULL WATER ICE & WATER ICE button lamp - If you turn on the power, this will always come in first. The initial water subtraction is done three times and then the ICE MAKING operation is proceeded. If you put the cup in the ice exit, you can discharge the ice for the time set in F1. -
Page 18: Function Button Description (Fnd Display Window)
Function Button Description (FND Display Window) Set the maximum opening time of the ice dispense valve. (Adjustable in 1 second increments, default is 20 seconds.) → Even if you keep pressing the ejection lever, ejection is not possible beyond the time set in this item. It is a function to dispense ice at once. (Ice is dispensed regardless of the set value of F1.) → This function is activated by turning off the mode switch and pressing the water button and ice button at the same time for 3 seconds or longer. It is a function to dispense ice at a set time. (Adjustable in 1 second increments) → This function is only used in the ice mode. If you touch the ejection lever, the ice is ejected at the set time and automatically closes. This function drains the water stored in the reservoir. (The first and second digits of FND adjust the drainage time (in seconds)) (The fourth digit of FND controls the number of repetitions) → This function is performed at the first ice making after power is turned on. It is a function to periodically drain water when making ice. (The second digit of FND adjusts the drainage time (in seconds)) (The 3rd and 4th digits of FND adjust the multiplication interval (in units of 30 seconds)) → This function is activated when ice making. In the simultaneous dispensing mode of ice and water, each dispensing time is adjusted. (The first and second digits of the FND are the ice dispensing time) (The 3rd and 4th digits of FND are water drain time) → Even if the dispensing time is increased in this item, it is limited in the “F1” item. It is a function to operate the UV lamp periodically. (The first and second digits of FND are the lamp lighting time (in minutes)) (The 3rd and 4th digits of FND are the lamp off time (in hours)) → The UV lamp always operates periodically regardless of the discharge. AUGER It is a function to control the usage time alarm and warning. (If “A” is displayed, it is a function to set the usage time alarm) (If "E" is displayed, it is a function to set the usage time warning) → This item can be adjusted from 0.1 to 9.9, and 0.1 is 1000 hours. Check the AUGER usage time. (FND displays "Year, Month, Day, Time" sequentially) Check the AUGER usage time. -
Page 19: Three Drainage Functions
Three Draining Functions (Forced Draining, Automatic Draining, Water Draining) 1) Forced drainage function (Must be implemented to prevent freezing in winter storage. Please also use this function for cleaning the inside.) Power FND display window - Turn on the power switch and press the switch "DOWN + SET"... -
Page 20: Water Removal In Water Tank And Evaporator
6. Required Actions to prevent frost Water Removal in Water Tank and Evaporator If the ambient temperature falls below 0℃, water will freeze inside the machine and machine operation will be impossible. If you do not use for a long period of time in winter, be sure to completely remove the ice making water inside the body by following the instructions below. -
Page 21: Maintenance Schedule
7. Maintenance, repair and disinfection ※ Please keep the product according to the instruction manual and label provided. ● Be sure to have a qualified service technician service the product. ● To reduce the risk of electric shock, do not touch or disassemble the parts of the ice maker. ●... -
Page 22: Cautions For Cleaning The External Panel(Stainless Steel)
Cautions for cleaning the external panel(stainless steel) ※ How to remove rust How to clean rusted parts 1. Rust spots in early stage - Rust spots in early stage mean that the stainless steel itself is not severely affected, thus mild detergent or any commercially available cleaning agent will restore original state. -
Page 23: How To Clean And Disinfect 23~24
How to clean and disinfect ※ The ice maker should be cleaned and disinfected at least twice a year. More frequent cleaning and disinfection may be required. ◆ Make sure to comply with the following. Do not use ammonia-based detergent to prevent damage to the personnel or the ice maker itself. ●... - Page 24 3. Disinfection wash Dilute 10 L of warm water and 400 mL of 5.25% sodium hypochlorite solution (bleach). (※ Dilution ratio may vary depending on the solution manufacturer, please refer to the solution manual). If this is the minimum amount to be used, use more washing solution. ※...
-
Page 25: Circuit Diagram
8. Circuit Diagram... -
Page 26: Error Type
9. Error Type ① When Error occurs, the front use button (ICE-WATER-ICE & WATER) of the door lights alternately to the left and right. Restart after action. ② When the button is lit alternately to the left and right, open the door and press the bottom setting button of the control buttons, Error display will appear. -
Page 27: Before Requesting Service
10. Before Requesting Service Make sure to check the following if the product is operated inappropriately. If the issue persists, contact the local distributor where you purchased the product or the customer service center. Please provide the information on the warranty when you contact us. (Model, serial number, name of distributor, date of purchase and detailed description of issue) Operational status What to check... -
Page 28: Product Warranty
11. Product Warranty Period If you did not receive or lost a warranty card or receipt, or if it is difficult to confirm the date of purchase due to other reasons, the warranty period will be calculated from 6 months after the date of manufacture. - Page 29 MEMO...
- Page 30 MEMO...
- Page 32 Online Internet Service http://www.icetro.com 3 2 4 0 4 6 4 - 1 0...
Need help?
Do you have a question about the ID-0450-AN and is the answer not in the manual?
Questions and answers