Table of Contents
Advertisement
Quick Links
• Where the supply voltage is different.
• This product is designed for indoor
use only.
• The appearance, design, color, and
parts of the product are subject to
change without notice.
September 16, 2022
ICE MAKER
User's Manual
Read this manual carefully before
using the product. Keep the manual in
a safe place after reading it, for
future reference.
IU-0090-AN
IU-0090-ANP
IU-0090-ANA
IU-0090-ANAP
Advertisement
Table of Contents

Subscribe to Our Youtube Channel
Related Manuals for icetro IU-0090-AN


Summary of Contents for icetro IU-0090-AN
- Page 1 User’s Manual Read this manual carefully before using the product. Keep the manual in a safe place after reading it, for future reference. IU-0090-AN IU-0090-ANP IU-0090-ANA IU-0090-ANAP • Where the supply voltage is different. • This product is designed for indoor use only.
-
Page 2: Table Of Contents
Table of Contents Overview ----------------------------------------------------- 3 Unpacking ---------------------------------------------------- 4 Installation Specifications ----------------------------------------- 6 Gravity Drain Model --------------------------------------------- 8 Drain Pump Model ---------------------------------------------- 9 Installation of the Product ---------------------------------------- 10 Guide to Operating the Ice Maker ---------------------------------- 14 Maintenance Schedule -------------------------------------------18 Specifications ------------------------------------------------- 19 10. -
Page 3: Overview
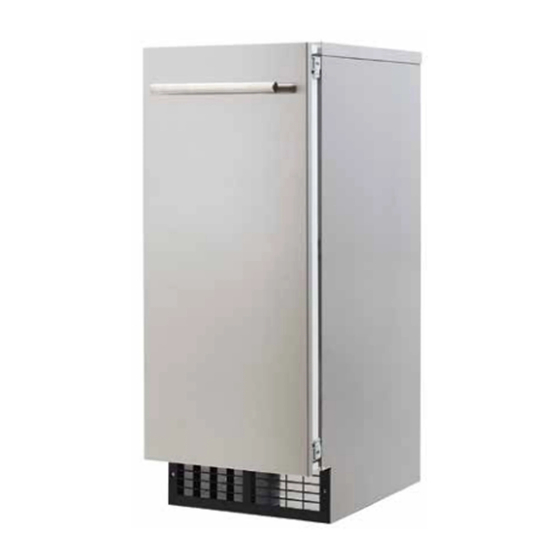
1. Overview The functions and specifications stated in this manual and on the website may be changed at anytime without prior notice. WARNING CAUTION The manual has marks. The information described in the boxes is important for the safe and efficient installation of the ice maker. -
Page 4: Unpacking
2. Unpacking After removing the packing material, check the appearance of the ice maker for possible defects or irregularity. If the product shows any irregularity in its appearance, contact your local distributor. All the packing material (straps, box, Styrofoam, and wood, etc) should not be left within reach of children and should be disposed of. - Page 5 Water supply The ice maker requires a continuous supply of potable water at a pressure of 20-80psi Water quality There is no such thing as “perfectly pure” water. All kinds of water, including tap water, contains impurities. Rainwater absorbs impurities from the atmosphere and/or when it passes through soil. Some impurities consist of solid particles called suspended solids and are filtered through micro filters.
-
Page 6: Installation Specifications
3. Installation Instructions Space requirements When installing the ice maker, check that the electric power, and piping position are correct. Refer to the installation specifications and drawings shown on pages 7 and 8. Figures 4, 5, 6 and 7 show the entire dimensions of the product. This product comes standard with a gravity drain connection that requires a drain line to be run from the drain fitting at the back of the product to appropriate water drain. - Page 7 Plumbing Requirements Connect a 1/4" water line to the water supply. Install a shutoff valve between the potable water supply and the product so that the user can operate the valve. Do not install the shutoff valve at the back of the product. Do not use a self-piercing valve.
-
Page 8: Gravity Drain Model
4. Gravity Drain Model The drain line should drop 1/4“ for every foot. S hut- O ff Val ve D rai n Tub e W ater Fi l ter A standpipe fitted with a trap at the lower part may be used Lo cate d rai n W ater I nl et Tub e as a drainpipe. -
Page 9: Drain Pump Model
5. Drain Pump Model 1) Position the ice maker at the front of the opening of installation location. 2) Install the water inlet line (1/4" diameter copper pipe) and connect the water supply valve. 3) Connect the drain line from the ice maker to the drainpipe. Important Information: An air gap may be required between the drain line and the drainpipe, under the provision of local laws and regulations. -
Page 10: Installation Of The Product
6. Installation of the Product Important Information: Turn on the water supply and check for any leaks at the connection. The user does not need to fill the container with water. The first batch of ice should be discarded. Ice production requires 1-2 hours. - Page 11 Door Reversal The direction in which the door opens may be changed. The hinges are attached to the right-hand side of the door when the product is shipped from the factory. However, the ice maker is designed so that the hinges may be installed on either side.
- Page 12 Installation of custom door panel This description concerns the model on which a decorative door is installed. ① Loosen the anchor screws on the lower hinge of the door and separate the door. ② Arrange the decorative door so that it matches the door of the product.
- Page 13 Installation Checklist If you have any questions or problems regarding installation, address your queries to the distributor or dealer. You may also seek information on the company’s website. ■ Does the ice maker work properly? If the ice maker does not work, check whether the plug has been inserted properly.
-
Page 14: Guide To Operating The Ice Maker
7. Guide to Operating the Ice Maker Button & Display LAMP button - If you open the door, the interior lights turn on done (for 30 seconds) - Each time you press the button, the light color changes (White, Blue ,Green, Red, Scarlet, Sky blue) ICE lamp - When the operation switch is switched to the 'ice' position, this will always come in first. - Page 15 Using the ice maker Use of the ice maker is very simple. Simply turn the switch at the lower end of the product to the “ICE” position. The product automatically starts ice production, which continues until the ice container has been filled with ice. Remove the ice using indoor ice scoop found on the inside left wall of the icemaker.
- Page 16 Operation time The machine continues to operate until the ice bin is full, which takes about 10 hours. Full bin time may vary depending on the ambient and water temperatures. How it makes ice Water is supplied to the inside of the drum, and as the AUGER rotates, the water freezes and is ejected upward.
- Page 17 Cleaning outside If the surface of the door and lever become stained, scrub them at once. If the door and/or gasket have spots on the surface, remove the spots using soap and warm water. Use non-abrasive cloths or pads. In the case of the stainless steel exterior, use a soft and non-abrasive stainless steel washing agent and use a soft lint free cloth.
-
Page 18: Maintenance Schedule
8. Maintenance Schedule -The following maintenance schedule is guideline -Maintenance and repair should be done more frequently according to water quality, equipment usage environment and local hygiene regulations. Maintenance Schedule Frequency Area Task Daily Scoop Clean the scoop using a neutral cleaner. Rinse thoroughly after cleaning. -
Page 19: Specifications
9. Specifications Items Specification Remarks IU-0090-AN, IU-0090-ANP ~P: W/D Drain Model IU-0090-ANA, IU-0090-ANAP Pump Ice shape Nugget ※ Maximum sapacity 88 lb/day (40 kg/day) (at air 50℉, water 50℉) Storage capacity 24.3 lb (11 kg) AN~ : 14.9" x 21.9" x 34" (378 x 556 x 858 mm) ※... -
Page 20: Error Type
10. Error Type Lamp Current ● ● ● Causes Action / Release Condition DRAIN WAER When the operation switch is Ice Making switched to the 'ICE' position When the operation switch is Drainage stops and goes out when the changed to 'WASH', the 'ICE' lamp operation switch is switched to the 'off' Washing blinks... -
Page 21: Circuit Diagram
11. Circuit diagram... -
Page 22: Troubleshooting Guide
12. Troubleshooting guide PROBLEM POSSIBLE CAUSE POSSIBLE SOLUTION Ice maker is unplugged Plug ice maker in. Reset breaker - if it happens again, call an authorized service Breaker tripped contractor. Switch turned to “OFF” Turn switch to “ICE”. Ice on sensor tube – it is normal for ice maker to be off. Ice maker does not Storage bin full, keeping ice Ice maker in room below 50℉(10℃) –... - Page 23 The information and images included in this guidebook are the property of ICETRO. It is not permitted to copy or use a part or the whole of this manual and the information and images included in this manual without first obtaining...
- Page 24 Online Internet Service http://www.icetro.com 3240470-01...
Need help?
Do you have a question about the IU-0090-AN and is the answer not in the manual?
Questions and answers