Advertisement
Quick Links
Advertisement

Related Manuals for ARRI TRINITY 2


Summary of Contents for ARRI TRINITY 2
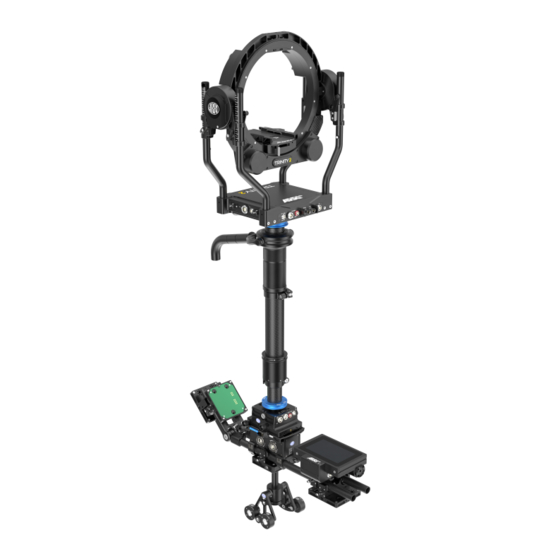
- Page 1 TRINITY 2 Setup Q U I C K G U I D E 01.09.2022...
- Page 2 TRINITY 2 assembly quick guide TRINITY 2 assembly quick guide Preperations ADVICE Always ensure that you are using a proper C-Stand, Low Boy Stand or an another suitable stand. Make sure the stand is set up on even ground. Make sure you are not exposed to strong wind or heavy rain.
- Page 3 ► Lock the clamp lever. → The Gimbal is positioned. Attach the TRINITY 2 head to the upper Post ► Bring the TRINITY 2 head close to the upper end of the post. ► Ensure that the bubble at the back of the TRINITY head is pointing in the same direction as the bubble at the Top Stage.
- Page 4 TRINITY 2 assembly quick guide Place the TRINITY 2 system into the Docking Bracket ► Pusch the Balance Rod fully back first. ► Lift the rig into the Docking Bracket and slide the post into the park posi- tion. Add the 19mm Rods to the Batteryhanger BHM-2 ►...
- Page 5 TRINITY 2 assembly quick guide Complete the Battery Hanger / Sled ► Attach one battery mount to the rear hinge and the second battery mount to the bottom front bars. ► Attach the RCP-3 on top of the bars in front.
- Page 6 TRINITY 2 assembly quick guide Mount the Monitor Adapter to the Master Grip TRINITY ► There are two different monitor adapters to choose from: Monitor Adapter for Transvideo (K2.0014831) Monitor Adapter for Small HD (K2.0014832). ► Slide the monitor adapter on the 19mm rod and bring it in the desired position.
- Page 7 LBUS Socket at the Master Grip TRINITY and with the LBUS Socket at the TRINITY 2 head. ► Connect the 12G HD SDI BNC Cable, 0,63m/25in (K2.0041984) with the Monitor Out at the TRINITY 2 head and the Video In of the monitor.
- Page 8 If the camera length is unnecessarily long, the COG / hight of the Tilt axis of the TRINITY 2 head could be quite high, which will force you to extend the Center Post to compensate for top weight.
- Page 9 The special hight of every SAM plate will lift the dedicated camera right into the center of the TRINITY 2 inner ring. This way a perfect COG of the camera is guaranteed. Available SAM plates and lens support brackets: K2.0041201...
- Page 10 TRINITY 2 camera setup quick guide Prepare the TRINITY 2 Head ATTENTION Ensure that the Stabilizer is switched OFF. Tilt-Lock ► Move the Lock lever to the left in the Locked position. Safety Latch ► Touch the safety latch with your thumb and slide it fully to the right.
- Page 11 TRINITY 2 camera setup quick guide Installation of the camera in the TRINITY 2 head Placing the camera ► Gently slide the camera into the ring from either the front or back. ► Bring the camera as close as possible to its center of gravity.
- Page 12 TRINITY 2 camera setup quick guide Locking Clamp Lever ► After the camera has reached the desired position / COG, push the clamp lever all the way to the right until the dovetail clamp mechanism is securely locked. Checking the current height of the tilt axis ►...
- Page 13 TRINITY 2 balance quick guide TRINITY 2 balance quick guide Center the Top Stage Adjust Side to Side ► Turn the side to side adjustment until the top stage is left and right in the center. Or until the edges of the housing are aligned.
- Page 14 TRINITY 2 balance quick guide Add Batteries Batteries ► Add two compact 90 watt or maximum 150 watt batteries to either battery mount. ► Double check that all cables are properly connected. Docking Bracket Balance Position Balance Rod ► Move the Balance Rod clamp into a 45° position.
- Page 15 Only use the Top Stage TST-2 in combination with the Battery Hanger Module BHM-2 for the internal power supply of the TRINITY 2 Head. Alternatively, an external power source can be used to power the TRINITY 2 head. DO NOT combine the internal with an external power supply! Main Power Battery Hanger ►...
- Page 16 TRINITY 2 balance quick guide Center the Camera ► Move the camera to a neutral position in both the Tilt and Roll axis. Power up the TRINITY 2 Head Main Power Main Power ON ► Bring the MAIN switcher into the ON position. ATTENTION After switching on, the TRINITY-2 head is supplied with 24V, camera, monitor, accessories are supplied with 12V and 24V, depending on the case.
- Page 17 TRINITY 2 balance quick guide Power up the TRINITY 2 Stabilization CAUTION Automatically move to the home position Risk of crushing fingers. The camera / tilt and roll axis will automatically move to the home position, after turning on the stabilization.
- Page 18 TRINITY 2 balance quick guide Neutral Horizontal Balance ► Bring the entire rig slowly into a horizontal position. ► Make sure that none of the cables, brackets or other accessories are blocking the movement of the TRINITY head. ► Move the Gimbal in the desired position.
- Page 19 TRINITY 2 balance quick guide Vertical Balance After the center of gravity COG of the camera has been set in the TRINITY 2 head, the camera is the reference for the following adjustment. Do not move the camera fore or aft from the previously...
- Page 20 TRINITY 2 balance quick guide Side to Side Balance After the Top Stage and the Pendulum had been centered, the Battery Hanger is now the reference for the side to side adjustment. Do not move the Top Stage or the Pendulum out the previously determined neutral centerposition! ►...
- Page 21 TRINITY 2 balance quick guide Side to Side Fine Adjustment ► Turning the fine adjustment to the right moves the camera further to the right. ► Turning left moves the camera further to the left. ► Lock the clamp once the entire system is vertical.
-
Page 22: Final Check
TRINITY 2 balance quick guide Final Check ► Bring the entire rig back to a horizontal position. ► Make sure the entire rig is still vertically neutral and there is still no dropdown. ► To verify that the entire system is neutral in the horizontal roll axis, check the bubble at the top stage. - Page 23 TRINITY 2 balance quick guide Final Check Check Side to Side ► To verify that the entire system is neutral in the vertical axis, check that the post is in a line with the stand. ► And double check the Bubble at the Top Stage too.
Need help?
Do you have a question about the TRINITY 2 and is the answer not in the manual?
Questions and answers